Written By: Don Dodi
Fact Checked By: Kristen Brown
Reviewed By: Diego Rosenberg
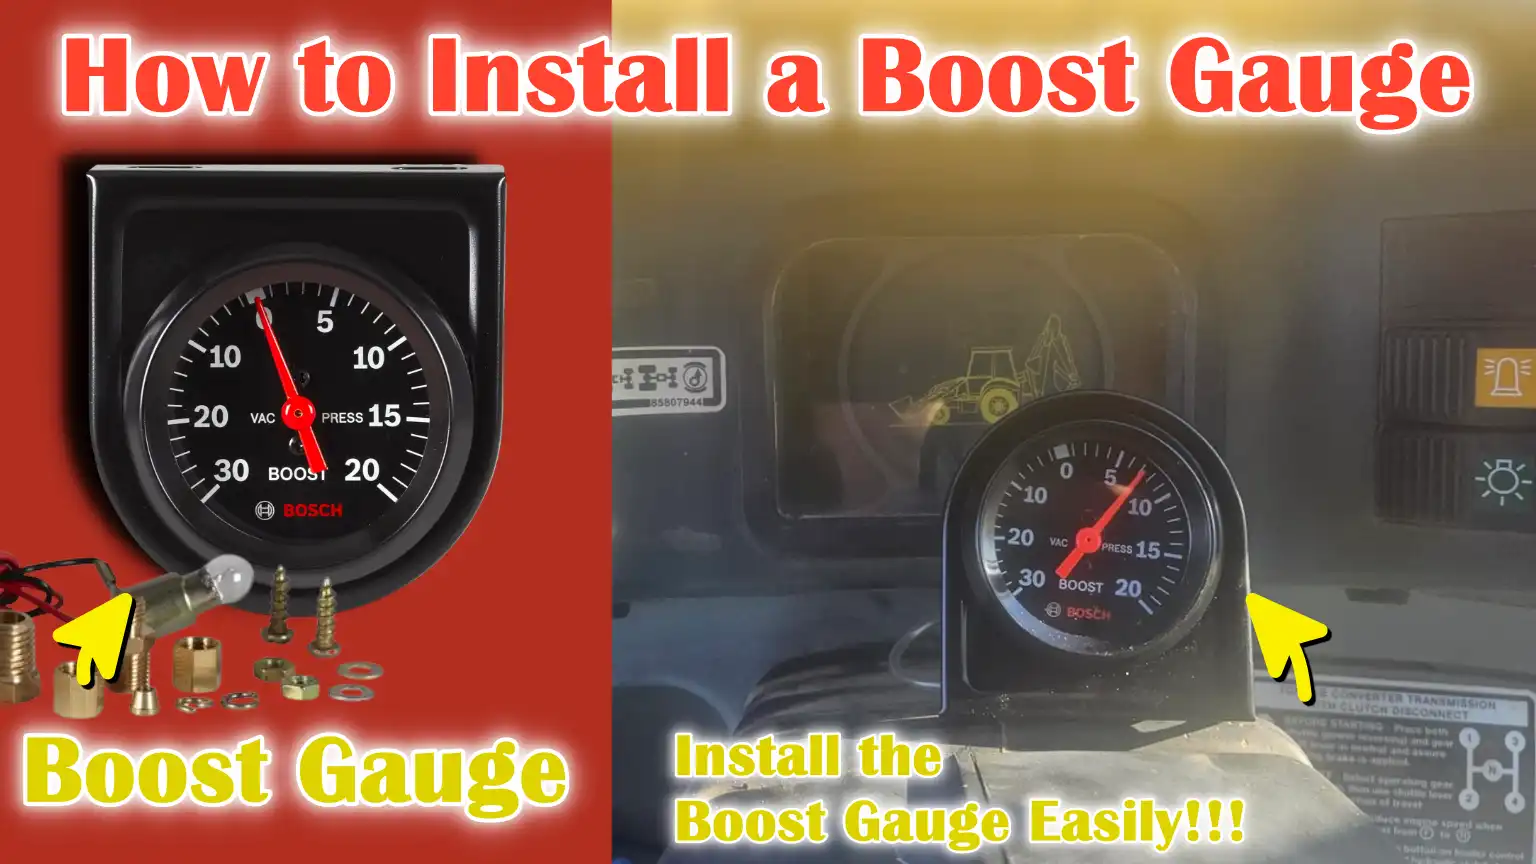
Yes, the work of the boost gauge is to show you exactly how hard your turbocharger is actually working at that particular moment.
So, basically it is the important monitoring tool for any turbocharged vehicle as it literally shows you how much air pressure the turbocharger is producing in real time, so this pressure is commonly known as “boost”; that directly affects the engine power, fuel delivery and overall engine safety as well.
As well as, most of the factory dashboards do not display exact boost levels, which is why drivers cannot easily tell if the turbo is under-performing or it is creating too much pressure.
That’s why, in this guide you’ll learn How to Install a Boost Gauge so that you can detect the problems such as boost leaks, failing turbo components, waste-gate issues or over-boost conditions before they can cause some serious engine damage.
Not only this, there’s automotive engineering principles that shows that the excessive boost can increase the combustion temperatures and stress the engine parts as well; other than this the low boost often signals as air leaks or mechanical faults.
Tools
| Item | Why It Is Needed |
|---|---|
| Boost Gauge Kit | This is the main part that measures turbo pressure. It displays vacuum and boost levels while driving. |
| Vacuum / Boost Hose | It carries air pressure from the engine to the gauge. A strong hose prevents leaks and inaccurate readings. |
| T-Fitting or Boost Tap Adapter | It allows the gauge to share the existing boost line without cutting or damaging it. |
| Electrical Wiring | The gauge light requires power so it can be clearly seen at night or in low light. |
| Basic Hand Tools | These tools help with removing panels, tightening fittings, and properly securing the gauge. |
| Drill and Rubber Grommet | Use it only if there is no factory hole in the firewall to safely pass the boost hose. |
| Zip Ties and Hose Clamps | It keeps hoses and wires tight, clean, and away from heat or moving parts. |
| Safety Gloves and Eye Protection | Protects you from sharp edges, hot parts, and dust when working in the engine bay. |
How to Choose the Best Mounting Location for Boost Gauge
Choosing the right mounting location for the boost gauge is crucial, as it directly impacts how easily the driver can read the gauge, how safe the driving experience is, and how clean the vehicle’s interior appears.
The boost gauge should be easily visible so that the driver’s eyes are not diverted from the road for more than a moment.
Automotive safety studies show that prolonged installation can increase reaction time, increasing the risk of accidents.
Therefore, the mounting location should strike a balance between visibility, safety, and interior design.
A well-chosen location also protects the gauge from vibration, heat, and sudden impact, ensuring its longevity and accurate readings.
1. Common Mounting Locations
Several mounting locations are commonly used because they provide reliable visibility and easy installation.
Each location has its own advantages and disadvantages, depending on the vehicle’s design and driver preferences.
A-Pillar Pod
The A-pillar pod is mounted on the side pillar of the windshield and is one of the most popular locations for a boost gauge.
This placement places the gauge near the driver’s natural forward line of sight, making it easier to read without having to turn the head completely.
Because the A-pillar is already near eye level, it allows for quick readings during acceleration or boost changes.
However, care must be taken as some vehicles have side airbags inside the A-pillar, and improperly placing the gauge there could deploy the airbags.
Dashboard Mount
The dashboard mount places the boost gauge on or slightly above the dashboard surface.
This location is easy to find and ideal for drivers who want a simple and clean setup.
The gauge is generally stable and less affected by vibrations when properly installed.
The main concern with dashboard mounting is sunlight glare and reflections on the windshield, which can make it difficult to read while driving on a bright sunny day.
Vent Mount
A vent mount places the boost gauge inside an air conditioning vent.
This option is popular because it looks clean and closely resembles the factory design.
It places the gauge near eye level and, in many cases, requires no drilling.
However, using a vent mount can reduce airflow from the vent, and in very hot or cold weather, direct air onto the gauge can damage internal components over time.
Steering Column Mount
A steering column mount places the boost gauge directly above or next to the steering wheel.
This position provides high visibility because it is directly in front of the driver.
This is especially useful for performance driving where constant attention is required to change boost.
The disadvantage is that improper installation can block warning lights or interfere with steering wheel adjustments, so correct placement is crucial.
2. Considerations Regarding Visibility and Driver Safety
Visibility is an important factor when choosing a boost gauge location.
The gauge should be legible at a glance and not distract the driver from traffic conditions.
The angle of the gauge face should minimize glare and reflections, especially when driving in daylight.
Safety guidelines state that aftermarket gauges should not obstruct airbags, warning lights, or the driver’s view of the road.
A secure mounting position helps maintain complete control of the vehicle while also providing vital engine information.
3. Legal and Interior Aesthetic Considerations
In some regions, vehicle modification laws prohibit objects that obstruct the windshield or the driver’s visibility.
A boost gauge placed too high or too close to the windshield may violate local traffic regulations.
It’s important to check local vehicle regulations before final installation.
From an interior design perspective, gauges should blend in with the vehicle’s interior styling and appear well-integrated, not distracting.
A clean and properly aligned installation improves both resale value and daily driving comfort, making the upgrade appear professional and purposeful.
How to Prepare Vehicle for Installation
Preparing the vehicle before installing a boost gauge is an essential step that ensures safety, accuracy, and a smooth installation process.
Proper preparation reduces the risk of electrical damage, prevents injury, and helps avoid installation mistakes that could lead to boost leaks or inaccurate gauge readings.
Many installation problems aren’t caused by the gauge itself, but rather by skipping basic preparation steps.
Taking the time to properly prepare the vehicle ensures reliable operation of the boost gauge and protects both the engine and the vehicle’s electrical system.
1. Parking on a Level Area and Applying the Parking Brake
Always park the vehicle on a level and stable surface before beginning any installation work.
A level surface prevents the car from rolling and provides better balance when working inside the engine bay or under the dashboard.
Applying the parking brake locks the rear wheels and adds an extra layer of safety, especially when removing hoses from the firewall or bending into the engine compartment.
A stable vehicle also helps maintain proper posture while working, reducing the risk of accidentally slipping or dropping tools.
2. Allowing the Engine to Cool Completely
The engine must be allowed to cool completely before beginning installation.
Turbocharged engines generate very high temperatures, and parts such as the turbo housing, exhaust manifold, and surrounding hoses can remain hot for extended periods of time, even after the engine is turned off.
Touching hot parts can cause serious burns, and moving them while hot can also damage vacuum lines.
A cool engine makes handling hoses, fittings, and wiring safer, and also allows for more accurate boost and vacuum line checks.
3. Disconnecting the Negative Battery Terminal
Disconnecting the negative battery terminal is an important safety step when working with electrical parts.
This can prevent accidental short circuits, blown fuses, or damage to sensitive electronic control units.
Many boost gauges require tapping into power or lighting circuits, and working on live electrical systems increases the risk of sparks or misconnections.
Removing the negative terminal cuts power to the vehicle’s electrical system, while in most modern cars, the stored vehicle settings remain the same.
4. Checking Engine Bay and Firewall Access Points
Before installing the boost gauge, carefully examine the engine bay and firewall to plan the hose and wire routing.
The firewall is the metal barrier between the engine bay and the cabin, and many vehicles already have factory rubber grommets that can be used to safely route hoses.
Identifying these access points can prevent unnecessary drilling and reduce the risk of damaging wiring or insulation.
A clean probe also helps keep the hose away from heat sources, sharp edges, and moving parts, improving the gauge’s long-term reliability and accuracy.
How to Identify the Boost/Vacuum Source
Identifying the correct boost or vacuum source is one of the most important steps when installing a boost gauge, as its accuracy depends entirely on where it receives its pressure information.
A boost gauge should read pressure directly from the engine’s air intake system, not from any other system.
If the wrong source is used, the gauge may display inaccurate values, respond slowly, or show no boost at all.
The correct source ensures that the gauge reflects the engine’s actual condition during idle, acceleration, and full boost, helping drivers quickly diagnose problems and protect the engine.
1. Understanding Intake Manifold Pressure
Intake manifold pressure refers to the air pressure inside the intake manifold, the chamber that supplies air to the engine cylinders.
When the engine is idling or cruising, this pressure is typically below atmospheric pressure, which is called vacuum.
When the turbocharger builds pressure, the intake manifold pressure rises above atmospheric pressure, which is called boost.
The boost gauge works by measuring these pressure changes in real time.
Because the intake manifold directly reflects how much air is being supplied to the engine, it is the most accurate location for measuring both vacuum and boost conditions.
2. Common Boost Source Locations
There are several common locations where a boost gauge can safely and accurately read intake pressure.
These locations are already designed to handle vacuum and boost, making them reliable sources when properly connected.
Intake Manifold Vacuum Line
The intake manifold vacuum line is the most accurate and most recommended source for a boost gauge.
This line is connected directly to the intake manifold and responds quickly to throttle changes.
During idle, it provides a strong vacuum, and during acceleration, it clearly displays boost pressure.
Using this line allows the gauge to display smooth and accurate readings under all driving conditions.
Blow-Off Valve Line
The blow-off valve line is another commonly used boost source because it is connected to the intake system and responds quickly to pressure changes.
This line controls the blow-off valve, which releases more pressure when the throttle is closed.
Because it carries both vacuum and boost, it can provide accurate readings when properly tapped.
However, it is important to ensure that the line diameter is not reduced, as this can affect valve operation.
Factory Boost Reference Port
Some turbocharged vehicles have a factory boost reference port designed for a sensor or control system.
This port is an ideal source because it was designed by the manufacturer to accurately measure intake pressure.
Using the factory port reduces the risk of leaks and inaccurate readings.
When available, it is often the cleanest and safest option.
3. Avoid These Lines
Not all vacuum or pressure lines are suitable for a boost gauge.
Some lines perform essential safety or fuel control functions and should never be tapped.
Fuel Pressure Regulator Line
The fuel pressure regulator line directly affects fuel delivery to the engine.
Connecting a boost gauge to this line can distort the fuel pressure signal, resulting in poor engine performance or an unbalanced air-fuel ratio.
Any blockage in this line can cause hesitation, misfires, or long-term engine damage.
Brake Booster Line
The brake booster line provides vacuum assistance for braking.
This line is very large and designed only for brake operation.
Tapping into it can reduce braking assistance, which is very dangerous.
For safety reasons, this line should never be used as a boost gauge source.
4. Importance of Leak-Free Connections
Leak-free connections are essential for accurate boost gauge readings and proper engine operation.
Even a small air leak can cause inaccurate pressure readings, rough idling, or boost loss.
Leaks also force the engine to work harder, which can reduce performance and fuel efficiency.
Using proper fittings, tight clamps, and good-quality hoses ensures a stable pressure signal and reliable gauge performance over time.
How to install the Boost Line or Sensor
Installing the boost line or pressure sensor is the step that physically connects the boost gauge to the engine’s air pressure system.
This step directly impacts how quickly and accurately the gauge responds to changes in boost and vacuum.
A properly installed line provides smooth and stable readings, while poor installation can cause pressure leaks, delayed needle movement, or inaccurate boost values.
Taking the time to properly install and secure the line also prevents long-term damage from heat, vibration, or engine movement.
1. Safely Cutting the Selected Vacuum Line
The selected vacuum or boost line must be cut carefully to avoid damage and air leaks.
The cut should be clean and straight so that the hose seals tightly around the fitting.
Using a sharp cutting tool helps prevent tearing or crushing the hose, which can cause small leaks that affect the gauge’s accuracy.
Cutting the correct line also ensures that the boost gauge reads the correct intake manifold pressure without disturbing other engine systems.
2. Installing the T-Fitting Correctly
The T-fitting allows the boost gauge to work with the existing vacuum or boost line without interfering with its original function.
It must be installed in the correct direction and fully inserted into the hose to create an airtight seal.
A loose or incorrectly installed fitting can cause pressure loss or slow gauge operation.
Proper installation ensures that both the main system and the boost gauge receive the correct pressure signal simultaneously.
3. Routing the Boost Hose from the Firewall
The boost hose must pass through the firewall to connect the engine bay to the gauge inside the cabin.
The firewall is designed to isolate heat, noise, and smoke from the passenger area, so routing must be done carefully.
Whenever possible, use existing factory holes to avoid drilling.
A smooth and straight hose path reduces signal delay and prevents pressure fluctuations.
4. Using Grommets to Protect Hose from Damage
Always use rubber grommets when routing boost hoses through metal openings in the firewall.
Engine vibration and vehicle movement can wear down metal edges over time.
A grommet creates a protective barrier that prevents wear, cracks, and sudden hose failure.
This simple step greatly improves safety and long-term reliability.
5. Keeping Lines Away from Heat and Moving Parts
Once routed, boost lines should be kept away from hot parts such as the exhaust manifold, turbo housing, and radiator.
Excessive heat can soften or melt the hoses, causing leaks or complete failure.
Lines should also be kept away from belts, pulleys, and steering components to prevent rubbing or pulling.
Properly securing the boost signal keeps it stable and the hose protected during everyday driving and engine movement.
How to Wire the Boost Gauge – Illumination and Power
Proper wiring of a boost gauge is essential for reliable operation, accurate readings, and safe electrical performance.
To ensure clear readings at night, the gauge requires a stable power supply and proper lighting connections.
Poor wiring can cause lights to flicker, inaccurate readings, blow fuses, or even damage the vehicle’s electrical system.
Understanding each wire and its purpose helps ensure that the boost gauge works when the vehicle is running and connects smoothly to the factory dashboard lighting.
1. Identifying Power, Ground, and Illumination Wires
A boost gauge typically has three main electrical connections: power, ground, and illumination.
The power wire supplies electricity to power the gauge, the ground wire completes the electrical circuit, and the illumination wire controls the backlight.
It is very important to correctly identify these wires, as mixing them up could cause the gauge to stop working or cause electrical faults.
Before making any connections, the vehicle’s wiring diagram or a test light can help verify the function of each wire.
2. Connecting to a Switched 12V Power Source
The boost gauge should be connected to a switched 12V power source so that it only works when the ignition is in the ON or RUN position.
This prevents the gauge from drawing power when the vehicle is off, which could drain the battery.
Common switched power sources include circuits connected to the fuse box or ignition.
Using a switched source ensures that the gauge starts and stops with the engine, just like factory instruments.
3. Properly Grounding the Gauge
Proper grounding is essential for stable gauge operation and accurate readings.
The ground wire should be connected to a clean, unpainted metal surface on the vehicle body or chassis.
A weak or painted ground can cause the gauge needle to move erratically or cause the backlight to flicker.
A strong ground connection ensures smooth performance and protects the gauge from electrical noise.
4. Tapping into the Dash Light Circuit for Nighttime Illumination
Connecting the illumination wire to the dash light circuit allows the boost gauge to illuminate in sync with the vehicle’s interior lighting.
This ensures that the gauge’s brightness matches the rest of the dashboard and dims when the headlights are on.
Proper illumination wiring improves nighttime visibility and prevents the gauge from being too bright or distracting when driving in low light.
5. Testing Electrical Connections Before Final Assembly
Before permanently installing the gauge, all electrical connections should be tested.
Turning on the ignition should provide power to the gauge, and turning on the headlights should turn on the backlight.
Testing at this stage helps quickly detect loose connections or wiring errors.
Proper testing eliminates the need to remove the panel again and ensures the boost gauge works safely and reliably from the first drive.
How to Install the Boost Gauge
Installing the boost gauge is the final physical step that determines how easy it is to read and how well it performs during daily driving.
A properly installed gauge remains stable, is clearly visible in all lighting conditions, and does not cause distractions or safety issues.
Poor installation can cause vibration, rattling, or shifting over time, making it difficult to see readings and reducing the gauge’s life.
Careful installation ensures long-term reliability and a factory-like clean appearance.
1. Installing the Gauge in the Selected Pod or Mount
The boost gauge should fit snugly into the selected pod or mounting bracket without any force.
Most pods are designed to hold the gauge tightly so it doesn’t move during driving.
Properly installing the gauge ensures that it doesn’t loosen due to road vibrations or engine movement.
A sturdy mount keeps the gauge aligned and prevents unnecessary pressure on internal components.
2. Adjusting the Gauge Angle for Clear Visibility
The angle of the boost gauge is crucial for legibility.
The gauge should be positioned facing the driver so that it can be read at a glance while keeping most eyes on the road.
Proper angle adjustment reduces glare from sunlight and dashboard reflections.
A properly positioned gauge provides an accurate reading of the boost level without distracting the driver during acceleration.
3. Ensuring the Gauge is Firmly Fixed and Vibration-Free
Once installed, the gauge and its mount must be securely secured to prevent any movement or shifting.
Vibration can cause the needle to appear blurry, making it difficult to accurately read boost changes.
Over time, constant vibration can also loosen fittings or damage the gauge’s internal components.
Vibration-free installation ensures stable readings and extends gauge life.
4. Organize and hide unnecessary wiring and hoses
Removable wiring and hoses should be properly organized behind panels or under the dashboard.
Proper routing prevents wires from becoming loose or obstructing pedals, steering, or airbags.
Hidden and secure lines also prevent them from being broken or accidentally pulled.
Cleanliness increases safety, improves the appearance of the interior, and facilitates future maintenance.
How to Test and Calibrate the Boost Gauge
Testing and calibrating the boost gauge confirms that the installation was done correctly and that the gauge is displaying the correct engine pressure.
This step is crucial because even a small error in hose routing or wiring can cause inaccurate readings.
Proper testing helps identify leaks, wiring issues, or sensor problems before driving.
A properly tested boost gauge becomes a reliable tool for monitoring engine health and turbo performance.
1. Reconnecting the Battery
After installation is complete, the battery must be reconnected to restore power to the vehicle and boost gauge.
Reconnecting the battery provides power to the gauge and resumes normal operation.
This step must be performed carefully to ensure the terminals are tight and secure, as a loose battery connection can cause electrical problems that affect gauge performance and other vehicle systems.
2. Starting the Engine and Checking the Idle Vacuum Reading
When the engine starts, the boost gauge should immediately show a vacuum reading at idle.
Most healthy turbocharged engines show consistent vacuum during idling because the throttle is mostly closed.
A stable vacuum reading indicates that the gauge is connected to the correct source and that there are no major leaks.
If the gauge shows no movement or the reading is unstable, it may indicate a connection or wiring problem that needs attention.
3. Checking for Boost Leaks or Abnormal Needle Movement
The engine bay and hose connections should be carefully inspected while the engine is running.
Any hissing sounds, loose fittings, or wobbly hoses may indicate a boost or vacuum leak.
The gauge needle should move smoothly as the engine speed changes.
Sudden surges, fluttering, or delayed movement often indicate leaks, bent hoses, or worn fittings, which should be repaired to ensure accurate readings.
4. Road Testing Under Light and Full Boost
A road test is necessary to verify how the boost gauge performs under real driving conditions.
During light acceleration, the gauge should gradually move from vacuum to boost.
Under fast acceleration, it should smoothly reach the boost level expected for the vehicle.
Consistent and predictable movement indicates that the gauge is responding correctly to engine load and turbo pressure.
5. Verifying Accurate and Stable Readings
The final verification involves confirming that the boost gauge readings are stable and repeatable.
The gauge should return to the same vacuum level at idle and reach the same boost level under the same driving conditions.
Stable readings over multiple drives indicate correct calibration and a leak-free installation.
Accurate data helps drivers detect changes in boost behavior early, helping to prevent engine damage and performance loss.
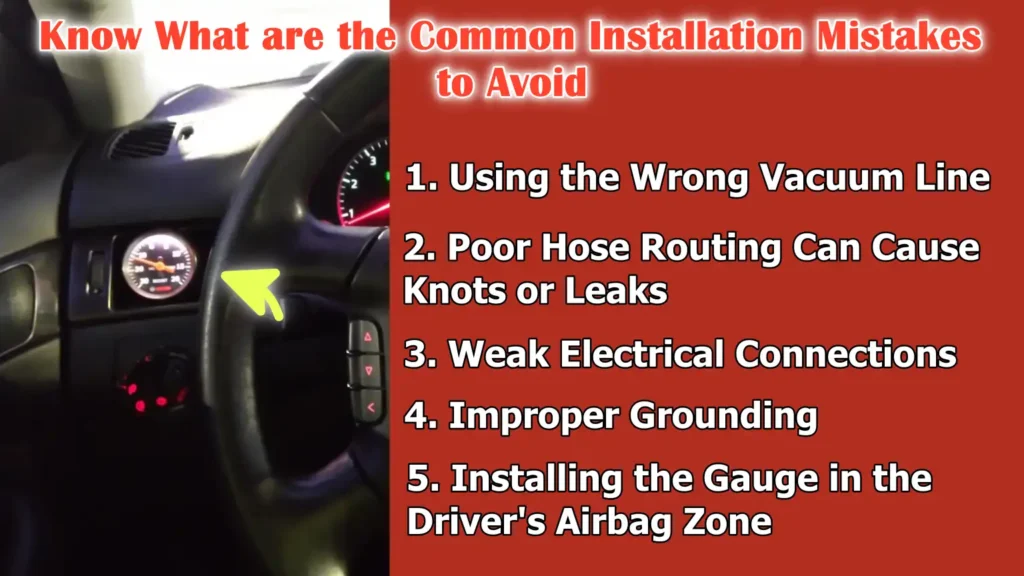
Know What are the Common Installation Mistakes to Avoid
As important as it is to follow the correct steps when installing a boost gauge, it’s equally important to avoid common installation mistakes.
Many boost gauge problems, such as inaccurate readings, flickering lights, or boost leaks, are caused by minor mistakes that can be easily prevented.
Understanding these mistakes helps ensure the gauge functions properly, remains reliable over time, and doesn’t interfere with the vehicle’s safety systems.
Careful installation protects both the engine and the driver.
1. Using the Wrong Vacuum Line
One of the most common mistakes is connecting the boost gauge to the wrong vacuum line.
Not all vacuum lines have the correct intake manifold pressure.
Using the wrong line can cause delayed or inaccurate readings and can affect other engine systems.
The boost gauge should always be connected to a line that provides both vacuum and boost so it accurately reflects the engine’s actual condition.
2. Poor Hose Routing Can Cause Knots or Leaks
Improper hose routing can cause hoses to rub against sharp bends, protrusions, or metal edges.
Knots in the hose can block airflow and slow the gauge’s response, while leaks can cause pressure to escape and produce inaccurate readings.
Over time, vibration and heat can worsen these problems.
Smooth, secure routing is essential for accurate and consistent boost readings.
3. Weak Electrical Connections
Loose or weak electrical connections can cause the boost gauge to suddenly turn on and off or display unstable readings.
Poor connections increase electrical resistance, which can affect gauge performance and lighting.
Secure and well-fitted connections ensure consistent power delivery and protect the gauge from electrical faults.
4. Improper Grounding
Improper grounding is a major cause of gauge malfunctions.
A ground connected to painted or dirty metal cannot properly complete the electrical circuit.
This can cause lights to flicker, needle movement problems, or even damage the gauge completely.
A clean, solid ground point ensures stable operation and accurate readings.
5. Installing the Gauge in the Driver’s Airbag Zone
Installing a boost gauge in the airbag deployment area is a serious safety mistake.
In an accident, airbags deploy forcefully, and loose objects could be propelled toward the driver.
Installing the gauge in this area could pose a danger and interfere with proper airbag operation.
Always choose a mounting location that does not block or obstruct any parts of the airbag system.
Read More:
How to Maintain and Do Long-Term Care of Boost Gauge
Even, there’s scientific research that shows that the controlled increases in boost pressure that directly enhances the engine combustion efficiency and power output as well as by raising in-cylinder pressure and by improving the heat release during the combustion. So, studies found that this improvement in performance also contributes to the reduces CO and hydrocarbon emissions when the monitored and managed in the correct way, because the boost pressure plays such a central role in how a turbocharged engine actually breathes and burns the fuel, that’s why when you have a truly reliable boost gauge then it helps the drivers to ensure that the engine always stays in within the optimal performance ranges during the daily driving and tuning as well.[¹]
Regular maintenance and long-term care are essential to keep the boost gauge performing accurately and reliably over time.
The boost gauge is constantly exposed to changes in engine pressure, vibration, heat, and dust, which can gradually affect its performance.
Simple maintenance checks help prevent inaccurate readings and detect engine or gauge-related problems early.
Proper care ensures the gauge remains a reliable tool for monitoring turbo performance and engine health.
1. Periodic Inspection of Hoses and Fittings
Boost and vacuum hoses should be inspected regularly to ensure they are tight and free of damage.
Over time, heat and engine vibration can cause hoses to harden, crack, or become loose at fittings.
Even small leaks can reduce boost accuracy and engine performance.
Checking the condition of hoses and the tightness of fittings helps maintain accurate pressure readings and prevent unexpected failures.
2. Checking Gauge Accuracy Over Time
The accuracy of the boost gauge should be checked occasionally, especially if vehicle performance seems inconsistent.
A healthy gauge should show consistent vacuum at idle and consistent boost levels under consistent driving conditions.
Sudden changes in readings without any engine modifications may indicate a sensor problem or a pressure leak.
Regular accuracy checks help ensure the gauge accurately reflects engine conditions.
3. Cleaning the Gauge Lens
The gauge lens should be kept clean for clarity.
Dust, fingerprints, and debris can interfere with readings, especially in bright sunlight or at night.
Cleaning the lens with a soft, non-scratching cloth helps maintain clarity.
A clean lens provides quick and accurate readings of the boost level while driving.
4. Signs of a Boost Leak or Gauge Failure
Certain signs may indicate a boost leak or gauge problem.
Fluctuations in needle movement, lower-than-normal boost readings, or slow response during acceleration may indicate a leaking hose or loose fitting.
A gauge that doesn’t return to normal vacuum at idle or a light that doesn’t illuminate may indicate an electrical or internal gauge problem.
Recognizing these signs early can help prevent performance loss and engine damage.
Conclusion – How to Install a Boost Gauge
So, now you have understood that monitoring the boost pressure is one of the simplest ways to stay informed about the health and current condition of the turbo engine.
A properly installed boost gauge provides real-time information about intake pressure, which directly impacts engine power, fuel delivery, and component stress.
And, by monitoring vacuum and boost levels, drivers can quickly identify problems like boost leaks, overboost conditions, turbo component failure, or incorrect tuning before serious damage occurs.
Also, when you install them correctly and used consistently, a boost gauge increases driver awareness, aids in safe performance driving, and plays a vital role in long-term engine safety and efficiency.
So, that’s it from this guide and you can ask remaining questions below.
Frequently Asked Questions
Q1. What is a boost gauge and why is it important to install it?
Answer: A boost gauge is an instrument that measures the air pressure generated by the turbocharger inside the engine. This pressure directly impacts engine power and safety. Installing a boost gauge allows drivers to view real-time boost and vacuum levels, helping them quickly identify problems like boost leaks, overboost conditions, or turbo failure. Most factory dashboards don’t display accurate boost pressure, so a boost gauge provides vital information that protects the engine and improves driving awareness.
Q2. Is it difficult for beginners to install a boost gauge?
Answer: Installing a boost gauge is not difficult for beginners if the steps are followed carefully. The process primarily involves connecting the vacuum or boost line, routing the hose through the firewall, connecting the gauge to power and lighting, and mounting it securely. Basic tools and patience are usually sufficient. Many first-time installers successfully complete the installation by working slowly and checking each step before proceeding.
Q3. Where should the boost gauge be connected for accurate readings?
Answer: The boost gauge must be connected to a vacuum or boost source that reads intake manifold pressure. This is the pressure that flows into the engine cylinders and indicates both vacuum and boost conditions. Common correct sources include the intake manifold vacuum line, the blow-off valve line, or the factory boost reference port. Using the correct source ensures the gauge responds quickly and shows accurate readings under all driving conditions.
Q4. Can the wrong vacuum line damage the engine or gauge?
Answer: Using the wrong vacuum line can cause inaccurate readings and impact engine systems. Lines connected to components such as the fuel pressure regulator or brake booster are crucial for engine control and safety. Tapping into these lines can disrupt fuel delivery or reduce braking assistance. While this may not cause immediate engine damage, it can create unsafe conditions and make the gauge unreliable.
Q5. Do I need to drill into the firewall to install a boost gauge?
Answer: Drilling into the firewall isn’t always necessary. Many vehicles have factory rubber grommets or unused access points that allow hoses or wires to safely enter the cabin. These should always be checked first. If drilling is necessary, use rubber grommets to protect the hose from sharp metal edges. Proper firewall routing prevents hose damage and ensures long-term reliability.
Q6. How do I know if my boost gauge is installed correctly?
Answer: A properly installed boost gauge will show consistent vacuum at idle and smooth movement as engine speed and load change. During acceleration, the gauge should smoothly rise to boost and return to vacuum when the throttle is released. Stable and consistent readings under consistent driving conditions indicate correct installation. Any blinking lights, delayed needle movement, or unusual readings should be investigated.
Q7. What are normal boost and vacuum readings after installation?
Answer: Normal vacuum readings at idle are usually observed when the engine is warm and running smoothly. Boost readings vary depending on the vehicle, turbo setup, and tuning. Stock turbo vehicles typically show good boost during acceleration. The main indicator of a correct installation is consistent readings, not the exact number. Sudden changes in normal readings may indicate a leak or mechanical problem.
Q8. Why does my boost gauge needle shake or wobble?
Answer: Wobble or wobble of the needle is often caused by small air leaks, loose fittings, or bent hoses. This can also happen if the gauge line is too long or installed incorrectly. Electrical grounding problems can affect electronic gauges. A smooth and steady needle shows a clear pressure signal, while unstable movement should be corrected to ensure an accurate reading.
Q9. Can a boost gauge drain a car’s battery?
Answer: A boost gauge can drain a car’s battery if it is connected to a constant power source instead of a switched power source. The gauge should receive power only when the ignition is on. Proper wiring ensures that the gauge turns off with the engine, preventing battery drain and electrical problems.
References:
[1] Boost pressure influence on combustion, emission characteristics, and performance of diesel engines with various fuel types
https://www.sciencedirect.com/science/article/pii/S2215098625000382

Guys, I’m a car audio enthusiast and customization expert and I love clear sound and clean installation. Plus, I have spent years helping people build their dream audio setups. And whenever I’m working on cars, I probably listen to music and thinks about the next big upgrade.