Written By: Don Dodi
Fact Checked By: Kristen Brown
Reviewed By: Diego Rosenberg
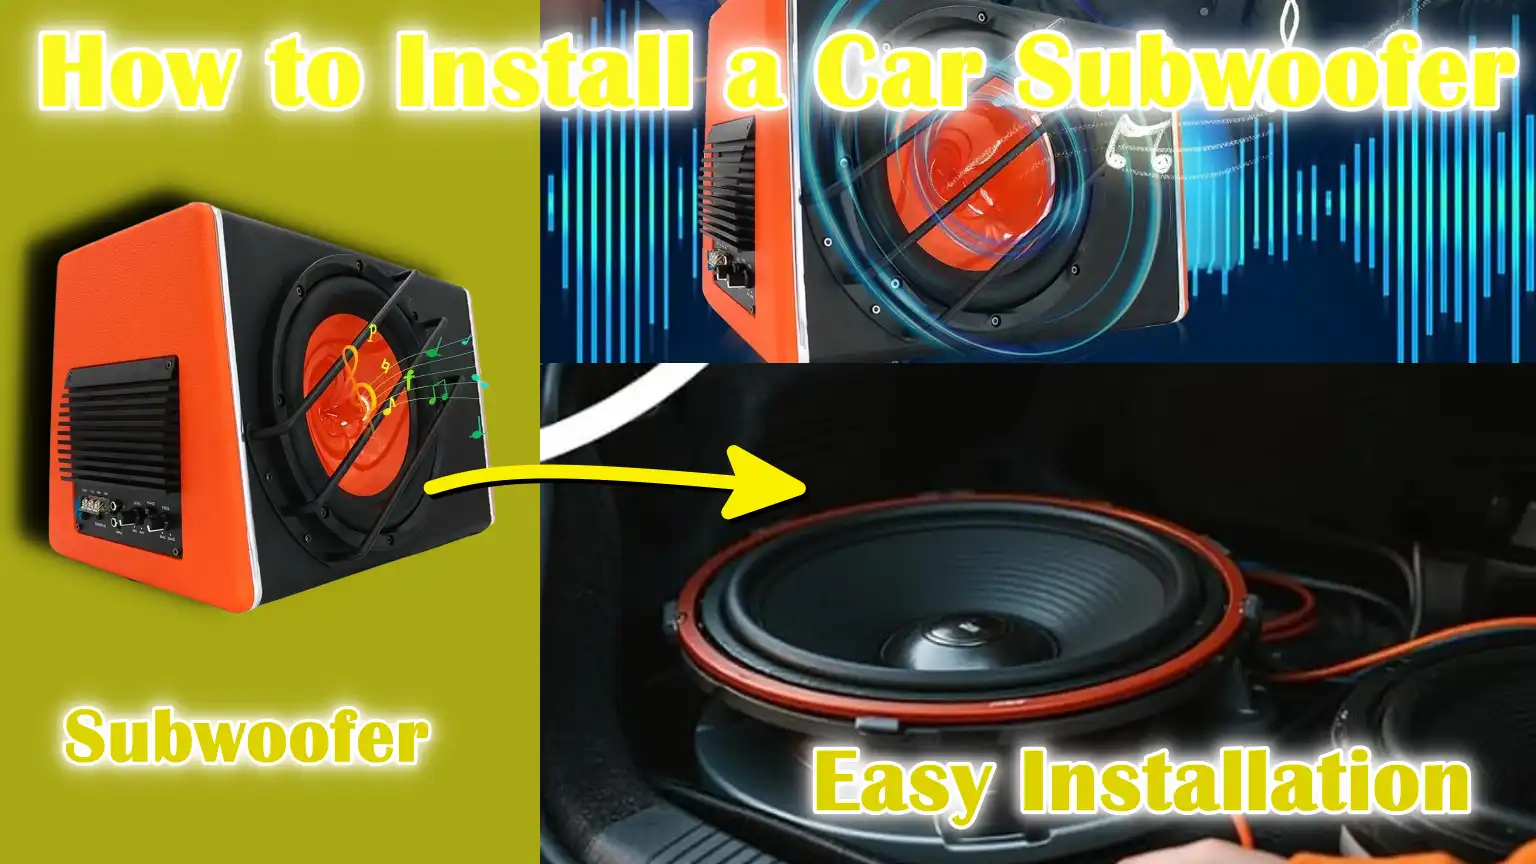
So, when you add a subwoofer then you’ll make a car stereo sound richer and more clearer, as the subwoofer is actually built to play very low notes as well: roughly 20 to 200 Hz as well and you can feel the bass and of course hear as well.
And whenever the sub handles those deep tones, then your door speakers no longer struggle with heavy bass and the result is that you’ll have voices and instruments sound cleaner and less distorted as well.
Plus, most of the installations actually uses a dedicated amplifiers and some subs actually have one built in as well and a proper power and ground cable of the right gauge, also an inline fuse which should be mounted close to the battery and either RCA or speaker-level inputs from the head unit.
Additionally, a safe install ideally starts with disconnecting the battery’s negative terminal, as running power through a grommet firewall hole, that scrap the paint to bare metal for a solid ground and secure all wires so that they can’t rub or pinch each other.
Also, you have to match the sub’s impedance to the amp, so just set the gain and low-pass crossover so the bass will be tight and that make sure the enclosure is firmly mounted so it won’t move under braking as well.
And all these things will shown in this guide which is all about How to Install a Car Subwoofer that have the ability to transform your car’s audio in the complete way.
Tools
| Item Name | Purpose / Why You Need It | Tips for Use |
|---|---|---|
| Screwdrivers (Flat & Phillips) | Removing screws holding panels, head units and parts in place. | Choose the complete set (various sizes) for easy access in tight spaces. |
| Wire Strippers | To cleanly remove insulation from power, ground and speaker wires. | Avoid cutting the wire fibers; adjustable strippers work best. |
| Crimpers | Adding connectors (such as ring terminals) to wires for strong, secure connections. | Use matching crimp connectors for a secure hold. |
| Drill with Bits | Mounting the subwoofer box or amplifier, if necessary. | Use the correct size bit; avoid drilling into fuel lines or hidden wiring. |
| Panel Removal Tool | Gently remove car panels and trim without breaking or scratching them. | Plastic tools for interior decoration are safer than metal screwdrivers. |
| Multimeter (Optional) | Check for proper voltage and verify connections. | Helps you find power cables and confirm ground quality. |
| Soldering Iron (Optional) | Soldering wire connections for a stronger, longer-lasting bond. | Use heat-shrink tubing to cover soldered joints for protection. |
| Subwoofer | Produces deep bass sound (low frequency audio). | Choose the right size (8″, 10″, 12″, etc.) based on your space and sound preference. |
| Subwoofer Enclosure (Box) | Holds the subwoofer securely and improves sound quality. | Prefabricated boxes are easier for beginners; sealed boxes give denser bass and ported boxes give more intense bass. |
| Amplifier | Provides power to the subwoofer; this is needed unless you purchase a powered sub (built-in amp). | Match the amp’s power (watts RMS) and impedance (2Ω or 4Ω) to your subwoofer. |
| Amplifier Wiring Kit | This includes power wire, ground wire, RCA cable, remote wire, connector and fuse holder. | Get the correct gauge (thickness) wire based on the amp size (for example, 4-gauge for high power amps). |
| Fuse Holder + Fuse | Protects your car’s electrical system from short circuit or overload. | Locate the fuse holder 18 inches away from the battery. |
| Electrical Tape | Covering exposed wires to prevent short circuits and protect wire bundles. | Use high quality tape that won’t fray in heat. |
| Zip Ties | Keeps wires neat and clean, preventing them from getting tangled or pinched. | Cut off excess tie ends to avoid sharp edges. |
| Gloves | Protects Your Hands From Cuts And Scrapes While You Work. | Use comfortable gloves for better grip on the tools. |
| Safety Glasses | Protects your eyes from debris while drilling or cutting. | Transparent lenses work best indoors or in low-light areas. |
Preparation
Careful setup makes the entire installation safer, faster and better sounding.
A car runs on a 12-volt system, which is typically around 12.6 volts when the engine is off and can rise to around 13.8-14.4 volts when the alternator is charging.
These numbers may seem small, but this system can deliver high current.
A short or loose wire can damage electronic equipment in a matter of seconds. Good preparation protects the car and you and prevents noisy or weak bass later.
Measure the space you plan to use, gather your equipment and plan your cable path from the battery to the amplifier and then to the subwoofer.
A clear plan reduces installation time and helps you avoid hidden parts like airbag wiring, fuel lines, or sharp metal edges.
1. Disconnect the car battery to avoid electrical hazards.
Always remove the negative (-) battery cable before touching any power wires. This stops the flow of current and reduces the risk of sparks, blown fuses, or damage to the module. Use the correct wrench that fits the clamp to avoid turning the nut.
Remove the negative cable first and keep it away from the post so it doesn’t bounce back. Wait at least five to ten minutes after disconnecting because some systems hold a charge in the capacitors and airbag circuits may remain active for a short time.
If your radio requires a code, make sure you have that code before disconnecting. When you run the main power wire later, install an inline fuse near the battery, ideally within 45 cm or about 18 inches from the positive post, so the wire is protected end to end.
Use a rubber grommet where the wire passes through the firewall so the metal edge doesn’t cut the insulation. Cover long wires with split loom to protect them from heat and friction and secure the wire so it doesn’t move or rub.
2. Review the car’s audio system layout and owner’s manual
Read the owner’s manual and, if available, the radio or amplifier guide for your specific model. Different cars use different wire colors, different antenna power feeds and different data systems.
Some cars use a factory amplifier or “MOST bus” or “CAN bus” link between the head unit and speakers, which changes where you have to tap for a signal. The manual gives fuse locations, current ratings, safe jack points and trim-panel steps.
It also warns you about airbag and seat-belt pretensioner wiring, which you shouldn’t tamper with. Make sure your head unit has RCA pre-outs; if not, plan for a speaker-level input or line output converter.
Note your subwoofer impedance, which is often 2 ohms or 4 ohms and match it to the amplifier’s rated load so the amplifier can deliver clean power without overheating.
If you’re planning a high-power system, check the condition of the alternator and battery; weak charging parts can cause dimming lights, voltage drops, or amplifier clipping.
Mark your cable path on a simple sketch so you can put power wires on one side of the car and signal wires on the other to reduce noise.
3. Choose the right spot for the subwoofer
Choose a spot that suits the size of the box, keeps air flowing around the amp and is safe for daily use.
The trunk of most sedans works well because it has room for a 10-inch or 12-inch subwoofer and a sealed or ported box.
Bass coming from the trunk can reach the cabin through holes in the seats; holes in folding seats or ski-passes are even more helpful.
Under-seat subwoofers are a good option for compact cars and trucks where space is limited; these units are shallow and often power-driven, but they produce less deep bass than a large trunk box.
The cargo area of a hatchback or SUV can produce good output because the subwoofer shares the cabin’s volume, but you’ll need to anchor the enclosure so it doesn’t slide off when braking. Maintain access to the spare tire and jack and avoid blocking important vents or anchors.
Place the amplifier on a solid surface with at least a few centimeters of air gap on all sides to allow heat to escape. Adjust the subwoofer and box to get the sound you want; many people place the subcompact in the back of the car for better bass, but you can try different orientations to see which produces a denser and stronger sound.
Secure everything with proper brackets so the weight doesn’t move it and make sure cables stay away from hinges, rails and seat tracks.
How to Install a Car Subwoofer
Placing the subwoofer correctly is just as important as wiring it, because a poorly installed subwoofer can shake, rattle, or even get damaged when the car is moving.
The subwoofer is heavy and produces strong vibrations when playing bass, so its casing must be stable and firmly attached to the car.
A box that moves when braking or cornering can pull wires, tip over, or damage surrounding panels. Proper installation also improves sound because a strong casing helps deliver air to the subwoofer more efficiently without energy loss.
When planning its placement, make sure the box is in a place where there is enough air to produce deep bass and that it is not blocked by seats, panels, or luggage.
Air flow is important because blocking the speaker cone or the port of a ported box will reduce output and muffle the sound.
1. Determine whether you are using a pre-enclosed subwoofer or building a custom box
The first step is to know what type of casing you have. Many people choose pre-enclosed subwoofers because the box is already built to the correct internal volume for the speaker and saves time.
Pre-enclosed models are easier for beginners and can be sealed or ported. Sealed boxes are airtight and provide more accurate bass, while ported boxes use air vents to provide louder bass at lower frequencies, although they are larger.
If you are building a custom box, you will need to follow the volume and material thickness recommendations provided by the subwoofer manufacturer.
Most subwoofer boxes are made of 5/8-inch to 3/4-inch medium-density fiberboard (MDF) because it is dense, strong and resists vibration.
If the box is too small or too large compared to the recommended size, the subwoofer will not sound right and its lifespan may be shortened.
2. Steps to Securely Install a Subwoofer Enclosure to Prevent Movement
Once you have found the right enclosure, place it in the chosen location and make sure it fits properly.
The cover should not put pressure on any wires, trim panels or back seats and there should be enough room to fully open the trunk or cargo area. Secure the box to the car with metal brackets, screws or sturdy straps, specially in sedans and SUVs.
If the subwoofer is in a truck or under a seat, make sure it is attached to a sturdy part of the floor or vehicle frame.
A securely mounted box prevents accidents and protects both the subwoofer and the car’s interior.
When installing screws into the car’s body or floor, make sure the metal underneath does not pierce fuel lines, brake lines or wires. Check the space underneath first and use smaller screws if needed.
3. Tips to ensure excellent sound performance (avoid blocking air flow)
After the cover is securely in place, make sure nothing is blocking the speaker cone or port (if it’s a ported box).
The subwoofer needs space to push air freely to produce deep bass. Placing the box too close to a wall or trunk lid can reduce performance.
A general rule is to leave at least two to three inches of space between the subwoofer or port and any surface.
If your box is in the trunk, place the subwoofer in the rear of the car as this often produces louder bass due to sound waves bouncing and mixing inside the cabin.
You can test different positions and directions to get the best sound, as the ideal setup may vary by car.
Also, do not place any objects or heavy items directly on top of the box, as this can block air flow, damage the box, or bend the speaker cone.
A solid and open position will help the subwoofer perform at its best and provide loud, clear and accurate bass for years to come.
How to Wiring the System
Wiring is the most important part of installing a car subwoofer because poor connections can result in poor performance, electrical noise, or even serious damage to your car’s electrical system.
Every wire must be connected correctly and firmly so that electricity flows safely and the sound signal is clear. It’s important to use the correct wire gauge according to the size of your amplifier.
Most subwoofer amplifiers require 8-gauge or 4-gauge wire and using too thin a wire can lead to overheating, voltage drops and amplifier shutdown.
You also need to plan the wiring carefully.
Power wires should be on one side of the car, while signal wires, such as RCA cables, should be on the other side.
This separation helps prevent electrical noise or interference from entering the audio signal. Always take time with wiring because clean, strong connections help your system last longer and perform better.
1. Power Wire Connections
The power wire carries current from the car’s battery to the amplifier, so it must be installed and secured correctly.
Start by connecting the power wire directly to the battery’s positive terminal using a ring terminal. It’s very important to install an inline fuse holder as close to the battery terminal as possible, ideally within 18 inches. This fuse protects your car and amplifier from electrical short circuits, which could cause a fire.
After installing the fuse holder, run the power wire through the firewall into the cabin and use a rubber grommet to prevent sharp metal from cutting into the wire’s insulation.
Run the wire under the car’s interior panels or carpet, taking care not to hit seats, trim pieces, or moving parts.
Secure it with clips or zip ties so it doesn’t move over time. Avoid running the wire near hot equipment such as the exhaust system because the high heat can melt the insulation and cause a dangerous short circuit.
2. Ground Wire Connections
A strong ground wire is just as important as the power connection.
The ground wire should be as short as possible, usually less than 18 inches and connected to a solid, unpainted metal part of the car’s chassis near the amplifier.
Scrape off any paint, rust or coating at the connection point so that the ring terminal on the ground wire is in direct contact with the metal.
Use a strong bolt to hold the ground wire firmly in place because a loose ground can cause voltage drops, distortion and amplifier shutdown.
One of the most common causes of alternator noise or hum in a car audio system is a poor ground connection, so it’s important to take the time to clean the ground for clear sound.
3. Remote Turn-On Wire
The remote turn-on wire is a thin wire that tells the amplifier when to turn on and off. It should be connected to the head unit’s remote or amplifier turn-on output, which usually gives off a 12-volt signal when the stereo is turned on.
This wire prevents the amplifier from running when the car is off, which can drain the battery. Connect this wire to the amplifier along with the RCA or speaker signal wires.
If your head unit does not have a remote turn-on output, you can connect it to another switched 12-volt source that has power only when the car is running, such as the ignition wire.
4. RCA or Speaker-Level Inputs
If your head unit has pre-amp outputs, use RCA cables to send the music signal to the amplifier.
These cables carry a clean, low-level signal and should be plugged in the opposite direction from the car’s power wires to avoid interference.
Connect the left and right RCA plugs to the correct inputs on the amplifier. If your head unit does not have RCA outputs, you will need to use the speaker-level inputs, which allow you to connect the amplifier directly to the speaker wires coming from the head unit.
In this case, make sure the polarity of the speaker wires is correct, as reversing them can cause phase problems and weak bass.
5. Connecting the Subwoofer
Finally, connect the subwoofer to the amplifier, making sure the polarity is correct.
The positive terminal of the amplifier should be connected to the positive terminal of the subwoofer and the negative terminal to the negative terminal.
Reversing the polarity can reduce bass and drastically reduce output.
Pay attention to the impedance of your subwoofer as most amplifiers are designed for a 2-ohm or 4-ohm load.
If you are connecting more than one subwoofer, you may have to connect them in series or in parallel to get the correct total impedance for the amplifier.
Once connected, double-check all wires to make sure their connections are strong and secure any loose wires so they don’t move or break when moved. Correctly wired systems not only sound better, but also run cooler and last longer.
Read More:
How to Check the System Properly
Checking your car’s subwoofer system is an important step because it ensures that all the wiring and connections you used are working properly and the system is safe to use.
Many people rush through this task, but a careful check can save you from damaging or rewiring expensive equipment.
Before checking, double-check all wires to make sure they are tight, secure and not touching any bare metal surfaces where they shouldn’t.
Also make sure the inline fuse for the power wire is installed correctly and that no wires are stranded under the panel or seat.
Once everything is confirmed as clear, you can begin testing the system step-by-step.
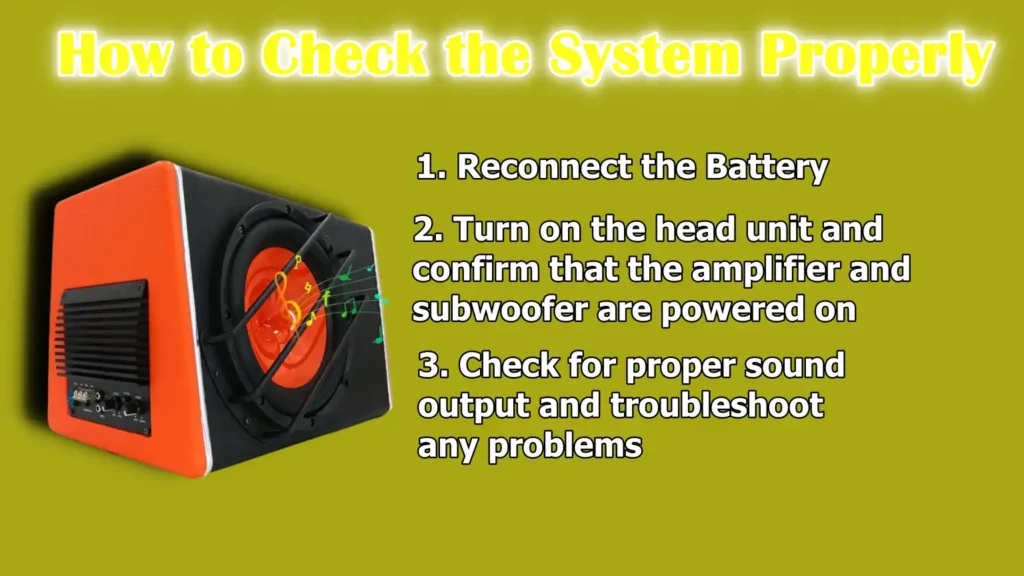
1. Reconnect the Battery
Reconnect the negative battery cable that was disconnected during installation. Make sure it is properly connected to the battery terminal so that it doesn’t come loose while driving.
When reconnecting, you may see a small spark, which is normal as some current flows back into the system, but it should be very small.
If you see a large spark, disconnect immediately and double-check your wiring as this may indicate a short circuit.
After reconnecting the battery, check the battery’s inline fuse to make sure it is not blown. If the fuse is blown, it usually means there is a problem with the wiring, such as a power wire touching ground.
2. Turn on the head unit and confirm that the amplifier and subwoofer are powered on
Turn on your car’s head unit (stereo) and check that the amplifier is powered on. Most amplifiers have a small LED light that indicates the presence of power.
If the amplifier does not turn on, check the remote turn-on wire, ground connection and inline fuse. Once the amplifier turns on, the subwoofer should turn on as well.
At this stage, turn down the volume on the head unit and slowly increase it to ensure that the amplifier and subwoofer are working properly.
Avoid setting the amplifier gain or bass boost too high during the initial check, as this can distort the sound and even damage the speakers if the wiring is incorrect.
3. Check for proper sound output and troubleshoot any problems
Play a song with distinct bass notes and listen carefully. If you hear loud, clear bass, the system is working properly.
If there is no sound, check the RCA or speaker-level input connections on the amplifier and head unit. If the sound is weak or distorted, it may be due to incorrect polarity in the subwoofer wiring or incorrect settings on the amplifier.
Reverse polarity may cause the subwoofer phase to be different from the other speakers, causing reduced bass.
If you hear rattling or vibration, check that the subwoofer box is firmly mounted and that no loose panels or wires are touching the speaker cone.
Also make sure that there are no objects in the enclosure that could obstruct air flow. If the amplifier goes into protect mode and shuts down, it usually means there is a problem with the wiring or that the subwoofer load is too low for the amplifier.
Correct any problems before playing music at high volume. Taking the time to thoroughly test the system ensures that your subwoofer will perform at its best and remain reliable for years.
How to Secure and Finalize the Installation
Finalizing your installation is just as important as wiring and testing because loose wires, open connections and incorrect amplifier settings can cause long-term problems or even damage the system.
Once you are confident the subwoofer is working properly, you need to make sure every part of the installation is neat, secure and protected.
This not only keeps the system reliable, but also enhances the look of the setup. Properly secured wires prevent movement that can lead to loose connections, rattling and short circuits to metal parts.
Taking time to finalize the installation will save you from having to troubleshoot preventable problems later.
1. Secure all wires with zip ties and make sure they are hidden
After testing the system, check each wire you have installed and secure it with a high-quality zip tie.
Tie the wires tightly, but not too tightly, to avoid damaging the insulation. Make sure power wires, RCA signal cables and speaker wires are tucked neatly along the factory wiring paths or under the edges of the carpet.
Hiding the wires protects them from being pinched, trapped, or damaged by items in the trunk or cabin.
This also gives the installation a professional, factory-finish look. Any exposed wiring that runs through metal holes should be protected with rubber grommets or split-loom tubing so that the insulation does not rub against sharp edges over time.
Properly securing the wires also reduces the chance of rattling noises that can cause vibrations inside the car when playing bass.
2. Reinstall all removed panels and make sure no wires are pinched
Next, reinstall all panels, carpet sections and trim pieces that were removed during installation. Before installing a panel, double-check that no wires are pinched or trapped behind it.
Frayed wires can break or short-circuit when they hit metal, causing a blown fuse or electrical fire.
When reinstalling panels, press them firmly into their clips so they fit together and don’t rattle when you drive the car. If you removed the head unit or dash trim, make sure the stereo is firmly mounted in its brackets and that all factory screws and bolts are in their original positions.
Clean and safe re-installation protects loose parts from vibration and keeps your vehicle’s interior as original as possible.
3. Adjust amplifier settings for bass level, gain and crossover frequency
The last step is to fine-tune the amplifier settings so your subwoofer produces clean, powerful bass without distortion.
Start by setting the gain correctly. Gain is not a volume control; it matches the amplifier’s input level to the head unit’s output.
Turn the head unit volume down to about three-quarters and then slowly increase the amplifier gain until the bass plays clearly without distortion.
Next, adjust the low-pass crossover so that the amplifier sends only bass frequencies to the subwoofer. A good starting point is between 70 and 100 Hz.
This setting keeps midrange and high-frequency sounds out of the subwoofer, improving the overall clarity of your audio system.
If your amplifier has a bass boost feature, use it sparingly as too much boosting can cause distortion and shorten the life of the subwoofer.
Once the settings are set, listen to several songs at different volumes and keep adjusting slightly until the bass blends naturally with the rest of the speakers.
Proper tuning ensures that the subwoofer works to its full potential and delivers the deep, clear bass you installed it for.
How to Troubleshooting Common Problems
Even after careful installation, your subwoofer system may experience problems. Knowing how to troubleshoot can save time and prevent further damage.
Most problems are caused by incorrect wiring, poor connections, or incorrect amplifier settings and each problem can be resolved step by step.
Troubleshooting is best done when the car is initially off so you can safely inspect all wires.
Using a multimeter can be extremely helpful in checking for the correct voltage at the amplifier’s power and ground points.
Timely troubleshooting of minor problems can prevent permanent damage to the subwoofer, amplifier, or even the car’s electrical system.
1. The Subwoofer Is Not Turning On
If your subwoofer is not turning on, it means the amplifier is not receiving power. First, make sure the inline fuse near the battery is not blown and that the fuse rating matches the amplifier’s specifications.
Check for any loose or corroded terminals in the power wire connections connected to the battery and amplifier. Then make sure the ground wire is connected to bare metal and not loose, as poor grounding will prevent the amplifier from turning on.
Also check the remote turn-on wire; this wire should receive 12 volts from the head unit when the stereo is turned on.
If the amplifier’s power light still doesn’t light up, check the voltage at the power and remote terminals using a multimeter.
You should see 12-14 volts at the power terminal and about the same voltage at the remote terminal when the head unit turns on.
If both voltages are present and the amplifier still doesn’t turn on, it may be defective and need repair.
2. Weak bass output or distortion
Weak bass or distorted sound is often caused by incorrect wiring or amplifier settings. Check the polarity of the subwoofer wiring; the amplifier’s positive terminal should be connected to the subwoofer’s positive terminal and the negative terminals should also match.
Reversed polarity can cause the subwoofer to be out of phase with the rest of the speakers, resulting in weak bass. If you are using more than one subwoofer, make sure the total impedance matches the amplifier’s rated load.
Wiring the subwoofers incorrectly can cause the impedance to be too low, which can overstrain the amplifier and cause distortion.
Check the amplifier’s gain setting; too high a gain setting will clip the audio signal and cause harshness and distortion in the bass.
Finally, inspect the enclosure. An improperly sealed or small box can significantly reduce bass output and cause distortion in loud volumes.
3. Alternator noise or ground loop noise
If you hear a rattling sound that changes with engine speed, it is usually caused by a ground loop or poor grounding.
Start by improving the amplifier’s ground connection by sanding the mounting surface and firmly tightening the ground terminal.
Make sure the ground wire is short, ideally less than 18 inches. Also check that the RCA cables are not running alongside power cables as this can cause electrical interference.
If the problem persists, you can use a ground loop isolator on the RCA cables, which helps break the interference loop.
Alternator noise can also occur when the voltage in the system is low, so check the battery and alternator to make sure they are in good condition and are delivering consistent voltage.
Fixing the noise problem not only improves sound quality but also protects your equipment from long-term electrical stress.
Safety and Maintenance Tips
If a car subwoofer system is installed safely and maintained properly, it can deliver years of reliable performance.
Many people overlook maintenance after installation, but constant vibration, temperature changes and everyday use can gradually loosen connections or wear out parts.
By taking small preventive steps, you can protect your car’s electrical system, prevent damage to expensive audio equipment and maintain clear, powerful bass.
Good safety practices also reduce the risk of electrical short circuits and fires, which are rare but possible if wiring is neglected or overloaded.
1. Avoid overloading the car’s electrical system
Your car’s alternator and battery are designed to handle the vehicle’s normal electrical load. Installing a powerful subwoofer and amplifier, specially at high volumes, can draw excessive amounts of current.
If the electrical system is overloaded, you may notice dimming headlights, sluggish operation of windows, or even a blown fuse.
To avoid this, always keep the amplifier’s power requirements in line with the car’s electrical capacity. If you’re using a higher wattage amplifier, consider upgrading to a higher capacity alternator or adding a secondary battery or capacitor to handle the extra current flow.
Also make sure you’re using power and ground wires of the correct gauge because thinner wires can overheat and increase resistance, putting a strain on both the amplifier and the charging system.
2. Check the condition of wires and fuses periodically.
Wires and connections should be inspected regularly because vibration and movement can loosen or damage them over time.
At least every few months, lift the panel or look in the trunk to make sure all wires are secured with zip ties and that none are frayed or rubbing against sharp edges.
Check electrical wires near the firewall and around corners where insulation may be worn. Inline fuses near the battery should also be checked for corrosion or damage.
If the metal contacts are discolored or the fuse housing is cracked, replace it immediately.
Check the amplifier’s ground connection periodically to make sure it is still tightly connected to bare metal as a weak ground connection can cause distortion or intermittent shutdowns.
3. Maintain proper amplifier settings to avoid damage
Improper amplifier settings are one of the major causes of subwoofer beating and distorted sound.
Gain should always be set correctly so that the amplifier does not clip the signal, which can permanently damage the speaker.
Avoid setting the bass boost too high as excessive boosting can push the subwoofer beyond its mechanical limits.
The low-pass crossover should be adjusted so that only bass frequencies are sent to the subwoofer, usually between 70 and 100 Hz.
If you replace your head unit or other components, re-tune the amplifier as different signal levels can affect the gain settings.
Maintaining proper settings not only protects the subwoofer, but also ensures that the bass remains clean and tight rather than booming or distorted.
By following these safety and maintenance tips, you can enjoy a reliable, high-quality sound system that works consistently for years.
Conclusion – How to Install a Car Subwoofer
So, by now you have known that the car audio system is definitely more than just volume, as it build a sound stage that makes every drive feel like a live concert as well.
Installing a subwoofer in a car may seem a little daunting at first, but with the right preparation and a careful step-by-step process, it’s a project most people can complete successfully.
A properly installed subwoofer not only transforms the overall listening experience by producing deep and clear bass, but also helps your entire sound system perform better.
When the low frequencies are handled by a dedicated subwoofer, your smaller speakers can focus on the mid and high frequencies, reducing distortion and making the sound clearer at all volume levels.
Aside from improving sound, a safe installation with well-planned wiring saves your car’s electrical system from unnecessary strain and keeps its components safe for years.
You should know that power and RCA signal cables must be routed on the opposite sides of the vehicle as it reduces the noise interference which is caused by the alternator or engine.[¹]
Regular maintenance, correct amplifier settings and periodic checking of wiring and fuses can extend the life of the system and keep it sounding as good as it did when it was installed.
That’s it from this guide now you’re welcome on the comment box.
Frequently Asked Questions
Q1. How easy is it to install a subwoofer in your car?
Answer: Installing a subwoofer in your car can range from fairly simple to a little tricky, depending on your experience and the type of system you’re working with. If you’re using a powered subwoofer that has an amplifier already built into its enclosure, the process is usually easier because there are fewer parts to connect. You usually need to connect a power wire from the battery, a ground wire from the car chassis, a remote turn-on wire and a signal input from the head unit. For many people, this type of setup can be completed in two to three hours using basic tools such as a screwdriver, wire stripper and drill. If you’re installing a subwoofer and a separate amplifier, the job requires more planning. You’ll need to lay thick power and ground wires, connect RCA or speaker-level inputs and securely mount both the amplifier and the subwoofer enclosure. You also need to make sure the amplifier’s settings match the subwoofer’s impedance and power requirements. For beginners, this process can take four to six hours because you’ll need to learn how to safely run wires through the firewall, how to keep cables from getting pinched or damaged and how to set up the amplifier correctly. Reading the user manuals for both the car and the audio equipment makes this process easier because you’ll know the correct wire colors and connection points. Overall, installing a subwoofer is not impossible for a beginner, but it does require patience, basic knowledge of car wiring and the ability to follow instructions carefully. If you like hands-on projects and can spare the time, you can install it yourself and save on labor costs. However, if you’re uncomfortable working around a car battery, pulling wires out of tight spaces, or adjusting amplifier settings, it’s better to have a professional install the system. A professional can usually get the job done quickly, make sure everything is secure and fine-tune the sound for best performance.
References:
[1] How to Remove an Alternator Whine From a Car Stereo
https://itstillruns.com/remove-alternator-whine-car-stereo-5973804.html

Guys, I’m a car audio enthusiast and customization expert and I love clear sound and clean installation. Plus, I have spent years helping people build their dream audio setups. And whenever I’m working on cars, I probably listen to music and thinks about the next big upgrade.