Written By: Don Dodi
Fact Checked By: Kristen Brown
Reviewed By: Diego Rosenberg
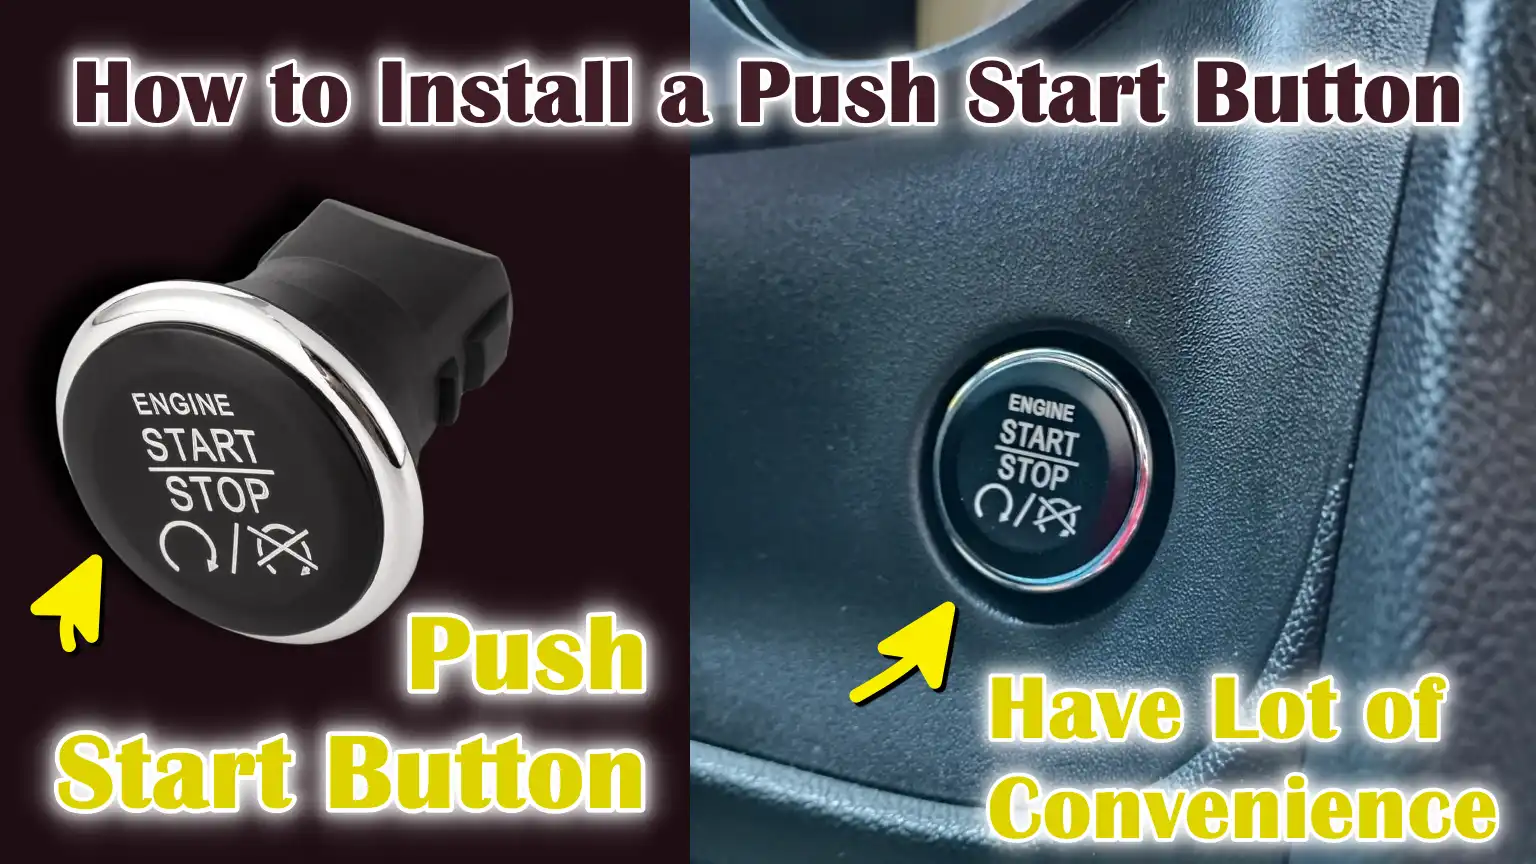
Basically, push start buttons uses electrical signals to start your vehicle, also you can have lot of convenience in everyday driving with this simple upgrade, so that you can easily start your car faster, smoother and more reliable way.
And, this technology was first widely adopted by the vehicle manufacturers, with the motive to improve the convenience, reduce the ignition wear and support the modern vehicle security systems as well.
In a stardard push start setup, you need to press the button that actually sends the power to the accessory system, ignition circuit and starter motor in a controlled sequence, that is just like how key works but with fewer moving parts.
Now, with this guide you’ll learn How to Install a Push Start Button so that you can improve the ease of use and integrate better with safety features such as: brake-pedal interlocks and immobilizers as well.
So, let’s understand everything about how the system actually works before installation, as it helps you to prevent any possible electrical failures, starting issues and other safety risks as well in this process.
How to Check the Vehicle Compatibility Before Installing a Push Start Button
Basically, modern push start button systems are actually built on the keyless entry technology, which now-a-days replaces the need for a physical key with secure RF signal communication between the vehicle and the key fob, so these systems actually uses coded signals that reduce the risk of traditional theft and that’s how it simplify the process of starting and stopping the engine as well, that literally eliminates the manual key in action, as keyless ignition also enhances ease of use for drivers who juggles items or they have to drive through the adverse weather conditions.[¹]
1. Types of Vehicles Suitable for Push Start Conversion
Push start button systems can be installed in most modern vehicles, but the exact compatibility depends on the car’s electrical and ignition system.
Vehicles with traditional key-based ignition are generally easier to convert than older vehicles with mechanical or entirely analog ignition systems.
Cars with modern electronic ignition and CAN bus systems may require additional modules or adapters to properly integrate the push start system.
Sports cars, sedans, SUVs and compact cars are all suitable, provided the electrical system can handle the additional wiring required for the push start system.
Before attempting installation, it is crucial to consult the vehicle’s wiring diagram or contact the manufacturer to confirm compatibility.
2. Manual vs Automatic Transmission Compatibility Considerations
The type of transmission in the vehicle affects the push start button installation process.
In automatic cars, the push start system must be connected to the brake pedal interlock, ensuring the engine only starts when the brake pedal is depressed.
For vehicles with manual transmissions, the system often needs to be connected to the clutch pedal switch, preventing the engine from starting without the clutch engaged.
Omitting these safety connections can lead to the car starting unexpectedly, potentially causing engine damage or accidents.
Understanding the type of transmission is crucial for both safe operation and proper wiring of the push start system.
3. Factory Immobilizer and Security System Limitations
Many modern vehicles are equipped with factory immobilizers, which are electronic security systems designed to prevent the car from starting without authorization.
These systems work by recognizing the original car key or key fob through encrypted signals.
Installing a push-start button without proper integration with the factory immobilizer can prevent the car from starting or trigger error codes.
In some vehicles, additional modules or bypass circuits are required to safely interface the push-start system with the existing immobilizer.
Ignoring these limitations can also compromise the vehicle’s security, making it more vulnerable to theft.
4. Legal and Warranty Considerations
Before installing a push-start button, it’s crucial to consider the legal and warranty implications.
In some jurisdictions, modifying the ignition system may affect insurance coverage if the car is involved in an accident.
The vehicle’s warranty may also be voided if the modifications interfere with the factory electrical system or engine components.
It’s advisable to consult with the vehicle manufacturer, review the warranty terms and verify local regulations regarding vehicle modifications.
Taking these precautions ensures that the installation is safe, legally compliant and avoids any unforeseen expenses or liability issues.
Tools
| Tool | Purpose / Why Needed |
|---|---|
| Screwdriver set – Flathead & Phillips | It is used to remove dashboard panels, trim and screws without damaging them. |
| Socket wrench set | It is used to loosen or tighten bolts and fasteners that secure the dashboard or console. |
| Wire strippers | It is used to remove insulation from wires so that they can be connected properly. |
| Wire cutters | It is used to cut wires to the correct length for a secure connection. |
| Multimeter | It is used to check voltage, continuity and to safely identify the correct ignition wires. |
| Trim removal tool | It is used to safely remove interior panels without scratching or breaking them. |
| Crimp connectors / Butt connectors | It is used to securely connect wires and ensure a stable electrical connection. |
| Electrical tape / Heat shrink tubing | It is used to insulate wires and prevent short circuits or sparks. |
How to Prepare the Vehicle Interior for Push Start Button Installation
1. Safely Removing Dashboard Panels and Trim
Before installing the push start button, it’s crucial to carefully remove the dashboard panels and trim surrounding the steering column and center console.
These panels are often secured with screws, clips, or fasteners that can be easily damaged if forced.
Using the correct tools, such as a screwdriver set or trim removal tools, ensures that the panels are removed without breaking or scratching them.
Careful removal also prevents damage to the clips, which can be difficult to replace and may leave gaps in the interior.
Taking your time with this step preserves the car’s aesthetics and makes subsequent steps much easier.
2. Locating the Factory Ignition Switch
Once the panels are removed, the next step is to locate the vehicle’s factory ignition switch.
The ignition switch is typically located on the steering column or behind the keyhole on the dashboard.
Identifying it correctly is essential, as this is where the push start button system will connect to the car’s existing ignition circuit.
Misidentifying the ignition switch can lead to incorrect wiring, failure to start the car, or damage to the vehicle’s electronics.
Consulting the car’s wiring diagram or service manual beforehand can make this step safer and more accurate.
3. Accessing the Ignition Wiring Harness
After locating the ignition switch, it’s necessary to access the wiring harness connected to it.
This harness contains the necessary wires that control the accessory, ignition and starter circuits.
Clear access to the harness ensures safe testing and secure connections.
Using a multimeter at this stage helps confirm which wire serves which function.
Proper access to the wiring harness ensures that the push-start button system integrates correctly with the car’s electrical system and prevents any short circuits or accidental damage to the wiring.
4. Organizing Interior Components During Removal
When removing panels and accessing the wiring, it’s crucial to keep all screws, bolts, clips and removed panels organized.
Labeling them or placing them in separate containers ensures that reassembly is easy and error-free.
Misplaced parts can lead to rattling panels, loose trim, or an incomplete installation.
Keeping the components organized also saves time during the final installation steps and ensures that the car’s interior is in perfect condition after the push-start button is installed.
How to Proper Identify and Understand the Ignition Wires
1. Common Ignition Wire Types – Power, Accessory, Starter and Ground
Ignition wires control the flow of electricity from the battery to various parts of the vehicle when starting the engine.
The power wire carries constant battery voltage and is responsible for powering the ignition system.
The accessory wire activates electrical components such as the radio, lights, or dashboard systems when the key is in the accessory or ignition position.
The starter wire sends power to the starter motor to crank the engine when the ignition is turned on.
The ground wire completes the electrical circuit by returning current to the battery, ensuring all components function correctly.
Understanding these wire types is crucial for safely connecting a push-start button, as each wire plays a specific and vital role in starting the vehicle.
2. How to Confirm Wire Functions Using a Multimeter
A multimeter is an essential tool for safely identifying and testing ignition wires.
By setting the multimeter to measure voltage or continuity, you can determine which wire is active in different ignition positions.
For example, the power wire will always show battery voltage, while the accessory wire will only show voltage when the key is in the accessory position.
The starter wire only shows voltage when cranking the engine.
Testing each wire before connecting a push-start button prevents errors that could damage the vehicle’s electrical system or prevent the engine from starting.
Using a multimeter provides an accurate and reliable method for confirming wire functions, rather than relying on guesswork or visual identification.
3. Avoiding Common Wiring Identification Mistakes
One of the most common mistakes during push-start installation is misidentifying wires, which can lead to short circuits, blown fuses, or permanent damage to the ignition system.
Assuming that all cars use the same wire colors is dangerous, as manufacturers often use different color codes.
Connecting the push-start system to the wrong wires can prevent the engine from starting or damage electronic components.
Using a multimeter to verify wire functions and consulting the vehicle’s wiring diagram helps avoid these mistakes.
Patience and careful testing are crucial for a successful and safe installation.
4. The Importance of Correct Wire Matching for System Reliability
Matching the push-start button wires to the correct ignition wires is critical for long-term system reliability.
Correct connections ensure that the accessory, ignition and starter circuits operate in the same sequence as they would with a traditional key.
Incorrect connections can lead to intermittent starting problems, damage to the starter motor, or trigger warning lights on the dashboard.
Properly connecting the wires also ensures that safety features such as the brake or clutch interlock function correctly.
Taking the time to correctly identify and connect the wires guarantees that the push-start system will operate reliably and safely for years to come.
How to Install and Securely Mount the Push Start Button
1. Finding the Best Location for the Push Start Button
Find the best location for the push start button for both convenience and safety.
The button should be easily accessible to the driver without obstructing any other controls or instrument gauges.
Common locations include near the steering column, the center console, or the instrument panel where the key ignition was previously located.
The location should be easily identifiable and accessible for pressing the button while driving.
Consider ergonomics, visibility and ease of wiring access to ensure the button is comfortable and easy to use during daily driving.
2. Installing or Fitting the Button Without Damaging the Panel
If the chosen location involves plastic or trim panels, care must be taken to avoid cracking, breaking, or scratching the interior panel.
Using the correct tools for the button’s architecture and protecting surrounding areas with masking tape can prevent damage.
Some push start buttons come with mounting brackets or snap-fit designs, eliminating the need for drilling and providing a more secure fit to the interior components.
Proper preparation before installation, including accurately measuring the location and ensuring sufficient space behind the panel for wiring, helps prevent damage and maintains the vehicle’s aesthetics.
3. Securing the Button to Prevent Loosening or Malfunction
Once installed, the push start button should be securely fastened to prevent it from becoming loose or shifting over time.
A loose button can affect electrical connections, leading to starting malfunctions or intermittent operation.
The button typically uses screws, bolts, or locking nuts to hold it in place.
Proper mounting ensures the button remains stable and protects surrounding components from damage.
It’s crucial that the button is securely attached to its mounting at the factory, ensuring it remains stable even when driving on rough roads or during prolonged, continuous use.
4. Ensuring Visibility and Driver Accessibility
The push-start button should be located in a clear, easily accessible position for the driver, requiring no awkward reaching or excessive stretching.
With the correct placement, the driver can quickly locate and press the button to start or stop the engine.
Buttons placed too low, too far to the side, or behind other controls can be distracting or delay operation.
Checking the placement before final mounting ensures the button is comfortably within reach, clearly visible and seamlessly integrated into the overall vehicle layout.
Accessibility and visibility are key factors for both safety and convenience.
How to Connect the Push Start Button Wiring to the Vehicle
1. Learn, Wiring Connection Process – Easy Steps
Connecting a push start button to a vehicle requires attention to detail and a thorough understanding of the ignition system.
The first step is identifying the power, accessory, starter and ground wires using a multimeter or the vehicle’s wiring diagram.
Once identified, each wire from the push start button system is connected to its corresponding ignition wire.
The power and accessory wires are typically connected to the ignition harness to ensure the correct sequence when the button is pressed.
The starter wire is connected to the starter circuit, which only activates the engine when the system detects that all safety requirements, such as engaging the brake or clutch, have been met.
Working in a step-by-step manner minimizes errors and ensures reliable operation of the push start system.
2. Integrating the System with the Ignition Circuit
Proper integration with the ignition circuit is crucial because the push start button replaces the traditional key in starting the engine and controlling electrical accessories.
The push start system must replicate the exact function of the key, first sending voltage to the accessory circuit, then to the ignition circuit and finally to the starter motor.
Improper integration can lead to failure to start the engine or damage to the sensitive electronics in modern vehicles.
Using relays or manufacturer-specified connection points ensures that the system works in harmony with the vehicle’s existing wiring and electronic modules.
Correct integration guarantees that the push start system will function identically to the factory ignition system.
3. Properly Grounding the System
A proper ground connection is essential for any push start button installation.
The ground wire completes the electrical circuit by returning current to the vehicle’s battery and ensures stable operation of all connected components.
Poor grounding can lead to erratic behavior, such as failure to start the engine, the button not registering when pressed, or electrical interference with other circuits.
To ensure maximum conductivity, ground connections should be made to a clean, paint- and rust-free metal surface.
Properly grounding the system protects both the push-start components and the vehicle’s electrical system from damage.
4. Wire Management and Insulation for Long-Term Reliability
Once all connections are made, managing and insulating the wiring is crucial to prevent future electrical problems.
Wires should be routed neatly, away from moving parts, sharp edges and heat sources.
Using electrical tape, heat shrink tubing, or wire loom protects the wires from abrasion, short circuits and moisture.
Organizing the wiring also makes future troubleshooting and maintenance easier.
Proper wire management and insulation ensure the push-start button system remains reliable for the long term, preventing unexpected short circuits or intermittent malfunctions that could affect the vehicle’s safety or starting performance.
How to Integrate the Safety Features and Optional Add-ons
1. Brake Pedal or Clutch Safety Connection
One of the most crucial safety measures for a push-start button is ensuring it only allows the engine to start when the driver is ready.
In automatic vehicles, this is achieved by connecting the system to the brake pedal switch.
The engine will only crank when the brake pedal is depressed, preventing accidental starts.
In manual transmission vehicles, the system connects to the clutch pedal switch, ensuring the engine won’t start unless the clutch is fully engaged.
This connection not only prevents accidents but also protects the starter motor from damage due to incorrect engagement.
Properly integrating the brake or clutch safety connection is essential for both driver safety and the reliable operation of the push-start system.
2. Considering Steering Lock and Immobilizer
Modern vehicles are equipped with steering locks and electronic immobilizers to prevent theft.
When installing a push-start button, it’s crucial to consider these systems to ensure proper operation.
The push-start system must work in conjunction with the factory immobilizer so that the engine only starts when a recognized key or fob is present.
Ignoring these systems can lead to error codes, prevent the engine from starting, or compromise the vehicle’s security.
In some cases, additional modules or bypass circuits are required to safely integrate the push-start button without disabling safety features.
Understanding these considerations ensures the push-start system remains secure and fully compatible with the vehicle’s existing security systems.
3. Optional Remote Start or Keyless Entry Integration
Some push-start kits offer optional features such as remote start or keyless entry.
Remote start allows the engine to be started from outside the vehicle using a key fob or smartphone app, which is convenient for warming up or cooling down the vehicle before driving.
Keyless entry allows the doors to be unlocked and locked without a physical key.
When integrating these features, proper wiring and compatibility checks are crucial to avoid interference with the ignition or safety circuits.
Correct integration ensures that the push-start system operates reliably with these additional features without any electrical conflicts or compromises to safety.
4. Preventing Accidental Engine Start
Preventing accidental engine start is a key aspect of a safe push-start button installation.
This involves ensuring the button is not activated unless all safety conditions, such as pressing the brake or clutch, are met.
The wiring must be properly routed and secured to prevent accidental triggering due to vibration, moisture, or contact with other components.
Additionally, relays or safety modules incorporated into the system prevent the engine from starting if the vehicle is in gear or if the security system detects a potential malfunction.
These precautions protect the driver, passengers and the vehicle itself, while also ensuring long-term reliability and peace of mind.
How to Test After Push Start Button System Installation
1. Safely Reconnecting the Battery
After completing the wiring and mounting of the push start button, the first step in testing the system is to reconnect the vehicle’s battery.
Always begin by connecting the negative terminal last to minimize the risk of accidental short circuits or sparks.
Before turning on the ignition, double-check all wire connections to ensure they are secure, properly insulated and not touching any metal surfaces that could cause a short circuit.
Safely reconnecting the battery is crucial to prevent damage to both the push start system and the vehicle’s electrical components.
2. Testing Accessory, Ignition and Engine Start Functions
Once the battery is reconnected, each function of the push start button should be tested individually.
Begin by pressing the button without pressing the brake or clutch to verify that accessory circuits, such as the radio, lights and dashboard systems, are activating correctly.
Next, test the ignition function by pressing the button while pressing the brake or clutch, ensuring that the dashboard lights and electronic modules activate as expected.
Finally, test the engine start by fully pressing the button and observing that the starter engages and the engine cranks smoothly.
Systematically testing each function ensures that the system is properly integrated and operating safely.
3. Verifying Proper Functioning of Safety Interlocks
A crucial part of push start button testing is verifying that all safety interlocks are functioning correctly.
This includes ensuring that the engine does not start unless the brake or clutch is depressed and verifying that the vehicle does not start if it is in gear.
If the push start system is integrated with a factory immobilizer or steering lock, these systems should also be tested to confirm that they prevent unauthorized starting.
Proper verification of the safety interlock protects the driver, passengers and vehicle from accidents and also ensures that the push-start system functions as expected during daily use.
4. Troubleshooting Common Problems After Installation
Even with careful installation, minor issues may arise during testing, such as the engine failing to start, accessory circuits not activating, or a loose button.
Common causes include loose or incorrect wire connections, poor grounding, or improperly integrated safety switches.
Troubleshooting should begin by rechecking all connections, ensuring the ground is secure and confirming that the wires correspond correctly to their ignition functions.
Using a multimeter to test voltage and continuity can help identify hidden wiring problems.
Systematic troubleshooting ensures that the push-start button system is reliable, safe and ready for long-term use.
How to Reassemble the Dashboard and Perform Final Installation Checks
1. Properly Reattaching Trim and Panels
After completing the wiring and testing of the push-start button, the dashboard panels and trim should be carefully reattached.
Begin by aligning each panel to its original position, ensuring all clips and fasteners are properly engaged.
Gently press the panels into place and tighten any screws or bolts without overtightening, as excessive force can crack the trim or damage the mounting points.
Proper reassembly restores the interior to its original appearance and maintains the structural integrity of the dashboard, resulting in a professional and clean installation of the push-start button.
2. Ensuring No Wires Are Pinched or Exposed
Before finalizing the dashboard assembly, it’s crucial to ensure all wires are securely routed and not pinched, stretched, or exposed.
Wires should be kept away from sharp edges, moving parts and heat sources to prevent abrasion, short circuits, or electrical malfunctions.
Using wire looms, electrical tape, or heat shrink tubing provides protection and prevents accidental contact.
Proper wire management ensures the push-start system remains safe and reliable in the long term and protects the vehicle’s electrical system from damage.
3. Checking Button Alignment and Responsiveness
Once the dashboard is reassembled, the push-start button should be checked for proper alignment and responsiveness.
The button should be flush with the panel, feel stable when pressed and return to its resting position without sticking.
Pressing the button multiple times should consistently activate the accessory, ignition and engine start functions without any delays or hesitation.
Proper alignment and responsiveness ensure that the push-start button is both functional and comfortable for everyday driving use.
4. Final System Reliability Check
The final step of the installation process is a thorough check of the entire system.
Test the push-start button multiple times to verify that all circuits, safety interlocks and optional features are functioning correctly.
Check that the dashboard panels are secure, the wiring is properly insulated and the button is firmly mounted.
A complete final check confirms that the installation is safe, reliable and professional, giving the driver confidence in the push-start system’s performance for years to come.
Avoid Common Push Start Button Installation Mistakes
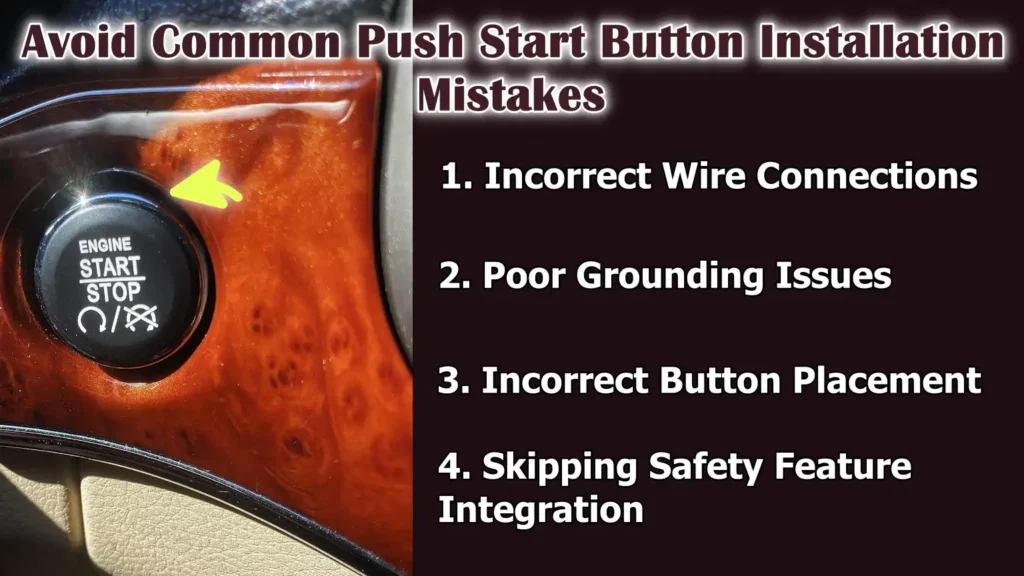
1. Incorrect Wire Connections
One of the most common mistakes when installing a push-start button is connecting the wires to the wrong circuits.
Incorrect wiring can prevent the engine from starting, damage the vehicle’s electronic control module, or cause short circuits that blow fuses.
For example, connecting the starter wire to the accessory circuit can prevent the engine from cranking, while incorrectly connecting the ignition wire can damage dashboard electronics or trigger warning lights.
To avoid these problems, always use a multimeter to identify wires, carefully follow the vehicle’s wiring diagram and double-check every connection before finalizing.
Correct wiring ensures the push-start system operates reliably and safely.
2. Poor Grounding Issues
Improper grounding is another common installation mistake that can cause malfunctions in the push-start button.
Weak or loose ground connections can prevent the engine from starting, cause intermittent button failures, or damage other electrical components.
Ground wires should be connected to a clean, unpainted, rust-free and dirt-free metal surface to ensure a strong electrical connection.
Tightening the ground connection securely and testing it with a multimeter helps prevent electrical problems and guarantees consistent operation of the push-start system.
3. Incorrect Button Placement
Placing the push-start button in an inconvenient or unsafe location is a mistake that affects both ease of use and safety.
Buttons that are too far from the driver, hidden behind panels, or in a location where they can be accidentally pressed can cause distractions or unintentional engine starts.
To avoid this, choose a location that is easily accessible, clearly visible and does not interfere with other controls.
Testing the placement before final mounting ensures the button is comfortable to use and operates reliably every time.
4. Skipping Safety Feature Integration
Failing to connect essential safety features such as brake or clutch interlocks, steering locks, or immobilizers can lead to serious hazards.
Without these safety connections, the engine could start unexpectedly, the vehicle could roll away if it’s in gear, or the security system could be bypassed, increasing the risk of car theft.
Always integrate and test these features according to the manufacturer’s instructions.
Proper safety integration protects the driver, passengers and the vehicle and ensures the push-button start system operates safely and effectively.
Read More:
How to Maintain Push Start Button and Do Long-Term Care for Push Start Systems
1. Periodic Wiring and Connection Checks
Regularly checking the wiring and connections of the push start button is crucial for long-term reliable performance.
Over time, vibrations, heat, or accidental contact with other components can cause wires to loosen or insulation to degrade.
Periodic checks should include looking for frayed wires, loose connectors, or signs of corrosion at connection points.
Ensuring all connections are secure and properly insulated prevents intermittent malfunctions, electrical shorts, or engine starting problems.
Performing these checks every few months maintains system performance and extends the life of the installation.
2. Cleaning and Maintaining the Push Start Button
The push start button itself should also be kept clean and free from dust, dirt, or sticky residue.
Dirt buildup can affect the button’s responsiveness or cause it to stick, while exposure to liquids can damage the internal electrical contacts.
Cleaning the button with a soft, dry cloth or a slightly damp cloth with a mild cleaner helps maintain smooth operation.
Avoid using harsh chemicals or excessive moisture, as these can seep into the internal circuitry and cause permanent damage.
Regular maintenance ensures the button continues to function reliably for years to come.
3. Signs of Electrical Wear or Malfunction
For safety, it’s essential to watch for early signs of electrical wear or malfunction in the push start system.
Warning signs include irregular engine starting, delayed response when pressing the button, flickering dashboard lights, or a loose or non-functional button.
These issues may indicate faulty wiring, poor grounding, or defective connectors.
Recognizing these signs early allows for preventative measures to be taken before the system completely fails, reducing the risk of being stranded or causing further damage to the vehicle’s electronics.
4. Understand, When You Have to Consult to the Professional Inspection
Even with meticulous maintenance, professional inspection is sometimes necessary.
If the push-start system consistently exhibits unusual behavior despite secure wiring and proper cleaning, or if there are complex issues with the ignition, immobilizer, or integrated security features, it’s best to consult a certified technician.
Professionals can diagnose hidden electrical faults, test system integration with factory modules and safely repair or replace faulty components.
Seeking expert assistance when needed ensures the system remains fully functional, reliable and safe for long-term use.
Conclusion – How to Install a Push Start Button
Now, you have clearly understood that push start button is actually more than just a stylish upgrade; as it is literally designed to provide the driver a convenience and efficiency.
So, when you replace a traditional ignition with a modern push-start system results in easier engine starting, reduced wear and tear on mechanical parts and integration with safety features such as brake or clutch interlocks and vehicle immobilizers.
Also, it is really important to have proper installation and that requires a careful preparation, correct wiring, secure mounting and attention to safety systems to ensure the system functions flawlessly.
And, when you properly installed and maintain it, then a push-start button not only gives your car a modern look but also ensures safe, efficient and reliable operation every time you start the engine.
This system combines innovation with practical functionality, providing drivers with both confidence and convenience in their daily use.
Now, you can ask unsolved queries in the comment section below, for more related information.
Frequently Asked Questions
Q1. Can I install a push-start button in any car?
Answer: Most modern cars with electronic ignition can support a push-start button, but not all vehicles are compatible. Older cars with mechanical ignition systems may require additional wiring modifications, adapters, or professional assistance. It’s crucial to consult your vehicle’s wiring diagram and understand whether your car has an immobilizer or other security features that need to be integrated with the push-start system. Ensuring compatibility prevents electrical problems and ensures the system functions reliably.
Q2. Is professional installation necessary for a push-start button?
Answer: Professional installation is not strictly necessary if you have basic knowledge of car electronics, tools and wiring safety. However, a professional can ensure proper integration with the vehicle’s ignition, safety interlocks and immobilizer system. This is specially important for modern cars with complex electronics. If you are unsure about the wiring or your vehicle’s safety systems, it’s safer to seek expert assistance to avoid damaging the vehicle or creating a safety hazard.
Q3. Will installing a push-start button affect my car’s warranty?
Answer: Installing a push-start button may affect your car’s warranty if the modification interferes with the factory electronics or ignition system. Some manufacturers may void the warranty for aftermarket modifications to critical components. It’s advisable to review your car’s warranty terms and consult with the manufacturer or dealer before installation. Following proper installation procedures and using a high-quality kit can minimize the risk of warranty issues.
Q4. Does a push-start button improve car security?
Answer: If a push-start button is properly installed and integrated with the vehicle’s immobilizer and key recognition system, it can enhance security. Modern systems prevent the engine from starting unless the correct key fob or electronic signal is present. However, a poorly installed system can create vulnerabilities, so it’s crucial to carefully follow the safety and security integration steps. A correctly installed push-start system provides both convenience and protection against unauthorized starting.
Q5. How do I maintain my push-start button system for long-term use?
Answer: Maintaining a push-start button system involves regular checks and general care. Periodically inspect all wiring and connections to ensure they are secure and free from damage. Keep the button clean and free of dirt, liquids, or sticky residue to prevent sticking or malfunction. Watch for signs of electrical malfunction, such as delayed engine starting or flickering dashboard lights. If any problems arise, consult a professional before further use. Consistent maintenance ensures the system remains reliable and provides safe, smooth operation for years to come.
Q6. What should I do if the engine doesn’t start after installation?
Answer: If the engine doesn’t start, the most common causes are incorrect wiring, a poor ground connection, or the safety switches not being properly integrated. First, check all wire connections and ensure the ground is securely attached to a bare metal surface. Verify that the brake or clutch interlock is functioning correctly and that the vehicle is in the correct gear for starting. Using a multimeter to test the voltage in the ignition and starter circuits can help identify wiring problems. If troubleshooting doesn’t resolve the issue, it’s best to consult a professional technician to avoid damaging the vehicle.
Q7. Can I add remote start or keyless entry to my push-start system?
Answer: Yes, many push-start button kits allow for integration with optional features such as remote start or keyless entry. Remote start allows you to start the engine from outside the vehicle using a key fob or smartphone, while keyless entry enables you to unlock and lock the doors without a physical key. Proper wiring and compatibility checks are essential to avoid any interference with the ignition or safety circuits. When integrated correctly, these features enhance convenience while maintaining the vehicle’s security and electrical reliability.
Q8. Is it safe to use a push-start button in manual transmission cars?
Answer: Yes, push-start buttons are safe in manual transmission vehicles, provided the clutch interlock is properly connected. The engine will only start when the clutch pedal is fully depressed, preventing sudden movement or damage to the engine. It’s crucial to ensure the interlock is functioning correctly and the wiring is properly matched to the starter and ignition circuits. When installed correctly, push-start systems operate safely and reliably in both automatic and manual transmission vehicles.
References:
[1] Keyless Entry System
https://www.sciencedirect.com/topics/engineering/keyless-entry-system

Guys, I’m a car audio enthusiast and customization expert and I love clear sound and clean installation. Plus, I have spent years helping people build their dream audio setups. And whenever I’m working on cars, I probably listen to music and thinks about the next big upgrade.