 Skip to content
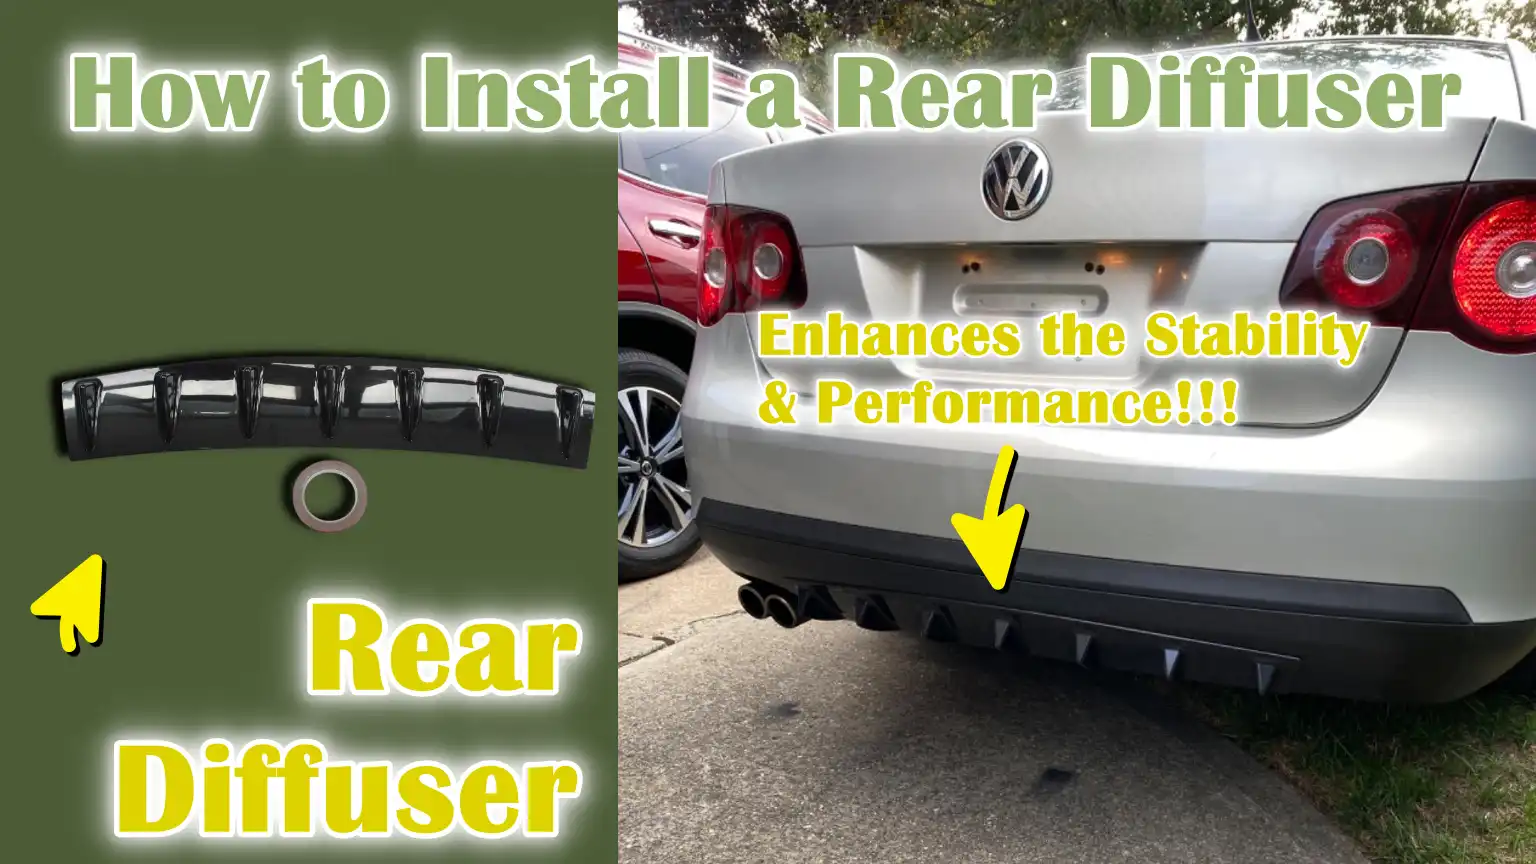
Written By: Don Dodi
Fact Checked By: Kristen Brown
Reviewed By: Diego Rosenberg
Now-a-days, there are many modern performance cars that actually uses a rear diffusers, as it literally provides controlled airflow that ultimately improves the efficiency and rear-end grip as well.
Simply, a rear diffuser is a functional aerodynamic component, which can be installed at the lower rear section of a vehicle’s bumper area; and it is designed to manage the how air exists from the underneath the car.
So, whenever the vehicle moves, then there are the air that flows rapidly beneath it, that literally creats the turbulence that can reduces the stability of the vehicle, that can be clearly noticed specifically at the higher speeds.
That’s why, a vehicle need a rear diffuser to help the smooth and control this airflow, as it gradually expands the air channel, in that way it reduces the drag and that can improve the rear-end stability as well.
That’s why, we have covered everything in this guide about How to Install a Rear Diffuser, so that you can easily enhance the airflow, vehicle balance, reduce the lift; which becomes really helpful particularly during the highway driving or cornering.
At First, Let’s Understand About the Compatibility of Rear Diffuser
Choosing the right rear diffuser for your vehicle is one of the most crucial steps before installation.
Rear diffusers are not universal parts that fit every car the same way.
Every vehicle has a different rear bumper shape, underbody layout, exhaust placement and ground clearance.
If a diffuser isn’t compatible with these factors, it can look awkward, scrape against the road, block airflow, or even come loose while driving.
Understanding compatibility ensures the diffuser fits securely, performs as intended and lasts a long time without damage or noise.
1. Considering Vehicle-Specific Design
Every car is designed differently and rear diffusers are manufactured to account for these differences.
Factors such as bumper length, bumper curvature, exhaust cutouts, underbody panels and suspension height determine whether a diffuser will fit correctly.
For example, a diffuser designed for a sedan may not work on a hatchback because they have different rear overhangs and airflow paths.
Performance cars often have flatter underbodies, allowing diffusers to function more effectively, while everyday cars may require diffusers with more ground clearance to avoid scraping.
Always checking the diffuser’s compatibility with your specific vehicle’s make, model and year helps prevent poor fitment and installation problems.
2. The Difference Between OEM-Style and Aftermarket Rear Diffusers
OEM-style rear diffusers are designed to match the original factory bumper and mounting points.
They are generally easier to install because they follow the same shape and attachment points as the factory parts.
These diffusers focus on clean fitment, durability and a balanced look.
Aftermarket rear diffusers, on the other hand, often prioritize aggressive styling or enhanced airflow designs.
While they may offer a sportier appearance, they might require additional drilling, brackets, or adjustments during installation.
Understanding this difference allows installers to prepare properly and avoid any unforeseen issues during the fitting process.
3. The Importance of Matching the Diffuser Shape to the Rear Bumper Geometry
For proper function, the rear diffuser’s shape must precisely match the curves and angles of the rear bumper.
If the diffuser doesn’t conform to the bumper’s geometry, gaps can form, airflow can become uneven and mounting points may not be securely positioned.
Poor alignment can also lead to vibrations, rattling noises, or even contact with the exhaust system.
A well-matched diffuser fits seamlessly with the bumper, allowing air to flow smoothly beneath the car and maintaining proper ground clearance.
Matching the diffuser’s shape to the bumper’s geometry ensures both functional performance and a clean, factory-like appearance.
Tools
| Item Name | Why These Tools Are Important |
|---|---|
| Screwdriver Set | This helps to securely attach the diffuser without damaging the screws. |
| Socket Wrench Set | It is used to tighten the mounting hardware in the perfect way and evenly. |
| Torque Wrench | It is use to prevents over-tightening that can even crack the diffuser. |
| Drill Machine | It is required when the diffuser has no pre-drilled holes. |
| Drill Bits | It is to ensures the correct hole size for screws or bolts. |
| Measuring Tape | It helps you to position the diffuser evenly and straight way. |
| Marker or Pencil | It is needed to prevents from any mistakes during drilling. |
| Jack and Jack Stands | It is use.d to creates safe working space under the bumper |
| Cleaning Cloth | It is used to remove dust and oil to ensure better fit and bonding. |
How to Prepare the Vehicle for Rear Diffuser Installation
Properly preparing the vehicle before installing the rear diffuser is a crucial step.
Many installation problems stem not from the diffuser itself, but from inadequate vehicle preparation.
Taking the time to prepare the car ensures a safe working environment, proper alignment and a secure final fit.
A well-prepared vehicle also reduces the risk of damage to the bumper, underbody parts and mounting points during installation.
1. Choosing a Safe and Level Surface
A flat and stable surface is essential when preparing the vehicle for rear diffuser installation.
Working on uneven ground can cause the car to be at an angle, leading to misalignment and increasing the risk of the vehicle shifting or falling.
A level surface helps the diffuser sit evenly against the bumper and allows for accurate measurements during installation.
Smooth concrete surfaces, such as those found in garages or driveways, are ideal as they provide stability and prevent tools or jack stands from sinking or slipping.
2. Properly Lifting the Vehicle Using Jack Stands or Ramps
Lifting the rear of the vehicle provides the necessary clearance to access the bumper and underbody area.
The vehicle should always be lifted using the correct jack points specified by the manufacturer to prevent damage to the chassis.
Jack stands or ramps are used to securely support the vehicle after lifting, which is crucial for safety and stability.
A properly lifted vehicle remains stable while working underneath it and allows for clear visibility of the mounting points, exhaust clearance and underbody panels during diffuser installation.
3. Cleaning and Inspecting the Rear Bumper Mounting Area
Before installing the rear diffuser, the rear bumper and mounting area should be thoroughly cleaned.
Dirt, grease and road debris can interfere with proper alignment and reduce the strength of fasteners or adhesives.
Cleaning the surface also makes it easier to identify cracks, loose panels, or damaged mounting points that could affect the installation.
Inspecting the area helps identify any obstructions, such as factory clips or underbody covers, that may need to be adjusted before installing the diffuser, making the installation process easier and more reliable.
How to Inspect the Rear Diffuser Before Installation
Inspecting the rear diffuser before installation is a crucial step that many people overlook, but it can prevent serious fitment and safety issues later on.
Rear diffusers are often made of lightweight materials and shipped in large packages, meaning they can be damaged during transit and the damage may not be immediately apparent.
Taking the time to inspect the diffuser ensures it is in good condition, correctly manufactured for your vehicle and ready for installation without any alignment problems or extra work.
1. Checking for Shipping Damage or Manufacturing Defects
Before attaching the diffuser to the vehicle, it should be carefully inspected for cracks, warping, scratches, or uneven edges.
Even small cracks can propagate over time due to vibration, heat and road shocks.
Manufacturing defects such as uneven surfaces, poorly shaped fins, or weak mounting areas can affect both appearance and performance.
Identifying these issues early allows for replacement or repair before installation, saving time and preventing future malfunctions.
2. Verifying Mounting Points and Pre-Drilled Holes
The mounting points and pre-drilled holes should align correctly with the vehicle’s bumper or underbody.
Each hole should be clean, evenly spaced and free of rough edges that could cause stress cracks.
If the mounting points are misaligned or missing, forcing the diffuser into place can lead to misalignment or a loose installation.
Verifying these areas ensures the diffuser can be mounted securely and evenly, which is essential for long-term stability and safety.
3. Dry-fitting the diffuser to confirm alignment
Dry-fitting means placing the diffuser on the rear bumper without tightening any hardware.
This step helps confirm that the diffuser follows the natural contours of the bumper and sits evenly on both sides.
During the dry-fit, it’s easy to check for exhaust clearance, ground clearance and overall symmetry.
Correct alignment at this stage prevents drilling errors and ensures that the diffuser will look clean and professional once fully installed.
How to Remove the Factory Components – If It is Needed
Some rear diffuser installations require the removal of factory-installed parts before the new diffuser can be properly fitted.
These parts are typically installed by the manufacturer for underbody protection or airflow management, but they can block access to mounting points or interfere with the diffuser’s shape.
Understanding which parts need to be removed and how to remove them safely helps prevent damage to the bumper and ensures a clean, secure installation.
1. Identifying Factory Trim, Underbody Panels, or Covers
Factory components around the rear bumper may include plastic trim pieces, underbody panels, splash guards, or aerodynamic covers.
These parts are often held in place by screws, clips, or small bolts.
Identifying these components before removal is crucial, as some parts may need to remain in place, while others may need to be removed or modified for proper diffuser fitment.
Taking the time to understand the function of each part prevents the removal of components that are essential for safety or structural support.
2. Proper Removal Techniques to Prevent Bumper Damage
Factory parts should always be removed gently and with the correct tools.
Excessive force can break plastic panels or scratch the bumper surface.
Fasteners should be loosened slowly and evenly and plastic clips should be carefully disengaged to prevent breakage.
Supporting the panel with one hand while removing hardware reduces stress on the mounting points.
Using proper removal techniques preserves the bumper’s integrity and prevents costly cosmetic damage.
3. Storing Original Hardware for Potential Reuse
Once the factory components are removed, all screws, clips and bolts should be stored safely.
Many rear diffuser installations reuse the factory hardware and even if new hardware is provided, the original parts may be needed if the diffuser is removed later.
Keeping the hardware organized and labeled prevents loss and saves time during installation or future maintenance.
Proper storage also protects the small parts from dirt, rust, or damage, ensuring they remain usable when needed.
How to Perfectly Mark and Align the Rear Diffuser
Marking and aligning the rear diffuser is one of the most crucial steps in the entire installation process.
Even a high-quality diffuser will not function correctly or look good if it is not properly aligned.
Correct alignment ensures the diffuser sits flush, allows for smooth airflow under the vehicle and prevents stress on the mounting points.
Taking the time on this step avoids uneven gaps, crooked placement and drilling errors that are difficult to correct later.
1. Positioning the Diffuser on the Bumper
The rear diffuser should be positioned so that it follows the natural contours of the rear bumper and sits flush against its surface.
It should be evenly aligned with the lower edge of the bumper, without forcing it into place.
Proper positioning ensures the diffuser does not interfere with the exhaust system, tow hook, or other underbody components.
When positioned correctly, the diffuser will appear balanced and stable, resulting in a clean and professional look.
2. Ensuring Symmetry and Center Alignment
Symmetry is essential for both aesthetics and functionality.
The diffuser should be centered from left to right, ensuring that the distance from the center of the bumper to each end is equal.
Uneven alignment can lead to unbalanced airflow, vibrations and visual imperfections.
Measuring the distance from the center of the bumper to each end of the diffuser helps ensure proper alignment.
A centered diffuser distributes the load evenly across the mounting points, reducing long-term stress and loosening.
Even, there’s aerodynamic study in Applied Sciences; and in that researchers used a high-fidelity CFD modelling of realistic road cars to quantify that how rear underbody diffusers actually influences the downforce and drag, so they found out that with the carefully designed 7° diffueser with the sealing skirts significantly increased the downforce coefficient when we compare it to the baseline configuration, so that clearly shows that how specific kind of diffuser geometry choices directly affects the aerodynamic loads and the performance in the practical vehicle design, that’s why the ideal design and diffuser itself is really important.[¹]
3. Marking the Drilling Points – If It is Needed
Once the diffuser is properly aligned, the drilling points should be carefully marked.
These markings guide where the holes will be drilled and help ensure the diffuser is mounted securely and evenly.
The markings should be made while the diffuser is held firmly in its final position to prevent it from shifting.
Accurate marking reduces the risk of misaligned holes, which can compromise the mounting’s strength and affect the overall fit.
Properly marked drilling points simplify the installation process and contribute to a strong, reliable attachment.
How to Drill and Prepare the Mounting Holes
Drilling the mounting holes is a crucial step that directly impacts the security and longevity of the rear diffuser installation.
Incorrect drilling can weaken the bumper, cause misalignment, or damage components behind the bumper.
Proper preparation helps ensure the holes are clean, the correct size and in the correct locations.
Taking the time during this step improves the strength of the mounting and reduces the risk of vibration, cracking, or water ingress over time.
1. Choosing the Correct Drill Bit Size
Using the correct drill bit size is essential for proper mounting.
Using a drill bit that is too small can force screws or bolts into the material, potentially causing cracks or damaged holes.
Using a drill bit that is too large can result in loose fasteners that will not securely hold the diffuser.
The drill bit size should match the size of the mounting hardware provided with the diffuser.
The correct size ensures that the fasteners fit properly and distribute the load evenly, leading to long-term stability.
2. Protecting the Bumper and Underbody Components from Damage
Before drilling, it’s important to check what is behind the bumper surface.
Electrical wiring, sensors, exhaust components and underbody panels are often located near drilling points.
Applying light pressure and drilling slowly maintains control and prevents sudden breakthroughs that could damage hidden components.
Supporting the bumper while drilling also reduces vibration and stress, preventing cracks or deformation in the surrounding material.
3. Treating Drilled Areas to Prevent Corrosion
Drilling exposes the underlying material, which can lead to corrosion over time, specially in areas exposed to water, dirt and road salt.
Applying a protective coating to the drilled holes seals the surface and prevents corrosion.
This step is specially important for metal mounting points and for vehicles operating in wet or humid environments.
Proper treatment extends the lifespan of the installation and ensures that the mounting area remains strong and reliable.
How to Install Mounting Hardware and Brackets
Mounting hardware and brackets provide strength and stability to the rear diffuser.
These components securely hold the diffuser in place while the vehicle is in motion, withstanding vibrations, airflow pressure, road shocks and exhaust heat.
If the hardware is installed incorrectly, the diffuser may loosen, rattle, or shift over time.
Taking care during this step ensures the diffuser remains securely attached and functions as intended.
1. Securing Brackets to the Bumper or Chassis
Brackets are used to support the diffuser and distribute its weight evenly across the bumper or chassis.
They should be mounted flush against the mounting surface to avoid stress points.
Properly securing the brackets helps prevent bending, breaking, or shifting during driving.
When the brackets are correctly aligned and tightened, they create a strong foundation that keeps the diffuser stable during both normal driving and high-speed airflow conditions.
2. Using the Correct Bolts, Screws, or Rivets
Different fasteners are used depending on the diffuser design and the vehicle’s structure.
Bolts and nuts provide a strong hold for heavier components, while screws are typically used for lighter mounting points.
Rivets are often used in thin metal or plastic sections where access to the back is limited.
Using the correct fastener in the correct location ensures even pressure and reduces the risk of the mounting surface loosening, deforming, or breaking.
3. Applying Threadlocker or Sealant Where Necessary
Threadlocker is used to prevent bolts and screws from loosening due to vibration and movement.
This is specially important for exhaust or underbody components, where there is constant vibration and heat.
Sealant is applied around mounting holes to prevent water and dirt from entering the bumper or underbody.
The correct application of these products ensures long-lasting durability and protects the mounting area from corrosion and wear and tear.
How to Secure the Rear Diffuser to the Vehicle
Securing the rear diffuser is the step where the installation becomes permanent and load-bearing.
At this stage, the diffuser must be firmly attached so it can withstand airflow pressure, road vibrations and temperature changes without shifting or becoming loose.
A properly installed diffuser enhances stability, maintains correct airflow under the car and prevents noise or damage during driving.
Careful tightening ensures the diffuser remains in place over time and performs as intended.
1. Tightening the Diffuser in the Correct Sequence
Instead of fully tightening the diffuser on one side at a time, it should be tightened gradually and in a balanced sequence.
Starting from the center and working outwards ensures the diffuser remains properly aligned with the bumper.
This method allows for minor adjustments during installation and prevents warping or uneven gaps.
Tightening the diffuser in the correct sequence ensures the part settles naturally into place and avoids excessive stress on any single mounting point.
2. Ensuring Even Pressure at Mounting Points
Even pressure at all mounting points is crucial for both strength and aesthetics.
If the pressure is uneven, some areas may experience excessive load, potentially leading to cracks, warping, or loosening over time.
Ensuring even pressure allows the diffuser to sit flush against the bumper and distributes airflow forces evenly.
A well-balanced attachment reduces vibrations and improves long-term durability, specially during high-speed driving.
3. Tightening Fasteners to the Correct Torque Level
Fasteners should be tightened to the correct torque level to secure the diffuser without damaging it.
Overtightening can damage the threads, crack the mounting surfaces, or even damage the diffuser itself, while undertightening can lead to looseness or rattling.
Controlled tightening ensures that the fasteners hold securely while also allowing for some flexibility to accommodate vibrations and temperature changes.
Applying the correct torque helps maintain a strong and reliable installation that will last for a long time.
Finally, Learn How to Ensure Perfect Fitment and Check the Alignment
The final fitment and alignment check ensures the rear diffuser is properly installed and safe for everyday driving.
Even if the diffuser is securely attached, minor alignment issues, if left uncorrected, can lead to noise, vibration, or long-term damage.
This step verifies that the diffuser fits correctly with the bumper, maintains sufficient clearance from surrounding components and does not interfere with vehicle movement or road conditions.
1. Checking Gaps and Edges for a Flush Fit
The diffuser should fit evenly along the lower edge of the rear bumper with consistent gaps on both sides.
Uneven gaps or raised edges can indicate misalignment or uneven pressure on the mounting points.
A flush fit helps maintain smooth airflow and gives the installation a clean, factory-like appearance.
Checking the edges also helps identify areas where the diffuser might shift or loosen over time if not properly secured.
2. Checking Clearance from Exhaust Components
Exhaust systems generate considerable heat and move slightly during driving.
Sufficient clearance around the exhaust tips and pipes is crucial to prevent heat damage, melting, or rattling.
Adequate clearance ensures the diffuser is not exposed to excessive heat and does not come into contact with the exhaust during engine movement or vibration.
This check helps prevent long-term material damage and unwanted noise while driving.
3. Ensuring No Contact with Suspension or Road Surfaces
The diffuser should not touch any suspension components or hang so low that it comes into contact with the road surface.
When a car goes over a speed bump, the suspension components move up and down and any contact with the diffuser can cause cracks or damage.
Ground clearance is also crucial to avoid scraping on speed bumps or steep driveways.
The correct ground clearance ensures that the diffuser remains undamaged and that safe and smooth driving performance is maintained.
Know the Ideal Adhesive Curing and Setting Time – If Applicable With Your Kind of Diffuser
When adhesive is used during rear diffuser installation, allowing for proper curing and setting time is crucial.
Automotive adhesives are designed to strengthen over time as they form a bond with the surface.
Driving the vehicle too soon or exposing the adhesive to water before it has fully set can weaken the bond and cause the diffuser to shift or become loose.
Understanding the curing time ensures the diffuser remains secure and performs reliably under real-world driving conditions.
1. Recommended Curing Time for Automotive Adhesives
Different automotive adhesives require varying curing times depending on their formulation.
Some adhesives begin to bond within a few hours, but they require a full day or more to reach maximum strength.
During this time, the adhesive hardens and forms a strong bond between the diffuser and the bumper or mounting surface.
Following the manufacturer’s recommended curing time ensures the adhesive reaches its intended strength and durability.
2. Avoid Driving or Washing During the Curing Period
Driving or washing the vehicle during the curing period can disrupt the bonding process.
Vehicle movement creates vibrations and air pressure that can dislodge the diffuser before the adhesive has fully set.
Washing introduces water and cleaning chemicals that can weaken the bond.
Avoiding these activities allows the adhesive to cure evenly and securely, minimizing the risk of future loosening or failure.
3. Environmental Factors Affecting Adhesive Strength
Temperature, humidity and airflow all influence how adhesives cure.
Extremely cold temperatures can slow down the curing process, while excessive heat can cause the adhesive to set too quickly, resulting in a weaker bond.
High humidity can also interfere with proper bonding.
Installing the diffuser in a dry, room-temperature environment allows the adhesive to cure correctly, ensuring a strong, long-lasting bond.
What are the Post-Installation Inspection and Safety Check
The post-installation inspection ensures the rear diffuser is fully secure and safe before the vehicle is driven normally.
Even a properly installed diffuser can develop issues if minor details are overlooked.
This step helps confirm that all mounting points are tight, the diffuser is stable and there is no excessive movement or rattling.
Performing these checks reduces the risk of the diffuser becoming loose during driving, ensuring the safety of both the vehicle and other road users.
1. Verifying All Fasteners Are Secure
All bolts, screws and other fasteners should be given a final check after installation.
Fasteners can loosen slightly during tightening and if not re-checked, this can lead to small gaps or looseness.
Ensuring each fastener is properly tightened helps maintain even pressure on the diffuser and prevents movement over time.
This step is specially important for parts exposed to vibrations, airflow and temperature changes.
2. Checking Diffuser Stability by Hand
The diffuser should be tested by applying gentle pressure with both hands.
It should feel solid and firmly attached without bending or wobbling.
Any movement could indicate loose hardware or uneven mounting.
Checking stability by hand helps identify potential problems before driving forces such as air pressure or road vibrations are applied to the diffuser.
3. Confirming No Rattling or Movement
After installation, the area around the diffuser should be checked for any rattling or movement.
Light tapping and gentle shaking can reveal loose components that may not be immediately visible.
A rattling sound during driving often intensifies and can indicate loose fastenings or contact with surrounding parts.
Ensuring everything is secure and stable results in a smooth, safe and professional installation.
Now, How to Test Drive and Observe the Performance Accordingly
The test drive is the final confirmation that the rear diffuser has been installed correctly and is functioning as intended.
While the diffuser may appear secure when the vehicle is stationary, real-world driving conditions involve airflow pressure, vibrations and movement that cannot be replicated in a parked car.
Driving the car allows you to observe how the diffuser behaves at different speeds and road conditions, enabling the identification of any potential issues before they become serious.
1. Listening for Unusual Noises During Driving
During the test drive, it’s crucial to listen carefully for any rattling, rubbing, or buzzing noises coming from the rear of the vehicle.
These noises could indicate loose fasteners, uneven mounting, or contact with surrounding components.
These noises may only occur at certain speeds or over bumps, which can help pinpoint the exact source of the problem.
Addressing unusual noises promptly can prevent further damage and ensure a quiet, secure installation.
2. Monitoring Diffuser Stability at Different Speeds
As the vehicle’s speed increases, the airflow pressure beneath the car also increases.
The diffuser should remain stable and firmly in place at both low and high speeds.
Observing any vibrations, movement, or visual shifting confirms that the mounting hardware and brackets are functioning correctly.
A stable diffuser at varying speeds indicates that it is properly secured and capable of handling real-world driving conditions.
3. Observing Any Changes in Vehicle Handling or Airflow
After installation, some drivers may notice subtle changes in how the vehicle feels, particularly at highway speeds.
A properly installed rear diffuser can help smooth the airflow under the car, improving rear-end stability and reducing turbulence.
Observing how the car behaves during acceleration, cruising and cornering confirms whether the diffuser is functioning as intended.
Any sudden changes or unusual handling characteristics should be investigated to ensure proper fitment and alignment.
How to Maintain the Rear Diffuser & Ensure Safe Driving With Them

Proper maintenance after installing a rear diffuser is crucial for both safety and aesthetics.
Over time, vibrations from driving, road conditions and weather can gradually affect the mounting hardware and surface finish.
Regular care helps ensure the diffuser remains securely attached, functions correctly and maintains a clean and well-maintained appearance.
Simple maintenance practices can prevent minor issues from escalating into major and costly repairs.
1. Do Regular Inspection of Mounting Points
The mounting points should be regularly checked to ensure all fasteners remain tight and secure.
Driving over rough roads, speed bumps and uneven surfaces can gradually loosen the hardware.
Inspecting the mounting points helps detect early signs of loosening, damage, or wear.
Catching these issues early allows for prompt correction and prevents the diffuser from becoming unstable or damaged.
2. Clean Them to Maintain the Appearance
Rear diffusers are exposed to dirt, water, road salt and debris during everyday driving.
Regular cleaning helps prevent the buildup of grime that can damage the surface or conceal cracks and loose parts.
Gentle washing with mild cleaning products preserves the diffuser’s finish without causing scratches.
Keeping the diffuser clean also facilitates easier inspections and contributes to the overall well-maintained appearance of the vehicle.
3. Retighten the Hardware After Initial Use
After the first few drives, the hardware may loosen as the diffuser settles and adjusts to vibrations and airflow pressure.
Retightening the fasteners after initial use helps restore the correct tension and ensures even pressure across all mounting points.
This step is specially important after prolonged driving or high-speed use.
Properly retightening the bolts helps maintain stability over time and prevents them from loosening in the future.
Read More:
Understand, About the Common Installation Mistakes of Rear Diffuser
Even with a high-quality rear diffuser, improper installation can lead to problems such as poor fitment, noise, damage, or reduced performance.
Many issues arise because simple steps are skipped or not performed correctly.
Understanding common mistakes allows readers to install their diffuser safely and effectively, ensuring both function and aesthetics are maintained over time.
1. Don’t Misalign the Rear Diffuser During Initial Mounting
One of the most common mistakes is mounting the diffuser crooked or unevenly against the bumper.
Misalignment can result in uneven gaps, reduced airflow efficiency and excessive stress on certain mounting points.
Over time, this can lead to cracks, rattling, or loosening of the diffuser.
Taking the time to carefully dry-fit and adjust the diffuser before drilling or tightening fasteners helps prevent these alignment issues.
2. Don’t Overtight or Undertight the Fasteners
Incorrect fastener torque is another common mistake.
Overtightening bolts or screws can damage the diffuser material, strip threads, or deform mounting points.
Undertightening can cause the diffuser to vibrate or rattle while driving, leading to reduced stability and potential damage.
Using the correct torque and checking the fasteners after the first drive ensures a secure and long-lasting installation.
3. Don’t Skip the Surface Preparation Steps
Failing to clean or inspect the mounting surface is a mistake that often results in poor adhesion, improper fitment, or premature loosening of hardware.
Dirt, grease, or debris can prevent bolts, screws, or adhesives from properly securing the diffuser.
Failure to properly prepare the surface can conceal cracks, warped panels, or damaged areas that need attention before installation.
Thorough cleaning and inspection of the surface ensures a secure, proper fit and can prevent future problems.
Conclusion – How to Install a Rear Diffuser
Now, you have clearly understood that a rear diffuser is not just a piece of plastic at the back side of your car, as it is carefully engineered and designed part that literally balances airflow, performance and of-course enhances the style as well.
Basically, a properly installed diffuser helps manage airflow under the car, reduces turbulence and can improve stability at higher speeds.
And, rear diffuser also requires regular maintenance like: cleaning, checking mounting points and retightening hardware, ensures the diffuser continues to perform as expected and maintains a factory-quality appearance.
Plus, when you follow the correct procedures and paying close attention to alignment, mounting and clearance, car owners can avoid common mistakes and enjoy both the functional benefits and enhanced aesthetics.
Now, it is time to ask unsolved queries that is bothering you, as comment section is open for you.
Frequently Asked Questions
Q1. What is a rear diffuser and why is it important?
Answer: A rear diffuser is a component mounted under the rear bumper of a car. Its primary purpose is to manage airflow beneath the vehicle. As a car moves, air flows rapidly underneath it and if this airflow is turbulent, it can reduce stability and create lift. A rear diffuser smooths this airflow, reduces drag and can improve traction and handling, specially at higher speeds. Besides performance benefits, it also protects the underbody and gives the car a sporty, aggressive look. Proper installation ensures it functions as intended and lasts a long time.
Q2. How do I know if a rear diffuser is compatible with my car?
Answer: Compatibility depends on your car’s make, model and year. Every vehicle has a different bumper shape, exhaust placement and underbody layout. Diffusers can be OEM-style, resembling the factory design, or aftermarket, which may have a more aggressive shape. Before purchasing, you should compare the diffuser’s design to your car’s bumper to ensure it aligns with the mounting points and curves. Checking dimensions and reading product specifications will help avoid fitment issues and prevent damage to the bumper.
Q3. Can I install a rear diffuser myself, or should I hire a professional?
Answer: Many rear diffusers can be installed by anyone with basic mechanical skills and attention to detail. Following the step-by-step process, taking careful measurements and using the correct tools can result in a safe, reliable installation. However, if the diffuser requires extensive drilling, modifications, or precise alignment, hiring a professional ensures it’s done correctly without damaging the vehicle. Professionals also have experience checking clearances, torque specifications and adhesive curing, minimizing the likelihood of errors.
Q4. How do I prepare my car before installing a rear diffuser?
Answer: Preparation is crucial. The vehicle should be parked on a flat, level surface and the rear end should be safely lifted using jack stands or ramps. The bumper and mounting area should be thoroughly cleaned to remove dirt, grease, or debris. It’s essential to inspect for cracks, loose panels, or damaged clips before beginning. Proper preparation ensures accurate alignment, prevents damage during installation and makes the process smoother and faster.
Q5. What are the most common mistakes people make when installing a rear diffuser?
Answer: Common mistakes include misaligning the diffuser, overtightening or undertightening fasteners and neglecting cleaning or surface preparation. Misalignment can lead to uneven gaps and reduced airflow efficiency. Over-tightening can crack the diffuser or damage the mounting points, while under-tightening can lead to rattling or looseness. Skipping preparation steps can prevent the hardware and adhesive from bonding properly. Taking the time to carefully follow all steps will prevent these issues.
Q6. How long does the adhesive take to cure when installing the diffuser?
Answer: The curing time depends on the type of adhesive used. Some adhesives begin to bond within a few hours, but it can take 24 hours or more to reach full strength. During this time, the vehicle should not be driven and the diffuser should not be washed. Temperature and humidity can also affect curing, so it’s best to perform the installation in a dry, moderate environment. Waiting for proper curing ensures the adhesive forms a strong, durable bond.
Q7. How should I maintain my rear diffuser after installation?
Answer: Maintenance includes regularly checking the mounting points, inspecting for loose bolts or screws and cleaning the diffuser to remove dirt, debris, or road salt. After the first few drives, it’s important to re-tighten the fasteners as vibrations and settling can cause them to loosen. Regular cleaning maintains the appearance and makes it easier to identify any damage or issues. Following these maintenance steps ensures the diffuser continues to perform well and lasts a long time.
References:
[1] A Numerical Aerodynamic Analysis on the Effect of Rear Underbody Diffusers on Road Cars
https://www.mdpi.com/2076-3417/12/8/3763

Guys, I’m a car audio enthusiast and customization expert and I love clear sound and clean installation. Plus, I have spent years helping people build their dream audio setups. And whenever I’m working on cars, I probably listen to music and thinks about the next big upgrade.
