Written By: Don Dodi
Fact Checked By: Kristen Brown
Reviewed By: Diego Rosenberg
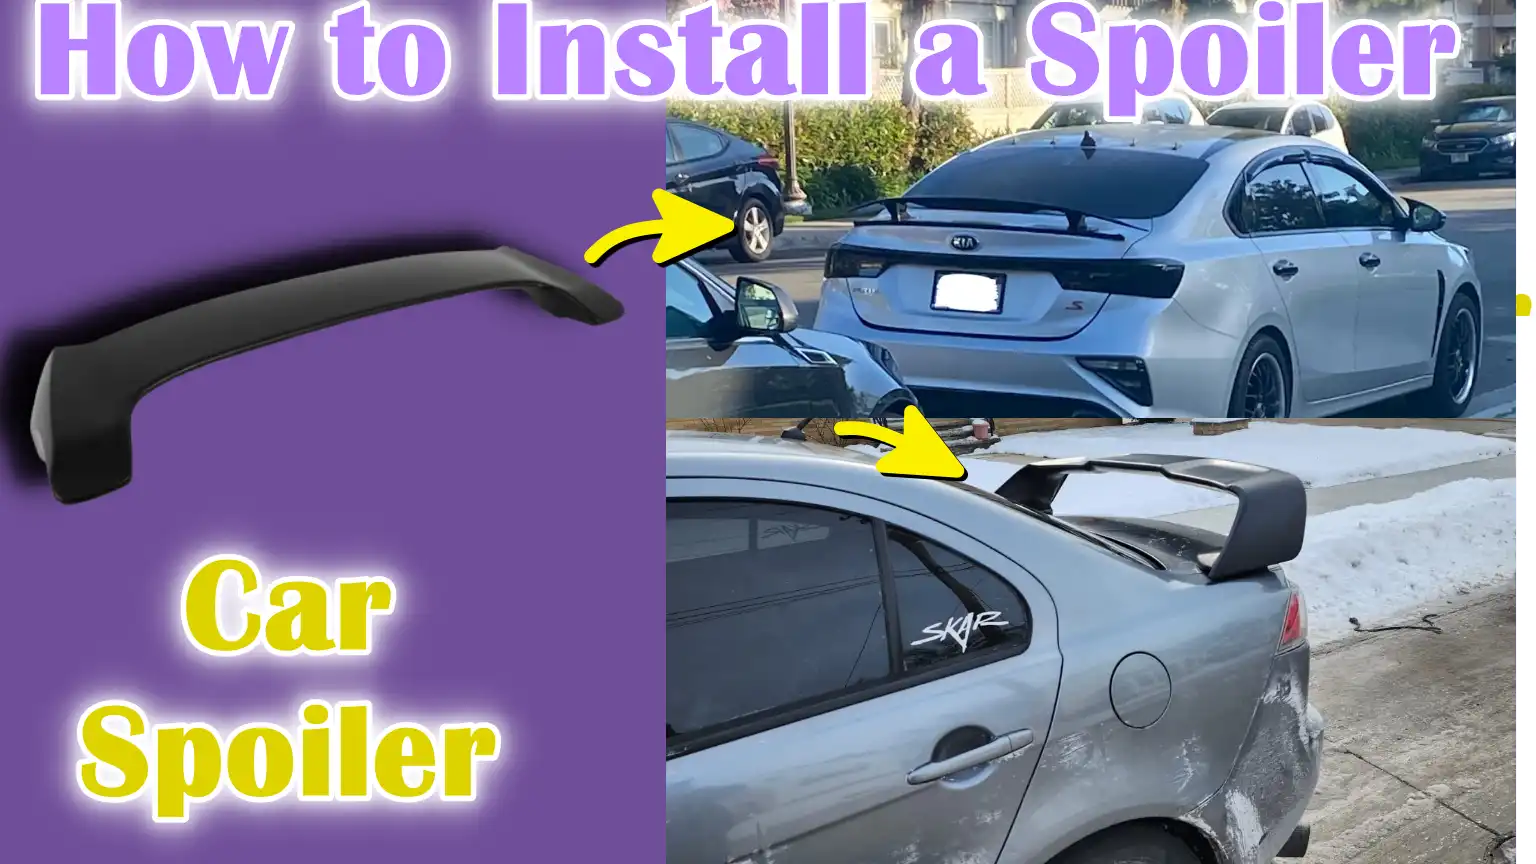
The spoiler is actually car’s AIR WING, as it shapes the wind flow and that’s how it boost the stability and it is such a stylish accessory as well.
Because it is the stylish appearance many would have thoughts only about it: but it is more of the functional piece of automotive engineering which is basically designed to improve your vehicle’s performance and appearance of course.
There’s another reason: because the spoiler originally developed for the high-speed race cars int he 1960s, which is why whenever they see it immediately give them a sportier look which actually true in every sense.
As well as, spoilers actually disrupts the airflow and that reduce the drag and increase in downforce which clearly helps the car to stay more stable at the higher speeds.
And even at the everyday driving speeds, if there’s a well-installed spoiler is available on the car then it can definitely improve the fuel efficiency and gives your car that sportier look as well.
Yes, there are aftermarket options spoilers are available that to allow any car owner to enjoy the same benefits which factory-installed spoilers with their performance models have.
Not only this, according to the industry research: if there’s improper installation takes place then it clearly lead to the paint damage, trunk leaks and even it can reduce the aerodynamic efficiency instead of improving it and that’s where someone needs to follow the clear step-by-step instruction and proper guide to know How to Install a Spoiler so that you can achieve a professional fit without any kind of costly mistakes.
Tools
| Tool / Material | Description | Purpose in Installation |
|---|---|---|
| Electric Drill & Drill Bits | A hand-held power tool with interchangeable drill bits. | If your spoiler requires drilling then to make clean holes in the trunk or mounting area. |
| Measuring Tape | A retractable ruler made of flexible metal or plastic. | The spoiler is centered and balanced to measure accurate distances. |
| Masking Tape | A low-adhesive paper tape. | Marking drill points, protecting paintwork and guiding positioning without leaving residue. |
| Screwdriver Set | A set of flat-head and Phillips tipped tools. | Tightening or loosening screws during assembly and mounting. |
| Marker or Grease Pencil | A pen-like instrument for marking surfaces. | Clearly marking where holes should be drilled or parts should be aligned. |
| Rubber Gasket / Sealant | Soft rubber or liquid that seals gaps. | To prevent water leakage and protect the trunk from corrosion around the drilled holes. |
| Wrenches / Socket Set | Device for holding and turning nuts and bolts. | To firmly secure the spoiler’s mounting hardware. |
| Safety Gear (Gloves, Safety Glasses) | Protective gloves and goggles. | To protect your hands from cuts and your eyes from debris while drilling. |
| Spoiler Installation Kit | This usually includes screws, bolts, washers, templates and instructions. | Providing all specific parts needed to safely attach the spoiler. |
Prepare the Car
1. Clean the Installation Area
Before you begin the installation, the trunk lid or rear surface should be free of dirt, dust, wax, grease and any other residue.
Even a thin layer of wax or road grime can cause the spoiler to sit unevenly, which can lead to poor alignment or loosening of the fitting over time.
Cleaning the area thoroughly allows the sealant or gasket material to bond better, reducing the risk of water leaks later on.
The best way to prepare the surface is to wash it with a mild car shampoo, rinse thoroughly and then wipe it with isopropyl alcohol to remove any remaining oily layer.
This step ensures that your surface is clean and smooth for a precise installation.
2. Review the Manufacturer’s Instructions
Every spoiler, whether it’s factory-made or aftermarket, comes with specific installation guidelines that should be read carefully before beginning the process.
These instructions will tell you the exact measurements, hole locations and mounting method recommended by the manufacturer.
Skipping this step or assuming that all spoilers are installed the same way could result in misplacement or damage to your vehicle’s bodywork.
By reading the instructions first, you’ll know if drilling is required, what tools are needed and how to position the spoiler for best aerodynamic performance.
3. Checking the Alignment
Before drilling or installing anything, you need to make sure the spoiler is mounted in the right place.
This is done by finding the center line of the trunk lid and using masking tape to outline the spoiler’s location.
If the spoiler comes with a paper or plastic template, position it according to the measurements provided, then temporarily secure it with masking tape.
This step allows you to visualize what the spoiler will look like, make any necessary adjustments and ensure that both sides are perfectly level.
Correct alignment at this stage avoids costly mistakes that can be difficult to correct later.
Marking and Measuring
1. Find the Center Line of the Trunk Lid
The first step in marking for spoiler installation is to locate the center line of the trunk lid.
The center line is essential for balanced placement, ensuring that the spoiler looks symmetrical and functions properly.
To find it, measure the total width of the trunk and divide it by two.
Draw a light line at this point with a light pencil or marker.
Accurate placement of the center line is critical because the slightest misalignment can make the spoiler appear off center, affect aerodynamics, or create stress points that can cause bolts to loosen over time.
2. Ensure Symmetry with a Measuring Tape
Once the center line is established, use a measuring tape to check the distance on either side of the trunk.
Measure from the center line to each mounting point, making sure the distance is exactly the same.
Symmetry isn’t just about appearance; it also ensures that the spoiler distributes force evenly across the trunk lid.
Even small discrepancies can cause uneven pressure, which can cause vibration, rattling or long-term damage to the paint and body.
3. Mark the mounting hole positions
After confirming symmetry, mark the exact locations of the mounting holes with a marker or grease pencil.
If your spoiler came with a paper or plastic template, position it according to the instructions and mark the template.
Clear and precise marks make drilling easier and reduce the risk of mistakes.
The correct placement of the holes is important because even the slightest deviation can affect the strength of the spoiler and its level seating with the car surface.
4. Double-check the measurements
Before drilling any holes, carefully double-check each measurement.
Use the phrase “measure twice, drill once” as a guiding principle.
This step is critical because mistakes made in this step often cannot be corrected without repairing paint or body damage.
Check the center line, symmetry and marked locations several times to make sure the spoiler will align perfectly when installed.
Taking a little extra time here can avoid costly mistakes and ensure a professional-looking result.
Drill and prepare the mounting holes
1. Protect the paintwork with masking tape
Before you drill any holes for the spoiler, it’s important to protect your car’s paint with masking tape.
Apply the tape exactly where you’ll drill, covering an area slightly larger than the drill bit.
This simple step prevents the paint from chipping or scratching during the drilling process.
Protecting the paint isn’t just for looks; it also prevents rust from forming on the exposed metal edges, ensuring that the spoiler area remains durable over time.
2. Drill pilot holes first
Start by drilling small pilot holes before using the full-size drill bit required for the mounting hardware.
The pilot holes give the larger bit direction, reducing the risk of cracking, breaking or uneven holes.
Drilling pilot holes also makes it easier to control the drill and ensures that the final hole is perfectly straight.
This step is specially important on metal surfaces like the trunk lid, where excessive force could bend or damage the panel.
3. Increase drill bit size gradually
After drilling the pilot holes, gradually increase the drill bit size until it is equal to the diameter of the mounting screws or bolts.
Increasing the bit size in stages maintains accuracy and does not put unnecessary stress on the metal.
Rushing this step can result in large or irregular holes, which can cause the spoiler to sit unevenly or move when installed.
Doing it slowly ensures a clean, professional fit for all hardware components.
4. Apply rust inhibitor or sealant
Once the mounting holes are drilled, it is important to treat the exposed metal edges with a rust inhibitor or sealant.
Exposed metal is very prone to rust, specially in areas where it often rains, snows or is humid.
Applying a rust inhibitor protects the car body and increases the lifespan of both the trunk lid and spoiler.
The sealant also prevents water from seeping through the holes, preventing leaks inside the trunk.
Proper treatment of drilled areas is a vital step for both safety and long-term durability.
How to Install a Spoiler – Step-By-Step Guide
1. Apply rubber gaskets or sealant
Before installing the spoiler, it is important to install rubber gaskets or apply a suitable sealant to all contact points.
These components create a protective layer between the spoiler and the car surface, preventing water from seeping into the trunk and reducing the risk of rust around the mounting holes.
Applying a gasket or sealant provides comfort to the spoiler, allowing it to absorb small vibrations that occur during driving and ensuring a firm and long-lasting fit.
Correct installation at this stage is important for both durability and performance.
2. Align the spoiler with the drilled holes
After applying the gasket or sealant, carefully align the spoiler with the drilled holes on the trunk lid.
Correct alignment ensures that the spoiler fits evenly across the width of the car and that all bolts or screws can be screwed into place without any pressure.
Misalignment at this stage can cause uneven pressure, which can cause the spoiler to bend, loosen, or damage the paint over time.
Taking the time to properly position the spoiler helps achieve a professional finish and optimal aerodynamic performance.
3. Install the mounting bolts or screws
After proper alignment, install the mounting bolts or screws into the drilled holes.
It is important to tighten them slowly and evenly, alternating between bolts if there are multiple mounting points.
This method prevents uneven pressure on the spoiler, which can cause warping or cracking in the mounting area.
Even tightening also ensures that the spoiler fits snugly on the trunk lid, providing maximum stability and a neat appearance.
Along with this, Msc Thesis shows that optimized spoiler configuration actually reduced the vehicle drag coefficient from 0.574 to 0.564 which is around ≈1.7% decrease and while it increasing negative lift which is downforce as well and it explicitly tying the lift reduction as it improved the straight-line stability and traction at speed.[¹]
4. Use washers for a secure fit if needed
In some cases, it is necessary to use washers to evenly distribute the pressure of the bolts or screws on the mounting surface.
Washers help prevent the bolts from sinking into the metal, reducing the risk of loosening over time and providing a more secure connection.
By installing washers where recommended, you increase the overall strength of the installation and ensure the spoiler stays firmly attached under normal driving conditions.
Securing and Finishing
1. Check that the spoiler is level and symmetrical
After the spoiler is installed, it is important to make sure that it is mounted level and symmetrical on the trunk lid.
Even a slight tilt or uneven position can affect the car’s aerodynamics, put unnecessary stress on the mounting points and make the spoiler look unbalanced.
Use a measuring tape or straight edge to confirm alignment, checking the distance from the edges of the spoiler to fixed points on the car.
Taking this extra time ensures that the spoiler not only looks professional but also functions as expected, improving stability and reducing unwanted vibrations while driving.
2. Tighten all fasteners to torque specifications set by the manufacturer
Once alignment is confirmed, all mounting bolts or screws must be tightened to torque specifications set by the manufacturer.
Using the recommended torque prevents overtightening, which can crack the spoiler or damage the trunk surface and undertightening, which can cause the spoiler to loosen over time.
Properly tightened fasteners provide a secure and durable installation, keeping the spoiler firmly in place even at high speeds or on rough roads.
3. Clean off excess sealant
After securing the spoiler, excess sealant must be carefully removed from the mounting area.
Sealant residue left behind can cause the spoiler to appear uneven, collect dirt, or interfere with the spoiler’s proper seal.
Use a clean, soft cloth and mild cleaner to wipe off excess material when needed.
This step helps maintain a clean finish and ensures that the protective seal remains effective without compromising the car’s appearance.
4. Reconnect any brake light wiring
For spoilers with integrated brake lights, it is important to reconnect the wiring correctly after installation.
Incorrect connections can damage the light or cause electrical problems.
Follow the manufacturer’s instructions for reconnecting the brake light, making sure all electrical contacts are secure and the light works properly when tested.
Reconnecting the wiring correctly not only complies with safety standards, but also ensures compliance with traffic regulations.
Read More:
What are The Spoiler’s Post-Installation Checks
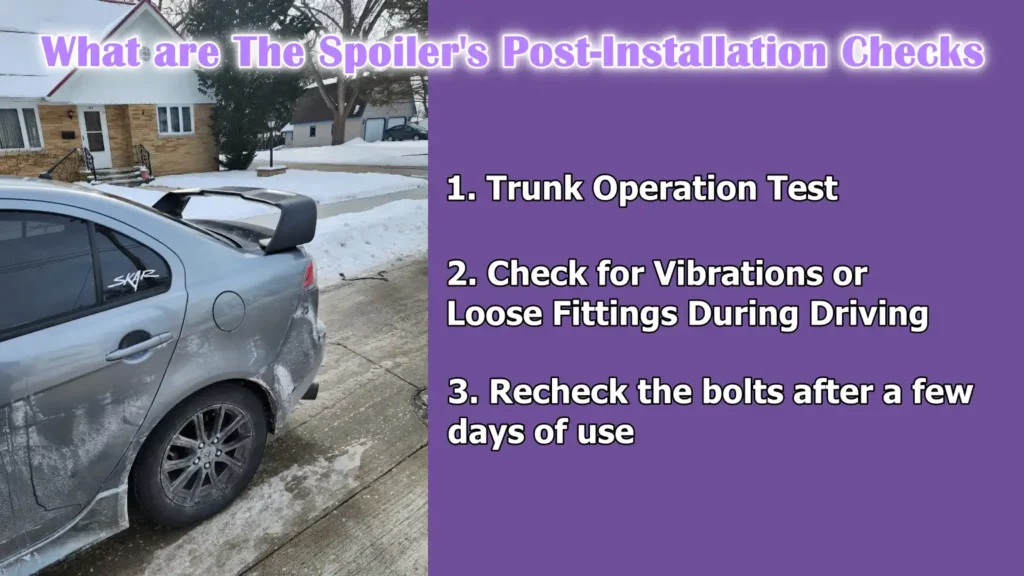
1. Trunk Operation Test
After installing the spoiler, the first step is to check the trunk lid to make sure it opens and closes smoothly.
Sometimes, extra hardware or sealant can slightly interfere with the movement of the trunk.
Checking it immediately helps to detect any interference or misalignment before it becomes a bigger problem.
A trunk that doesn’t function properly can damage the spoiler or the vehicle’s paint over time, so ensuring smooth operation ensures both the safety and longevity of the installation.
2. Check for Vibrations or Loose Fittings During Driving
Once the car is back on the road, it’s important to see how the spoiler behaves during driving.
Pay attention to unusual sounds, rattles, or vibrations, which may indicate that some bolts or screws are not fully secured.
Even the slightest movement can reduce the effectiveness of the spoiler and eventually cause damage.
Early detection of loose fittings allows for quick adjustments, preventing potential safety problems and ensuring that the spoiler remains stable at various speeds.
3. Recheck the bolts after a few days of use
After several days of driving, it is advisable to recheck the tightness of all mounting bolts and fasteners.
Vibrations and the spoiler’s weight can sometimes cause the initial installation to settle or shift slightly.
Retightening the bolts according to the manufacturer’s torque specifications ensures that the spoiler remains firmly attached and maintains its intended aerodynamic performance.
Regular checks after installation are a simple but important step in extending the life of both the spoiler and the vehicle.
Maintenance Tips
1. Regular Spoiler Cleaning
Regular spoiler cleaning is important to maintain both its beauty and functionality.
Dirt, dust and road debris can build up on the surface, causing scratches, paint damage or reduced aerodynamic efficiency over time.
Gently clean the spoiler with a soft cloth or sponge dipped in mild car shampoo, then rinse with clean water.
Regular cleaning not only keeps the spoiler looking new, but also prevents long-term wear and ensures it continues to perform its intended function of controlling air flow and providing stability.
2. Avoid high-pressure car washes in the first week
In the first week after installation, it is advisable to avoid high-pressure car washes.
The initial cure of sealants, adhesives or gaskets may still be ongoing and excessive water pressure may interfere with bonding, causing leaks or loosening the spoiler.
In the meantime, hand washing or using gentle, low-pressure cleaning methods ensures that the spoiler is securely set and reduces the risk of damage to both the installation points and surrounding paint.
3. Check Bolts and Seals Periodically
Even after proper installation, it’s important to periodically check all bolts, screws and seals on the spoiler.
Over time, vibration, weather conditions and temperature changes can cause fasteners to loosen or seals to deteriorate.
Regular inspections help you detect and fix any problems early, preventing potential damage to the spoiler or the car.
Ensuring that all parts remain strong and intact contributes to the spoiler’s long-term safety, stability and performance.
Conclusion – How to Install a Spoiler
So, the spoiler is not just small accessory but it literally makes a big different in how your car handles and performs.
Careful preparation, accurate measurements, precise drilling and proper securing of all hardware are essential to a successful installation.
By following the steps in this guide, you ensure that the spoiler is securely mounted, perfectly aligned and protected from water damage or wear.
Regular maintenance, including cleaning and checking fasteners, extends the life of both the spoiler and the vehicle’s trunk surface.
Ultimately, a well-installed spoiler is a combination of style, protection and performance, providing a reliable and attractive upgrade you can enjoy for years.
So, that’s it from this guide and now it is time to take your unsolved queries.
Frequently Asked Questions
Q1. Is it difficult to install a spoiler?
Answer: If you’ve never done car modification work before, installing a spoiler can be challenging, but it’s not impossible with careful preparation and the right tools. The difficulty depends on the type of spoiler, whether drilling is required, and how precise the measurements need to be. Some spoilers are designed as bolt-on kits with templates, making it easier for beginners to install. Others, specially custom or performance spoilers, may require drilling holes, using sealant, and aligning multiple mounting points, which can be more complicated. Following detailed instructions, taking careful measurements, and taking your time can make the process easy even for someone with no advanced mechanical experience. Having basic safety equipment and an assistant for alignment is also recommended, as this can avoid mistakes and protect your vehicle’s paintwork.
Q2. Can you install a spoiler on any car?
Answer: Spoilers can be installed on most cars, but not every spoiler will fit every model. Spoilers are designed to suit the shape and design of specific vehicles, so it’s important to choose a spoiler that fits your car’s make, model, and year. Factory-fit spoilers or aftermarket kits often provide customized templates and hardware for specific vehicles, ensuring a perfect fit. Some cars, specially older or unusually shaped models, may require custom spoilers or modifications for proper installation. Additionally, some spoilers are designed for aerodynamic benefits and may not be effective on all vehicles. Always check the manufacturer’s recommendations for compatibility, and make sure your car’s trunk lid or mounting surface is suitable for drilling or securely attaching the spoiler.
References:
[1] A Numerical Study On Rear-spoiler Of Passenger Vehicle
https://ira.lib.polyu.edu.hk/bitstream/10397/5189/1/REAR_SPOILER_STUDY_SINGAPORE_v57-124.pdf

Guys, I’m a car audio enthusiast and customization expert and I love clear sound and clean installation. Plus, I have spent years helping people build their dream audio setups. And whenever I’m working on cars, I probably listen to music and thinks about the next big upgrade.