Written By: Don Dodi
Fact Checked By: Kristen Brown
Reviewed By: Diego Rosenberg
Let’s understand this: a healthy car battery at rest should have around 12.4 to 127.7 volts; so if there’s anything significantly lower then this will be a clear signal for a weak or aging battery.
Which is why, you actually need a voltmeter as it shows the real-time health of your vehicle’s electrical system so that you can maintain that stable power throughout the years to come.
As well as, it is again true that every car depends on the 12-volt battery and a charging system which is powered by the alternator.
So, whenever the engine is off, you should check that the alternator should raise that number to around 12.4 to 127.7 volts and if engine is up and running; then the alternator should raise that number to around 13.5 to 14.7 volts so that to properly charge the battery and power systems such as: headlights, fuel injectors, ignition coils, infotainment systems and all kinds of sensors your car holds.
Actually, if the voltage drops too low, then simply your car may struggle to start, it can malfunction the electronic components and even the battery can slowly die because of this factor.
And, if the voltage rises too high, then it can literally damage the sensitive electronics and even shorten the battery life very much.
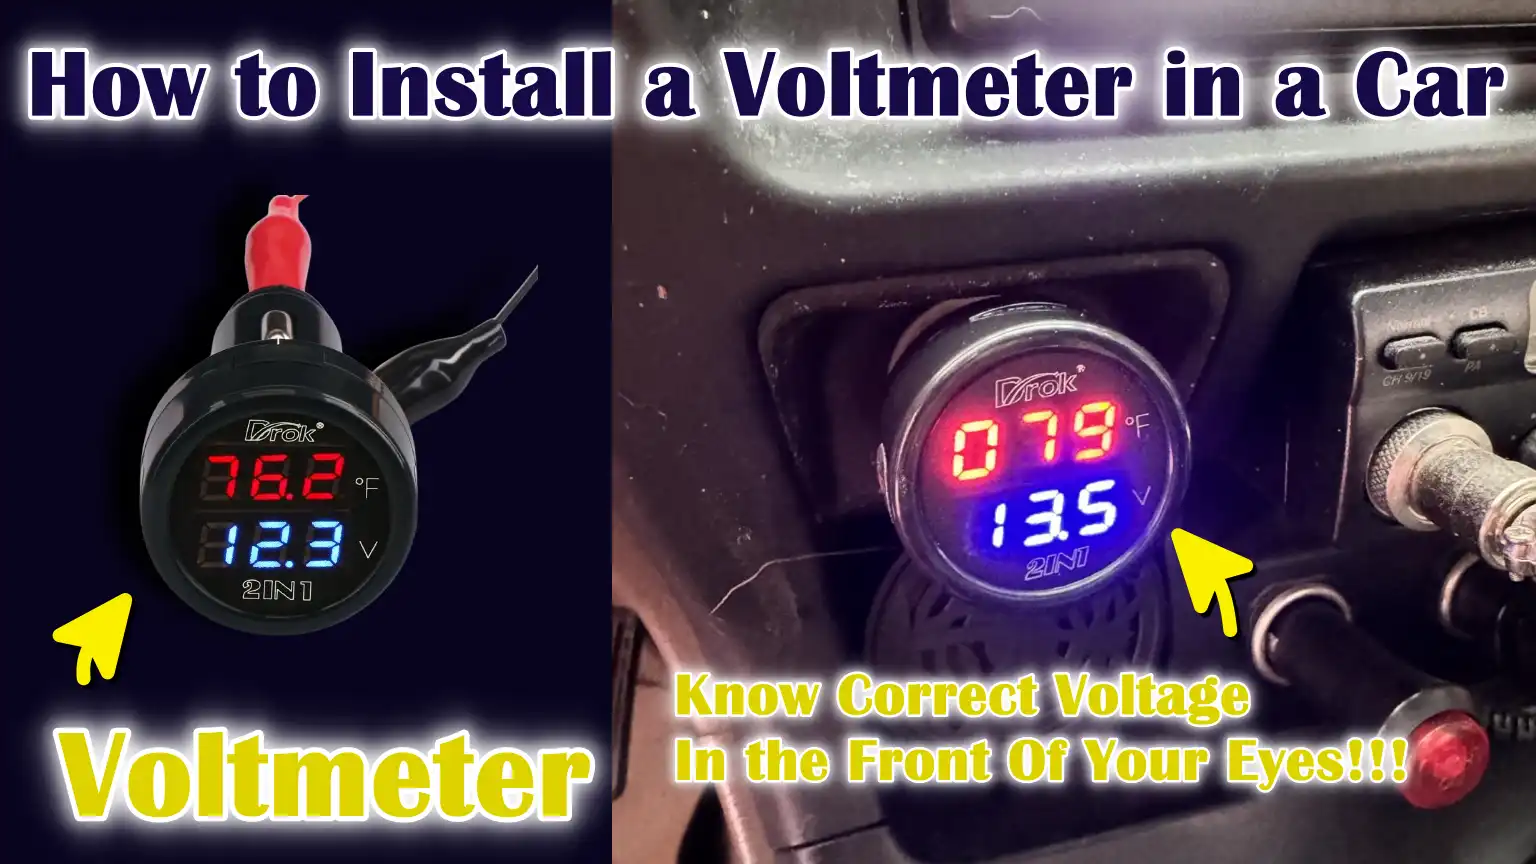
That’s why, you should have one voltmeter to know these things conveniently; so in this guide you’ll learn How to Install a Voltmeter in a Car, so that you can detect early signs of alternator failure, weak batteries, poor grounding or if there’s any wiring problems available even before they leave you clueless in the middle of the journey.
Understand, How a Car Voltmeter Works?
A car voltmeter is a gauge that measures the electrical pressure, also known as voltage, in your vehicle’s electrical system.
Voltage is what delivers power through wires to components like the starter motor, fuel pump, headlights, ignition system, sensors, infotainment screens and various control modules.
Most passenger vehicles use a 12-volt electrical system, but the actual voltage varies constantly depending on whether the engine is off or running.
A voltmeter connects to the vehicle’s power and ground circuits and continuously displays the current system voltage in real time.
This live reading allows you to monitor the condition of the battery and charging system while driving.
Unlike a simple warning light, which only illuminates when a serious fault occurs, a voltmeter detects small changes in voltage early, helping you detect problems before they become serious.
1. Difference Between Battery Voltage and Charging Voltage
Battery voltage and charging voltage are related, but not the same.
Battery voltage refers to the electrical pressure stored within the battery when the engine is not running.
This reading indicates the battery’s state of charge.
Charging voltage refers to the higher voltage generated by the alternator when the engine is running.
The alternator not only converts energy used to start the engine; it also powers all electrical systems and recharges the battery.
When the engine is off, the voltmeter mostly shows the battery’s stored energy.
When the engine is running, the voltmeter mostly shows the alternator’s output.
Understanding this difference helps you understand what the gauge is telling you.
2. How the Alternator and Voltage Regulator Affect Readings
The alternator is a generator driven by a belt from the engine.
As the engine rotates, the alternator produces electricity.
However, the alternator does not send a fixed voltage.
Instead, it works in conjunction with a voltage regulator.
The voltage regulator controls the alternator’s voltage output to keep it within a safe range.
If the voltage is too low, the battery will not charge properly.
If the voltage is too high, it can damage electronics and shorten battery life.
Modern vehicles often have electronic voltage regulators built into the alternator or controlled by the engine control module.
Because of this regulation, the voltmeter reading may increase or decrease slightly depending on power demands, such as when the headlights, air conditioning, or rear defroster are turned on.
Small variations are normal, but large or unstable variations may indicate a problem.
3. Normal Voltage Range
A well-functioning vehicle follows a predetermined voltage range under normal conditions.
Knowing these ranges helps you quickly determine whether your electrical system is functioning properly.
Engine Off Voltage
When the engine is off and the vehicle has been idling for a few hours, a fully charged and functioning 12-volt battery typically reads between 12.4 and 12.7 volts.
A reading of around 12.6 volts indicates a fully charged battery.
If the reading drops to around 12.2 volts, the battery is only half charged.
If it drops below 12.0 volts, the battery is considered severely discharged and may experience engine starting problems.
A consistently low engine-off voltage often indicates an old battery, parasitic drain, or poor charging performance.
Engine Running Voltage
In most vehicles, the alternator should raise the system voltage to around 13.5 to 14.7 volts when the engine is running.
This higher voltage ensures that the battery is properly charged and also provides power to all electrical systems.
If the running voltage remains below approximately 13.3 volts, the alternator may not be charging properly.
If it rises above 15 volts, the system may be overcharged, which could damage the battery and sensitive electronic modules.
Slight variations within the normal range are common, specially when electrical loads change, but the reading should remain stable overall.
4. What Abnormal Readings Mean
Abnormal voltmeter readings often provide early warning signs of electrical system problems.
If the voltage gradually drops to near 12 volts while driving, the alternator may be damaged and the vehicle may eventually stall due to battery drain.
If the voltage is too high, such as over 15 volts for a prolonged period, the voltage regulator may be damaged, leading to overcharging.
Overcharging can cause the battery to overheat, swell, leak and damage electronic components.
If the reading fluctuates rapidly, it could indicate loose wiring, poor grounding, or a bad alternator.
By recognizing these patterns, drivers can take preemptive steps like testing the battery, checking the alternator belt, or checking connections, rather than waiting for the car to suddenly break down.
Know, What are the Types of Car Voltmeters

Car voltmeters come in different styles and designs, but they all perform the same basic function: measuring and displaying the voltage of your vehicle’s electrical system.
The main differences are how they display information, how accurate they are, how easy they are to read and how they are installed.
Choosing the right type depends on your driving needs, budget, vehicle design and whether you want a simple, basic display or a more advanced monitoring system.
Understanding each type thoroughly will help you make a smart decision and avoid purchasing something that doesn’t meet your needs.
1. Analog/Needle-Style Voltmeter
An analog voltmeter uses a moving needle that points to numbers printed on a dial.
This design has been used for decades and is common in older vehicles and classic car builds.
The needle moves based on changes in voltage, allowing you to visually tell if the voltage is low, normal, or high.
A major advantage of an analog voltmeter is that you can immediately see sudden drops or increases because the needle physically moves on the scale.
Its design is also simple and it doesn’t rely heavily on digital circuits.
However, analog gauges may not display very precise numbers.
For example, you may see that the voltage is approximately 14 volts, but you may not know whether it’s exactly 13.8 or 14.2 volts.
For general monitoring, this is usually sufficient, but for detailed diagnostics, it may not be as accurate as a digital gauge.
2. Digital Voltmeter
A digital voltmeter displays voltage in precise numbers on a small screen, usually using LED or LCD technology.
Instead of a moving needle, it displays clear and precise readings like 12.6 volts or 14.3 volts.
This makes it easier to detect small changes in voltage that may indicate early electrical problems.
Digital voltmeters are generally more accurate than analog versions because they measure voltage electronically and display precise values.
Many modern aftermarket gauges use digital displays because they are compact, bright and easy to read both day and night.
However, some drivers may find it difficult to keep track of rapidly changing numbers compared to the direct movement of a needle.
Nevertheless, for accuracy and detailed monitoring, digital voltmeters are often a better option.
3. LED Bar-Style Voltmeter
LED bar-style voltmeters have a series of small lights arranged in a line or bar pattern.
As voltage increases or decreases, more lights turn on or off.
For example, a green light can indicate normal voltage, a yellow light can indicate caution and a red light can indicate low or high voltage.
This design provides an instant visual understanding of system health without having to read the actual numbers.
LED bar displays are easily visible while driving and are often used in custom dashboards or performance vehicles.
However, they typically don’t display accurate voltage values, so they’re more suitable for general monitoring than precise troubleshooting.
They’re simple, easy to install and often very durable.
4. OBD Plug-in Voltage Displays
OBD plug-in voltage displays connect to the vehicle’s OBD-II port, which is typically located under the dashboard.
This port communicates with the vehicle’s onboard computer system.
These devices often display voltage along with other data such as engine temperature, RPM, fuel consumption and diagnostic trouble codes.
Because they plug directly into the OBD port, installation is very simple and doesn’t require cutting or tapping wires.
The voltage readings displayed typically come from the vehicle’s electronic control system.
Despite their simplicity, these displays rely on the accuracy of the vehicle’s sensors and computers.
They’re ideal for drivers who want quick installation and multiple data readings without modifying the dashboard.
5. Dashboard-Mounted vs Panel-Mounted vs A-Pillar Gauges
The physical mounting location of a voltmeter impacts visibility, safety and overall appearance.
A dashboard-mounted voltmeter is placed above or inside the dashboard area, making it easy to see while driving.
This location provides good visibility, but it must be carefully positioned to avoid blocking the driver’s view.
Panel-mounted voltmeters are installed in a custom panel or factory-style gauge slot.
This creates a clean, integrated look and often appears more professional.
This may require cutting or modifying the inside panel.
A-pillar gauges are mounted on the inside pillar next to the windshield.
This location is popular in performance vehicles because it keeps important readings within the driver’s view.
However, improper installation can interfere with airbag deployment in some vehicles, so safety precautions should be taken.
Choosing the right mounting style depends on comfort, safety and how secure you want the installation to be.
Tools
| Tool or Material | Know Their Usefulness |
|---|---|
| Voltmeter Gauge Kit | This is the main device that displays your car’s voltage in real time. It typically consists of a gauge, a mounting bracket and basic wiring. Always choose a good-quality kit that supports 12-volt vehicles and has clear instructions. |
| Electrical Wires – Proper Gauge Size | These wires carry power from the fuse box or battery to the voltmeter. For most installations, 16-gauge or 18-gauge wire is safe and commonly used. Using the correct size wire prevents overheating and keeps voltage readings stable. |
| Fuse Tap or Inline Fuse Holder | A fuse tap securely connects the voltmeter to your car’s fuse box without cutting the factory wires. An inline fuse holder is used when connecting directly to the battery. This protects both the wiring and the gauge from short circuits and electrical damage. |
| Crimp Connectors or Soldering Tools | Crimp connectors help securely connect wires without loose connections. Soldering tools melt metal to create a strong and secure wire connection. A strong connection prevents voltage drops and inaccurate readings. |
| Wire Stripper and Cutter | This tool removes plastic covers from wires without damaging the underlying metal. It also cleanly cuts wires to the required length. Clean cuts and accurate stripping ensure a secure and reliable connection. |
| Drill – If Mounting Is Required | If you’re installing a gauge in a panel or dashboard, a drill is required. It helps create clean holes for mounting brackets or gauge pods. Always measure carefully before drilling to avoid damaging internal components. |
| Multimeter – For Testing Purpose | A multimeter measures voltage directly from the battery or fuse box. This helps you ensure the voltmeter is giving accurate readings after installation. This tool is crucial for checking accuracy and diagnosing electrical problems. |
| Electrical Tape and Zip Ties | Covering exposed wires with electrical tape prevents short circuits. Zip ties keep wires tightly together and away from moving or hot engine parts. Proper wire management helps ensure safety and long-term reliability. |
Now, Let’s Ensure Safety By Taking Necessary Precautions Before Installation of Voltmeter
Installing a voltmeter in your car isn’t difficult, but caution is always required when working with a vehicle’s electrical system.
A car battery may seem small, but it can deliver hundreds of amps of current instantly: so much so that, if handled improperly, it can melt wires, damage electronic modules, or cause serious injury.
Modern vehicles also have many sensitive control units that can be damaged by voltage spikes or sudden short circuits.
Taking the proper safety precautions before beginning the installation protects not only you but also your vehicle’s electrical system.
Understanding these precautions will minimize risks and ensure a clean and reliable installation.
1. Disconnecting the Negative Battery Terminal
Before touching any wires, always disconnect the negative battery terminal.
The negative terminal is usually marked with a minus sign and often has a black cable attached to it.
Removing this connection breaks the electrical circuit and prevents accidental sparks if a tool touches metal parts.
If you leave the battery connected and your wrench touches both the power wire and metal ground at the same time, it could cause a strong spark and damage the wiring or electronic system.
It’s safer to disconnect the negative terminal first as this reduces the risk of a short circuit.
After installation is complete, securely reconnect the terminal to restore power.
2. Avoiding Short Circuits
A short circuit occurs when a power wire directly touches ground or another wire without proper control.
This causes a very high flow of electricity, which can lead to overheating, melting insulation, blowing fuses, or even a fire.
To avoid short circuits, never leave bare wires exposed.
Always cover connections tightly with electrical tape or heat shrink tubing.
Ensure wires are not trapped between metal panels or near sharp edges.
It’s also important to keep wiring away from hot engine parts like the exhaust manifold, as excessive heat can melt the insulation and cause an electrical fault.
Careful routing and secure connections greatly reduce the risk of electrical problems.
3. The Importance of Proper Fuse Protection
A fuse is a small but essential safety device that protects your wiring and gauges.
Its function is to break the circuit if too much current flows through it.
Without a fuse, a wiring fault or short circuit could cause unlimited current to flow from the battery, overheating the wires and causing serious damage.
When installing a voltmeter, always use the fuse tap on the fuse box or, if connecting directly to the battery, install an inline fuse.
The fuse should be placed near the power source to protect the entire wire.
Using the correct fuse rating is crucial, as a fuse that is too large may not protect the circuit and a fuse that is too small may blow it.
4. Choosing the Right Wire Gauge
Wire gauge indicates the thickness of the wire.
Thicker wires can carry more current, while thinner wires are designed for lower loads.
Voltmeters themselves use very little power, but using the correct wire size is still essential for safety and stable readings.
In most cases, 16-gauge or 18-gauge wire is appropriate for voltmeter installation in a 12-volt system.
If the wire is too thin, it can heat up under certain conditions and cause a voltage drop, leading to inaccurate readings.
Using proper automotive-grade wire with good insulation ensures long-lasting and safe performance.
5. Working in a Well-Lit Area
Proper lighting is often overlooked, but it plays a vital role in a safe installation.
Working in dark or dimly lit areas increases the risk of incorrectly connecting wires, damaging internal panels, or missing loose connections.
Good lighting allows you to clearly identify fuse slots, wire colors and grounding points.
It also protects you from accidental contact between tools and live electrical components.
Taking your time and working in a clean, organized and well-lit area reduces errors and improves the overall quality of the installation.
A careful and patient approach is always safer than rushing.
How to Choose the Best Location for a Voltmeter
Choosing the right location for your voltmeter is just as important as wiring it correctly.
The location of the gauge affects how easily you can read it, how safe it is while driving and how neat the final installation looks.
The voltmeter’s purpose is to provide instant, real-time information about your car’s electrical health, so it should be placed where you can see it without taking your eyes off the road for more than a second.
It should also not block airbags, driving controls, or your natural field of vision.
Proper placement ensures safety, comfort and long-term ease of use.
1. Dashboard Mounting
Dashboard mounting is one of the most common and practical options.
In this setup, the voltmeter is mounted using a mounting pod or bracket on top of the dashboard or inside the dash panel.
This placement places the gauge within your normal line of sight, making it easy to check voltage while driving.
Because the dashboard is already designed to display essential driving information, placing the voltmeter here seems natural and familiar.
However, it’s important to ensure that the gauge doesn’t block airflow vents, instrument cluster visibility, or the driver’s view ahead.
Secure mounting is also essential to prevent vibration, specially on rough roads.
2. A-Pillar Mounting
A-pillar mounting places the voltmeter on the inside pillar between the windshield and the driver’s door.
This placement is popular in performance and modified vehicles because it keeps important information close to eye level.
Drivers can quickly glance at the gauge without looking down at the road.
This is useful when monitoring voltage during heavy electrical loads, such as when using high-power audio systems, winches, or additional lighting.
However, modern vehicles often have side curtain airbags in the A-pillar area.
The gauge should be carefully placed here to avoid obstructing airbag deployment.
Safety should always be the top priority when choosing this location.
3. Under-Dash Mounting
Under-dash mounting involves placing the voltmeter beneath the main dashboard, typically near the center console or beneath existing controls.
This method is less visible from the outside of the vehicle and can offer a cleaner look for drivers who prefer a more minimalist look.
It also eliminates the need for drilling into the dashboard’s clean surfaces.
However, the biggest disadvantage is that you have to look down slightly to read the gauge.
While this may not be a problem for occasional checks, it’s less of a problem if you need to monitor voltage frequently.
Under-dash mounting works best when the voltmeter is used for periodic checks rather than constant viewing.
4. Factory Gauge Cluster Integration
Factory gauge cluster integration involves installing the voltmeter within or alongside the original instrument cluster.
This option provides the most professional and factory-like look.
When done correctly, the voltmeter blends naturally with the speedometer, tachometer and fuel gauge.
Some advanced installations relocate unused gauges or use custom panels designed specifically for a specific vehicle model.
This method typically requires more skill as it may involve removing trim panels, replacing the cluster housing and ensuring proper lighting compatibility.
However, it often results in the cleanest and simplest look, making it the preferred option for long-term or permanent setups.
5. Consider Visibility and Driver Safety
Whatever mounting style you choose, visibility and safety should be paramount.
The voltmeter should be easily readable both day and night without glare or distraction.
It should not obstruct the view of the road, mirrors, or factory warning lights.
Wiring should be hidden and secure so it doesn’t interfere with pedals, steering components, or the airbag system.
Quick readout is essential, as drivers should never spend more than a short time staring at the gauge.
A properly positioned voltmeter allows you to reliably monitor your vehicle’s electrical system, allowing you to focus on safe driving.
Now, let’s Understand About the Basics of Voltmeter Wiring
Proper wiring is the most important part of installing a voltmeter in your car.
Even though a voltmeter uses very little power, it must be connected correctly to provide accurate readings and keep your vehicle safe.
A basic voltmeter typically has three main connections: a positive power wire, a ground wire and sometimes an illumination wire for lighting.
Each wire has a specific role in the circuit.
If any connection is loose, improperly grounded, or unsafe, the gauge may give inaccurate readings or stop working altogether.
Understanding how each wire works will help you complete a safe and reliable installation.
1. Positive/Power Wire Connection Options
The positive wire supplies voltage to the voltmeter so it can measure and display system voltage.
This wire can be connected in a few different ways, depending on your preferences and vehicle setup.
A common method is to connect it to the fuse box using a fuse tap.
This method is safe because it draws power from an existing fused circuit.
Another method is to connect directly to the battery’s positive terminal using an inline fuse.
This provides a direct reading of battery voltage, but it must always have proper fuse protection.
Some installers connect to an accessory circuit that is turned on with the key.
Regardless of the method used, the connection must be secure, clean and protected from heat and vibration to ensure stable readings.
2. Ignition-Switched Power vs Continuous Battery Power
Choosing between ignition-switched power and continuous battery power affects how the voltmeter works.
Ignition-switched power means the voltmeter is only on when the key is in the “On” or “Run” position.
This prevents the gauge from draining the battery when the vehicle is parked.
This is the most common and recommended setup for daily drivers.
Continuous battery power means the voltmeter remains active even when the engine is off.
This allows you to monitor battery voltage at any time, but if the gauge draws power continuously, it can slowly deplete the battery charge over time.
For most users, ignition-switched power offers the best balance between convenience and battery protection.
3. Replacing the Ground Wire
The ground wire completes the electrical circuit connecting the voltmeter to the vehicle’s chassis.
A poor ground connection is one of the most common causes of inaccurate voltage readings.
The ground should be connected to a clean, unpainted metal surface on the vehicle’s body or frame.
To ensure a strong metal-to-metal contact, remove any paint, rust, or dirt.
A loose or weak ground can cause the voltmeter to display low voltage or flash.
Using a secure bolt and tightening it properly ensures a strong and reliable ground connection.
4. Illumination Wire for Night Lighting
Many voltmeters have an illumination wire so that the display illuminates when the vehicle’s headlights are on.
This wire is usually connected to the dashboard lighting circuit.
When connected correctly, the voltmeter’s brightness will match other dashboard lights and can be reduced by adjusting the dimmer switch.
This feature improves visibility at night without creating glare.
If the illumination wire is connected incorrectly, the gauge may remain lit all the time or may not remain lit at night.
Proper connection ensures comfortable night driving and a factory-like appearance.
5. Importance of Installing a Fuse
Installing a fuse in voltmeter wiring is an important safety measure.
The fuse protects the wire and the vehicle from excessive current in the event of a short circuit.
The fuse should always be installed as close as possible to the power source, whether it’s a fuse box or battery.
This ensures that the entire length of the wire is protected.
If a short circuit occurs and the fuse is missing, the wire can quickly overheat and cause serious damage.
Choosing the correct fuse rating is also important.
As voltmeters draw very little current, a small fuse is usually sufficient.
Installing the correct fuse prevents electrical fires, protects the vehicle’s sensitive electronics and ensures long-term safety.
How to Install a Voltmeter in a Car – Easy Steps
Installing a voltmeter is a simple process if done carefully and in the correct order.
Proper installation ensures accurate voltage readings, prevents electrical damage and keeps the wiring safe for long-term use.
Because a car’s electrical system can generate high currents, each step must be performed with care and patience.
Following these steps will help you complete the installation safely and professionally.
1. Disconnect the Battery
Before beginning any electrical work, disconnect the negative battery terminal.
This is crucial because a car battery can deliver hundreds of amps instantly during a short circuit.
Even a small spark can damage the sensitive electronic control modules found in modern vehicles.
Removing the negative cable breaks the electrical path and reduces the risk of accidental contact between power and ground.
This simple task prevents serious damage to your tools, wiring and vehicle electronics.
Why This Is Important
When the battery is connected, touching a live wire with metal can cause a direct short circuit.
This can result in sparks, melted wires, blown fuses, or, in extreme cases, even a fire.
Modern cars have many computer-controlled systems that are sensitive to voltage spikes.
Disconnecting the battery prevents sudden power surges and ensures you’re working in a safe environment.
This is one of the most important safety steps in any automotive electrical installation.
2. Mount the Voltmeter Gauge
Choose the mounting location you decided on earlier and carefully prepare the area.
If using a bracket or pod, position it so that the gauge is clearly visible but does not obstruct the view of the road or factory instruments.
If drilling is required, measure twice before drilling to avoid damaging hidden wiring or panels.
The gauge should be firmly installed without movement.
Securing the Bracket or Pod
The bracket or pod must be properly tightened to prevent vibration during driving.
Constant vibration can loosen screws over time and damage the gauge’s internal components.
Use the mounting hardware provided in the kit and ensure the surface is stable and clean.
A secure mount improves durability and creates a clean, professional look.
Ensuring Stable Positioning
The voltmeter should be angled to provide quick and easy readings.
It should not reflect sunlight directly into your eyes or cause glare at night.
Stability is important because the gauge should not be shaken by sudden movements or impacts.
A properly positioned gauge ensures safe and comfortable monitoring.
3. Connect the Positive Power Wire
The positive wire supplies power to the voltmeter so it can measure system voltage.
A common and safe method is to use an add-a-fuse connector in the fuse box.
This allows you to draw power from an existing circuit without disconnecting the factory wiring.
If you want the voltmeter to turn off with the key, choose a circuit that is active when the ignition is on.
Connecting to the Fuse Box – Add-a-Fuse Method
Insert the add-a-fuse into the correct fuse slot, usually an accessory or ignition circuit.
This method keeps the installation clean and protects the vehicle’s fuse system.
Ensure the fuse tap is inserted in the correct direction to ensure proper protection of the circuit.
Secure the wire so that it does not interfere with the pedals or steering components.
Connecting Directly to the Battery – With an Inline Fuse
If you want continuous battery monitoring, you can connect the positive wire directly to the battery terminal.
In this case, you’ll need to install an inline fuse very close to the battery connection point.
This protects the entire length of the wire in case of a short circuit.
Without a fuse near the battery, a fault in the wiring could cause overheating or serious damage.
Recommended Fuse Rating
A voltmeter uses very little current, typically less than one amp.
A small fuse, typically between 1 amp and 5 amps, is sufficient for safety.
Using a fuse that is too large reduces safety because it may not blow quickly enough during a fault.
Always choose the fuse rating recommended by the voltmeter manufacturer.
4. Connect the Ground Wire
The ground wire completes the electrical circuit and is just as important as the positive connection.
A poor ground can cause inaccurate voltage readings or flickering on the display.
The ground must be connected to a solid metal part of the vehicle’s chassis.
The Best Grounding Point
Good grounding points include the factory grounding bolt under the dashboard or a metal bracket attached directly to the vehicle’s frame.
Avoid plastic parts or painted surfaces as they do not conduct electricity properly.
A strong ground ensures accurate and stable readings.
Cleaning the Metal Surface for a Solid Ground
If the selected grounding point has paint, rust, or dirt, clean it with sandpaper or a wire brush.
Bare metal contact is essential for proper electrical flow.
Tighten the bolts firmly so that the connection does not loosen over time.
A clean and secure ground improves performance and reliability.
5. Connect the Illumination Wire – Optional
If your voltmeter has a lighting feature, connect the illumination wire to the vehicle’s dashboard lighting circuit.
This illuminates the gauge when the headlights are on.
This improves visibility when driving at night.
1. Tapping into the Headlight Circuit
Find the wire that powers the dashboard light when the headlights are on.
Use a safe tapping method to connect without damaging the factory wiring.
Ensure the connection is properly insulated to avoid short circuits.
2. Ensuring Proper Dimming Compatibility
Many vehicles have the ability to adjust the dashboard brightness using a dimmer switch.
Connecting the illumination wire correctly ensures that the voltmeter’s brightness changes with the other dashboard lights.
This prevents glare at night and maintains the factory look.
6. Secure and Organize the Wiring
After all connections are complete, neatly route the wires along the existing wiring paths.
Proper routing prevents any problems with pedals, steering components, or moving engine parts.
Use Zip Ties
Use zip ties to secure the wires together and secure them to something sturdy.
This prevents the wires from hanging loose or vibrating while driving.
Organized wiring reduces wear and improves safety.
Avoid Heat and Moving Parts
Keep the wires away from hot areas like the exhaust manifold and moving parts like the steering shaft or pedals.
Excessive heat can melt the insulation and moving parts can damage the wires over time.
Careful routing increases the longevity of the installation.
7. Reconnect the Battery and Test
After everything is in place, reconnect the negative battery terminal.
Tighten it securely to secure the connection.
Now you’re ready to test the voltmeter.
Checking Voltage with the Engine Off
With the engine off, the voltmeter should read approximately 12.4 to 12.7 volts for a healthy, fully charged battery.
If the reading is too low, the battery may need charging or replacement.
Checking Voltage with the Engine Running
Start the engine and observe the reading.
It should rise to approximately 13.5 to 14.7 volts, indicating that the alternator is charging properly.
A slight difference when applying an electrical load is normal.
Confirming Correct Readings
For complete accuracy, compare the voltmeter reading with a digital multimeter connected directly to the battery terminal.
The readings should be very close.
If there’s a significant difference, recheck the wiring and ground connections.
Proper testing ensures your voltmeter is working properly and ready to reliably monitor your vehicle’s electrical health.
How to Test and Verify the Accuracy of Voltmeter
After installing a voltmeter, testing and verifying its accuracy is an important step.
Even if the wiring appears correct, minor errors like weak grounding, loose connections, or voltage drops in thin wires can cause inaccurate readings.
A voltmeter is only useful if it provides accurate and reliable information about your vehicle’s electrical system.
Because modern vehicles rely heavily on stable voltage for the engine control module, fuel injection system, sensors and safety features, it’s crucial to ensure your gauge reflects the actual system voltage.
Proper testing ensures you can trust the displayed numbers and quickly identify electrical problems.
1. Comparing with a Digital Multimeter
The best way to verify your voltmeter reading is to compare it with a digital multimeter.
A digital multimeter is an accurate testing tool designed to measure voltage directly at the battery terminals.
To test, set the multimeter to DC voltage and place the red probe on the positive terminal of the battery and the black probe on the negative terminal.
This gives you the actual battery voltage without any interference, including wiring lengths or dashboard connections.
Then compare this reading with your installed voltmeter.
Both readings should be very close, typically within 0.1 to 0.3 volts.
A slight difference is normal due to minor resistance in wires and connections, but a significant difference may indicate poor grounding, a thin wire, or a loose power connection.
This comparison confirms that your gauge is properly calibrated and connected.
2. Expected Voltage Reading
Understanding expected voltage values helps you determine whether your system is functioning properly.
When the engine is off and the vehicle has been at rest for several hours, a fully charged 12-volt battery should read between 12.4 and 12.7 volts.
If the reading is around 12.2 volts, the battery is slightly discharged.
A reading below 12.0 volts usually means the battery is weak or needs charging.
When the engine is running, the alternator should increase the voltage to around 13.5 to 14.7 volts.
This higher voltage is necessary to recharge the battery and power all electrical systems.
If the running voltage remains around 12 volts, the alternator may not be charging.
If it rises above 15 volts, the voltage regulator may be faulty and overcharging the system.
Stable readings within the normal range indicate that both the battery and alternator are functioning properly.
3. Troubleshooting Incorrect Readings
If your voltmeter shows readings that don’t match the multimeter or expected values, troubleshooting should begin with the wiring.
First, check the ground connection.
A weak or dirty ground is one of the most common causes of incorrect voltage displays.
Make sure the grounding point is clean, free of paint or corrosion and properly installed.
Next, check the positive power connection.
Loose fuse taps, poorly crimped connectors, or worn wires can create resistance that reduces the displayed voltage.
Also, check that the fuse is properly installed and not slightly blown.
If the voltage fluctuates rapidly while driving, it could indicate loose wiring or a bad alternator.
If the readings are consistently high or low even after verifying the wiring is correct, testing the battery and alternator with professional equipment may be necessary.
Careful testing and systematic checking ensure that your voltmeter provides reliable information and helps you confidently maintain your vehicle’s electrical health.
Now, Understand Common Installation Mistakes So That You can Avoid Them
Installing a voltmeter may seem simple, but small mistakes during installation can result in inaccurate readings, electrical damage, or even safety risks.
A car’s electrical system is powerful and sensitive at the same time.
The battery can deliver a large amount of current in a single moment and modern vehicles have many electronic control units that can be damaged by improper wiring.
Avoiding common installation mistakes ensures that your voltmeter works properly, lasts longer and doesn’t cause hidden electrical problems.
Understanding these mistakes in clear and simple terms will help ensure a safe and professional installation.
1. No Inline Fuse
One of the most common mistakes is connecting a voltmeter directly to the battery without an inline fuse.
A fuse is a protective device that stops the flow of electrical current when excessive current flows through the wire.
Without a fuse, a short circuit could cause the battery to draw unlimited current, causing the wire to overheat and melt, or even start a fire.
Even if the voltmeter uses very little power, the wire connected to the battery is still exposed to the entire battery current.
A fuse should always be placed near the power source to protect the entire wire.
Skipping this step removes an important safety barrier and significantly increases the risk.
2. Poor Grounding
One of the most common causes of inaccurate voltage readings is a weak or improper ground connection.
The ground wire should be connected to clean, solid metal directly connected to the vehicle chassis.
If the connection is made to painted, rusted, or dirty metal, the electrical resistance increases.
This resistance can cause the voltmeter to show a voltage lower than the actual battery voltage.
Poor grounding can also cause flickering or unstable readings.
Cleaning the metal surface and tightening the connection firmly before connecting the ground ensures accurate measurements and long-term reliability.
3. Using Undersized Wire
Using too thin wire for vehicle use can cause problems over time.
Although the voltmeter doesn’t draw much current, it is susceptible to vibration, heat and electrical noise in the vehicle environment.
Thin or poor-quality wire can cause voltage drop, meaning some of the electrical pressure is dissipated before reaching the gauge.
This can lead to slightly inaccurate readings.
In extreme cases, a short wire can overheat if a sudden electric current is applied.
Using the correct automotive-grade wire, which is typically 16-gauge or 18-gauge for a voltmeter, ensures safe operation and accurate voltage display.
4. Connecting to the Wrong Fuse Slot
Selecting the wrong fuse slot in the fuse box can cause unexpected problems.
Some fuse slots provide constant battery power, while others only receive power when the ignition is on.
Connecting to the wrong slot can cause the voltmeter to remain on all the time, slowly draining the battery while the vehicle is parked.
In other cases, tapping into a vital safety circuit can cause problems with the factory system.
It’s important to identify the correct accessory or ignition-switched circuit for your desired setup.
Checking the vehicle’s fuse diagram helps avoid confusion and mistakes.
5. Leaving exposed wiring
Leaving exposed or loose wires is another common mistake.
Exposed metal wires can accidentally touch other metal parts and cause a short circuit.
Loose wiring can also get caught in moving parts like pedals or steering components.
Over time, if wires rub against sharp edges, vibration can damage the insulation.
All connections should be properly insulated using electrical tape or heat shrink tubing.
Wires should be laid neatly and secured with zip ties to prevent kinking.
Proper wire management not only improves safety but also gives the installation a clean and professional look.
How to Solve Voltmeter Problems
Even with careful installation, voltmeters can sometimes experience problems.
Vehicle electrical systems operate in demanding environments, such as heat, vibration, humidity and frequent changes in electrical load.
Because of this, minor wiring problems or malfunctions in the charging system can impact voltmeter performance.
Understanding common symptoms and their meanings can help you quickly identify the cause.
Voltmeters are designed to provide early warning about battery and alternator health, so when the gauge itself shows poor performance, it’s important to perform a step-by-step check.
1. The Gauge Won’t Turn On
If the voltmeter won’t turn on at all, it’s most likely that the power supply is missing or a fuse has blown.
First, check the fuse protecting the voltmeter circuit.
Even a small short during installation can cause the fuse to blow.
If the fuse is okay, check that the positive wire is connected to the circuit that actually receives power.
If it’s connected to an ignition-switched source, the gauge won’t turn on unless the key is in the run position.
Also check the ground connection, as without a proper ground, the circuit can’t be complete and the gauge will remain off.
Loose connectors or poorly crimped terminals can also disrupt power flow.
Using a multimeter to test the voltage on the gauge’s power wire helps confirm whether power is reaching the unit.
2. Flickering Display
A flickering voltmeter display usually indicates an unstable connection.
The most common cause is a weak ground connection.
If the ground point isn’t clean or tight, vibrations from driving can cause the connection to move slightly, leading to unstable readings.
Another possible cause could be a loose fuse tap or connector in the fuse box.
Electrical vibrations from engine movement can cause a slight interruption in current flow.
In some cases, flickering can occur when the alternator begins to fail and produces unstable voltage.
To determine this, compare the voltmeter reading with a digital multimeter connected to the battery.
If the two show fluctuations, the problem may be with the charging system rather than the gauge.
3. Incorrect Voltage Readings
If the voltmeter displays values that don’t match the expected voltage levels, the first step is to verify accuracy using a digital multimeter.
A small difference of a few tenths of a second due to minor resistance in the wiring is normal.
However, if the difference is significant, there may be a voltage drop in the power wire or a poor ground connection.
Thin wires, long wires, or faulty connectors can reduce the voltage reaching the gauge.
Ensure all connections are tight and free of corrosion.
Also, ensure the voltmeter is designed for a standard 12-volt automotive system.
Proper wiring and clean connections are essential for reliable readings.
4. Reading Stuck at 12V
If the voltmeter reading remains at or around 12 volts even when the engine is running, it often indicates that the alternator is not charging properly.
A properly functioning charging system should increase the voltage to approximately 13.5 to 14.7 volts when the engine is running.
If the reading doesn’t increase, the alternator belt may be loose, the alternator may be worn, or the voltage regulator may be faulty.
It’s also possible that the voltmeter is connected to a circuit that only displays battery voltage, not the full charging voltage.
Testing the battery directly with a multimeter will confirm whether the alternator output is normal.
If the battery voltage doesn’t increase when the engine is running, professional alternator testing may be necessary.
5. Readings Over 15V
Voltage readings over 15 volts when the engine is running usually indicate overcharging.
This is often caused by a faulty voltage regulator that allows too much electrical pressure into the system.
Overcharging can cause the battery to overheat, swell and leak fluid.
It can also damage sensitive electronic components such as the control module and sensors.
If the voltmeter consistently reads over 15 volts, the charging system should be checked immediately.
In rare cases, falsely high readings may be due to a bad ground or faulty wiring in the gauge.
Confirming the reading with a digital multimeter will help determine whether the problem lies with the charging system or the voltmeter installation.
Learn, When to Use Ignition-Switched vs Constant Power
Choosing between ignition-switched power and constant battery power is an important decision when installing a voltmeter.
Both options are technically correct, but they perform different functions and affect how the gauge works.
A voltmeter only measures voltage, but how it receives power determines when it turns on and how it interacts with the vehicle’s battery.
Clearly understanding the differences will help you choose the safest and most practical setup for your driving needs.
1. Advantages and Disadvantages of Each
Ignition-switched power means the voltmeter only turns on when the key is in the “On” or “Run” position.
The biggest advantage of this setup is safety and convenience.
The gauge automatically turns off when the vehicle is turned off, eliminating the need to manually turn it off.
This reduces the risk of battery drain and is beneficial for most drivers.
It also keeps the display off when the car is parked, which can extend the life of the digital screen and internal electronics.
The biggest drawback is that you can’t monitor the battery voltage unless the key is on.
Continuous battery power means the voltmeter is connected directly to the battery or a circuit that always has power.
The biggest advantage of this setup is that you can check the battery voltage at any time, even with the engine off.
This is useful when you want to closely monitor the battery’s health or if the vehicle is used off-road, camping, or for audio systems, where battery condition is frequently important.
However, the disadvantage is that the voltmeter may draw a small amount of power continuously.
Even though most voltmeters use very little current, this small amount of current drawn over a long period of time can slowly drain the battery’s charge if the vehicle isn’t driven regularly.
2. Pay Attention to Battery Drain
Battery drain is an important issue to pay attention to.
A typical car battery’s capacity is measured in amp-hours, often between 40 and 70 amp-hours for most passenger vehicles.
Even a small electrical draw of a few milliamps from a voltmeter can add up over days or weeks.
Modern vehicles already use low background power from alarm systems, clocks and control modules.
Adding another constant draw increases the overall load.
If the vehicle is not used for long periods, the battery can become so discharged that it becomes difficult to start.
Ignition-switched power eliminates this concern because the voltmeter only works when the engine is running or the key is on.
3. Best Option for Daily Drivers
For most daily drivers, ignition-switched power is the best and safest option.
It provides voltage information while the vehicle is running, which is when monitoring is most important.
It also prevents unnecessary battery drain and requires no manual control.
Continuous power may be useful for specific applications or vehicles that require close battery monitoring, but it needs to be carefully managed to avoid prolonged discharge.
Generally, choosing ignition-switched power provides the best balance of safety, convenience and battery protection for everyday use.
Read More:
How to Maintain the Voltmeter for Achieving Long-Term Perfect Accuracy
Even, there’s academic research that confirms that measuring the battery voltage is actually a reliable indicator of a battery health; and according to the detailed study from the Virginia Tech: the voltage behavior during the engine cranking can literally distinguish between the healthy and failing batteries, that shows that why a dashboard voltmeter is really important gauge that shows you the automotive electrical health quiet conveniently.[¹]
Installing a voltmeter isn’t just about setup; it’s also about long-term monitoring and regular observation.
A voltmeter provides real-time information about your vehicle’s electrical health, but it’s truly useful when you understand patterns over time.
Car batteries and alternators don’t usually fail suddenly without warning.
In most cases, small fluctuations in voltage appear a few days or weeks before a complete failure.
By paying attention to regular readings, you can avoid being stranded, avoid costly repairs and extend the life of both the battery and charging system.
Long-term monitoring helps you understand what’s normal for your particular vehicle so you can immediately notice any changes.
1. How Often to Check the Readings
You don’t need to stare at the voltmeter constantly, but it’s wise to glance at it every time you drive.
When starting the engine, note how much the voltage drops during cranking and how quickly it rises after the engine starts.
While driving, specially at night with headlights, air conditioning and other accessories on, check that the voltage remains stable within the normal charging range of approximately 13.5 to 14.7 volts.
If you notice a gradual decrease in voltage while driving, this could indicate a charging problem.
Regular, minor checks during normal driving are sufficient to stay informed without distraction.
2. Signs of Alternator Failure
An alternator is responsible for charging the battery and powering all electrical systems when the engine is running.
An early sign of alternator failure is if the voltage remains around 12 volts even after the engine starts.
A healthy system should quickly rise above 13 volts.
Another warning sign is if the voltage gradually decreases while driving, specially when the electrical load increases.
You may notice dimming headlights, dimming power windows, slowing air conditioning, or even warning lights on the dashboard.
If the voltage reading fluctuates wildly without any reason, it could be a sign of a bad alternator or a faulty voltage regulator.
Early detection of these signs can prevent sudden engine failure due to a drained battery.
3. Signs of a Weak Battery
A weak battery often shows warning signs before it is completely damaged.
When the engine is off, a good, fully charged battery typically reads between 12.4 and 12.7 volts.
If the resting voltage drops below the regular 12.2 volts, the battery may be losing its ability to hold a full charge.
When starting the engine, if the voltage drops significantly, such as below 10 volts, it could indicate low battery capacity.
Slow engine cranking, difficulty starting in cold weather and the need for frequent jump-starts are common symptoms of a weak battery.
Monitoring these voltage patterns helps you replace the battery before it fails.
4. Preventive Electrical System Checks
Preventive maintenance increases reliability and extends the life of parts.
Periodically check the battery terminals for corrosion, which appears as a white or blue powder around the terminals.
Corrosion increases resistance and reduces charging efficiency.
Ensure battery connections are tight and clean.
Check the alternator belt for proper tension and signs of wear, as a loose or slipping belt can reduce charging performance.
Check for damage to wiring connections, specially near heat sources.
It’s also helpful to occasionally use a digital multimeter to confirm the accuracy of the voltmeter.
Simple safety checks combined with regular voltage monitoring provide robust protection against sudden power outages and ensure your vehicle’s charging system remains reliable over time.
Conclusion – How to Install a Voltmeter in a Car
So, its been clear that reliable vehicle performance is not only about the engine power but it also needs really stable electrical supply to function correctly and that’s why monitoring the voltage gives you the information about if there’s any low or high current is flowing.
Because modern vehicles rely heavily on stable voltage to operate fuel systems, ignition components, sensors, infotainment units and safety modules, voltmeters help drivers monitor battery and alternator performance in real time, helping detect minor electrical problems before they escalate into major failures.
A healthy car battery typically maintains approximately 12.4 to 12.7 volts with the engine off, while a properly functioning alternator increases the voltage to approximately 13.5 to 14.7 volts when the engine is running.
By understanding these normal voltage ranges, drivers can quickly identify early warning signs such as a weak battery, a bad alternator, poor wiring connections, or voltage regulator problems.
Proper installation plays a really important role in ensuring the safe and proper operation of a voltmeter.
Regular voltage monitoring helps drivers notice unusual changes that could signal a developing problem.
Now, you can ask related questions in the comment box.
Frequently Asked Questions
Q1. What does a voltmeter do in a car?
Answer: A voltmeter measures the electrical voltage in your car’s battery and charging system. It shows how much electrical power is available and whether the alternator is charging the battery properly. In simple terms, it tells you whether your car’s electrical system is functioning properly. When the engine is off, the voltmeter shows the battery’s resting voltage. When the engine is running, it shows the charging voltage generated by the alternator. By looking at these numbers, you can quickly determine whether your battery is strong, weak, or the alternator is failing.
Q2. What is a normal voltage reading for a car battery?
Answer: A fully charged 12-volt car battery typically reads between 12.4 and 12.7 volts with the engine off. If the reading drops below 12.2 volts, the battery may be weak or slightly discharged. When the engine is running, the alternator charges the battery; The voltage should rise to approximately 13.5 to 14.7 volts. If the reading is below 13 volts while driving, the alternator may not be charging properly. If it exceeds 15 volts, there may be a problem with the voltage regulator, which could damage the battery and electronic components.
Q3. Can I install a voltmeter without professional help?
Answer: Yes, many car owners can install a voltmeter themselves if they have basic tools and some knowledge of car wiring. This process usually involves connecting one wire to the power source, one wire to ground and sometimes one wire to the lighting circuit. However, it is very important to disconnect the battery before starting and use an inline fuse for safety. If you are not comfortable working with electrical systems, it is always safer to seek help from a professional mechanic or auto electrician.
Q4. Where should I connect the positive wire of the voltmeter?
Answer: The positive wire can be connected to an ignition-switched power source or directly to the battery. Connecting to an ignition-switched fuse is often the best option because the voltmeter will only turn on when the key is in the ON position. This will prevent battery drain when the car is parked. If you connect it directly to the battery, you should use an inline fuse near the battery terminal for protection. Fuses typically range from 1 amp to 5 amps, depending on the gauge manufacturer’s instructions.
Q5. Why is grounding important for a voltmeter?
Answer: Grounding completes the electrical circuit and allows the voltmeter to function properly. A poor ground connection can cause inaccurate readings, flashing displays, or the gauge not turning on at all. The ground wire should be connected to a clean, unpainted metal surface on the vehicle’s body or chassis. Before connecting the ground wire, it’s important to remove any paint, rust, or dirt to ensure a strong and stable connection. A strong ground ensures accurate voltage measurement.
Q6. Will a voltmeter drain my car’s battery?
Answer: If the voltmeter is constantly connected to battery power and left on all the time, it can slowly drain the battery over several days or weeks. Therefore, many installers choose ignition-switched power sources so that the gauge automatically turns off when the car is turned off. Digital voltmeters use very little power, but if the car is not driven regularly, even a small amount of power consumption can impact the battery.
Q7. How can I tell if my alternator is failing using a voltmeter?
Answer: If the engine is running and the voltmeter shows less than 13 volts, the alternator may not be charging properly. You may also notice dim headlights, weak power windows, or a battery warning light on the dashboard. If the voltage reading fluctuates rapidly, it could be a sign of a bad voltage regulator. A consistent reading between 13.5 and 14.7 volts usually means the alternator is working properly.
Q8. What size wire should I use to connect the voltmeter?
Answer: Most voltmeters draw very little current, so a small wire like 18-gauge or 16-gauge is usually sufficient. Using a wire that is too thin can cause voltage drops or overheating, while a wire that is too thick can be difficult to use in tight spaces. For optimal performance and safety, always follow the advice of the gauge manufacturer.
Q9. Can a voltmeter improve vehicle reliability?
Answer: Yes, a voltmeter helps you detect electrical problems early. By observing unusual voltage readings, you can replace a weak battery before it breaks down or repair an alternator before it becomes a problem. Many drivers discover electrical problems when their car won’t start. Voltmeters provide early warning signals, helping to avoid unexpected failures and costly repairs.
References:
[1] Automotive Lead-Acid Battery State-of-Health Monitoring System
https://vtechworks.lib.vt.edu/items/454e00a3-bfd0-4d93-bd44-46ac0dca5c17

Guys, I’m a car audio enthusiast and customization expert and I love clear sound and clean installation. Plus, I have spent years helping people build their dream audio setups. And whenever I’m working on cars, I probably listen to music and thinks about the next big upgrade.