Written By: Don Dodi
Fact Checked By: Kristen Brown
Reviewed By: Diego Rosenberg
Basically, the purpose of the child car seat it to protect a child properly, but it only works when it is installed correctly and used as intended to be.
And, without a doubt having a child car seat is really important, in terms to safety consideration, as it is literally the safety device a parent uses to protect a child while travelling in a vehicle.
Not only this, there’s research from the traffic safety organizations from all around the world that consistently shows that when you correctly uses the child restraints then it significantly reduces the risk of serious injury and death during the car crashes.
Just understand that: proper installation is not simply about placing the seat in the vehicle: as it involves choosing the right kind of seat for your child’s age, weight and height, also you need to secure it tightly by using the correct installation method, also you have to adjust the harness accordingly and ensure that every safety feature works as intended to do.
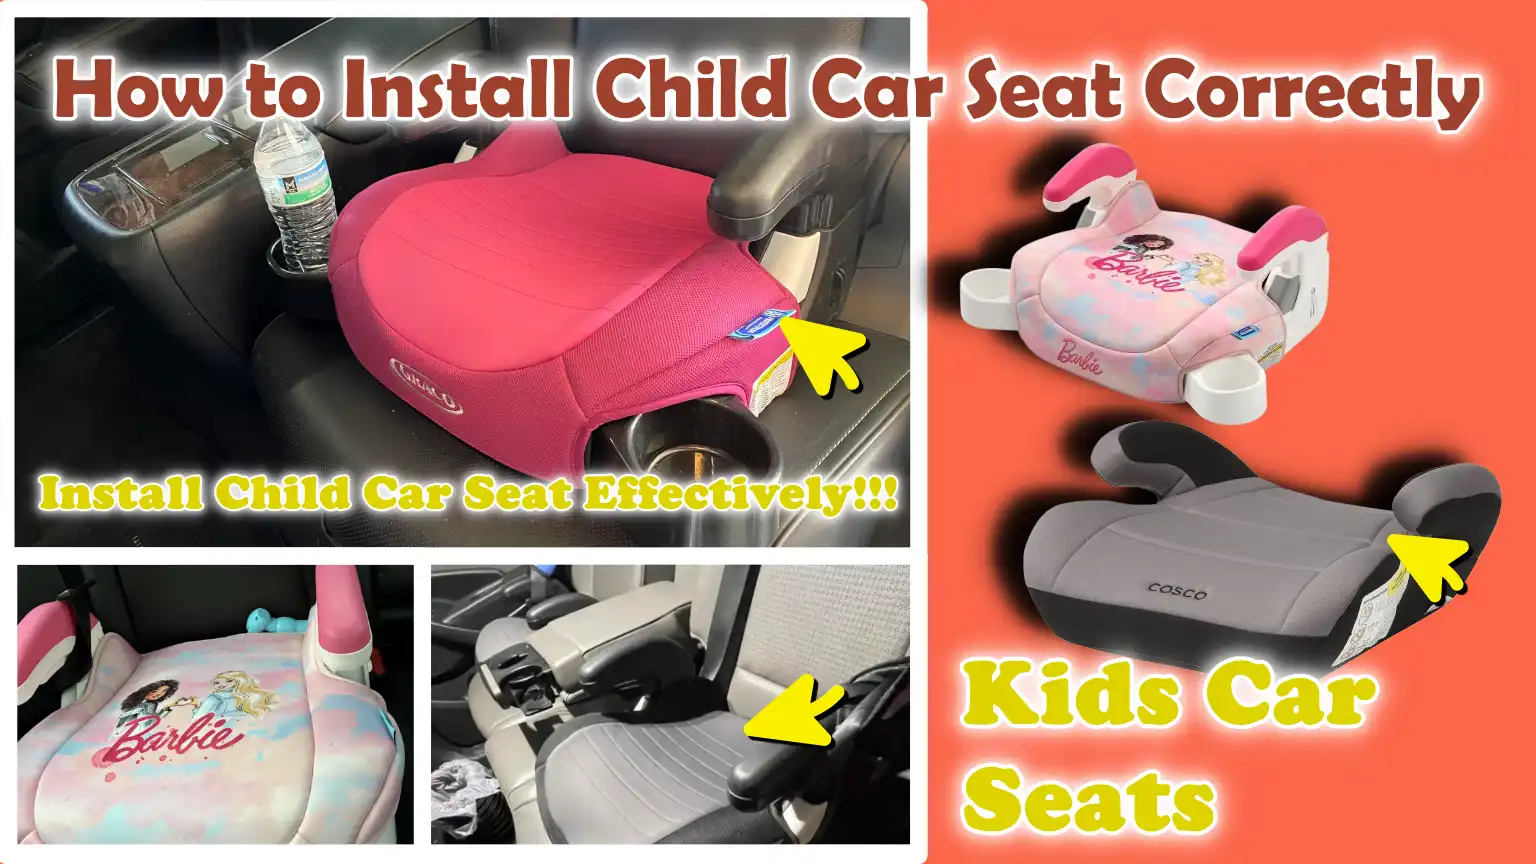
So, that’s all you’ll learn in this guide about How to Install Child Car Seat Correctly so that you can easily and safely transport a newborn baby, toddler or older child as well.
How to Choose the Right Child Car Seat
1. Understanding Child Car Seat Categories
Choosing the right child car seat begins with understanding the different categories available.
Each type of seat is designed for a specific stage of a child’s development, providing safety tailored to their size and growth.
Using the correct seat is crucial, as a child’s safety needs evolve as they grow.
A properly selected car seat helps minimize the risk of injury during sudden stops, sharp turns, or vehicle collisions.
Familiarizing yourself with the main categories of car seats makes it easier to choose the safest option for your child.
Rear-Facing Car Seats
Rear-facing car seats are designed for infants and toddlers and are considered the safest option for children in this age group.
In the event of a collision, these seats support the child’s head, neck and spine, distributing the force of the impact across the entire back surface of the seat.
Rear-facing protection is particularly vital because young children have delicate neck muscles and their heads are relatively large in proportion to their bodies.
Safety experts recommend keeping children rear-facing for as long as possible, provided they remain within the seat’s height and weight limits, to ensure they receive maximum protection.
Forward-Facing Car Seats
Forward-facing car seats are intended for children who have outgrown the rear-facing limits of their previous seats.
These seats feature a built-in harness system that securely restrains the child and helps distribute the force of a collision across the body’s stronger parts.
Many forward-facing seats also include a “top tether,” which helps prevent the head from pitching forward during a collision.
Properly adjusting the harness and correctly installing the seat are essential to ensure that the seat provides the level of safety for which it was designed.
Booster Seats
Booster seats are designed for older children who have outgrown forward-facing harness seats but are not yet large enough for the vehicle’s standard seat belt to fit them properly.
A booster seat elevates the child slightly so that the lap and shoulder belts rest in the correct position across their body.
This reduces the risk of injury to the abdomen, neck and chest during a collision.
Children should continue to use a booster seat until the vehicle’s seat belt fits them correctly without any additional support.
2. Choosing a Seat Based on Age
When selecting a child car seat, age is one of the primary factors parents consider.
Infants typically require rear-facing seats; toddlers often remain in rear-facing seats or transition to forward-facing seats; and older children typically move on to booster seats.
However, age should be used merely as a general guideline, as children grow at different rates.
The safest approach is to follow the car seat manufacturer’s recommendations while also taking into account the child’s weight and height.
3. Choosing a Seat Based on Weight
Weight is one of the most critical factors in determining whether a child can safely use a specific car seat.
Each seat’s minimum and maximum weight limits are established through rigorous safety testing.
Exceeding these limits can compromise the seat’s ability to protect the child in the event of an accident.
Parents should regularly monitor their child’s weight and compare it against the limits specified in the car seat’s guidelines to ensure that the seat remains appropriate and safe.
4. Choosing a Seat Based on Height
When selecting a child car seat, height is just as important as weight.
A child may reach the seat’s height limit before reaching its weight limit, making it necessary to transition them to the next stage of car seat.
Proper height positioning ensures that the harness straps, headrest and other safety components are correctly aligned.
Regularly checking your child’s height helps ensure that they continue to receive the appropriate level of safety protection as they grow.
5. Checking for Safety Certifications
Before purchasing a child car seat, it is essential to verify that it meets all necessary safety standards.
Safety certifications indicate that the seat has undergone rigorous testing to evaluate its performance in various types of accidents.
Certified seats are designed to demonstrate structural integrity, effective safety mechanisms and compliance with strict requirements for child safety.
Looking for approved safety labels and manufacturer information can help parents choose a reliable and trustworthy product.
6. Checking Compatibility with Your Vehicle
Not every child car seat fits perfectly in every vehicle; therefore, compatibility between the seat and the vehicle is a crucial consideration.
Factors such as the size of the seat, the contours of the vehicle’s seat, the location of anchor points and available space can all influence how the seat is installed.
A car seat that fits well in one vehicle may not necessarily fit well in another.
Just Read the Manual Before Installation
Reading the manual before installing a child car seat is the most critical step in the entire process, yet it is frequently overlooked.
Many parents assume that installing a car seat is a simple task; however, different vehicles and car seat models may have specific requirements that directly impact safety.
Child car seats are designed and tested according to precise specifications and adhering to these instructions ensures that the seat functions correctly in the event of an accident.
Spending a few minutes carefully reading both manuals helps avoid common installation errors, enhances the stability of the seat and provides the assurance that the child is traveling with full protection.
Understanding the information provided by the manufacturer also helps parents correctly utilize essential safety features and avoid actions that could compromise the effectiveness of the car seat.
1. Why Both Manuals Are Essential
Many people focus solely on the child car seat manual, overlooking the fact that the vehicle owner’s manual is equally important.
The car seat manual details how the seat should be installed, adjusted and used, whereas the vehicle manual specifies where and how a child restraint system can be safely installed within that specific vehicle to ensure the child’s safety.
As every vehicle is constructed differently, the location of anchor points, seat belt systems and seating positions can vary significantly.
Consulting both manuals simultaneously ensures that the installation instructions provided by both the car seat manufacturer and the vehicle manufacturer are followed correctly.
This combined approach minimizes confusion and facilitates a secure installation that satisfies the requirements of both components.
2. Understanding Vehicle-Specific Instructions
Vehicle manufacturers provide essential information regarding child seat installation, specifically for child safety purposes, that is typically not found in the car seat manual itself.
These instructions often specify which seating positions are suitable for child car seats, where the lower anchors and tether anchors are located and how the vehicle’s seat belts should be utilized when installing a child safety seat.
Some vehicles may impose restrictions on certain seating positions or provide specific directives regarding the use of airbags and anchors.
Understanding these vehicle-specific details helps parents select the safest location for the car seat and ensures that installation procedures are followed correctly.
Disregarding these instructions can result in improper seat installation and compromise the level of protection provided in the event of a collision.
3. Understanding Child Seat-Specific Instructions
Every child car seat features a unique design, possesses distinct features and has specific installation requirements.
The car seat manual contains vital information, such as how to adjust the harness, recline settings, weight and height limits and approved installation methods.
It also outlines when a child should transition from a rear seat to a front seat, or from a harnessed seat to a booster seat.
As different car seat models function in different ways, relying on general information rather than the manufacturer’s specific instructions increases the risk of making errors.
Carefully reading the child seat manual enables parents to understand the proper usage of every safety feature, thereby ensuring that the seat is utilized exactly as intended during the testing and certification processes.
4. Identifying Essential Safety Warnings
Car seat and vehicle manuals contain critical safety warnings designed to prevent serious errors.
These warnings highlight actions that should never be taken such as: installing the seat incorrectly, placing a rear-facing seat directly in front of an active airbag, or using the seat beyond its specified weight and height limits.
Many of these warnings are grounded in real-world crash tests and extensive safety research.
By paying close attention to these guidelines, parents can avoid practices that could heighten the risk of injury during an accident.
Understanding these warnings before installing the seat can be invaluable in ensuring the child’s complete safety.
5. Locating Installation Diagrams and Labels
Most child car seats feature diagrams, labels and instructional stickers that provide immediate visual guidance during installation.
These diagrams often illustrate the correct method for routing the seatbelt, the location of anchor points, proper harness positioning and indicators for the seat’s recline angle.
The vehicle’s owner’s manual may contain similar illustrations, identifying tether anchor points and approved seating positions for installation.
These visuals can simplify the installation process and help parents verify that every step is being executed correctly.
Take a moment to locate and understand these diagrams and labels before you begin the installation.
How to Prepare Your Vehicle for Installation
Preparing your vehicle before installing a child car seat is a crucial step that directly impacts safety and the quality of the installation.
Many difficulties associated with installation arise not because of the car seat itself, but because the vehicle was not properly prepared beforehand.
Taking the time to inspect the seating area, remove potential obstructions and understand your vehicle’s safety features can make the installation process smoother and more effective.
A properly prepared vehicle facilitates the secure fitting of the child car seat, minimizes unnecessary movement and ensures that all safety systems function correctly.
Before installing any child restraint system, parents should carefully assess the vehicle’s environment to ensure it provides the safest foundation for the car seat.
1. Choosing the Safest Seating Position
Selecting the correct seating position is one of the most critical decisions when installing a child car seat.
In most vehicles, the rear seat is considered the safest location for children, as it keeps them away from the impact of frontal collisions and the force of the front airbags.
Many safety experts recommend the center rear seat, provided a secure installation is possible there, as it is generally the furthest removed from the potential impact of side-impact collisions.
However, the safest position is ultimately the one where the car seat can be installed correctly, in full compliance with the instructions provided by both the vehicle manufacturer and the car seat manufacturer.
Parents should consult their vehicle’s owner’s manual to identify approved seating positions and to ensure that the chosen location allows for a firm and secure installation of the seat.
2. Removing Unnecessary Items from the Vehicle
Before installing a child car seat, it is essential to remove any unnecessary items from the seating area that could obstruct the installation process or pose a hazard during a collision.
Loose objects such as: toys, bags, books, electronic devices and other personal belongings, as it can slide at high speeds during a sudden stop or collision, potentially causing injury.
Items placed underneath or behind a child’s car seat can also compromise the seat’s stability and prevent it from seating properly against the vehicle’s seat.
In a clean and clutter-free space, a child’s car seat fits snugly against the vehicle’s seat, helping to ensure that all safety features function correctly.
3. Checking the Condition and Stability of the Seat
The condition of the vehicle’s seat plays a crucial role in the proper installation of a child’s car seat.
Before beginning the installation process, parents should inspect the seat for any damage, excessive wear and tear, loose cushioning, broken parts, or other issues that could compromise its stability.
The vehicle’s seat must be sturdy, securely mounted and capable of supporting the child’s car seat without excessive movement.
It is also essential to ensure that the seatback is securely locked in its upright position.
A stable vehicle seat provides a solid foundation for the child’s car seat, helping to ensure its proper performance during both normal driving conditions and accidents.
4. Locating Anchor Points and Seatbelt Systems
Modern vehicles are equipped with specific anchor points and seatbelt systems designed to facilitate the secure installation of child car seats.
Prior to installing the seat, parents should locate the lower anchors, upper tether anchors and seatbelts that can be utilized for the installation process.
These components are often situated in varying locations depending on the vehicle model and the specific seating position being used.
Before beginning the process, understanding the location of these systems can save time and minimize errors during installation.
The vehicle owner’s manual typically contains detailed diagrams and information that assist in identifying anchor points and approved installation methods.
Familiarity with these systems helps ensure that the child car seat is installed correctly and in accordance with the manufacturer’s recommendations.
5. Ensuring Adequate Space for Installation
Having sufficient space is crucial for properly installing a child car seat and ensuring long-term comfort.
Some car seats, particularly rear-facing models, require ample space to achieve the correct recline angle and provide adequate support for the child’s head and neck.
If the designated seating area is too confined, it may be difficult to properly tighten the seat or adjust the harness as needed.
Parents should verify that the chosen seating position provides enough room for the car seat, while also ensuring that other passengers can sit comfortably and safely.
Adequate space also prevents the car seat from exerting pressure on the vehicle’s seats, doors, or other interior components, pressure that could potentially compromise the vehicle’s safety integrity.
Now, Let’s Understand About the Car Seat Installation Methods
Properly installing a child’s car seat begins with understanding the approved installation methods available in your vehicle.
Modern child car seats are typically designed to be installed using either the LATCH system or the vehicle’s seat belt system.
Both methods are safety-tested and, when used correctly, can provide excellent protection in the event of an accident.
The most critical factor is not which method is used, but rather ensuring that the seat is installed correctly, exactly as specified in the instructions provided by both the vehicle manufacturer and the car seat manufacturer.
Understanding how each system works helps parents choose the most appropriate installation method, avoid common mistakes and ensure that the child’s car seat remains secure during daily driving and in any emergency situation.
1. Installing the Seat Using the LATCH System
The LATCH system was developed to make installing child car seats easier and more consistent by reducing reliance on the vehicle’s seat belts.
LATCH stands for “Lower Anchors and Tethers for Children,” and it is a feature found in most modern vehicles.
This system allows the child car seat to be connected directly to anchors that are built into the vehicle’s interior structure.
Many parents find installing the seat using the LATCH system easier because it provides clearly designated attachment points, which simplifies the process of securely tightening the seat.
However, correctly attaching and tightening the seat remains absolutely crucial; even when using the LATCH system, an improperly installed seat will not be able to provide full protection.
What is the LATCH System?
The LATCH system is a standardized method for installing child safety seats, designed to enhance both the safety and ease of use of car seats.
This system consists of lower anchors located at the base of the vehicle seat and upper tether anchors situated behind the seating area.
These anchors are specifically engineered to withstand the forces generated during a collision and to maintain a robust connection between the vehicle and the child safety seat.
The LATCH system was introduced to minimize installation errors and to establish a more reliable method for securing child car seats.
Although the LATCH system can simplify the installation process, parents must strictly adhere to the weight limits and installation instructions specified by the seat manufacturer.
Lower Anchors
Lower anchors are metal attachment points typically located at the junction where the vehicle seat cushion meets the seatback.
Child car seats equipped with connectors designed for lower anchors can be attached directly to these points, rather than utilizing the vehicle’s seatbelt.
Once connected, the seat straps should be tightened until there is minimal movement in the car seat when tested along the seatbelt path.
Lower anchors are designed to create a secure link between the vehicle and the child seat, helping the seat remain stable during both normal driving conditions and collisions.
Parents should always verify the maximum weight limit for using the lower anchors, as exceeding this limit may necessitate switching to the seatbelt installation method.
Top Tether Anchors
The top tether anchor is a crucial safety feature primarily used in conjunction with forward-facing child car seats.
A tether strap extends from the upper portion of the child seat and attaches to a specific anchor point located within the vehicle.
In the event of a collision, the tether helps minimize the forward movement of the car seat and prevents the child’s head from thrusting too far forward.
This additional safety measure can significantly enhance safety and reduce the risk of head and neck injuries.
Many safety experts consider the top tether to be one of the most critical components for installing forward-facing car seats and it should always be used whenever recommended by the manufacturer.
2. Installing the Seat Using the Vehicle’s Seatbelt
Installing the seat using the vehicle’s seatbelt is another approved and highly effective method for securing a child car seat.
In many instances, a properly installed seatbelt is just as safe as a properly installed LATCH system.
The seatbelt is routed through a designated path built into the child car seat and is then locked in place according to the vehicle manufacturer’s instructions.
As every vehicle is equipped with seatbelts, this installation method is available in almost all situations; it can be particularly useful when lower anchors are unavailable or when the prescribed weight limit for LATCH installation has been exceeded.
To ensure that the seat is securely fastened, it is crucial to properly tighten and lock the seatbelt.
When Is It Appropriate to Install the Seat Using the Seatbelt?
Using a seat belt is often the best option when a child’s weight exceeds the maximum limit specified for the use of lower anchors, or when lower anchors are not available in the chosen seating position.
It is also commonly used when installing certain booster seats or larger child restraint systems.
In some vehicles, installing a seat using the seat belt may result in a tighter and more secure fit compared to using the LATCH system.
Parents should not assume that one method is inherently safer than the other in every situation.
The safest method is the one that ensures the seat is installed securely and complies with all manufacturer instructions and safety requirements.
Locking Systems and Seat Belt Requirements
Most vehicle seat belts are equipped with a locking system, which is essential for properly installing a child car seat.
These systems prevent the seat belt from loosening during normal driving and help keep the car seat securely anchored to the vehicle.
Depending on the vehicle, the locking system may be integrated directly into the seat belt itself, or it may require the use of a specific locking feature built into the child car seat.
It is crucial to understand how the vehicle’s seat belt locks; if the seat belt does not lock correctly, the seat may shift excessively, potentially compromising safety levels in the event of a collision.
Before installing a seat, parents should always consult the vehicle’s owner’s manual to determine the correct method for locking the seat belt.
3. Why You Should Not Use Both Systems Simultaneously Unless Approved
Many parents believe that using both the LATCH system and the vehicle’s seat belt simultaneously will result in a more secure installation; however, this practice is generally not recommended.
Child car seats are tested and certified based on specific installation methods; therefore, using both systems simultaneously can sometimes place excessive stress on the seat or compromise its ability to absorb the forces generated during a collision.
Unless the car seat manufacturer explicitly states that both methods may be used concurrently, parents should choose to install the seat using either the LATCH system or the vehicle’s seatbelt system, but not both.
Installing the seat according to the approved method ensures that, in the event of a collision, the child restraint system functions exactly as it was designed to, thereby providing the highest possible level of safety.
How to Properly Install a Rear-Facing Child Car Seat
A rear-facing child car seat offers the highest level of protection for infants and toddlers, as it supports their head, neck and spine in the event of a collision.
In a frontal collision, one of the most common and severe types of accidents, a rear-facing seat distributes the force of the impact across the child’s entire back, rather than concentrating it on fragile parts of the body.
Proper installation of the seat is critical; no matter how safely the seat is designed, if it is installed incorrectly, it will fail to provide the protection for which it was intended.
Taking a little time to correctly position the seat, set the proper recline angle, secure it firmly and finally perform a safety check can significantly enhance the safety of a child traveling in the vehicle.
Carefully following every step of the installation process ensures that the car seat remains stable and effective during both daily commutes and emergency situations.
1. Positioning the Car Seat Correctly
The first step in installing a rear-facing child car seat is to place it in an approved location inside the vehicle.
In most cases, the back seat is the safest location, as it keeps children away from the front airbags and provides greater distance from the force of a frontal collision.
The car seat must be placed squarely on the vehicle’s seat; it should not be tilted or angled to either side.
It is essential to ensure that the base of the car seat sits flush against the vehicle’s seat and that no obstructions prevent it from seating correctly in its designated spot.
Placing the seat in the correct position establishes a solid foundation for the remainder of the installation process, ensuring that, in the event of a collision, the seat functions exactly as it was designed to do.
2. Setting the Seat Recline Angle
For rear-facing car seats, the recline angle is critical for both safety and comfort.
Newborns and young children lack significant neck strength; therefore, if the seat is positioned too upright, their heads may slump forward.
This forward head slump can partially obstruct their airway, making it difficult for them to breathe.
Most car seats feature built-in recline indicators, level lines, or angle markers to assist parents in setting the seat to the correct angle.
Adhering to the recline angle recommended by the car seat manufacturer ensures that the child’s airway remains open while simultaneously allowing the seat to effectively absorb the impact forces generated during a collision.
Checking the recline angle every time the seat is installed is an excellent safety practice.
3. Connecting the Lower Anchors or Seatbelt
Once the car seat has been placed in the correct position, it is essential to securely fasten it to the vehicle.
To do this, you may utilize either the lower anchors of the LATCH system or the vehicle’s seatbelt.
Regardless of the installation method you choose, you must strictly adhere to the instructions provided by both the car seat manufacturer and the vehicle manufacturer.
The attachment straps or seatbelt must be routed exclusively through the designated “rear-facing belt path,” as using an incorrect path could compromise safety.
Proper installation ensures that the seat remains firmly anchored to the vehicle’s frame, thereby preventing excessive movement of the seat during sudden stops or collisions.
4. Tightening the Installation System
Once the car seat is positioned correctly, the installation system must be tightened until the seat is firmly secured against the vehicle’s seat.
Whether you are utilizing lower anchors or the seatbelt, it is crucial to completely eliminate any slack, as a loose seat may compromise its ability to provide protection during a collision.
Applying slight downward pressure on the car seat while tightening often results in an even more secure installation.
The objective is to establish a robust connection between the child safety seat and the vehicle, ensuring that the forces generated during a collision are effectively absorbed.
A properly installed seat is generally safer and provides greater stability throughout the entire journey.
5. Checking for Excessive Movement
Once the installation system has been tightened, you should check the car seat for any movement.
You should grasp the seat at the belt path and gently push it from side to side, as well as forward and backward.
A properly installed car seat should not move more than approximately one inch in any direction at the belt path.
If the seat moves excessively, it may indicate that further tightening or adjustment is required.
Performing this simple check is the most effective way to ensure that the seat is securely installed and ready for use.
6. Ensuring Proper Head and Neck Support
Rear-facing car seats are specifically designed to provide essential support to the heads and necks of young children.
Proper support helps safeguard these delicate areas during normal driving conditions and, most importantly, in the event of a collision.
The car seat must be adjusted correctly, in strict adherence to the manufacturer’s instructions, to ensure that the child’s body remains in the proper position within the seat.
For children seated in a rear-facing position, the harness straps should be positioned at or slightly below shoulder level to ensure that the child remains securely fastened to the seat.
Adequate support for the head and neck enhances comfort, maintains proper seating posture and ensures overall safety throughout the entire journey.
7. Checking for Secure Installation
Before placing the child in the seat, it is essential to perform a final check to ensure that every aspect of the installation is secure.
Parents should verify that the seat’s recline angle is correct, the attachment system is firm, the seat does not move excessively and all components are properly connected.
It is also beneficial to inspect the seat periodically, as daily use can sometimes cause straps to loosen or the seat’s position to shift over time.
Taking a few moments to perform these final checks ensures that whenever the vehicle is on the road, the rear-facing car seat is fully prepared to provide the child with the highest level of safety.
How to Properly Install a Forward-Facing Child Car Seat
Forward-facing child car seats are designed for children whose weight or height has exceeded the limits of their previous rear-facing seat, but who are still too small to safely use a booster seat.
These seats utilize a harness system to securely restrain the child and help distribute the forces generated during a crash across the body’s strongest parts such as: the shoulders, chest and hips.
Proper installation is paramount, as a loose or incorrectly installed seat can shift excessively during a collision, thereby compromising the very safety for which it was designed.
A correctly installed forward-facing car seat helps limit a child’s movement during sudden stops and accidents, thereby reducing the risk of serious injury.
Following the correct installation procedure and conducting regular safety checks can help ensure that the seat functions effectively every time the vehicle is driven.
1. Choosing the Right Seating Position
Selecting the correct seating position is the first step when installing a forward-facing child car seat.
The back seat is generally considered the safest location, as it keeps children away from front airbags and major impact zones.
Some vehicles offer multiple approved seating positions, while others may have restrictions based on anchor locations or specific vehicle design features.
Parents should consult both the vehicle owner’s manual and the child car seat manual to determine the safest and most appropriate location.
The chosen seating position should allow the car seat to remain level and stable, while also ensuring easy access to all necessary anchors or seat belt attachment points.
2. Connecting the Lower Anchors or Seat Belt
Once a seating position has been selected, the car seat must be secured using either the LATCH system’s lower anchors or the vehicle’s seat belt.
Both methods are considered safe, provided they are used correctly and in accordance with the manufacturer’s instructions.
The connecting strap or seat belt must be routed through the specific forward-facing belt path indicated on the car seat.
Using the incorrect belt path can compromise the seat’s performance during an accident.
Once the connection is established, any excess slack should be removed to create a firm connection between the child seat and the vehicle.
A secure connection helps keep the seat stable and minimizes its movement during sudden jolts.
3. Connecting and Tightening the Top Tether
The top tether is one of the most critical safety features of a forward-facing car seat.
This strap connects the upper portion of the child seat to a specific anchor point located within the vehicle.
In the event of a collision, this anchor helps prevent the seat from shifting forward and limits excessive forward movement of the child’s head.
Studies have shown that the correct use of this anchor enhances the seat’s safety capabilities and significantly reduces the risk of head injuries.
After attaching the anchor to the correct point, it is essential to tighten it firmly in accordance with the manufacturer’s instructions.
A properly tightened anchor provides greater stability to the seat and offers an additional layer of protection during a collision.
4. Ensuring the Correct Seat Angle
Although forward-facing car seats are generally more upright than rear-facing seats, maintaining the correct seat angle remains essential.
Most car seats feature indicators or guides that assist parents in positioning the seat correctly.
If the seat angle is too upright or too reclined, it can adversely affect both the child’s comfort and safety.
The correct seat angle ensures that the harness functions effectively, providing proper support to the child’s body during normal travel as well as in the event of a collision.
Checking the seat angle during installation ensures that the restraint system operates exactly as intended and provides appropriate support to the child.
5. Checking for Stability
After installing and tightening the seat, its stability must be checked to ensure that it is securely fastened.
Grasp the car seat near the belt path and gently push it from side to side, as well as from front to back.
If the seat is installed correctly, it should not move more than one inch in any direction when checked at the belt path.
If the seat moves excessively, it may indicate that the seatbelt, lower anchors, or anchor straps need to be tightened or adjusted further.
Performing this simple check helps identify installation issues before placing the child in the seat and is considered an essential part of the car seat installation process.
6. Confirming Secure Installation
The final step is to carefully inspect the entire installation to ensure that every component is secure and functioning correctly.
Parents should verify that the lower anchors or seat belts are properly tightened, the top tether is connected and secure, the seat angle is correct and the car seat passes the movement test.
It is also essential to ensure that no straps are twisted and that all attachment points are firmly connected.
Regular inspections are recommended, as daily use can cause certain components to loosen over time.
Confirming a secure installation before every trip ensures that the forward-facing child car seat provides the highest level of safety whenever the vehicle is on the road.
How to Properly Install a Booster Seat
A booster seat is an essential safety device designed for children who have outgrown their forward-facing, harnessed car seats but are not yet large enough for an adult seat belt to fit them correctly.
Many parents mistakenly assume that once a child transitions out of a harnessed seat, a standard adult seat belt alone is sufficient.
However, adult seat belts are designed to fit adult body dimensions and may not provide adequate protection for smaller children.
A booster seat elevates the child slightly, positioning them so that the vehicle’s lap and shoulder belts fit correctly across the strongest parts of their body.
Proper use of a booster seat reduces the risk of injury to the head, neck, chest, abdomen and spine during an accident.
It is crucial to install it correctly and position the belts properly; if a booster seat is used incorrectly, even a high-quality seat will fail to provide full protection.
1. Assessing a Child’s Readiness for a Booster Seat
Before placing a child in a booster seat, it is essential to ensure that they are physically ready for this transition.
Booster seats are generally intended for children whose height or weight has exceeded the limits of their forward-facing, harnessed seat and who are capable of sitting properly, without slouching, shifting around, or unbuckling the seat belt, for the entire duration of the trip.
A child who is not yet mature enough to sit correctly may not receive the full safety benefits provided by a booster seat.
Before making this transition, parents should carefully review the manufacturer’s instructions regarding age, height and weight limits.
Transitioning to a booster seat too early can increase the risk of injury, as the vehicle’s seatbelt system may not yet be able to provide adequate protection for the child.
2. Positioning the Booster Seat Correctly
Correctly positioning the booster seat is a crucial step in ensuring safety.
The booster seat should be placed squarely and levelly on the vehicle’s seat and situated in a location where both the lap and shoulder belts can be utilized effectively.
During use, the seat should neither tilt, wobble, nor shift significantly from its position.
Many booster seats are designed to function optimally on the vehicle’s rear seats, where children are generally safer than in the front seat.
Ensuring that the booster seat rests firmly and evenly on the vehicle’s seat helps maintain proper belt alignment and provides support to the child throughout the entire journey.
3. Correctly Positioning the Lap Belt
The lap belt plays a vital role in a child’s safety during an accident and positioning it correctly is essential when using a booster seat.
Rather than passing over the abdomen or navel, the belt should rest across the upper thighs and below the hips.
When the belt is positioned in this manner, the impact forces generated during an accident are distributed across the body’s strong skeletal structures, specifically the pelvic bones, which are better equipped to withstand such forces.
If the lap belt is positioned too high, the risk of abdominal injury during a collision increases.
Booster seats are specifically designed to help keep the belt in this safe position; this is the primary reason why booster seats are recommended for children who are not yet large enough to use an adult seatbelt on its own.
4. Positioning the Shoulder Belt Correctly
The shoulder belt should pass across the center of the child’s chest and rest comfortably on the shoulder.
It should never be positioned behind the back, under the arm, or near the neck.
If the shoulder belt is positioned incorrectly, the level of protection provided during an accident is significantly reduced and the risk of injury increases.
Many booster seats feature belt guides that help keep the shoulder belt in the correct position.
When the belt is positioned correctly, it distributes the force of a collision evenly across the chest and shoulder, preventing the child from being thrown forward during a sudden stop or impact.
As the child grows, regularly checking the positioning of the shoulder belt helps ensure their continued safety.
5. Check for Proper Belt Fit on the Child’s Body
The primary purpose of a booster seat is to improve the fit of the vehicle’s seat belt system; therefore, it is crucial to ensure that the entire belt system fits the child’s body correctly.
The lap belt should pass over the hips, while the shoulder belt should pass over the chest and shoulder, avoiding contact with the neck or face.
A properly fitted belt helps keep the child securely in place during an accident, thereby reducing the likelihood of serious injury.
Parents should check the belt’s fit every time the booster seat is used, as factors such as clothing, the child’s physical growth and their sitting posture can sometimes alter how the belt rests on the body.
6. Checking Sitting Posture
When it comes to booster seat safety, proper seating posture is often overlooked.
Even if the seatbelt is correctly positioned at the start of a journey, safety can be compromised if the child slouches, leans to one side, tucks the shoulder belt behind their back, or fails to sit properly.
Children using booster seats must sit completely upright; their backs should rest firmly against the vehicle’s seat and their legs should be positioned comfortably to minimize excessive movement.
Proper seating posture ensures that the seatbelt remains correctly positioned throughout the entire journey, thereby guaranteeing that the safety system functions exactly as intended in the event of an accident.
Parents should periodically remind their children about proper seating habits, as correct posture plays a crucial role in ensuring the full safety protection provided by a booster seat.
Read More:
How to Properly Secure Your Child in the Car Seat
Installing a child car seat correctly is just one part of the safety process.
Whenever the vehicle is in motion, the child must also be properly secured within the seat itself, every single time.
If the harness is loose, mispositioned, or used incorrectly, even a perfectly installed car seat cannot provide complete protection.
During a collision, the forces involved can be immense, even if the vehicle is traveling at a low speed, making it absolutely critical to tighten the harness properly to minimize the risk of injury.
The harness system is designed to securely contain the child within the protective shell of the car seat and to distribute the impact forces across the strongest parts of the child’s body.
Taking a few extra moments to check the harness fit, the position of the chest clip and the child’s clothing can significantly enhance the level of safety provided to the child during the journey.
1. Properly Adjusting the Harness Height
The height of the harness plays a crucial role in how effectively a child car seat protects a child during a collision.
The correct positioning of the harness depends on whether the seat is being used in rear-facing or forward-facing mode.
For children seated in a rear-facing position, the harness straps should emerge from the slots located at or slightly below shoulder level.
For children seated in a forward-facing position, the straps should emerge from the slots located at or slightly above shoulder level.
Correct harness positioning helps keep the child’s body aligned within the seat and minimizes excessive body movement during a collision.
As children grow rapidly, parents must regularly check the harness height and adjust it as needed to ensure a proper fit and consistent safety.
2. Tightening the Harness Straps
The harness straps should be tightened sufficiently to secure the child safely, yet without causing any discomfort.
Loose straps can allow for excessive movement during a collision, thereby increasing the risk of injury and compromising the effectiveness of the car seat.
After seating the child, parents should pull the harness adjustment strap until the harness fits snugly against the child’s body.
The straps should be taut around the shoulders, chest and hips, with no visible slack anywhere.
A properly tightened harness helps keep the child correctly positioned within the car seat’s protective shell, ensuring that the safety system functions exactly as it was designed to during a collision.
3. Performing the Pinch Test
The Pinch Test is a simple yet highly effective method for determining whether the harness is sufficiently tight.
After tightening the harness, parents should attempt to pinch the harness strap vertically (from top to bottom) near the child’s shoulder.
If they are able to gather and pinch a significant amount of the harness fabric between their fingers, the harness is still too loose and requires further tightening.
If no excess fabric can be gathered, the harness is generally considered to be sufficiently tight.
Many child safety experts recommend this quick safety check, as it provides an easy way to verify the correct harness tension and helps prevent one of the most common errors associated with car seat usage.
4. Positioning the Chest Clip Correctly
The chest clip is designed to help keep the harness straps properly positioned on the child’s shoulders.
To be most effective, the chest clip should be positioned in the center of the chest, at the level of the armpits.
If the clip is positioned too low, the harness straps may slip off the shoulders during an accident.
Conversely, if it is positioned too high, it may cause discomfort to the child and will not function correctly.
The purpose of the chest clip is not to hold the child in the seat independently; rather, it helps maintain the harness in the correct position, ensuring that the safety system provides continuous protection throughout the entire journey.
5. Wearing Appropriate Clothing for Safe Harness Use
The type of clothing a child wears can significantly impact how the harness fits and functions.
Children should wear comfortable clothing that allows the harness straps to rest directly against the body without any excessive slack.
Thin-layered clothing generally provides the best fit, as it allows the harness to be tightened securely.
Wearing appropriate clothing helps parents achieve a secure harness fit and minimizes the risk of “hidden slack”, looseness that could compromise safety.
It is always a good practice to check the harness tension after dressing the child, as different clothing materials can affect the fit of the safety system.
6. Avoiding Bulky Coats and Accessories
When placing a child in a car seat, one should avoid dressing them in heavy coats, thick jackets, padded snowsuits, or bulky accessories.
These items create excessive space between the child’s body and the harness; consequently, while the straps may appear tight, they are actually dangerously loose.
In the event of an accident, these heavy garments compress under pressure, resulting in a dangerous slackness in the harness that allows the child too much room to move around.
Instead of dressing the child in heavy clothing underneath the harness, parents should first securely fasten the child into the harness and, if additional warmth is needed, place a blanket or coat over the harness.
Avoiding heavy clothing and unnecessary accessories ensures that the harness fits correctly, thereby providing maximum safety for the child during travel.
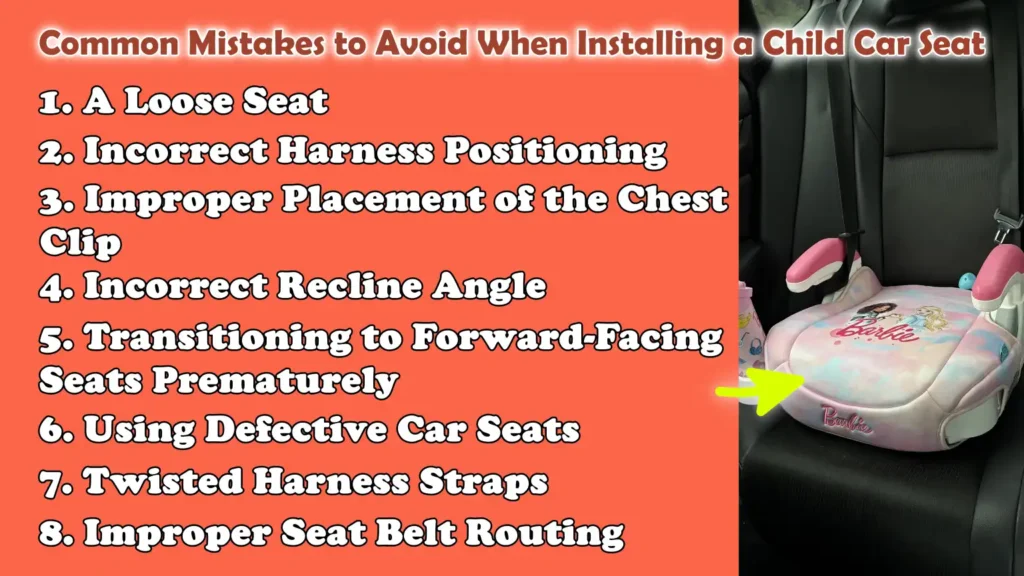
Common Mistakes to Avoid When Installing a Child Car Seat
Even the safest and most expensive child car seat cannot provide complete protection if it is installed or used incorrectly.
Research and safety testing on child car seats have consistently revealed that many seats are used with at least one major error, thereby compromising their ability to protect the child during an accident.
These mistakes often occur because parents are unaware of the essential requirements for installation, overlook critical instructions, or simply assume the seat is secure without performing a proper safety check.
By understanding the most common errors made during installation and use, parents can identify these issues proactively, before they pose a safety risk.
By recognizing and correcting these mistakes, caregivers can significantly enhance the level of safety provided to their child on every journey.
Plus, it is true that motor vehicle crashes continue to be a huge safety concern for children, that’s why proper child restraint usage is really important, even according to the Centers for Disease Control and Prevention, there are more than 1,000 child passengers actually lose their lives in vehicles crashes during 2023, while over 142,000 children literally suffered injuries, that’s why safety experts also give important to have correctly installed child car seats and booster seats that actually plays a really critical role to reduce these kinds of risks and improves the protection during collisions as well.[¹]
1. A Loose Seat
A loose car seat is one of the most common, and potentially dangerous, mistakes made by parents.
When a child car seat is not firmly secured within the vehicle, it can shift excessively during a collision, thereby diminishing its ability to protect the child.
When checked at the belt path, a properly installed car seat should not move more than one inch from side to side or front to back.
Excessive movement can amplify the impact forces exerted on the child’s body during a collision and may cause the seat to shift into an unsafe position.
Regularly checking the tightness of the seat, and re-checking it after long journeys or whenever adjustments are made, helps ensure that the seat remains secure and stable.
2. Incorrect Harness Positioning
The harness system is designed to properly secure the child within the car seat; however, incorrect positioning of the harness can significantly compromise its safety capabilities.
If the harness straps are positioned too high, too low, or are tightened incorrectly, they cannot effectively distribute the force of an impact across the child’s body during an accident.
For rear-facing children, the harness straps should be at or slightly below shoulder level, whereas for forward-facing children, the straps should be at or slightly above shoulder level.
Positioning the harness correctly limits the child’s movement and ensures that they remain securely contained within the protective shell of the seat.
As children grow, the harness must be adjusted regularly to maintain a safe and proper fit.
3. Improper Placement of the Chest Clip
The chest clip is a critical component that helps keep the harness straps positioned correctly over the child’s shoulders.
A common mistake is placing the chest clip too low, near the abdomen, or too high, near the neck.
Its correct position is in the center of the chest, at armpit level.
When the chest clip is positioned correctly, it helps prevent the harness straps from slipping off the shoulders during a collision.
Improper placement can compromise the effectiveness of the harness system and increase the risk of injury.
Checking the position of the chest clip before every trip is a simple yet vital safety habit.
4. Incorrect Recline Angle
Many parents underestimate the importance of the car seat’s recline angle, particularly when using rear-facing seats.
If the angle is too upright, an infant’s head may slump forward; this can partially obstruct the airway and make breathing difficult.
Conversely, if the seat is reclined too far back, it will not be able to absorb the impact of a collision as effectively as it was designed to do.
Most children’s car seats feature built-in recline indicators or level markers to assist in achieving the correct angle.
Following these indicators and verifying the angle during installation helps enhance both the child’s safety and comfort.
5. Transitioning to Forward-Facing Seats Prematurely
Moving a child from a rear-facing seat to a forward-facing seat too soon is another common mistake.
Rear-facing seats provide superior protection for the head, neck and spine because they distribute the force of a collision across the child’s entire back.
As young children’s bones are still developing and their neck muscles are relatively weak, this additional support is crucial.
Many parents switch their child to a forward-facing seat prematurely based solely on age, whereas they should also pay close attention to the seat’s height and weight limits.
Safety experts recommend keeping children in rear-facing seats for as long as possible, provided they remain within the limits specified by the manufacturer, as continued use of a rear-facing seat generally offers greater protection during severe collisions.
6. Using Defective Car Seats
Children’s car seats are not designed to last forever.
Manufacturers assign expiration dates to them because materials such as plastic, foam and webbing can degrade over time due to temperature fluctuations, exposure to sunlight and daily use.
Older seats may lack newer safety features or may no longer meet current safety standards.
Using an expired car seat can compromise safety during a collision and increase the likelihood of equipment failure.
Parents should always check for expiration labels or manufacturing dates and replace any seats that have reached the end of their designated lifespan.
7. Twisted Harness Straps
Surprisingly, twisted harness straps are a common issue that can impact both comfort and safety.
Harness straps are designed to distribute the force of a collision evenly across a child’s body; however, twisting reduces the surface area available to disperse that force.
This can create pressure points and diminish the effectiveness of the safety system during a collision.
Twisted straps can also make it difficult to properly adjust and secure the harness.
Before every trip, parents should inspect the harness to ensure that all straps are completely straight, free of any twists, kinks, or bunching.
8. Improper Seat Belt Routing
Errors in seat belt routing occur when the vehicle’s seat belt is threaded through the child car seat using the incorrect path.
Many car seats feature distinct routing paths for rear-facing and forward-facing installations; using the wrong path can compromise safety.
Improper routing prevents the seat from being securely anchored in place, which can negatively affect its ability to manage forces during a collision.
Parents should carefully follow the illustrations and instructions provided in the car seat manual and verify that the seat belt is routed correctly before tightening the seat.
Taking a few extra moments to confirm that the seat belt is properly secured can help ensure that the car seat functions exactly as intended during a collision.
Conclusion – How to Install Child Car Seat Correctly
It is really necessary that a child car seat should work best as it is the matter of the safety of your beloved child, but it only happens when every part of the safety process is followed correctly.
Although modern child car seats are manufactured using extensive crash-testing, engineering research and advanced safety technologies, their effectiveness depends significantly on their proper installation and correct daily usage.
A car seat that has been carefully selected, securely installed, correctly adjusted and regularly inspected can provide far superior protection during sudden stops, sharp turns and vehicle collisions.
Every step of this entire process matters, from selecting the appropriate seat based on the child’s age, weight and height, to ensuring that the harness fits properly and the seat remains firmly and stably anchored in place.
Child safety is not a one-time task, but rather an ongoing responsibility.
As children grow, their car seat requirements evolve; therefore, making regular adjustments and conducting safety checks becomes essential.
Parents should constantly monitor height and weight limits, inspect the harness system, check expiration dates and, whenever necessary, revisit the manufacturer’s instructions.
Even minor errors such as: a loose seat, twisted straps, an incorrect seat angle, or an improperly routed seatbelt, can compromise the level of protection afforded to the child.
Fortunately, most of these issues can be avoided through vigilance, regular inspections and a thorough understanding of the fundamental principles of car seat safety.
And, that’s all from this guide about How to Install Child Car Seat Correctly, also you can comment for more information.
Frequently Asked Questions
FAQ 1: How do I properly install a child car seat?
Answer: Properly installing a child car seat begins with reading both the car seat manual and the vehicle owner’s manual. Select an approved seating position, position the car seat according to the manufacturer’s instructions and secure it firmly using either the LATCH system or the vehicle’s seat belt. Tighten the seat until it moves no more than one inch along the belt path. After installation, properly adjust the harness and perform a final safety check to ensure everything is secure. Proper installation ensures that the car seat can provide the protection it was designed for, specially in the event of an accident.
FAQ 2: What is the safest location for installing a child car seat?
Answer: Generally, the back seat is considered the safest location for installing a child car seat. Many safety experts consider the center position of the back seat to be the safest, provided the seat can be securely installed there, because this position is often the furthest away from side-impact collisions. However, the safest location ultimately remains the spot where the car seat can be installed correctly, that is, in accordance with the instructions provided by both the vehicle manufacturer and the car seat manufacturer. In some vehicles, it may not be possible to securely install certain types of car seats in the center position of the back seat; in such cases, choosing one of the side positions in the back seat is the better option.
FAQ 3: Should I use the LATCH system or the vehicle’s seat belt?
Answer: When used correctly, both the LATCH system and the vehicle’s seat belt are considered safe methods for installing a child car seat. Neither method is inherently safer than the other. The best option depends on the type of vehicle, the specific car seat being used and how securely the seat can be installed. Some parents find it easier to use the LATCH system, while others are able to secure the seat more firmly using the vehicle’s seat belt. Always follow the manufacturer’s instructions and choose the method that allows the seat to be installed most securely.
FAQ 4: How tight should a child’s car seat be?
Answer: If a child’s car seat is installed correctly, it should not move more than one inch when checked at the belt path, whether moving side-to-side or front-to-back. If the seat moves too much, it may indicate that it needs to be tightened further. Installing the seat securely is crucial; if the car seat is loose, it could shift out of place during a collision, thereby compromising the protection provided to the child.
FAQ 5: How do I know if the harness is tight enough?
Answer: The harness should fit snugly against the child’s body, with no visible slack anywhere. A common method for checking the harness tightness is to perform the “pinch test.” If you are able to pinch and grasp the harness webbing near the child’s shoulder, it means the harness is too loose and needs to be tightened further. A properly tightened harness helps keep the child securely in place within the car seat during an accident.
FAQ 6: Where should the chest clip be positioned?
Answer: The chest clip should be positioned right in the center of the child’s chest, at the level of their armpits. Positioning it in this manner ensures that the harness straps remain properly seated on the shoulders. If the chest clip is positioned too low, the harness straps may slip out of place; Conversely, if the clip is positioned too high, it may cause discomfort to the child and will not function effectively.
FAQ 7: When should a child be transitioned from a rear-facing car seat to a forward-facing seat?
Answer: A child should remain in a rear-facing car seat until they reach the maximum height or weight limit specified by the car seat manufacturer. Rear-facing seats provide superior protection for a child’s head, neck and spine because, in the event of a collision, they distribute the force of the impact evenly across the child’s back. Safety experts generally recommend keeping a child in a rear-facing seat for as long as it remains feasible within the seat’s specified limits.
References:
[1] Child Passenger Safety
https://www.cdc.gov/child-passenger-safety/about/index.html

Guys, I’m a car audio enthusiast and customization expert and I love clear sound and clean installation. Plus, I have spent years helping people build their dream audio setups. And whenever I’m working on cars, I probably listen to music and thinks about the next big upgrade.