Written By: Don Dodi
Fact Checked By: Kristen Brown
Reviewed By: Diego Rosenberg
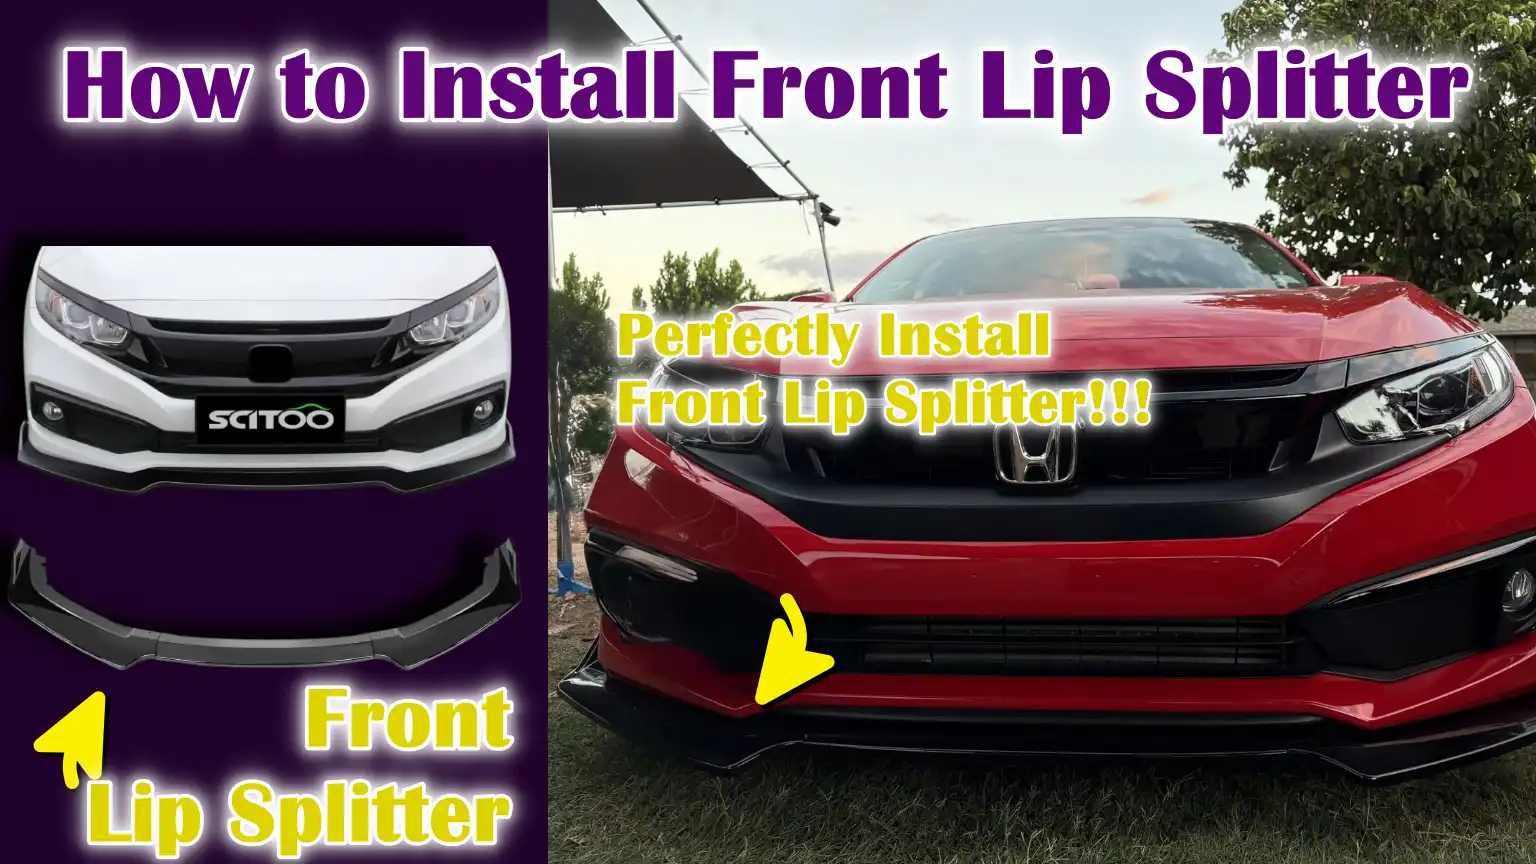
Basically, if you have the front lip splitter in a proper way, then it improves the airflow control, protects the bumper and also enhances the vehicle stability and that’s how it makes your vehicle more aerodynamic.
So, it is positioned at the lowest edge of the front bumper, plus the front lip splitter works by controlling the airflow; as it literally reduces the amount of air flowing underneath the vehicle and increases the downward pressure at the higher speeds as well.
Not only this, there are automotive aerodynamic studies that shows that the limiting the underbody airflow actually helps to reduce the front-end lift, that’s why it improves the steering response, braking stability and overall road grip as well, which is benefiting specially at the highway driving.
Along with this, it has more usefulness along with the performance benefits; as front lip splitter also serves as a protective barrier, that literally absorbs minor impacts from the road debris, speed bumps and uneven surfaces that would otherwise damage the bumper directly.
Now, in this guide you’ll learn How to Install Front Lip Splitter, so that you can align them correctly and prevent front any possible premature failures as well.
Tools
| Item Name | Purpose / Use |
|---|---|
| Drill | It is used to make clean holes in bumpers or under panels. |
| Screwdriver | This allows the screws to be tightened firmly without damaging the splitter. |
| Ratchet Set | This helps tighten the bolts quickly and evenly. |
| Torque Wrench | This ensures that the bolts are tightened firmly and to the correct pressure. |
| Self-Tapping Screws | This makes it possible to attach the splitter directly to plastic or metal. |
| Bolts | It provides strong and durable bond. |
| Washers | This distributes the pressure evenly and prevents cracking. |
| Mounting Brackets | This gives strength and support to the splitter. |
| Measuring Tape | This ensures correct centering and equal spacing. |
| Masking Tape | This helps you mark the drilling point without damaging the paint. |
| Marker | It clearly shows the drilling and alignment position. |
| Work Gloves | It protects hands from sharp edges and tools. |
| Safety Glasses | This protects the eyes from dust and drilling debris. |
| Wheel Chocks | This can prevent the vehicle from rolling during work. |
| Support Rods | This increases power at high speeds. |
| Thread Lock Liquid | This prevents the screws and bolts from loosening. |
| Sealant | It protects the drilled holes from moisture and dirt. |
What are the Basic Pre-Installation Preparation You Need to Do
1. Checking Vehicle Compatibility and Splitter Fitment
Before beginning the installation, it’s crucial to ensure that the front lip splitter is designed for your specific vehicle model, bumper shape and model year.
Front bumper widths, curves and mounting points vary and even minor differences can affect how well the splitter fits.
A properly matched splitter will fit snugly against the bumper, align with factory mounting areas and require minimal force to install.
Checking compatibility beforehand helps avoid uneven gaps, poor airflow control and stress on mounting points after installation.
2. Inspecting the Splitter for Defects or Shipping Damage
As soon as you unpack the front lip splitter, inspect it carefully.
Look for cracks, bends, uneven edges, or surface blemishes that may have occurred during shipping or storage.
Even minor defects can weaken the splitter, specially when it’s installed and subjected to wind pressure, road vibrations and temperature changes.
Installing a defective splitter can lead to premature failure or poor fitment, so it’s always best to ensure the part is in perfect condition before proceeding.
3. Cleaning and Degreasing the Bumper Mounting Surface
The section of the bumper where the splitter will be mounted must be thoroughly cleaned and free of dirt, oil, wax and road grime.
Any residue left on the surface can prevent the splitter from seating properly and can compromise the strength of the fasteners over time.
Cleaning the surface ensures that the splitter sits evenly against the bumper, improves fastener grip and helps maintain proper alignment during and after installation.
4. Ensuring Adequate Ground Clearance and Ride Height
Ground clearance plays a crucial role in both safety and durability after installation.
Before installing the splitter, measure the distance between the ground and the lower edge of the bumper to ensure the splitter won’t scrape the ground during normal driving.
Vehicles with low ride height are more susceptible to scraping on speed bumps, ramps and uneven roads.
Confirming the clearance beforehand helps prevent damage, reduces the risk of breakage and ensures the splitter remains practical for everyday use.
5. Reviewing Manufacturer’s Instructions and Torque Specifications
Each front lip splitter is designed with specific mounting methods and fastener limitations.
Reviewing the manufacturer’s instructions ensures the splitter is installed in the correct position and secured using the recommended hardware.
Torque specifications are critical because overtightening can crack the bumper or splitter, while undertightening can lead to looseness or vibration issues.
Following these guidelines improves safety, ensures proper airflow function and guarantees long-term durability.
How to Ensure the Correct Vehicle Positioning and Safety Setup
1. Parking on a Level, Flat Surface
The first step to a safe installation is parking the vehicle on a flat and level surface.
A level surface keeps the car stable and ensures the front lip splitter aligns evenly with the bumper.
When the vehicle is parked on uneven ground, measurements can be inaccurate and the splitter may appear centered during installation but look uneven after driving.
Flat ground also reduces the risk of the vehicle shifting while tools are being used, helping to prevent accidents and damage.
2. Safely Lifting the Vehicle
Lifting the front of the vehicle provides clear access to the underside of the bumper and makes drilling and tightening much easier.
Use ramps or jack stands that are rated for the vehicle’s weight and always follow the correct lifting points specified by the vehicle manufacturer.
Safe lifting prevents sudden drops, protects suspension components and allows you to work comfortably with both hands.
A stable elevated position also increases accuracy in aligning and tightening the splitter.
3. Securing the Wheels to Prevent Movement
Even when parked, a vehicle can still roll slightly if not properly secured.
Placing wheel chocks behind the rear wheels prevents unwanted movement during installation.
This extra safety step is crucial because drilling and tightening fasteners can create small forces that could cause the vehicle to shift.
Keeping the wheels locked in place ensures the safety of both the installer and the vehicle throughout the entire process.
4. Disconnecting Under-Tray Panels if Necessary
Some vehicles have plastic under-tray panels or splash guards beneath the front bumper.
These panels may need to be loosened or removed to properly fit the splitter and access the correct mounting points.
Carefully removing these panels will prevent breakage and make reinstallation easier once the splitter is secured.
Proper access ensures that the splitter is securely mounted and does not interfere with existing components after installation.
How to Ensure Perfect Alignment & Test the Fitting
1. Holding the Splitter in Place to Confirm Alignment
Before any drilling or fastening, the front lip splitter should be held firmly against the front of the bumper to see how it naturally sits.
This step helps confirm that the splitter’s shape matches the bumper’s curve and that the mounting surface is in full contact.
A proper test fit prevents stress on the splitter after installation and helps you identify alignment issues, such as uneven edges or gaps, which can affect airflow and durability.
2. Centering the Splitter Relative to the Bumper and Grille
Correct centering is crucial for both aesthetics and performance.
The splitter should be evenly aligned with the center of the bumper and grille to maintain balanced airflow across the front of the vehicle.
When a splitter is off-center, it can create uneven air pressure at high speeds, potentially leading to vibrations or uneven wear.
Taking the time to center the splitter ensures a clean, factory-style look and stable airflow control.
3. Accurately Marking the Drilling Points
Once the splitter is in the correct position, it’s essential to carefully mark the drilling points.
Accurate marking ensures that the screws or bolts go in straight and align with the strongest mounting areas of the bumper.
Incorrectly placed holes can weaken the bumper material and reduce the fastener’s holding strength.
Clean and precise marking ensures the splitter sits properly and remains secure for long-term use.
4. Verifying Symmetry on Both Sides of the Vehicle
The splitter’s symmetry should be checked by comparing the left and right sides.
Both sides should extend the same distance from the bumper and follow the same angle.
Uneven edges are easily visible and can affect airflow balance during driving.
Verifying symmetry improves the overall look and ensures the splitter functions evenly under air pressure.
5. Checking Clearance for Turning Radius and Suspension Travel
Before final installation, it’s crucial to confirm that the splitter doesn’t interfere with steering or suspension movement.
Turn the front wheels fully in both directions and check that the splitter doesn’t come into contact with the tires or wheel liners.
Also, consider suspension travel when braking or driving over bumps.
Sufficient clearance prevents rubbing, breakage and unexpected damage during normal driving conditions.
How to Do Point Preparation for Drilling and Mounting
1. Choosing the Correct Drill Bit Size
Selecting the correct drill bit size is crucial for creating strong and clean mounting points.
The drill bit size should match the diameter of the screws or bolts being used to ensure the fasteners can securely grip the material without excessive force.
A hole that is too small can crack the bumper or under-tray, while a hole that is too large can compromise the holding strength.
Choosing the correct drill bit ensures the splitter is securely mounted and remains stable during driving.
2. Drilling Pilot Holes in the Bumper or Under-Tray
Pilot holes guide the fasteners to the correct location and reduce stress on the bumper material.
Drilling slowly and with consistent pressure helps maintain clean edges and accurate alignment.
Pilot holes also make it easier to insert the screws straight, resulting in a better final fit of the splitter.
Careful drilling at this stage improves overall durability and prevents loosening over time.
3. Preventing Cracking or Damage to Plastic Surfaces
Most modern bumpers and under-trays are made of plastic or composite materials that can crack if handled carelessly.
Using a moderate drill speed, light pressure and a sharp drill bit helps prevent heat buildup and surface damage.
Supporting the drilling area from behind whenever possible also minimizes vibration.
These steps protect the bumper’s structural integrity and maintain a clean mounting surface.
4. Applying Rust Protection or Sealant to Drilled Areas
Drilling creates edges where moisture and debris can accumulate.
Applying rust protection or sealant around each drilled hole helps prevent corrosion on metal components and minimizes water ingress on plastic surfaces.
This added reinforcement improves long-term reliability and secures the mounting points in all weather conditions.
5. Reinforcing weak mounting points when necessary
Some parts of the bumper or undertray may be thin or flexible and may require reinforcement to properly support the splitter.
Adding washers, brackets, or backing plates distributes the load over a larger area and reduces stress on a single point.
This reinforcement increases strength, reduces vibration and ensures the splitter remains securely attached even at high speeds.
How to Install the Front Lip Splitter – Easy Method
1. Attaching the Splitter from the Center Outward
The installation process should begin by securing the splitter at the center of the bumper and then working outward on both sides.
Starting from the center ensures that the splitter remains in the correct position and doesn’t shift during installation.
This method ensures the splitter follows the natural curve of the bumper and minimizes the possibility of uneven gaps or misalignment.
Attaching from the center first also helps maintain balanced airflow and a clean, symmetrical look.
2. Securing Fasteners in a Balanced Tightening Sequence
Instead of fully tightening the fasteners on one side at a time, they should be tightened gradually and evenly across the entire splitter.
A balanced tightening sequence distributes pressure evenly and prevents the splitter from warping or becoming crooked.
This method reduces stress on the bumper and helps the splitter sit flush against the mounting surface.
Even tightening promotes long-lasting durability and reduces the risk of vibration during driving.
3. Installing Brackets or Support Rods – If Included
Some front lip splitters include brackets or support rods for added reinforcement, specially for high-speed driving.
These supports help manage air pressure and reduce flexing on the outer edges of the splitter.
Installing them according to the manufacturer’s instructions improves stability and ensures the splitter maintains its shape over time.
Properly fitted supports enhance overall safety and performance.
4. Ensuring Even Pressure Distribution on the Splitter
Even pressure distribution across the entire splitter is crucial to prevent weak points and stress on the material.
The splitter should sit flush against the bumper without any raised sections or gaps.
Uneven pressure can cause cracks, loosen fasteners, or reduce airflow efficiency.
Checking for consistent contact during installation ensures that the splitter is properly secured and functioning as expected.
5. Checking the torque specifications of all fasteners according to recommended values
After all fasteners have been installed, each should be checked using the torque values recommended by the manufacturer.
Correct torque prevents fasteners from loosening due to vibration, while also preventing damage from overtightening.
Proper management, isolation and safety precautions guarantee a secure and durable installation and ensure the system’s stability under normal operating conditions.
How to Check the Final Alignment and Fitment
1. Verifying that the splitter is flush with the bumper
After installation, the front lip splitter should sit flat and securely against the bumper surface.
A flush fit ensures that airflow flows smoothly over the splitter and minimizes drag caused by uneven edges.
When the splitter is not properly seated, air can get trapped underneath, potentially causing vibration or lift at higher speeds.
Checking this contact also confirms that the mounting points are holding evenly and that there is no excessive stress on any area.
2. Re-checking centering and symmetry
The centering should be checked one last time by visually inspecting the splitter in relation to the bumper and grille.
The splitter should extend an equal distance on both sides and follow a symmetrical angle.
Correct symmetry is crucial as uneven alignment can affect airflow balance and increase the likelihood of the splitter becoming loose over time.
A centered splitter improves stability, aesthetics and long-term reliability.
3. Confirming adequate ground clearance
Ground clearance should be measured with the vehicle fully resting on the ground.
The splitter must have sufficient clearance to avoid scraping on speed bumps, driveways and uneven road surfaces during normal driving.
Insufficient clearance increases the risk of the splitter scraping, cracking, or becoming damaged.
Confirming the clearance at this stage ensures that the splitter is safe for everyday use and reduces the likelihood of premature damage.
4. Checking for gaps, flex, or loose mounting points
A close inspection should be performed to check for any visible gaps, excessive movement, or loose fasteners.
When pressed lightly, the splitter should feel sturdy and not flex excessively.
Gaps or loose sections can allow air and water to enter, potentially weakening the mounting points over time.
Identifying and addressing these issues ensures that the splitter remains secure, stable and effective under real-world driving conditions.
What are the Important Post-Installation Checks
1. Lowering the Vehicle and Rechecking the Fitment
Once the installation is complete, the vehicle should be carefully lowered back to the ground and the front lip splitter should be rechecked.
Lowering the vehicle places the full weight on the suspension, which can slightly alter the bumper height and alignment.
Rechecking the fitment at this stage ensures the splitter is still securely fastened, centered and maintains proper contact with the bumper under normal driving conditions.
2. Performing a Steering Lock-to-Lock Test
The steering lock-to-lock test involves turning the steering wheel fully to the left and right while the vehicle is stationary.
This checks that the splitter does not interfere with the tires, wheel liners, or suspension components.
Proper clearance throughout the full steering movement is crucial for safety and prevents rubbing, noise, or damage during sharp turns or parking maneuvers.
3. Checking for Vibrations or Contact with the Road Surface
By gently pushing the vehicle or driving slowly at low speeds, the splitter should be checked for any signs of vibration or unwanted movement.
Vibrations can indicate loose fasteners or uneven mounting pressure.
It’s also essential that the splitter does not make contact with the road surface under normal driving conditions.
Detecting these issues early helps prevent long-term damage and ensures smooth, stable performance.
4. Ensuring the Splitter Does Not Obstruct Airflow Sensors
Modern vehicles often have airflow sensors, cooling ducts and radar systems located near the front bumper.
The splitter must be installed in a way that does not block or obstruct these components.
Obstruction can affect engine cooling, sensor accuracy, or safety systems.
Ensuring clear airflow and proper sensor function ensures that the vehicle continues to operate correctly even while benefiting from the splitter upgrade.
How to Maintain Front Lip Splitter for Long Run
1. Routine Fastener Inspection Intervals
The front lip splitter is constantly exposed to wind pressure, vibrations and road shocks, which can cause the mounting hardware to gradually loosen over time.
It is advisable to inspect all fasteners at regular intervals, specially after the first few weeks of driving and during routine vehicle checks.
Regular inspections help detect loose screws or bolts early, preventing cracks, rattling noises, or complete detachment while driving.
2. Cleaning Methods to Prevent Surface Damage
Proper cleaning maintains both appearance and structural integrity.
The splitter should be cleaned with mild soap and water to remove dirt, salt and road grime that can accumulate underneath the vehicle.
Harsh chemicals and abrasive brushes should be avoided as they can weaken the surface and reduce durability.
Gentle cleaning preserves the finish and prevents long-term surface degradation.
3. Monitoring Splitter Wear from Road Debris
Road debris such as stones, sand and small objects can cause gradual wear and tear on the lower edge of the splitter.
Regular visual inspections help detect scratches, chips, or thinning areas before they become severe.
Monitoring wear allows for timely repairs or replacements and helps maintain proper airflow and protection for the bumper.
4. Seasonal Checks for Expansion or Loosening
Temperature fluctuations can cause materials to expand and contract, specially during extreme heat or cold.
Seasonal checks help detect minor changes in fitment or hardware tightness due to temperature variations.
Checking the splitter during seasonal changes reduces the risk of stress cracks and ensures that the mounting points remain secure throughout the year.
5. When to Retighten or Replace Mounting Hardware
Fasteners should be retightened if any movement, noise, or visible gaps are observed.
Hardware showing signs of rust, damage, or bending should be replaced immediately to maintain safety and structural integrity.
Prompt replacement of worn or damaged hardware ensures that the splitter remains stable, functional and safe throughout its service life.
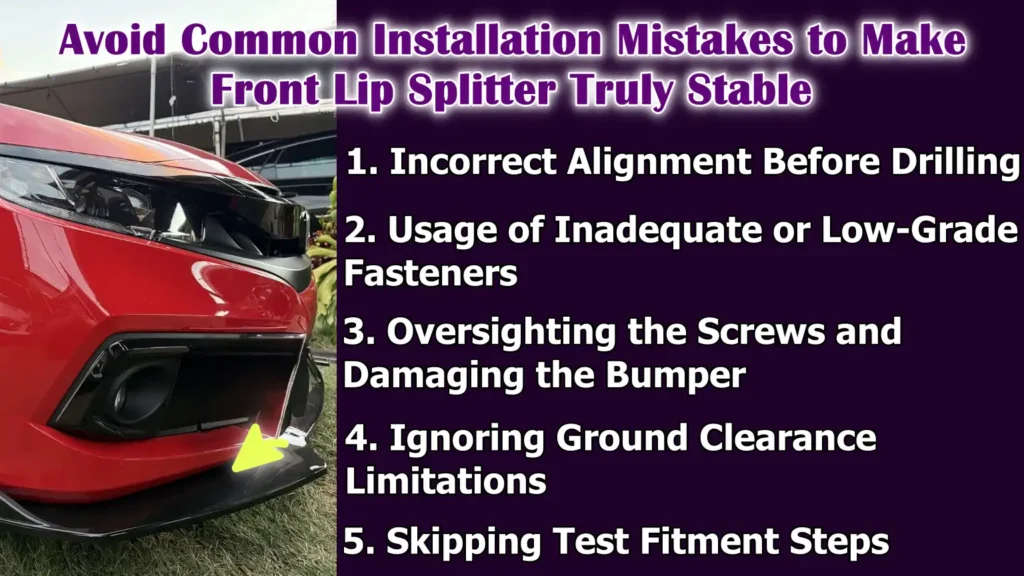
Avoid Common Installation Mistakes to Make Front Lip Splitter Truly Stable
Even, there is research that shows a front lip splitter work by manipulating the air pressure around the vehicle’s front end, plus according to the CFD research, these devices literally creates a region of low pressure beneath the front bumper and a high-pressure zone above, that’s why it provides measurable downforce gain that reduces the lift and even though the drag increase in slight manner, but it is a common compromise in aerodynamic tuning.[¹]
1. Incorrect Alignment Before Drilling
One of the most common mistakes is drilling holes without confirming proper alignment.
If the splitter isn’t centered or doesn’t follow the natural curve of the bumper, the holes will lock it into the wrong position.
This can lead to uneven gaps, poor airflow control and long-term stress on the mounting points.
Taking the time to properly align the splitter before drilling ensures a clean fit and prevents permanent installation errors.
2. Usage of Inadequate or Low-Grade Fasteners
Using weak or poor-quality fasteners can compromise the integrity of the installation.
Front lip splitters are constantly exposed to wind pressure and vibrations, specially at high speeds.
Inadequate fasteners can loosen, bend, or fail over time.
Choosing strong, corrosion-resistant fasteners helps maintain a secure attachment and improves long-term safety and durability.
3. Oversighting the Screws and Damaging the Bumper
Overtightening is a common problem, specially when working with plastic bumpers.
Applying too much force can crack the bumper, strip the threads, or damage the splitter.
Proper tightening ensures that the fasteners hold securely without putting excessive stress on the material.
Using the correct torque levels prevents unnecessary damage to both the bumper and the splitter.
4. Ignoring Ground Clearance Limitations
Ignoring ground clearance can lead to frequent scraping and premature damage.
Front lip splitters are close to the ground and can be affected by speed bumps, ramps and uneven roads.
Ignoring clearance limitations increases the risk of the splitter breaking or becoming damaged.
Checking clearances before and after installation ensures that the splitter remains practical for everyday driving.
5. Skipping Test Fitment Steps
Skipping the test fitment process often leads to misalignment and poor mounting strength.
Test fitting allows for adjustments before permanent installation and helps identify potential problems early on.
Without this step, correcting minor errors becomes difficult or impossible.
Proper test fitment improves alignment, strength and overall installation quality.
Read More:
Understand, What are the Legal, Safety and Practical Considerations
1. Local Road Legality and Vehicle Modification Regulations
Before installing a front lip splitter, it’s crucial to understand local road laws and vehicle modification regulations.
Many jurisdictions have rules governing how far vehicle components can extend below the bumper or protrude forward.
These regulations are in place to ensure road safety and prevent hazards to pedestrians and other vehicles.
Checking local guidelines can prevent fines, failed inspections, or the need to remove the splitter after installation.
2. Impact on Approach Angle and Speed Bumps
A front lip splitter reduces the vehicle’s approach angle, which is the angle at which the front of the vehicle can safely clear obstacles.
This modification increases the risk of scraping on speed bumps, ramps and uneven roads.
Understanding this impact allows drivers to adjust their driving habits, such as slowing down and approaching obstacles at an angle.
Awareness minimizes damage and extends the splitter’s lifespan.
3. Impact on Warranty and Insurance
Aftermarket modifications can affect vehicle warranties and insurance policies.
Some manufacturers limit warranty coverage if modifications cause damage to factory parts.
Insurance companies may also require disclosure of exterior modifications.
Informing your insurance provider and understanding warranty terms helps avoid coverage issues and ensures transparency in case of claims or repairs.
4. Daily Driving vs Track-Focused Splitter Setups
Not all splitters are designed for the same purpose.
Splitters designed for track use are often lower and provide enhanced airflow control, but they may be less practical for daily driving.
Splitters intended for everyday use prioritize durability and ground clearance.
Choosing the right setup based on driving habits ensures safety, comfort and long-term use without any unnecessary compromises.
Conclusion – How to Install Front Lip Splitter
Now, you have clearly understood that the effectiveness of a front lip splitter literally depends on the less on the part itself and more on how carefully and perfectly it is aligned, secured and maintained overall for long term service.
It also acts as a protective layer, shielding the lower bumper area from minor impacts, road debris and surface contact that commonly occur during everyday driving.
You should pay close attention to ground clearance, fastener quality and mounting strength to ensure the splitter remains secure and functional over time.
Also, there are safety measures such as proper vehicle positioning and post-installation checks further minimize risks and help maintain correct fitment in real-world driving conditions.
And, without a doubt regular maintenance is equally crucial, that’s why you need to do periodic inspections, proper cleaning and timely tightening or replacement of hardware can prevent damage, wear and loosening caused by vibrations from weather and road conditions.
Understanding legal requirements, warranty terms and the limitations of everyday driving allows owners to enjoy the benefits of a front lip splitter without facing any unwanted problems.
Now, it is time to ask unsolved queries about this guide.
Frequently Asked Questions
Q1. What is a front lip splitter and why is it installed?
Answer: A front lip splitter is a component that attaches to the lower edge of the front bumper. It helps manage airflow by controlling the air flowing under the vehicle, improving front-end stability at higher speeds. It also protects the lower bumper from minor impacts, stones and road debris. Many drivers install front lip splitters for both functional and aesthetic benefits.
Q2. Is it difficult to install a front lip splitter at home?
Answer: Installing a front lip splitter is not overly difficult if the correct steps are followed. Basic tools, careful alignment and patience are more important than advanced skills. Most installations can be done at home with proper preparation, test fitting and secure mounting. Taking your time during alignment and drilling minimizes mistakes.
Q3. Is drilling required to install a front lip splitter?
Answer: In most cases, drilling is required to create strong and secure mounting points. Some vehicles may have pre-drilled holes or under-tray mounting locations, but drilling is usually necessary for a proper fit. Pilot holes help prevent cracking and make fastening easier. Avoiding drilling often results in weaker attachments and reduced durability.
Q4. How do I ensure the front lip splitter is properly centered?
Answer: Centering is achieved by aligning the splitter between the bumper and the grille. Taking measurements on both sides and visually checking for symmetry ensures proper placement. A centered splitter improves airflow balance and prevents uneven pressure during driving. Test fitting before drilling is the best way to confirm correct alignment.
Q5. What should the ground clearance be for a front lip splitter?
Answer: Ground clearance depends on the vehicle’s ride height and driving conditions. The splitter should not scrape the ground during normal driving, over speed bumps, or when entering driveways. Checking the clearance before final installation helps prevent damage and ensures everyday usability. Extra caution is needed when choosing the size and position of the splitter for low-height vehicles.
Q6. Can a front lip splitter affect steering or suspension movement?
Answer: If installed incorrectly, the splitter can interfere with steering or suspension travel. Therefore, a steering lock-to-lock test is essential after installation. Proper clearance ensures the splitter does not contact the tires or wheel liners during turns or over bumps. Correct installation prevents these issues.
Q7. Should the fasteners be fully tightened during installation?
Answer: Fasteners should be tightened gradually and evenly, rather than all at once. Overtightening can crack the bumper or damage the splitter, while undertightening can lead to looseness and vibration. Using the correct torque levels ensures a strong and secure attachment.
Q7. How do I know if the splitter is securely installed?
Answer: A securely installed splitter fits perfectly with the bumper, doesn’t wobble excessively and doesn’t move when lightly pressed. All fasteners should be tight and evenly spaced. There should be no gaps or unusual noises when driving at low speeds.
Q9. Can a front lip splitter be used for everyday driving?
Answer: Yes, many front lip splitters are designed for everyday driving when properly installed. Choosing a splitter with adequate ground clearance and robust mounting improves practicality. Drivers should adjust their driving habits to avoid obstacles.
References:
[1] Computational Study of the Front-end Downforce Enhancing Aerodynamic Elements in Sports Cars
https://www.researchgate.net/publication/347866443_Computational_Study_of_the_Front-end_Downforce_Enhancing_Aerodynamic_Elements_in_Sports_Cars

Guys, I’m a car audio enthusiast and customization expert and I love clear sound and clean installation. Plus, I have spent years helping people build their dream audio setups. And whenever I’m working on cars, I probably listen to music and thinks about the next big upgrade.