 Skip to content
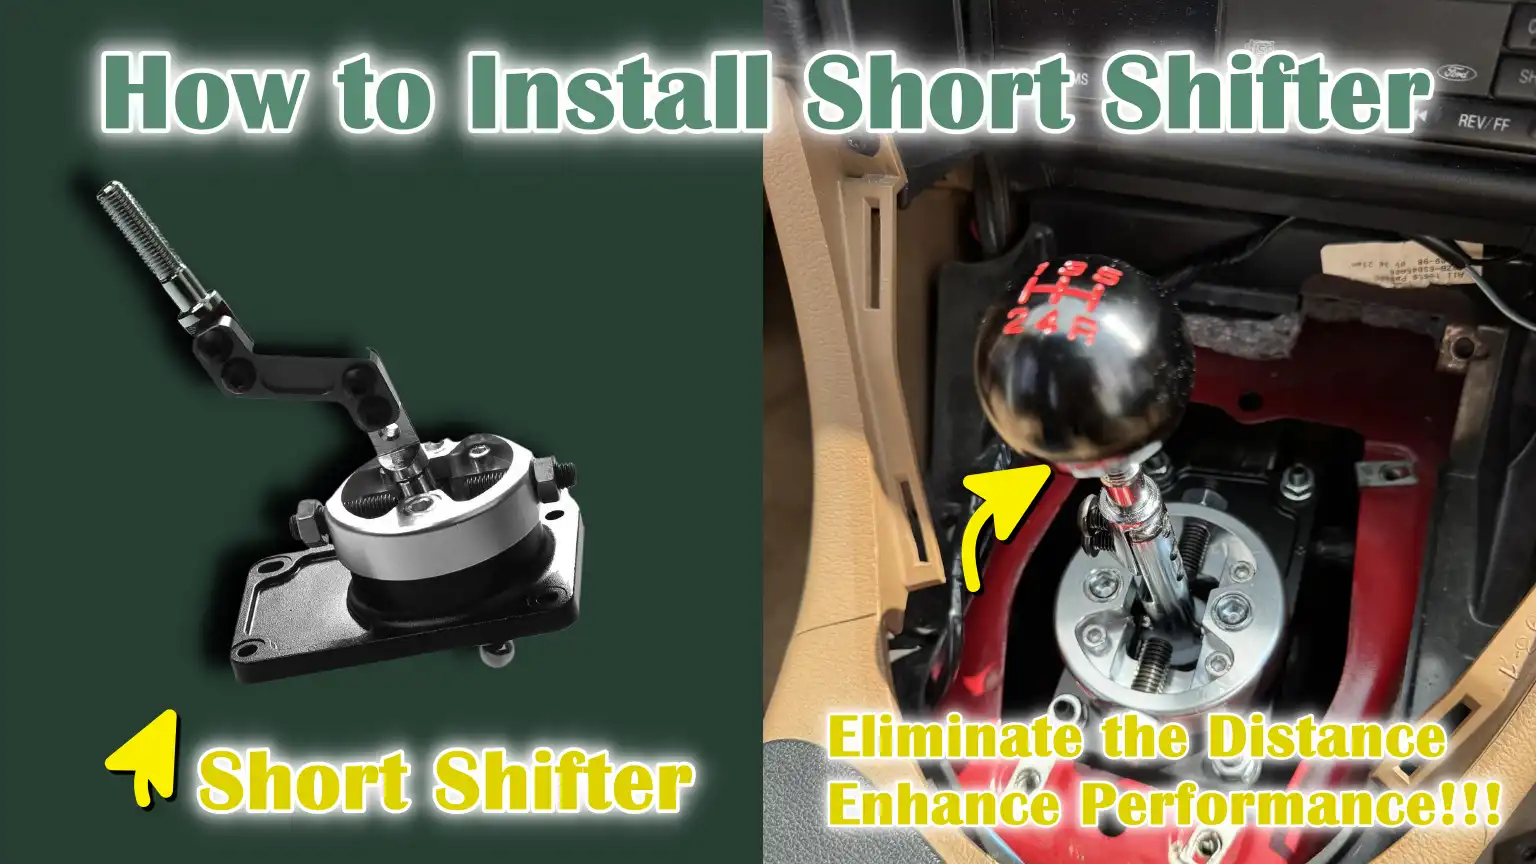
Written By: Don Dodi
Fact Checked By: Kristen Brown
Reviewed By: Diego Rosenberg
The short shifter actually makes every gear change feel really tighter, quicker and more connected to the car, even it directly improves how the car feels every time you change gears.
Basically, the short shifter literally reduces the distance the gear lever needs to move between gears, so which is commonly called “shift throw” as well.
Because, from the factory, most of the cars are actually designed with longer shift throws so that you can prioritize the comfort and ease of use for all drivers as well.
So, a short shifter changes the leverage point of the shifter mechanism, that allows it faster and more precise gear changes without modifying the transmission itself.
Not only this, there’s automotive engineers and performance specialists they agrees that when you install them correctly, then a quality short shifter doesn’t harm the gearbox at all and even it can actually improve the shift accuracy as it reduces unnecessary hand movement as well.
Additionally, there’s are performance driving studies and manufacturer data that shows that with the more direct shift it helps the drivers to maintain better control during the acceleration.
So, this is the guide which is specifically focuses on How to Install Short Shifter, so that you can easily upgrade and enhance your driving feel.
At First, Understand About How a Short Shifter Works
1. Basic Mechanics of a Manual Transmission Shifter
In a car with a manual transmission, the gear shifter functions as a simple mechanical lever that connects the driver’s hand to the transmission via a linkage, rod, or cable.
When you move the gear stick, that movement is transmitted to shift forks inside the transmission, which then engage the different gears.
From the factory, most manufacturers design the shifter with a long lever and a wide range of motion to make gear changes smooth, light and effortless for everyday driving.
This long movement helps reduce effort, but it also means the driver’s hand has to travel a longer distance between gears.
This system is inherently mechanical and direct, which is why changes to the shifter design can significantly impact the car’s feel without changing any internal transmission parts.
2. How Shortening Lever Length Reduces Shift Travel
A short shifter changes the position of the pivot point on the gear lever or the length of the lever above and below that pivot.
By doing so, the distance your hand has to move above the shifter is reduced, while the transmission linkage still moves the required amount.
This is basic leverage physics: when the upper part of the lever is shorter, less movement is required at the top to produce the same movement at the bottom.
As a result, the gear stick doesn’t have to travel as far to engage the next gear.
This shorter movement is what drivers call a reduced “shift throw,” and it’s the main reason why short shifters feel faster and more direct than factory shifters.
3. Impact on Shift Speed, Precision and Driving Feedback
Because the shifter travels a shorter distance, gear changes can be completed more quickly, specially during rapid acceleration or performance driving.
Many drivers also experience improved precision, meaning gears are more clearly defined and easier to find.
The shorter movement reduces the vagueness or looseness that can occur with a longer factory shifter.
Furthermore, driving feedback is often improved because the driver can feel gear engagement more directly through the shifter.
Although shifts may feel slightly stiffer due to the change in leverage, this increased firmness often helps drivers shift with more confidence and precision, specially at higher engine speeds.
4. Common Misconceptions About Short Shifters and Transmission Wear
A common misconception is that short shifters damage the transmission or cause gears to wear out faster.
In fact, a properly designed and installed short shifter does not increase internal transmission wear.
The transmission still shifts with the same force and in the same manner as before.
The most important things are correct installation, correct adjustment and smooth driving habits.
Rough or careless shifting can cause wear on any shifter, including the factory one.
Automotive engineers and aftermarket manufacturers generally agree that when short shifters are installed correctly and used responsibly, they are safe for long-term use, making them a reliable upgrade, not a risky modification.
Tools
| Tool or Material Name | Purpose / Use | Why It Is Necessary |
|---|---|---|
| Socket wrench set | To loosen and tighten the bolts holding the shifter. | It was necessary to remove the factory-installed shifter and securely install the new short shifter. |
| Screwdrivers – Phillips and Flathead | To remove trim panels, screws and shift boot clips. | This is necessary to access the shifter area without damaging internal parts. |
| Allen or hex keys | To install the bolts included in the short shifter kit. | Required for bolts that cannot be tightened with a normal wrench or socket. |
| Pliers | For removing clips or holding small parts. | This allows for safe separation of the linkage pin or clip without bending or breaking it. |
| Gloves | To protect hands from cuts and scratches. | Keeps hands safe from sharp edges while working inside the console. |
| Eye protection | To protect the eyes from dust or small particles. | It is important to prevent injury when removing or handling parts. |
| Short shifter assembly | Main advanced shifter. | The factory shifter needed to be replaced and the shift throw reduced. |
| Bushings and pivot points | Sports help reduce stress and improve physical activity. | Essential for smooth, precise and stable gear changes. |
| Mounting bolts and clips | To securely attach the shifter to the car. | This is necessary to keep the shifter firmly in place and operate safely. |
What are the Safety Precautions To Follow Before the Installation
1. Why Vehicle Stability is Crucial Before Working Inside or Underneath
Before beginning the short shifter installation, ensuring vehicle stability is one of the most critical safety factors.
While most of the work is done inside the cabin, some vehicles require working near or under the car to access linkages or mounting points.
Even slight movement or shifting of the vehicle can lead to serious injury or damage.
A stable vehicle remains firmly in place, allowing you to apply force to bolts and components without the risk of sudden movement.
Engaging the parking brake and securing the wheels ensures the car is completely stable, minimizing the risk of slips, falls, or sudden movement of parts during installation.
2. Electrical Safety Precautions When Working Near Interior Components
Modern vehicles have numerous electrical components under the center console, including airbags, sensors and infotainment system wiring.
Before removing trim panels or working near these components, it’s essential to mitigate the risk of electrical problems.
Accidentally pulling or damaging wires can trigger warning lights or cause system malfunctions.
Disconnecting the battery prevents short circuits and accidental airbag deployment.
This simple step protects both the vehicle’s electronics and the person performing the installation, making the process safer and more controlled.
3. Proper Use of Gloves and Eye Protection
Wearing gloves and eye protection for interior work might seem unnecessary, but they play a vital role in safety.
Metal edges under trim panels can be sharp and small clips or springs can break when removed.
Gloves protect hands from cuts, scrapes and pinched fingers, while also providing a better grip on tools.
Eye protection prevents dust, plastic fragments, or metal shards from entering the eyes, specially when working in confined spaces where parts may suddenly shift.
These basic safety precautions significantly reduce the likelihood of injury during installation.
4. Ensuring the vehicle is on a level surface
Parking the vehicle on a level surface ensures it remains balanced and stable while you are working.
A flat surface prevents the car from rolling and keeps internal components properly aligned during removal and reinstallation.
Working on uneven ground can cause the vehicle’s weight to shift to one side, increasing the risk of movement even with the parking brake engaged.
A level surface also makes it easier to sit, kneel, or comfortably access areas inside the vehicle, allowing for greater care and precision during installation.
How to Prepare the Vehicle for Short Shifter Installation
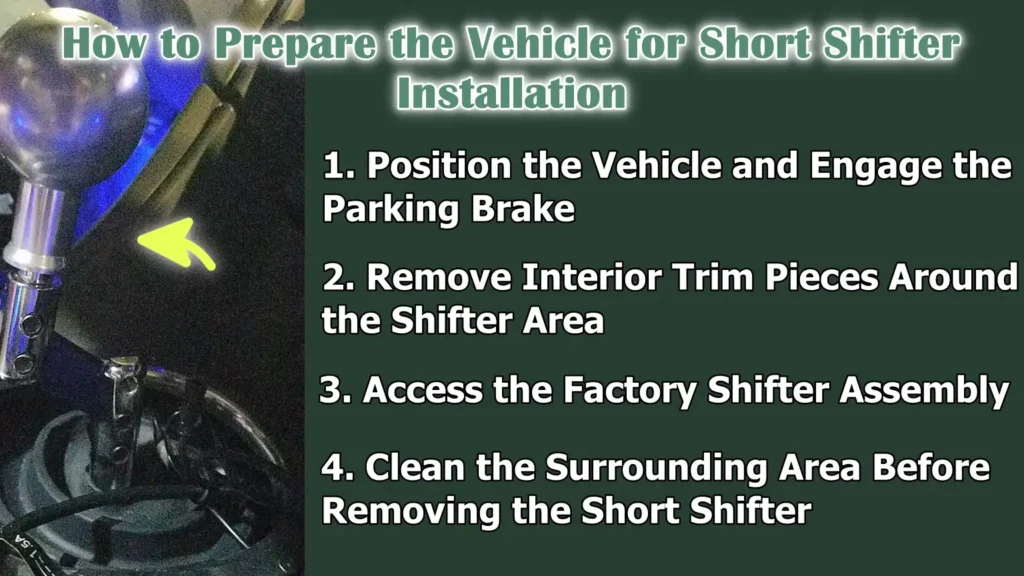
1. Position the Vehicle and Engage the Parking Brake
Before beginning the installation, it’s crucial to position the vehicle correctly to ensure safety and accuracy.
Parking on a flat, solid surface keeps the car stable and prevents unwanted movement while working inside the cabin.
Fully engaging the parking brake locks the rear wheels, which is specially important when applying force to remove or install shifter components.
A stable vehicle allows the shifter mechanism to remain aligned in its natural position, making removal and installation easier and reducing the likelihood of errors or misalignment.
2. Remove Interior Trim Pieces Around the Shifter Area
The area surrounding the shifter is typically covered by trim panels, a shift boot and sometimes additional console components designed for aesthetics and noise reduction.
These pieces should be removed carefully to avoid breaking plastic clips or scratching visible surfaces.
Most trim pieces are held in place by pressure clips or small screws and gentle removal helps prevent damage.
Taking your time with this step preserves the interior finish and ensures that all components can be properly reinstalled after the short shifter is fitted.
3. Access the Factory Shifter Assembly
Once the trim pieces are removed, the factory shifter assembly becomes accessible.
This assembly includes the gear lever, mounting base, bushings and linkage connections that transmit movement to the transmission.
Full access to this assembly is necessary so that bolts, clips and connections can be clearly seen and manipulated without excessive force.
Good access helps prevent accidental damage to surrounding wiring or plastic components and allows the installer to understand how the original system was arranged before removal, which is helpful during reassembly.
4. Clean the Surrounding Area Before Removing the Short Shifter
Cleaning the area around the shifter before removing the components is an often overlooked but crucial step.
Dirt, dust and small particles can fall into the shifter opening after the assembly is removed, potentially causing noise or poor movement later on.
Wiping the area with a clean cloth removes loose debris and makes it easier to clearly see the bolts and clips.
A clean area also reduces the likelihood of dirt affecting new bushings or moving parts, ensuring the short shifter operates smoothly after installation.
How to Remove the Factory Shifter Assembly
1. Detaching the Shift Knob and Shift Boot
The first step in removing the factory shifter assembly is to detach the shift knob and shift boot.
In most vehicles, the shift knob is either threaded or secured with a hidden clip or set screw.
Carefully removing it prevents damage to the threads or internal locking mechanism.
The shift boot is usually attached to the center console with clips or a trim ring and should be gently lifted to avoid tearing the material.
Removing these components exposes the upper portion of the shifter mechanism and provides ample space for comfortable and safe work.
2. Identifying Mounting Points and Linkage Connections
Once the shifter area is exposed, the next step is to identify how the factory shifter is mounted to the vehicle.
The assembly is typically secured at its base with bolts or nuts and connected to the transmission via rods or cables.
Taking the time to observe these mounting points and connections is crucial, as different vehicles have varying designs.
Understanding the location of each bolt, clip and connection helps prevent accidental damage and makes the removal process smoother and more controlled.
3. Carefully Disconnecting Cables or Rods Without Damage
The shifter connects to the transmission using cables or solid rods that are designed to move freely but fit securely in place.
These connections often utilize clips, pins, or bushings that must be gently removed.
Applying excessive force or using the wrong tools can bend the rods, stretch the cables, or break the clips, leading to potential shifting problems later on.
Applying steady pressure and supporting the connections during removal helps preserve these components and ensures they can be reused if necessary.
4. Inspecting Factory Bushings and Components
After removing the factory shifter assembly, it’s important to inspect the bushings and surrounding components.
Factory bushings are often made of soft materials that can wear out over time, leading to loose or imprecise shifting.
Checking for cracks, excessive play, or damage helps determine if replacement bushings are needed.
Inspecting the mounting area and linkage parts also ensures that no damage occurred during removal, allowing the new short shifter to be installed correctly and function as intended.
How to Install the Short Shifter Assembly
Not only this, there’s academic research, a short shifter was redesigned and evaluated against a factory unit, so that they can measure throw reduction and structural behavior; and it shows that a shorter, lighter shifter can maintain the strength while it reduces shift distance and actually improves overall gear-changing quality, which is why many performance installations actually favor short throw designs.[¹]
1. Aligning the New Short Shifter with the Mounting Location
Installing the short shifter begins, much like the factory shifter, by carefully positioning it at the mounting location.
Proper alignment is crucial, as the shifter must be flat and centered for correct operation in all gears.
If the shifter is not properly aligned, it can lead to binding, missed gears, or uneven wear over time.
Taking a moment to compare the position of the new shifter to the original one ensures that the linkage lines up correctly and the shifter base fits securely without force.
2. Properly Installing the New Bushings and Pivot Points
Short shifter kits typically include new bushings and pivot parts that replace the factory components.
These parts help reduce unwanted movement and improve shift accuracy.
It’s essential to install them in the correct orientation, as the bushings are designed to support the load and allow smooth movement at specific angles.
If installed incorrectly, the shifter may feel stiff or fail to return properly to the center position.
If recommended by the manufacturer, applying a light lubricant to the pivot points helps them rotate smoothly, reducing friction and wear during prolonged use.
3. Tightening the Bolts to the Recommended Torque Specifications
Once the shifter and bushings are in place, the mounting bolts should be tightened to the correct torque.
Torque specifications are set by the manufacturer to ensure the bolts are tight enough to securely hold the assembly without damaging the threads or distorting the parts.
Overtightening can damage the threads or crack the mounts, while undertightening can cause the shifter to wobble or loosen during driving.
Using the correct torque helps maintain stability, safety and consistent shifting performance.
4. Ensuring Smooth Movement Before Reassembly
Before reinstalling the interior trim and shifter boot, it’s crucial to test the shifter’s movement.
The shifter should move smoothly through all gears without binding, rubbing, or excessive resistance.
This quick check helps identify any alignment or installation issues before reassembling everything.
Smooth and consistent movement ensures that the short shifter is properly installed and ready to provide an improved shift feel once the interior parts are put back together.
How to Reassemble Interior Components
1. Reinstalling Trim Panels and Shift Boot
Once the short shifter is installed and tested, the interior parts can be carefully reassembled.
The trim panels and shift boot should be returned to their original positions, ensuring all clips and mounting points are properly aligned.
Applying even pressure to the panels helps prevent broken clips or uneven gaps.
The shift boot should fit snugly around the shifter and properly seal the opening to prevent dust and noise from entering the cabin.
Correct reassembly ensures the interior remains secure and rattle-free during driving.
2. Properly Fitting the Shift Knob
Proper installation of the shift knob is crucial for secure and comfortable shifting.
Most shift knobs thread onto the shifter, while some use locking clips or set screws.
Tightening the knob correctly prevents it from coming loose during driving, specially during quick gear changes.
The knob should be aligned straight so that the gear markings are in the correct orientation.
A properly fitted shift knob improves control, comfort and overall driving confidence.
3. Checking for Interference with Interior Parts
Before completing the installation, it’s essential to check that the shifter moves freely without touching the surrounding trim or center console.
The shifter should not rub against any plastic panels or the shift boot when changing gears.
Interference can cause noise, hinder movement, or lead to premature wear and tear on interior parts.
Gently moving the shifter through all gears ensures there is sufficient clearance and everything fits as intended.
4. Maintaining a Factory-Like Interior Finish
The careful reassembly process helps maintain a clean, factory-like interior look.
By properly aligning the trim panels and ensuring all parts are securely fitted, uneven gaps or loose components can be avoided.
Preventing scratches and fingerprints keeps the interior looking original and well-maintained.
Taking extra care during this step ensures that the upgrade enhances driving performance without negatively impacting the look and feel of the vehicle’s interior.
How to Adjust the Short Shifter – If Required for Your Vehicle
1. Understanding Adjustable Shift Throw Settings
Some short shifters come with adjustable settings that allow the driver to change how short the shift movement feels.
Shift throw refers to the distance the shifter travels between gears.
A shorter setting reduces hand movement and can make shifts feel faster, while a slightly longer setting might feel smoother and easier for everyday driving.
Understanding these settings helps drivers choose a balance between speed and comfort.
Making small adjustments and testing the feel ensures the shifter matches the driver’s preference without compromising proper operation.
2. Fine-Tuning Shift Height and Resistance
Adjustable short shifters may also allow for changes in shift height and resistance.
Shift height controls how high or low the shifter sits above the console, affecting hand position and comfort.
Resistance refers to how firm the shifter feels when moving between gears.
Increasing resistance can improve control and reduce accidental shifts, while lower resistance can make driving in traffic easier.
Fine-tuning these settings helps create a comfortable and reliable shifting experience suitable for both performance and daily use.
3. Ensuring Proper Gear Engagement
After making adjustments, it’s crucial to confirm that each gear engages fully and smoothly.
The shifter should click or settle into each gear without any grinding, hesitation, or feeling of only partial engagement.
Incorrect adjustments can lead to gears popping out or feeling vague.
Checking gear engagement with the engine off and then during a short test drive helps confirm that the shifter is operating correctly and safely.
4. Verifying Neutral Position Alignment
Neutral position alignment ensures that the shifter is properly centered when not in gear.
A correctly aligned neutral position allows for smooth side-to-side movement and makes finding gears consistently easier.
If the shifter does not return to the center or feels uneven, adjustment may be necessary.
Proper neutral alignment helps prevent missed shifts, reduces stress on linkage parts and ensures the long-term reliability of the short shifter system.
How to Perform Post-Installation Testing
1. Testing Gear Engagement with the Engine Off
Before driving the vehicle, it’s crucial to test the shifter with the engine off.
This allows for safe and controlled movement through all gears without the risks associated with a running engine.
The shifter should move smoothly into each gear position and return easily to neutral.
Each gear should feel distinct, without sticking or requiring excessive force.
Testing at this stage helps identify alignment or installation issues early, making them easier to correct before driving.
2. Conducting an Initial Test Drive at Low Speeds
Once the engine-off test is complete, the next step is to conduct a short, gentle test drive at low speeds.
Driving slowly allows the driver to focus on the feel of the shifter without the pressure of traffic or high engine speeds.
Shifts should be direct and predictable and the vehicle should respond normally during gear changes.
Testing at low speeds minimizes stress on the transmission while ensuring the short shifter is functioning correctly under actual driving conditions.
3. Listening for Unusual Noises or Resistance
During the test drive, it’s essential to listen carefully for unusual noises and feel for any unexpected resistance.
Sounds such as clicking, grinding, rattling, or rubbing may indicate loose bolts, misalignment, or interference with internal components.
Excessive resistance or stiffness in the short shifter can also indicate improper installation.
Paying attention to these signs helps prevent long-term damage and ensures the system is functioning as intended.
4. Confirming Improved Shift Feel and Precision
The final step of testing is to confirm that the short shifter is providing the expected improvements in shift feel and precision.
Gear changes should require less hand movement compared to the factory shifter and should feel more precise.
The driver should experience improved control and confidence during the shift, specially during acceleration.
Confirmation of these improvements indicates that the installation was successful and the short shifter is delivering its intended performance benefits.
Read More
What are the Common Installation Mistakes that You Should Avoid
1. Incorrect Bushing Placement
One of the most common mistakes during short shifter installation is installing the bushings in the wrong location or orientation.
Bushings are designed to support movement and reduce unwanted play and each one typically fits in only one specific place.
If the bushings are installed incorrectly, the shifter may feel tight, loose, or fail to return to the center properly.
Incorrect placement can also lead to uneven wear over time, degrading shift quality.
Taking the time to install each bushing in its correct location ensures smooth and precise shifter movement.
2. Overtightening or Undertightening Bolts
Bolt tension plays a crucial role in how well a short shifter performs.
Overtightening bolts can strip threads, crack mounting points, or restrict the shifter’s movement, resulting in stiff or rough shifting.
Undertightening bolts can cause parts to loosen during driving, leading to rattling, missed shifts, or unsafe operation.
Using the correct tightening torque ensures the shifter is securely mounted and allowed to move freely.
Correct bolt tension improves reliability and prevents long-term damage.
3. Skipping Adjustment Steps
Some installers skip adjustment steps to save time, but this often results in poor shifting performance.
Adjustable short shifters are designed to be fine-tuned for proper gear engagement and comfort.
Skipping these steps can lead to gears feeling vague, difficult to engage, or uneven in the shift pattern.
Taking the time to adjust the shift throw, height and alignment ensures the shifter operates as intended and provides the best driving experience.
4. Ignoring Manufacturer’s Instructions
Every short shifter is designed with specific installation steps and requirements provided by the manufacturer.
Ignoring these instructions can lead to improper installation, reduced performance, or even damage to the shifter or the vehicle.
The manufacturer’s guidelines are based on testing and engineering data to ensure proper fit and safe operation.
Carefully following these instructions helps prevent errors, ensures compatibility and safeguards the long-term performance and reliability of the short shifter system.
How to Maintain The Short Shifter for Precise Performance
1. Periodic Inspection of Shifter Components
Regular inspection of short shifter components helps maintain smooth and reliable shifting over time.
Checking the shifter assembly, mounting bolts, bushings and linkage connections allows for early detection of looseness or damage.
Over time, vibrations and frequent shifting can cause bolts to loosen slightly or bushings to wear down.
Inspecting these parts ensures everything remains secure and properly aligned, helping prevent sudden changes in shift feel or performance.
2. Lubrication Recommendations
Proper lubrication plays a crucial role in the smooth operation of a short shifter.
Frequent gear changes can cause friction at pivot points and moving joints, leading to stiffness or noise if not lubricated.
Using the lubricant recommended by the manufacturer reduces friction and wear and prevents excessive dirt buildup.
Applying lubrication at appropriate intervals ensures consistent shifter movement and protects metal and bushing surfaces from premature wear.
3. Signs of Wear or Misalignment
Over time, certain signs may indicate wear or misalignment in the shifter system.
Excessive play, difficulty engaging gears, unusual noises, or uneven resistance during shifting can indicate worn bushings or that the shifting components are no longer properly aligned.
Ignoring these signs can lead to reduced shifting accuracy and further damage.
Recognizing early symptoms allows for timely corrective action and helps maintain proper shifter function.
4. When should the shifter be readjusted or serviced?
Readjustment or servicing becomes necessary when there are noticeable changes in shift feel or gear engagement.
Adjustable short shifters may require fine-tuning after extended use or changes in driving conditions.
Servicing the shifter at the appropriate time restores smooth operation and prevents long-term stress on the linkage components.
Regular maintenance and timely adjustments ensure that the short shifter delivers precise and reliable performance throughout its lifespan.
Conclusion – How to Install Short Shifter
The short shifter literally enhances the performance, as it creates a smoother and more connected driving experience as well.
And, during the installation process, the focus isn’t just on replacing a single part, but on understanding how the shifter system works and how small mechanical changes can lead to significant improvements in control and precision.
So, a properly installed short shifter reduces unnecessary hand movement, allows the driver to shift gears more quickly and provides clearer feedback with each gear change.
Plus, these improvements stem from simple mechanical principles, not from modifications to the transmission itself, which is why short shifters are highly regarded by manufacturers and performance specialists when properly installed and adjusted.
Not only this, when you properly tested and maintained, it becomes not just an aftermarket add-on, but an integral part of the car.
At the end, the result becomes a smoother and more reliable shifting experience, enhancing control, comfort and driving enjoyment for years to come.
Now, you can write down your thoughts about this guide, or just ask the related questions.
Frequently Asked Questions
Q1. What is a short shifter and why would someone install one?
Answer: A short shifter is a replacement for the factory gear shifter in a manual transmission vehicle. It’s designed to reduce the distance between gears on the gear lever, known as the shift throw. People install short shifters to make gear changes quicker, more direct and more precise. It doesn’t change the internal workings of the transmission, but it improves the way the driver interacts with the car. This upgrade is popular because it enhances the driving experience without affecting reliability when installed correctly.
Q2. Is installing a short shifter difficult for beginners?
Answer: Installing a short shifter is considered a moderately difficult task, but many beginners can complete it with patience and the right instructions. The process mainly involves removing interior trim, disconnecting the factory shifter and installing the new unit in its place. No specific mechanical knowledge of the transmission is required. Taking your time, following the manufacturer’s instructions and double-checking each step will greatly reduce the chances of errors.
Q3. How long does it typically take to install a short shifter?
Answer: Most short shifter installations take between 1 and 3 hours, depending on the vehicle and the installer’s experience. Some cars have easily accessible shifter assemblies, while others require more trim removal or adjustments. Taking your time and working carefully may take longer, but it helps ensure a proper installation and optimal performance in the long run.
Q4. Does installing a short shifter damage the transmission?
Answer: A properly installed short shifter will not damage the transmission. This is a common concern, but the transmission still engages gears in the same way as with the factory shifter. Problems typically only occur if the shifter is installed incorrectly or not properly adjusted. Smooth shifting habits are more important to the health of the transmission than the type of shifter used.
Q5. Is it necessary to disconnect the battery before installing a short shifter?
Answer: It is recommended to disconnect the battery when installing a short shifter. Many vehicles have electrical wiring under the center console and disconnecting the battery reduces the risk of short circuits or accidentally triggering airbag warnings. This simple step adds an extra layer of safety and helps protect the vehicle’s electronics.
Q6. Will a short shifter make shifting more difficult or stiffer?
Answer: Due to reduced leverage, a short shifter may feel slightly stiffer than the factory shifter. This stiffness is normal and often preferred by drivers who want better control and feedback. However, it shouldn’t feel excessively tight or difficult. If shifting is difficult, it may indicate incorrect installation or a need for adjustment.
Q7. Do short shifters require adjustment after installation?
Answer: Some short shifters require adjustment, while others are pre-set by the manufacturer. Adjustable short shifters allow the driver to fine-tune the shift throw, height, or resistance. Proper adjustment ensures smooth gear engagement and prevents issues like missed shifts or gears popping out. Testing and fine-tuning after installation are crucial for optimal results.
Q8. Can I drive my car immediately after installing a short shifter?
Answer: Yes, you can drive after installation, but testing should be done cautiously. It’s best to first check gear engagement with the engine off and then perform a gentle test drive. Driving at low speeds allows you to confirm smooth operation before normal driving and identify any potential problems.
Q9. How do I know if my short shifter is installed correctly?
Answer: A properly installed short shifter will move smoothly through all gears without any binding, sticking, or resistance. Each gear should feel crisp and secure and the shifter should easily return to neutral. There should be no strange noises or looseness. If the shifting feels consistent and controlled, the installation is likely correct.
Q10. Does a short shifter require regular maintenance?
Answer: Short shifters require very little maintenance, but occasional checks are beneficial. Checking the bolts, bushings and linkages ensures everything is tight and in place. Applying a light lubricant to the moving parts, if recommended by the manufacturer, helps maintain smooth operation. Regular checks help prevent wear and tear and maintain consistent shift quality.
References:
[1] Design, Development and Performance Evaluation of a Lightweight Short Shifter for Enhanced Gear-Shifting Quality in Automobile
https://pureportal.coventry.ac.uk/en/publications/design-development-and-performance-evaluation-of-a-lightweight-sh/

Guys, I’m a car audio enthusiast and customization expert and I love clear sound and clean installation. Plus, I have spent years helping people build their dream audio setups. And whenever I’m working on cars, I probably listen to music and thinks about the next big upgrade.
