Written By: Don Dodi
Fact Checked By: Kristen Brown
Reviewed By: Diego Rosenberg
Yes, car chips actually looks small in size, but you should understand that even chip which is size of a grain of sand can actually turn into a rusty spot within a weeks if you left it untreated.
So, whenever you notice that there’s stone, piece of gravel or road debris actually hit the surface of your car, then you’ll notice that it leaves behind the tiny cracks in the paint that literally expose the bare metal underneath it.
And studies also shows that even a chip which is smaller than a pencil tip can begin to rust within days if moisture and oxygen reach that metallic part.
Plus, it is also true that these small spots can spread, weaken the protective layers and that can reduce the overall value of your car.
As well as, now-a-days modern automotive paints are actually designed with the multiple layers such as: primer, base color and clear coat: so these actually works together to protect your car from rain, dirt, sunlight and all kinds of chemicals.
So, whenever the chip brakes through these layers, then just think like your protective shield is lost now and you actually need to focus on repairing the chipped part of the paint quickly, so that you can save costly repairs caused by rust and corrosion in future.
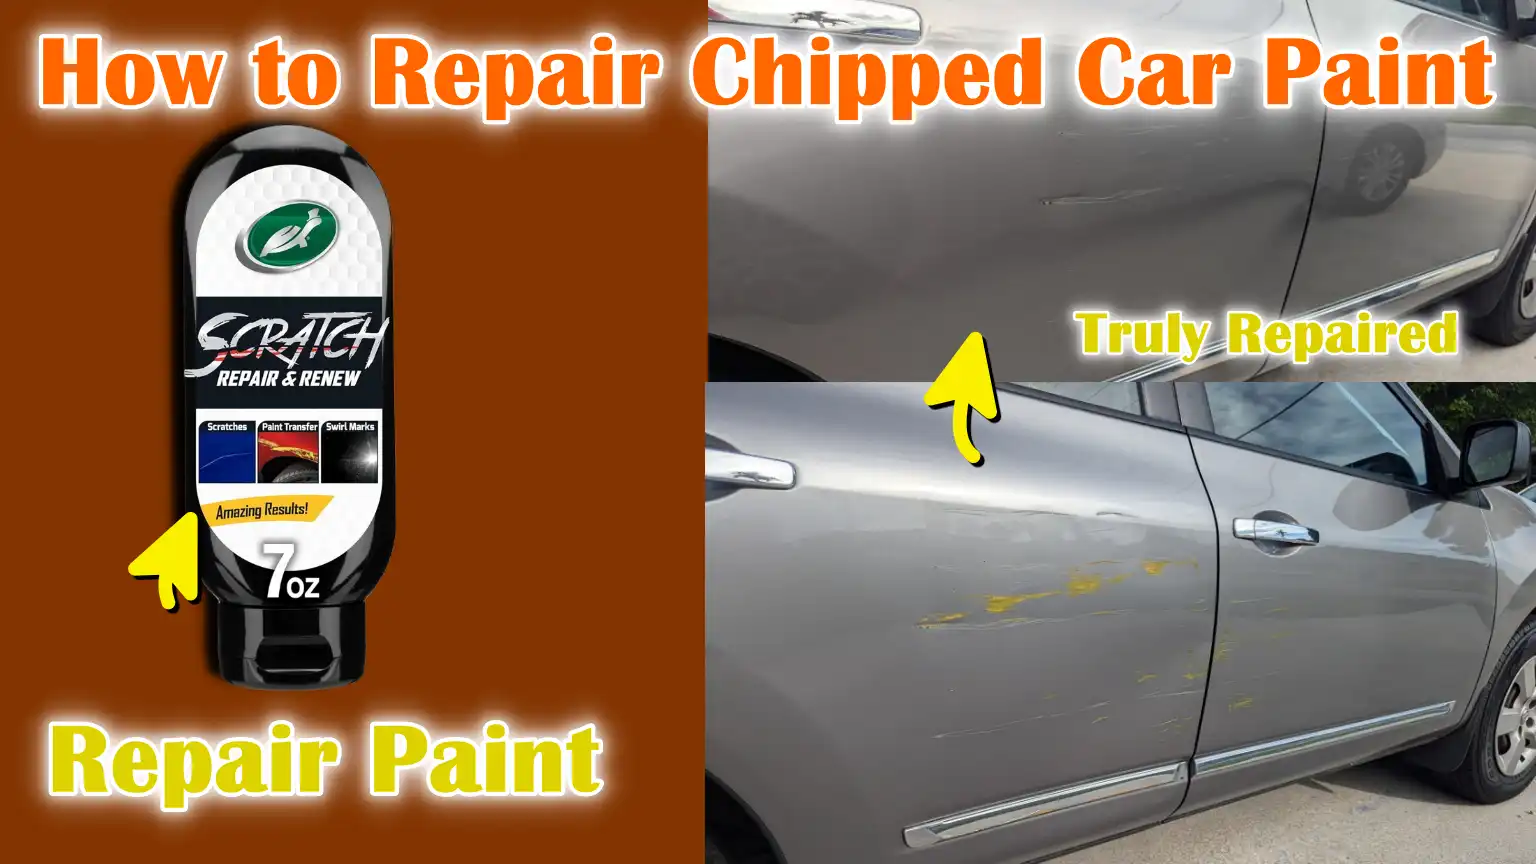
Because of that, this is the guide which specially focuses on How to Repair Chipped Car Paint, so that you can have all the right kinds of tools for your missions, with matching paint code methods and step-by-step approach as well.
Tools
| Tool / Material | Purpose / Use | Tips / Notes |
|---|---|---|
| Touch-up Paint | Matches the color of your car to fill in chips. | Use only the paint code for your car (usually on a sticker inside the door or engine bay). Shake well before use. |
| Primer | Protects bare metal and helps paint stick better. | This is only needed if the chip is exposing metal. Apply a very thin layer and let it dry completely. |
| Clear Coat | Protects new paint and enhances shine. | Apply a thin layer of touch-up paint after it dries. This helps it blend in with the surrounding paint. |
| Fine-grit Sandpaper / Sanding Block | Smoothes out rough edges around the chip. | For light sanding, use 1500-3000 grit. Wet sanding can help prevent scratches. |
| Rubbing Alcohol / Degreaser | Cleans away dirt, wax and oil for better paint adhesion. | Wipe the chipped area thoroughly before painting. Avoid touching it with bare fingers afterward. |
| Microfiber Cloths | Cleans and dries surfaces without scratching them. | Soft and lint-free cloths are best to avoid streaks or fibers in the paint. |
| Small Brushes / Applicators | To apply paint precisely to the chip. | Use a brush or applicator pen with a thin tip. Apply several thin coats instead of one thick coat. |
| Masking Tape (Optional) | Protects surrounding paint from accidental spills. | Use this if the chip is near an edge or in areas that are easy to overpaint. It can also help create a clean border. |
How to Prepare First
1. Clean the Damaged Area
Before repairing any paint chip, it’s important to thoroughly clean the area.
Dirt, dust and road grime can prevent the paint from adhering properly and cause an uneven repair.
Carefully wash the damaged area with mild soap and water, ensuring all loose particles are removed.
Cleaning not only helps the paint adhere better but also allows you to clearly see the extent of the damage.
2. Dry Thoroughly
After washing, ensure the surface is completely dry.
Any water or moisture left on the area can interfere with the paint’s adhesion and cause subsequent bubbling or peeling.
Gently pat the area with a soft microfiber cloth and let it air dry for a few minutes to ensure no moisture remains.
3. Remove Wax, Dirt and Oil
Even if the surface appears clean, there may still be wax, grease, or oil on it that can prevent the paint from adhering.
Use rubbing alcohol or a car-safe degreaser to carefully wipe the area.
This step is crucial because paint applied over contaminants can deteriorate faster, leading to peeling or uneven color.
4. Remove Rust
If you see rust inside the chip, it’s important to repair it before painting.
Rust can spread beneath the paint and cause long-term damage to the metal.
Gently sand the rusted area with fine sandpaper until you’re left with clean, bare metal.
Thoroughly removing the rust ensures that the touch-up paint will adhere properly and the repair will last.
How to Perform Masking and Surface Protection
1. Apply masking tape around the chip
Masking tape is a simple yet extremely effective tool for protecting surrounding paint when repairing a chip.
If the damaged area is near edges, bends, or other areas you don’t want to touch, carefully apply masking tape around the chip.
This creates a small barrier that prevents accidental paint spills and keeps your repair neat.
Using masking tape also helps you control the amount of paint applied, which is important for a smooth and professional-looking finish.
2. Lightly sand the edges of the chip
Even if the chip is small, its edges may be rough or jagged, making the repair visible after painting.
Lightly sanding the edges with fine-grit sandpaper helps smooth the transition between the chip and the surrounding paint.
This step allows the new paint to blend well with the old paint, reducing the likelihood of visible bumps or uneven surfaces.
Sanding also slightly roughens the surrounding paint surface, which improves adhesion and ensures that the touch-up paint sticks properly.
How to Apply Primer – Only If Necessary
1. Inspect the Bare Metal
Before applying any paint, it’s important to carefully inspect the chipped area.
If a chip exposes bare metal, it’s essential to apply a primer first.
Bare metal is highly sensitive to moisture and air, which can lead to rapid rusting.
Skipping this step can lead to rust forming beneath the touch-up paint, causing the repair to fail over time.
Applying a primer creates a protective layer that seals the metal and provides a surface for the paint to adhere to properly.
2. Apply a Thin Layer of Primer
When applying primer, less is more.
Using a thin brush or applicator, apply a thin, even layer to the exposed metal.
Applying too much primer can result in rough, uneven surfaces and a longer drying time.
The goal is to apply a light layer to the metal, as well as smooth out the edges so that the new paint blends well with the surrounding area.
3. Let the primer dry completely
Let the primer dry completely before painting.
Drying times can vary depending on the product, temperature and humidity, so always follow the manufacturer’s instructions.
Rushing this step can trap moisture or cause the paint to not adhere properly, leading to peeling or bubbling later.
Properly dried primer ensures that the touch-up paint adheres firmly and provides a durable, long-lasting repair.
How to Apply Touch-Up Paint
1. Shake the bottle of touch-up paint well
Before applying touch-up paint, it’s important to shake the bottle well.
Paint can set over time, causing the pigments and solvents to separate.
Shaking ensures color uniformity and consistency, which is essential for a smooth and even repair.
Properly mixed paint also improves adhesion and helps prevent color mismatches or streaks.
2. Use a Fine Brush or Applicator Pen
To apply the adhesive accurately, use a fine-tipped brush or applicator pen.
This allows you to apply the paint precisely to the damaged area without spreading it onto the surrounding surface.
To maintain a clean look and avoid bumps or uneven spots, it’s important to be careful when applying.
3. Apply Thin, Even Layers
It’s better to apply several thin layers rather than one thick layer.
Thinner layers dry more evenly, reducing the risk of drips or bubbles and allowing the paint to blend naturally with the existing surface.
Thicker paint can take longer to dry and may crack or peel over time.
Applying thinner layers makes it easier to gradually blend the paint with the surrounding color and texture.
4. Allow each coat to dry before applying the next
After applying each coat of paint, allow it to dry completely before applying the next.
Drying times can vary depending on the type of paint and environmental conditions, so it’s important to follow the manufacturer’s instructions.
Waiting ensures each coat adheres properly and results in a strong, durable repair that looks flawless.
Skipping this step can cause the paint to become uneven, bubble-like, or peel.
How to Allow the Clear Coat
As well as, it is true that multi-layer systems with an appropriate primer and clear-coat actually perform best under impact tests, while single-layer coatings are actually more likely to crack under stone hits and this is why you should use primer and clear-coat whenever you repair it.[¹]
1. Apply a Thin Layer of Clear Coat
After the touch-up paint has completely dried, it’s important to apply a layer of clear coat to the repaired area.
It acts as a protective layer that preserves color, provides shine and prevents damage from sun, rain, dirt and chemicals.
A thin, even layer is essential, as applying too much clear coat can result in streaks, uneven surfaces, or hazy areas.
Careful application ensures that the repaired area blends well with the surrounding paint and preserves the car’s original finish.
2. Allow the Clear Coat to Dry Completely
After applying the clear coat, allow it to dry completely before further use.
Drying times vary depending on the product, temperature and humidity, so always follow the manufacturer’s instructions.
Proper drying ensures that the protective layer hardens and adheres firmly to the paint, resulting in a durable and long-lasting repair.
Rushing the process or touching the area too early can result in scratches, stains, or a weak finish that may peel over time.
How to Blend & Give It Perfect Finishing
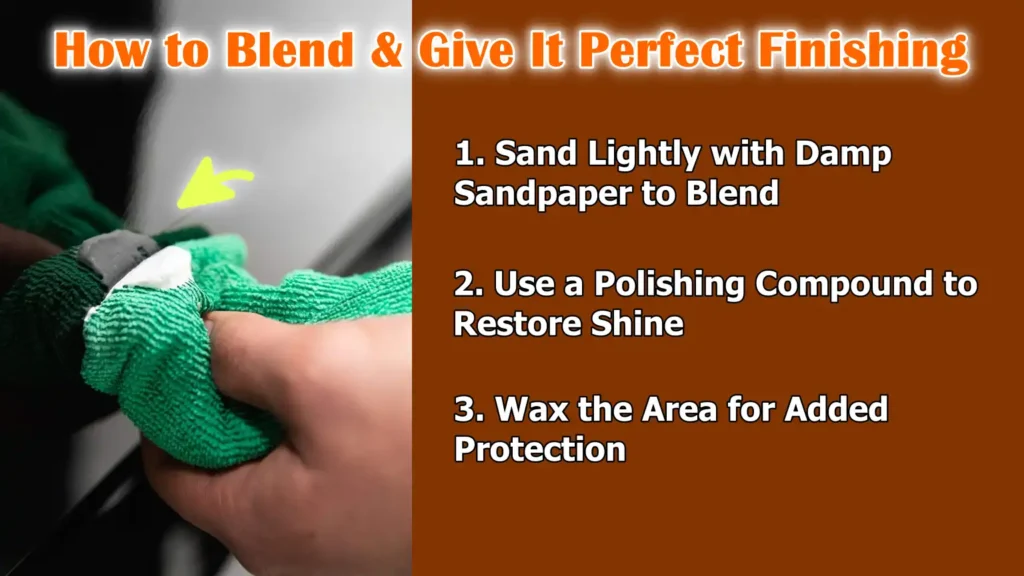
1. Sand Lightly with Damp Sandpaper to Blend
After the clear coat has completely dried, it may be necessary to lightly sand the repaired area with damp sandpaper to ensure it blends well with the surrounding paint.
Use very fine-grit sandpaper, typically between 2000 and 3000 grit and keep the surface wet while sanding.
Wet sanding removes minor irregularities or raised edges and ensures that the repaired area is not visible.
Sanding slowly and evenly is essential to avoid scratching or damaging the surrounding paint layers.
2. Use a Polishing Compound to Restore Shine
After sanding is complete, applying a polishing compound helps restore the smoothness and shine of the repaired area.
Polishing removes any fine scratches caused by sanding and enhances the paint’s reflective quality.
This step ensures that the repair looks natural and matches the original finish, making it virtually invisible to the eye.
For best results, use a soft microfiber cloth and apply the compound in small, circular motions.
3. Wax the Area for Added Protection
Finally, waxing the repaired area provides an additional layer of protection against damage caused by dirt, moisture and UV rays.
Waxing helps maintain the paint’s shine and extend the repair’s life.
Apply a thin, even layer of high-quality car wax and gently polish it after it dries.
Regular waxing after repairs can also prevent future chipping and scratches, keeping the car’s surface smooth and well-maintained.
Read More:
What are the Common Mistakes that You Better Avoid Them
1. Using the Wrong Color Code
One of the most common mistakes when repairing damaged car paint is using the wrong color code.
Car manufacturers assign each vehicle a specific paint code to ensure that the touch-up paint color matches the original color exactly.
Using the wrong code can result in significant color differences, making the repair visible and ruining the car’s overall look.
To ensure an accurate match, always consult the manufacturer’s label, which is usually located inside the driver’s door or under the hood.
2. Applying Thick Paint Layers That Cause Bumps
Applying thick paint layers may seem quicker, but this often results in bumps, uneven surfaces and longer drying times.
Thick paint can crack or peel over time, ruining the repair.
It’s always better to apply several thin coats, allowing each coat to dry completely.
This method ensures the paint blends naturally into the surrounding area and creates a smooth, professional-looking finish.
3. Not applying primer when bare metal is exposed
If bare metal is exposed due to a chip, not applying primer is a serious mistake.
Bare metal is susceptible to rust, which can spread beneath the paint and cause long-term damage.
Primer acts as a protective layer and helps touch-up paint adhere properly.
Applying primer before painting is essential for a durable and lasting repair that prevents rust.
4. Not allowing adequate drying time between steps
Rushing through the repair process without allowing each layer to dry properly can damage the entire finish.
Wet or partially dried paint, primer, or clearcoat may peel, bubble, or blend unevenly.
Following the manufacturer’s recommended drying time ensures that each layer adheres properly and results in a smooth, long-lasting repair.
Patience during each step is crucial for achieving professional-quality results.
Conclusion – How to Repair Chipped Car Paint
When you maintains the car paint by eliminating that ugly chips on car paint then it really sums up to strengthen your car’s shield against all-weather conditions, corrosion, rust and long-term damage as well.
As even a small chips enough to allow moisture and air to reach bare metal, increasing the likelihood of rust forming beneath layers of paint.
By following a careful, step-by-step process, including proper cleaning, priming, the correct application of touch-up paint and a protective clear coat, car owners can restore their vehicle’s original appearance while avoiding costly repairs in the future.
Using the right tools, materials and techniques ensures a durable, professional-looking result and taking the time to blend, polish and wax the repaired area preserves the car’s finish and overall value.
Ultimately, addressing paint chips promptly helps maintain your car’s appearance, protect its structural integrity and keep it in good condition for years to come.
So, that’s all from this one and now you can comment down your thoughts about it.
Frequently Asked Questions
Q1. Why does car paint peel?
Answer: Car paint can peel when you hit small stones, gravel, or road debris while driving. Extreme weather conditions like hail or intense sunlight can also weaken paint over time. Even not washing your car properly or using harsh chemicals can gradually weaken its protective layers, increasing the likelihood of paint peeling. Minor peeling may seem minor, but if left untreated, it can expose the underlying metal to moisture and oxygen, leading to rust and serious damage.
Q2. Can I repair paint peeling myself?
Answer: Yes, many car owners can repair minor paint peeling at home with the right tools, materials and careful technique. By cleaning the area, applying primer if needed, applying touch-up paint and protecting it with a clear coat, you can perform a professional-like repair. Patience and precision are essential, specially when applying thin layers and allowing adequate drying time between each step.
Q3. How do I know which paint color to use?
Answer: Every car has a specific paint code assigned by the manufacturer, usually found on a label inside the driver’s door, under the hood, or in the trunk. This code ensures that the touch-up paint exactly matches your car’s original color. Using the wrong code can cause a noticeable color difference, requiring repair. Be sure to double-check the code before purchasing paint.
Q4. Do I always need to apply a primer?
Answer: Primer is only necessary if a chip exposes bare metal. Bare metal is prone to rust, so primer acts as a protective layer and also helps the touch-up paint adhere better. In such cases, not applying a primer can cause the repair to fail and lead to rust beneath the paint. If the chip only affects the clear coat or top layer of paint, primer may not be necessary.
Q5. How many layers of paint should I apply?
Answer: It’s better to apply several thin coats of touch-up paint rather than one thick coat. Thin coats dry faster, reduce the risk of drips or bubbles and blend more naturally with the surrounding paint. Applying thick paint can cause bumps, cracks, or peeling. For a smooth and long-lasting finish, allow each coat to dry completely before applying the next.
Q6. Should I apply a clear coat after painting?
Answer: Yes, it’s important to apply a clear coat over touch-up paint. The clear coat protects the repaired area from sun, rain, dirt and chemicals and provides a smooth, shiny finish that blends in with the original paint. Without the clear coat, the repaired area can fade quickly and the paint may peel or crack again. It also protects the repaired area from minor scratches.
References:
[1] Experimental study on mechanical property and stone-chip resistance of automotive coatings
https://www.researchgate.net/publication/357259734_Experimental_study_on_mechanical_property_and_stone-chip_resistance_of_automotive_coatings

Guys, I’m a car audio enthusiast and customization expert and I love clear sound and clean installation. Plus, I have spent years helping people build their dream audio setups. And whenever I’m working on cars, I probably listen to music and thinks about the next big upgrade.