 Skip to content
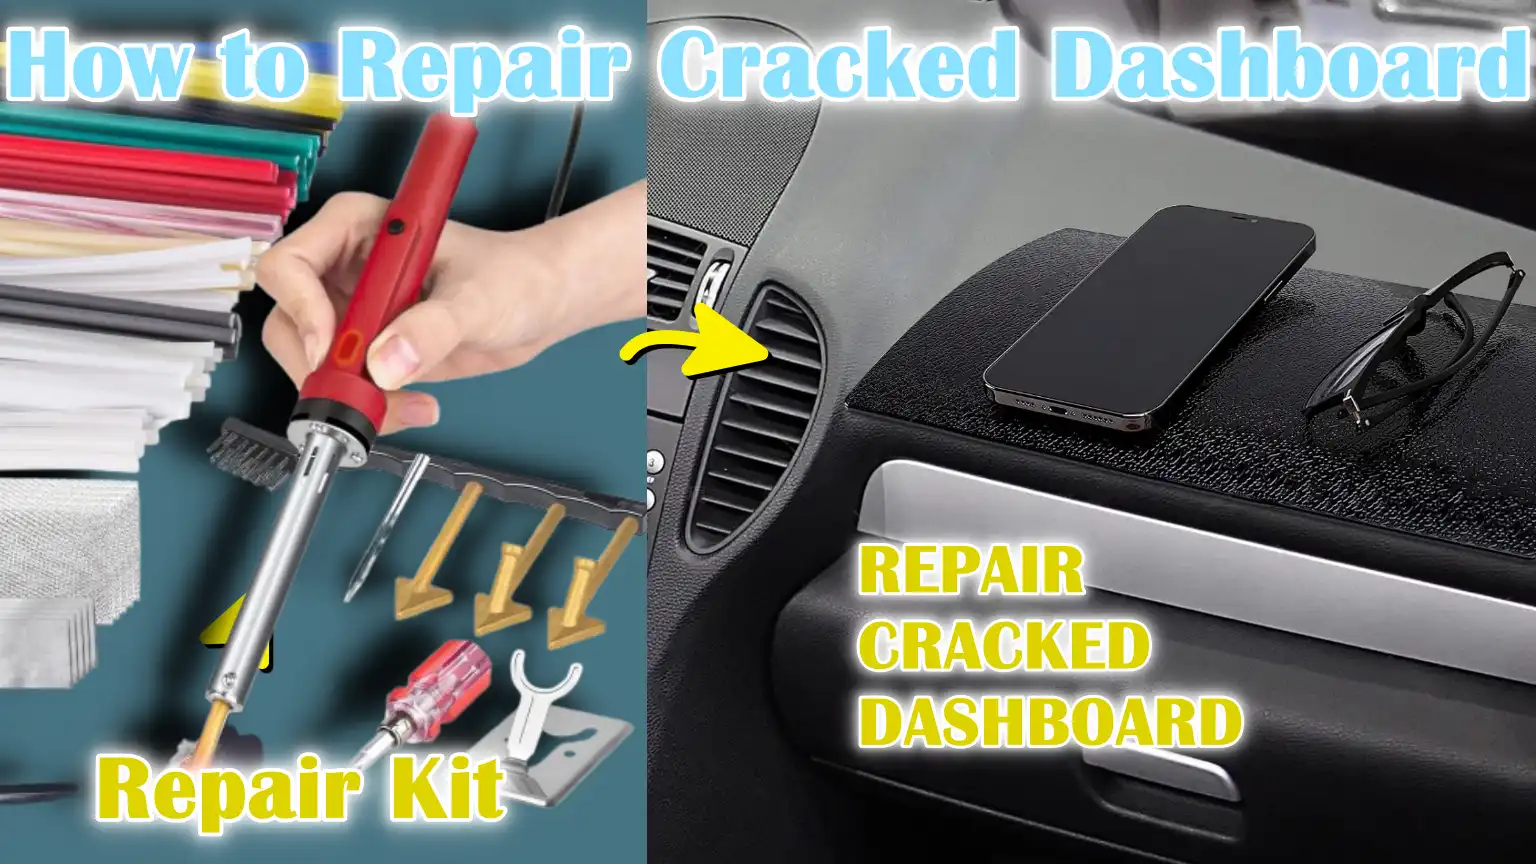
Written By: Don Dodi
Fact Checked By: Kristen Brown
Reviewed By: Diego Rosenberg
If your car dashboard often exposed to UV rays then it can result it to cracked dashboard, also directly sunlight without protection can quickens that process by 3-times faster than those shielded with cover or shades.
Indeed, a cracked dashboard is one of the common problems that car owners have to deal with, specially in the older vehicles or those exposed to harsh sunlight for the longer period of time.
Plus, research also shows that if there’s constant heat and ultraviolet rays from the sun then it can cause the dashboard materials such as: Vinyl, Plastic and Leather to dry out, weaken and eventually cracked up.
Not only this, if you don’t heal that small crack in their early days then over the time: even small cracks can grow more larger one that makes the interior look worn out and potentially lowers the resale value of the vehicle as well.
So, it is beyond just appearance: as deep cracks can also expose the foam or underlying structure as well, which might interfere with airbag function in some of the models if you ignore it completely.
Now, this is the guide on How to Repair Cracked Dashboard, which shows you affordable repair kits and other methods that can restore looks and strength of your car’s dashboard and it will be cost effective as well.
How to Access the Dashboard Damage First
Before beginning any repair work, it’s important to carefully inspect your dashboard to understand the extent of the damage.
Cracks can vary in size and depth and knowing this will help you decide the best way to repair it.
Check the entire dashboard surface, including hidden or shadowed areas, as small cracks can sometimes extend beneath the surface.
Pay attention to any discoloration, peeling, or soft spots in the material, as these may indicate underlying weakness.
Careful assessment ensures you don’t waste time or materials on ineffective repairs and helps prevent further damage during the process.
1. Small Cracks vs Deep/Long Cracks
Small cracks typically appear as fine lines or hairlines and are often caused by short periods of sun exposure or aging of the dashboard material.
These cracks are easier to repair because they don’t affect the dashboard’s underlying structure.
On the other hand, deep or long cracks can split the material down to the foam or plastic underneath and can be caused by excessive heat, accidental impact, or prolonged neglect.
These types of cracks require more careful repair, sometimes including patches or reinforced fillers, because simply applying compound to the surface may not properly bond the material.
Understanding the difference between small and deep cracks will help you choose the right repair method and avoid temporary solutions that could quickly fail.
2. When Repair is Possible vs When Replacement is Necessary
Repair is usually possible when the cracks are limited to the surface layer, the dashboard material is still flexible and there is no major structural damage.
Many small and medium cracks can be filled, smoothed and repaired with a DIY repair kit or professional compound.
When cracks are very large, the material has become brittle, or the dashboard is warped or broken, replacement becomes necessary.
Additionally, if the damage exposes internal wiring, the airbag compartment, or foam padding, replacement is often a safer and more reliable option.
Assessing repair or replacement in advance can save time and money and prevent further complications.
3. Safety Considerations (Airbag Area, Wiring Under Dashboard)
Safety is a key factor when dealing with a broken dashboard.
Many dashboards cover vital components such as airbags, wiring and ventilation systems.
Repairing cracks near these areas requires extra caution, as improper repairs can prevent airbag deployment or damage electrical connections.
Even small cracks near airbags should be treated carefully or, if unsure, should be left to professionals.
Always remove the car battery before beginning repairs to reduce the risk of electrical problems or accidental airbag deployment.
Prioritizing safety ensures that your dashboard repair improves its aesthetics and functionality without creating hidden dangers.
Tools
| Tool / Material | Purpose / Use | Notes / Tips |
|---|---|---|
| Dashboard repair kit (vinyl or leather filler, adhesive, grain pad, texture spray) | Used to fill cracks, join materials and match the original appearance of the dashboard. | Choose a kit that matches the color and material of your dashboard for best results. |
| Sandpaper (various grits) | Smooth the cracked area and remove rough edges before applying the filler. | Start with a coarse grit and finish with a finer grit for a smooth finish. |
| Cleaning supplies (mild soap, rubbing alcohol, microfiber cloth) | Cleans dust, grease and oil from dashboard surfaces before repairs. | A clean surface ensures better adhesion and a longer lasting repair. |
| Putty knife or applicator tool | Helps to evenly spread and smooth the filler into cracks. | Use a flexible tool to avoid further damage to the dashboard surface. |
| Heat gun or hairdryer (optional) | Accelerates the drying or hardening process of fillers and adhesives. | Keep it at a safe distance to prevent the dashboard from overheating or melting. |
| Protective gloves and mask | Protects your hands and prevents inhalation of dust or chemicals. | Always wear safety equipment when sanding, applying filler, or using adhesives. |
How to Prepare First to Fix the Dashboard Part
Proper preparation is the most important step before repairing a broken dashboard.
This ensures an effective, durable and safe repair.
Negligence in preparation can lead to improper adhesion of the filler, uneven surfaces, or damage to other parts of the dashboard.
Carefully preparing the dashboard will make the repair easier and more professional.
1. Disconnect the Battery for Safety
Before beginning any repair work, it’s important to disconnect the car’s battery.
This prevents any accidental short circuits or electric shocks, specially if you’re working near wiring or the airbag compartment.
Disconnecting the battery also reduces the risk of accidentally deploying the airbag while handling the dashboard.
Always wait at least 10-15 minutes after disconnecting the battery to ensure all electrical systems are completely off before beginning any work.
2. Clean the Dashboard Thoroughly
It’s important to thoroughly clean the dashboard because dust, oil and debris can prevent the repair material from adhering properly.
Use a mild soap solution or dashboard cleaner to remove dirt, then wipe the surface with rubbing alcohol to remove grease or residue.
Ensure the surface is completely dry before beginning the repair, as moisture can cause the filler to crack or peel later.
A clean surface allows you to clearly see all cracks, even small ones, so they can be treated properly.
3. Trim or smooth the rough edges of the crack
Cracks often have rough and uneven edges, which can make repairs difficult.
Using a sharp tool or sandpaper, gently trim and smooth the edges so the filler can adhere properly.
This step also prevents the crack from spreading further during the repair process.
For larger cracks, creating a slightly wider but smoother gap can allow the repair material to adhere more effectively and create a stronger finish.
4. Cover the surrounding area to prevent damage
Covering the area around the crack protects the rest of the dashboard from accidental scratches, excess filler, or paint overspray.
Use painter’s tape or protective paper to cover the area around the repair.
Proper masking ensures a clean and professional-looking repair and prevents additional work to correct mistakes.
It also helps preserve the dashboard’s original texture and color in areas that don’t require repair.
How to Repair Cracked Dashboard
Repairing a cracked dashboard requires careful attention to the size and depth of the crack.
The method depends on whether the crack is small and superficial or large and deep.
Following the correct steps will ensure a smooth, strong and long-lasting dashboard.
Using the right materials and techniques also helps maintain the dashboard’s original appearance and texture.
1. For Small Cracks
Small cracks are usually thin lines that don’t affect the dashboard’s underlying structure.
Start by applying vinyl or leather filler directly to the crack.
The filler penetrates the surface and bonds the material together, preventing the crack from widening.
After applying the filler, use a putty knife or applicator to smooth and blend the filler so it blends with the surrounding surface.
Once the filler has set, use a textured or grain pad to replicate the original dashboard finish.
This step is crucial because it makes the repair virtually invisible and preserves the dashboard’s natural look and feel.
The filler should be allowed sufficient time to fully harden before proceeding to the next steps or using the vehicle.
2. For Large Cracks
Larger cracks require more intensive treatment, as the damage often reaches the foam or plastic underneath.
Start by applying an adhesive backing or patch under the crack to provide structural support.
This prevents the crack from reopening after the repair.
Next, fill the crack with thin layers of repair compound, allowing each layer to dry before applying the next.
This layer creates a strong joint and a smooth surface.
After the compound has completely dried, lightly sand the area to remove any unevenness.
Finally, apply a textured spray or paint that matches the dashboard’s original color and pattern.
This step restores the aesthetic appearance and ensures that the repaired area blends seamlessly with the rest of the dashboard.
Giving it Finishing Touch
After the main dashboard crack repair is complete, the final steps are crucial to ensure a smooth, durable and natural-looking surface.
These final steps improve both the dashboard’s appearance and durability, making it look brand new.
Proper finishing also protects the repaired area from future damage and ensures that the repair blends well with the surrounding surface.
1. Light Sanding for a Smooth Surface
After the repair compound or filler has completely dried, lightly sand the area again.
Sanding smooths out any uneven spots or raised areas created during the repair process.
Using fine-grit sandpaper helps achieve a uniform surface without damaging the surrounding dashboard material.
This step is essential for a professional-looking repair and ensures that any subsequent paint or dye adheres evenly.
2. Apply Dashboard Paint or Dye That Matches the Original Color
After sanding, applying dashboard paint or dye restores the dashboard’s original color and uniformity.
Many dashboard repair kits include color-matched paint, but you can also purchase custom colors if needed.
This paint not only enhances the appearance but also provides a protective layer over the repaired area, protecting it from UV rays, heat and wear over time.
Instead of one thick layer, which can crack or peel, it’s recommended to apply several thin layers for a smooth, natural finish.
3. Blend the Edges
To make the repair virtually invisible, carefully blend the edges of the painted or dyed area into the surrounding dashboard.
This prevents sharp lines or color mismatches and maintains the dashboard’s factory look.
Using a small brush or sponge, lightly feather the edges so that the repaired area gradually blends into the original material.
The right mixture enhances visual appeal and ensures that the repair looks professional rather than unsightly.
4. Let it dry completely before use
Finally, it’s important to let the repaired area dry completely before using the car.
Drying time varies depending on the material used, but typically ranges from several hours to a full day.
Thorough drying ensures that the filler and paint are completely hardened, adhered and resistant to cracking or peeling.
To guarantee the best long-term results, avoid exposing the dashboard to direct sunlight or heavy use during this time.
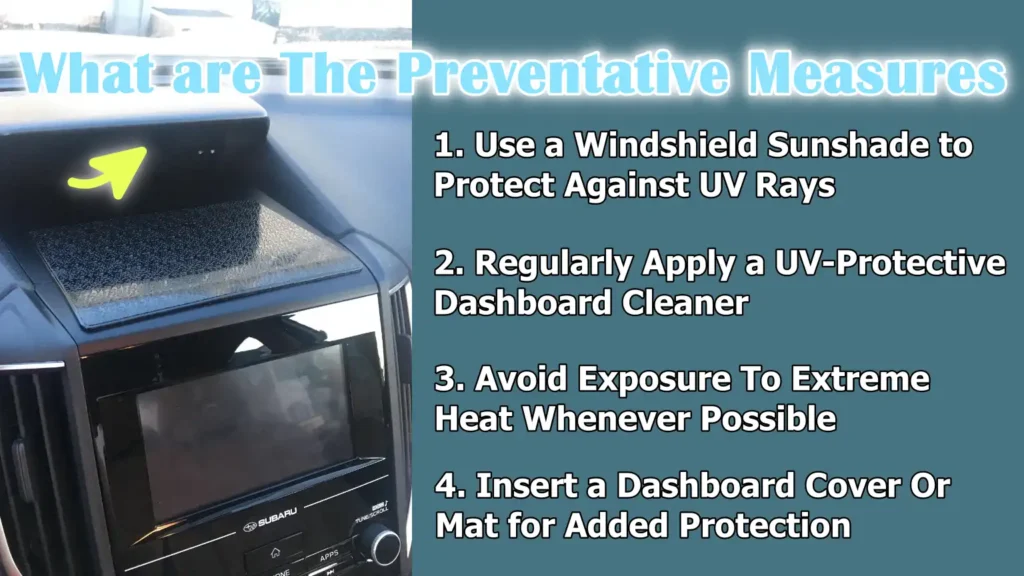
What are The Preventative Measures
Preventing future cracks and damage is just as important as repairing existing cracks and damage.
Dashboards are constantly exposed to heat, sunlight and everyday use, which can cause materials like vinyl, leather, or plastic to dry out and weaken over time.
Taking preventative measures can significantly extend the life of your dashboard, maintain its beauty and protect your car’s interior.
Regular care and a few simple preventative measures can help keep your dashboard strong, smooth and crack-free for years.
Actually the materials used in dashboard construction plays a significant role in their longevity and susceptibility to damage, as there are commonly used materials such as: TPO, PVC and PU that overs varies kinds of benefits but also they have their own kinds of limitations when they exposed to harsh environmental conditions. That’s why you should recognize first about their characteristics that will helps you to choose the right repair methods and to take preventive measure to maintain dashboard integrity as well.[¹]
1. Use a Windshield Sunshade to Protect Against UV Rays
UV rays from the sun are one of the main causes of cracks and discoloration on dashboards.
Using a windshield sunshade whenever your car is parked, specially in direct sunlight, can reduce the temperature inside the car and block harmful rays.
Studies show that cars parked in direct sunlight can reach interior temperatures exceeding 160°F (71°C), which accelerates material degradation.
Sunshades are an easy and effective way to protect your dashboard and prevent heat damage.
2. Regularly Apply a UV-Protective Dashboard Cleaner
Cleaning your dashboard with UV-protective products not only removes dust and dirt, but also provides a protective layer that protects the surface from sun damage.
These cleaners help maintain the flexibility of vinyl and leather materials, preventing them from drying out and cracking.
Using such products regularly, ideally once or twice a month, can slow the dashboard’s natural aging process and keep it looking fresh and new.
3. Avoid Exposure To Extreme Heat Whenever Possible
Exposing the dashboard to extreme heat for extended periods can weaken the material and cause cracks.
Whenever possible, park in shady areas, garages, or covered parking lots to avoid heat exposure.
Even short-term exposure to high temperatures can gradually damage surfaces over time.
Being mindful of heat exposure helps prevent premature deterioration of the dashboard and other interior components.
4. Insert a Dashboard Cover Or Mat for Added Protection
Dashboard covers or mats provide an additional layer of protection from heat, sunlight, dust and minor scratches.
They absorb UV rays and reduce direct contact with the dashboard material, significantly reducing the likelihood of wear and tear.
Covers are specially useful for older vehicles or dashboards showing signs of aging, as they aid repairs and prevent new cracks from forming.
Choosing a cover that fits well and doesn’t interfere with the airbag ensures both safety and protection.
Read More:
When to Seek Professional Help
While many dashboard cracks can be repaired at home using DIY methods, some situations require professional assistance.
In these cases, repairs without the proper skills or equipment can worsen the damage, compromise safety, or damage the finish.
Understanding when professional repair is necessary can save time and money and avoid potential risks associated with improper operation.
1. Serious Damage Beyond DIY Repair
If the dashboard has very large cracks, deep fissures, or extensive surface damage, DIY repair may not be sufficient.
Serious damage often requires specialized tools, adhesives and techniques that are only available at professional repair shops.
Repairing large cracks with standard filler kits can leave the surface uneven, weaken the repair, or cause the cracks to reopen sooner.
Professional repair ensures that the dashboard regains its structural strength and maintains a high-quality finish.
2. If the dashboard material is brittle and cracking
Over time, dashboard materials such as vinyl, plastic, or leather can become brittle and weak due to heat, sunlight and age.
When the material is cracking or breaking, self-repair is often ineffective because fillers or adhesives may not adhere properly to weak surfaces.
A professional can assess the condition of the dashboard, strengthen or replace damaged areas and use techniques that restore both durability and appearance.
3. If the crack is near the airbag housing or critical components
Cracks located near the airbag compartment, wiring, or other critical dashboard components require extra caution.
If the airbag system or electrical wiring has been compromised, self-repair in these areas can be dangerous, leading to malfunction or accidental deployment.
Professionals have the experience and knowledge to safely repair or strengthen these areas without compromising safety systems.
In such cases, professional repair is the safest and most reliable option to ensure both functionality and safety.
Conclusion – How to Repair Cracked Dashboard
You need to address a cracked dashboard properly as it prevents costly repairs and keeps your car’s safety and vehicle’s interior as well.
Furthermore, small cracks can be effectively repaired at home with the right preparation, tools and techniques, while larger or more serious cracks may require professional assistance to ensure durability and safety.
Proper cleaning, careful application of fillers, texture matching and color correction can make repairs nearly invisible and long-lasting.
Additionally, preventative measures such as using sunshades, UV-protectant cleaners, avoiding excessive heat and installing dashboard covers can significantly reduce the risk of future cracks.
By understanding the causes of dashboard damage and following a systematic repair and maintenance method, car owners can enjoy a safer, more attractive and well-maintained interior for years to come.
As well as, you can ask questions and comment down your thoughts about this guide.
Frequently Asked Questions
Q1. Why do dashboards crack?
Answer: Dashboards can crack due to prolonged exposure to sunlight, heat and UV rays, which dry out the vinyl, leather, or plastic material. Over time, these materials become brittle and lose their flexibility. Cracks on dashboards can also be caused by aging, accidents, or pressure. If left untreated, even small cracks can grow, making the dashboard look worn and reducing the vehicle’s resale value.
Q2. Can small dashboard cracks be repaired at home?
Answer: Yes, small cracks can often be repaired at home using a DIY repair kit. These kits typically contain vinyl or leather filler, adhesive and texture tools to fill the cracks and match the original finish. The key is to thoroughly clean the area, carefully apply the filler, smooth it with sandpaper and use a texture pad or spray to replicate the dashboard’s factory look. With patience and the right materials, home repairs can look professional and last a long time.
Q3. When is professional dashboard repair necessary?
Answer: Professional repair is recommended when cracks are large, dashboard material is brittle and crumbling, or damage occurs near critical components such as airbags or wiring. Professionals have the equipment and expertise to strengthen the dashboard, apply a stronger filler and more precisely match the texture and color. In these situations, complex home repairs could worsen the damage or compromise safety.
Q4. How can I prevent future dashboard cracks?
Answer: To prevent dashboard cracks, it’s important to protect the surface from heat, sunlight and excessive wear. Using a windshield sunshade when parking in direct sunlight reduces UV exposure and the internal temperature. Regularly applying a UV-protectant dashboard cleaner keeps the material flexible and prevents drying. Parking in a shaded area or garage and using a dashboard cover or mat adds another layer of protection, keeping the dashboard smooth and strong for years to come.
Q5. Will repairing a cracked dashboard restore its original appearance?
Answer: With proper repair techniques, small and medium cracks can be made nearly invisible. Using the right filler, smoothing tools and texture or color matching ensures that the repaired area blends seamlessly with the rest of the dashboard. Larger cracks may be difficult to completely conceal, but professional repair can restore both the dashboard’s strength and appearance. Preventative care after repair also helps maintain its new appearance.
Q6. Does dashboard repair increase car value?
Answer: Yes, repairing a cracked dashboard can help maintain or improve a vehicle’s resale value. A cracked or damaged dashboard reflects poor maintenance and can diminish a car’s overall appeal. By repairing cracks, repairing paint and protecting the dashboard, the interior looks cleaner, which is important to potential buyers.
References:
[1] A Short Review on Automobile Dashboard Materials
https://www.researchgate.net/publication/341162646_A_Short_Review_on_Automobile_Dashboard_Materials

Guys, I’m a car audio enthusiast and customization expert and I love clear sound and clean installation. Plus, I have spent years helping people build their dream audio setups. And whenever I’m working on cars, I probably listen to music and thinks about the next big upgrade.
