Written By: Don Dodi
Fact Checked By: Kristen Brown
Reviewed By: Diego Rosenberg
Just think like in that way: that the gear shifter is actually silent messenger between your hand and the transmission itself, so whenever it fails or worn out then your car simply stops listening as simple as that.
Yes, it actually connects the gear lever inside your car to the transmission and that literally allow you to select the right gear smoothly and safely.
But because we human made this cable as well, then obviously it can wear out, stretch or even snap due to the constant tension, heat exposure or corrosion as well.
And it is basically seen on those vehicle that have been logged more than 80,000 to 100,000 miles, so whenever the shifter cable damages then you may find it hard to change the gears or notice that shifter feels unusually loose.
Not only this, according to the ASE, the gear-linkage and cable-related issues actually account for nearly 10% of the transmission complaints in both manual and automatic vehicles, which is why you need to maintain them for the betterment of your safety.
But, the thing is you can easily replace a faulty shifter cable at home with just basic tools and mechanical understanding requires.
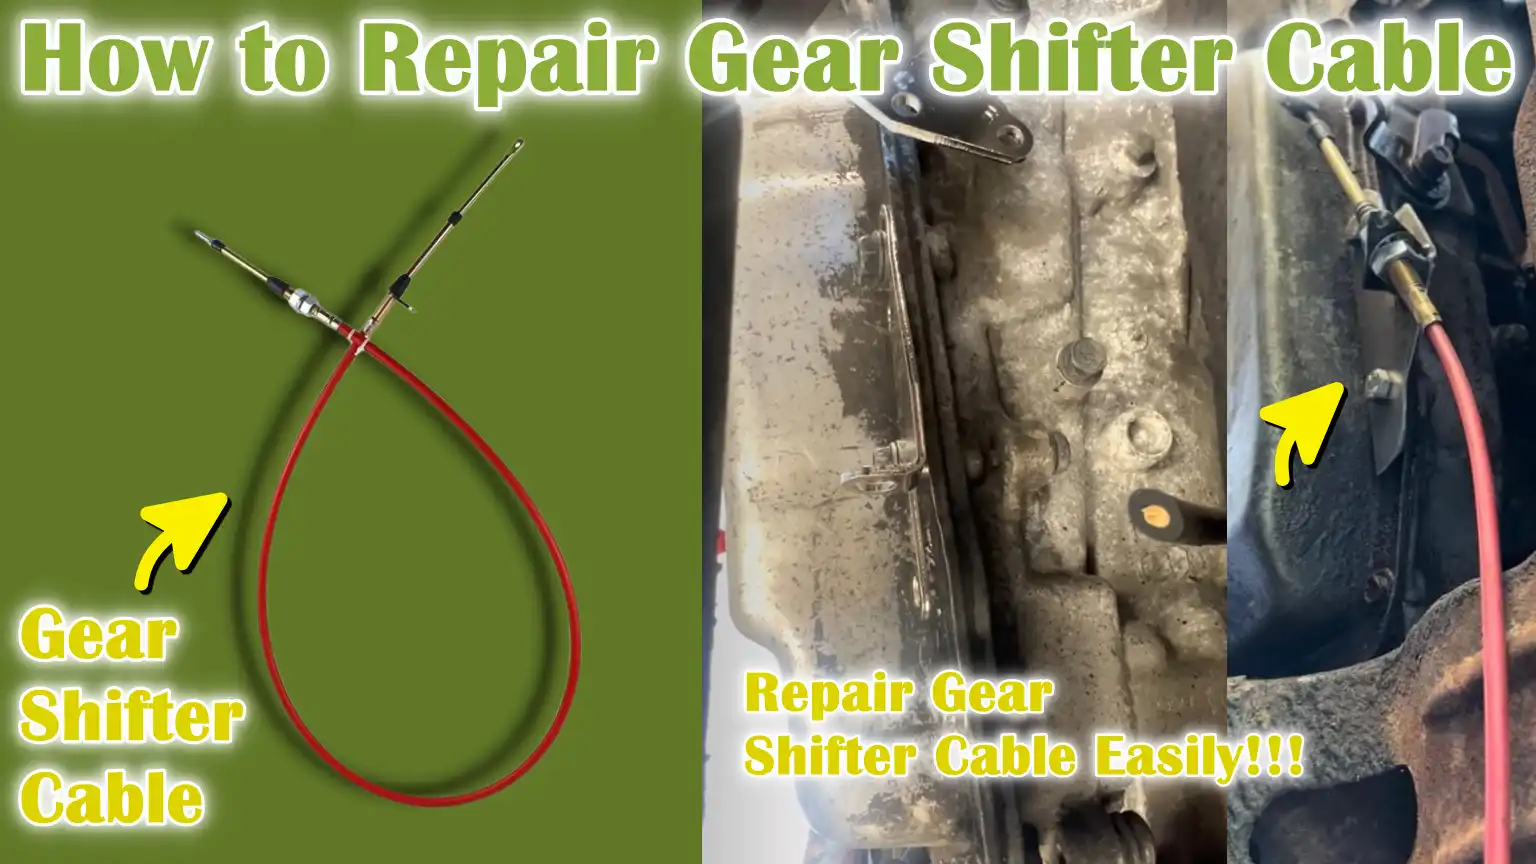
Now, this guide is to shows you How to Repair Gear Shifter Cable, so that you can easily repair it and save expensive labor costs as well.
Understand the Gear Shifter Cable System
1. The Role of the Shifter Cable in Manual and Automatic Transmissions
The gear shifter cable acts as a crucial link connecting the gear lever inside the vehicle to the transmission system under the hood.
In manual transmissions, this cable directly translates the driver’s hand movements to the gearbox, allowing for smooth and precise gear selection.
When you move the shifter to a specific position, the cable pulls or pushes the transmission lever to engage the selected gear.
In automatic transmissions, the cable performs a similar function, but instead of controlling clutches and gear synchronizers, it signals the transmission valve body to select the correct gear range, such as park, reverse, or drive.
Without a properly functioning cable, the transmission will not be able to interpret the driver’s commands, leading to difficulties in shifting, gear misalignment, or a complete loss of control over gear selection.
This seemingly simple cable is constructed from robust steel wires encased in a protective sheath, providing flexibility while withstanding the stresses and heat emanating from the engine bay.
2. Key Components Involved
The shifter cable system works in conjunction with several supporting parts that ensure accurate and reliable gear shifting.
The shifter assembly is located inside the vehicle’s cabin and houses the gear lever mechanism.
From there, the shifter cable connects to the transmission linkage, which acts as an intermediate connection between the cable and the transmission lever.
The transmission lever, also known as the selector lever or shift arm, is directly mounted on the transmission housing and moves in response to the cable’s tension.
To minimize friction and wear, small rubber or plastic bushings are installed at the connection points, allowing for smooth movement and reducing vibrations.
Over time, these bushings can crack or wear out, causing the gear to become loose even when the cable is properly adjusted.
All these components must work together correctly, as even a slight malfunction can affect the feel of shifting or cause difficulty in engaging gears.
3. Differences Between Single and Dual Shifter Cable Setups
Vehicles utilize either a single or dual cable setup depending on their transmission design.
A single cable system is typically found in older or simpler automatic transmissions, where one cable controls both the direction and selection of the gear.
In contrast, most modern manual transmissions use a dual cable setup.
One cable controls the side-to-side movement of the gear lever, determining which gear gate is selected, while the other cable handles the forward and backward movement that actually engages the gear.
This two-cable system provides more precise control and smoother shifting, specially in vehicles designed for higher performance or heavy-duty use.
Understanding which system your vehicle uses is crucial before beginning repairs, as the replacement process and adjustment points differ between single and dual cable configurations.
4. Typical Lifespan and Causes of Wear or Failure
The average lifespan of a gear shifter cable is typically between 80,000 and 120,000 miles, depending on driving habits, environment and maintenance.
In city driving conditions with frequent gear changes, the cable experiences more stress and wear compared to highway driving.
Exposure to moisture, dirt and road salt can cause corrosion, leading to difficult movement or internal wear.
Excessive heat from the engine bay can dry out the cable’s lubrication, making it difficult to move.
Poor maintenance or worn bushings can also put undue stress on the cable, causing it to stretch or break prematurely.
Regular inspection and lubrication can significantly extend its lifespan, while promptly replacing worn bushings prevents additional strain on the cable system.
Understanding these factors allows drivers to avoid sudden cable failures and maintain smooth, responsive gear shifting throughout the vehicle’s life.
Basic Signs of a Faulty or Damaged Shifter Cable
1. Difficulty Shifting Gears or a Jammed Gear Lever
One of the first and most common signs of a damaged shifter cable is difficulty shifting gears.
The gear lever may feel unusually stiff or require excessive force to move into position.
This is because the cable inside its protective sleeve can rust, kink, or partially fray, creating internal resistance.
Dirt and debris can also accumulate over time, hindering smooth movement.
In some vehicles, specially those driven in wet or dusty environments, this stiffness can gradually increase as the cable’s internal lubrication dries out.
If this problem is ignored, the stiffness can escalate until the lever becomes completely locked or refuses to engage certain gears.
A smooth and light shifter action is a sign of a healthy cable, while any roughness, sticking, or resistance is a clear warning that the cable system needs attention.
2. Loose or Disconnected Gear Lever
A loose or wobbly gear lever that moves too freely without engaging gears usually indicates a disconnected or broken shifter cable.
This problem occurs when the cable either breaks or becomes detached from the shifter assembly or the transmission lever.
In this situation, moving the gear lever results in little to no response from the transmission because the mechanical link has been broken.
Drivers may also notice that the lever no longer returns to its normal centered position.
This can be particularly dangerous as the transmission may remain in an unintended gear, or worse, in neutral, resulting in a loss of power to the wheels.
A loose gear lever should never be ignored as it often indicates a complete separation of the cable or a broken retaining clip that holds the cable in place.
3. The car won’t move even when in gear
If your car’s engine starts and the gear lever seems to shift normally, but the car doesn’t move, the cause is often a broken shifter cable.
In this case, the shifter mechanism may be working inside the cabin, but the disconnected or broken cable prevents the transmission from actually engaging the selected gear.
This symptom is common when the cable breaks suddenly or comes loose from its linkage point.
For automatic cars, this may mean the lever can still be moved to “drive” or “reverse,” but the transmission itself remains in “park” or “neutral”.
The same problem can prevent a manual car from engaging a gear, even though the lever is moving as usual.
This is one of the clearest signs of a complete cable failure and usually requires immediate repair or replacement.
4. Transmission stuck in one gear or neutral
Another common sign of a faulty shifter cable is that the transmission gets stuck in one gear or locks in neutral.
This happens because a stretched or misaligned cable cannot properly pull the transmission lever to change gears.
The outer casing of the cable may have shifted or broken, eliminating the correct tension on the inner wire.
When this happens, the transmission may get stuck in the last selected gear or refuse to engage any new gear.
Drivers often report that the gear lever moves, but the actual gear position on the dashboard or the car’s behavior doesn’t match.
A stuck gear can also be caused by bent linkages or worn bushings that affect the cable’s movement.
Adjusting or replacing the cable usually restores normal shifting operation.
5. Visual Inspection Indicators – Worn Cable, Corrosion, Broken Clips
A visual inspection can reveal a lot about the condition of the shifter cable.
If the outer casing is cracked, exposing the inner steel wires, it indicates significant wear and potential failure.
A worn or corroded cable suggests that moisture or dirt has entered the system, accelerating the corrosion process and weakening the metal.
Broken or missing clips at the cable ends can also cause looseness and misalignment, leading to shifting difficulties.
The cable should always move smoothly without binding, jamming, or visible damage.
Rust or excessive looseness around the mounting points are also additional warning signs that the cable is nearing the end of its lifespan.
Regularly checking these details helps catch early signs of failure before they cause major transmission control problems or render the vehicle undrivable.
Tools
| Tool / Material | Description | Purpose / Why It’s Needed |
|---|---|---|
| Socket Set and Ratchet | A set of sockets of different sizes that fit onto the ratchet handle. | Used to loosen and tighten the nuts and bolts holding the shifter assembly or cable bracket in place. This allows for quick and safe removal of components without damage. |
| Screwdrivers (Flat and Phillips) | The tip of a flat screwdriver is straight, while the tip of a Phillips screwdriver is cross shaped. | These are used to remove interior panels, covers and small screws that secure the shifter housing or trim pieces. They are essential for both interior and under-hood work. |
| Pliers or Needle-Nose Pliers | Hand tools with strong jaws; needle-nose pliers have long, pointed ends for tight spaces. | Used to grab, pull, or bend clips and small metal parts on the ends of shifter cables. These are specially helpful for safely removing stubborn retaining clips. |
| Replacement Shifter Cable (OEM or Compatible) | A new cable designed to match the make and model of your vehicle. “OEM” means Original Equipment Manufacturer. | Replace worn, stretched, or broken cables. Using correctly fitted cables ensures smooth and precise gear shifting, just like the original setup. |
| Lubricant or Grease | A smooth, slippery substance used to reduce friction and protect metal parts from corrosion. | It is applied to moving parts, bushings and joints to allow the new cable to slide smoothly and prevent early wear due to friction or corrosion. |
| Jack and Jack Stands (if necessary) | The jack raises the car and the jack stands hold it in a secure position while you work underneath it. | Jack stands are needed to access the cable connections at the transmission end. Jack stands stabilize the vehicle and prevent accidents during repairs. |
| Safety Gloves and Eye Protection | Protective gloves and clear safety glasses made of hard material. | This protects your hands from sharp metal parts, dirt and grease and also prevents eye injuries from debris or rust particles while assembling different parts. |
Safety Precautions That You Should Follow
1. Park the vehicle on a level surface and engage the parking brake
Before beginning any repair work on your vehicle, always ensure it is parked on a flat, solid and level surface.
This helps prevent the vehicle from unexpectedly rolling or shifting while you are working on it.
Even a slight incline can cause the vehicle to move when pressure is applied to bolts or parts, potentially leading to serious injury or damage.
Engaging the parking brake firmly locks the wheels in place, adding another layer of stability.
If you are working on a vehicle with a manual transmission, it’s also advisable to leave the gear lever in first gear to prevent unwanted movement.
For automatic vehicles, shift the lever to “Park”.
These small steps provide a safe and stable working environment, specially when accessing parts under the vehicle or near moving components.
2. Disconnect the vehicle’s battery
Disconnecting the vehicle’s battery is a crucial safety measure before beginning any repair work involving the gear shifter or transmission area.
Shifter cables often run near electrical connections, sensors and sometimes the transmission control module.
By removing the negative terminal from the battery, you eliminate the risk of short circuits or accidental electrical discharges that could damage sensitive electronic parts.
It also prevents the gear selector from accidentally moving due to powered systems like electronic shift locks or automatic transmission controls.
Waiting a few minutes after disconnecting allows any residual electrical charge to dissipate, ensuring a completely safe environment to work in.
3. Allow engine and transmission components to cool
It is essential to allow the engine and transmission to cool down before touching or working near them.
Metal components around the transmission area, such as the housing, exhaust pipes and brackets, can become extremely hot after driving.
Attempting to repair or replace the shifter cable while these parts are still hot can result in serious burns or damage to the new parts during installation.
Allowing at least 30 to 45 minutes for cooling ensures a comfortable and safe working environment.
A cool system makes the parts easier to handle, even without gloves, prevents grease or heat-related stickiness and helps prevent misalignment caused by expanding or contracting metal surfaces.
4. Use Proper Support When Working Under the Vehicle
To access the transmission end of the shifter cable, you may need to work under the vehicle.
Never rely solely on a car jack to support the weight of the vehicle, as jacks are designed for lifting, not for prolonged support.
Always use high-quality jack stands and place them at the correct lift points specified in the vehicle owner’s manual.
After lifting the car, gently shake it to ensure it is properly seated on the stands before going underneath.
For added safety, place wheel chocks behind the tires that are still on the ground to prevent any rolling motion.
Working under a safely supported vehicle not only prevents accidents but also allows you to work with greater confidence and precision when connecting or adjusting the shifter cable.
Taking these safety precautions seriously ensures that the repair process is smooth, controlled and without unnecessary risks.
6. How to Repair Gear Shifter Cable – Full Method Repair & Replacement Both
How to Diagnose the Problem
1. Understanding Why Diagnosis Is Important First
Before beginning any repairs, it’s essential to determine the root cause of shifting problems.
The gear shifter cable directly connects your gear lever to the transmission, ensuring smooth gear changes.
When a problem occurs, symptoms may mimic other issues, such as a bad shifter assembly, worn bushings, or bent linkages.
Therefore, careful diagnosis saves time and ensures you’re repairing the correct part.
A bad cable typically affects the way the gear lever feels or responds—it may be too stiff, too loose, or the gears may not engage at all.
Understanding these signs helps confirm whether the problem lies with the cable or another related component.
2. Checking Gear Lever Behavior
Start the diagnosis by checking the behavior of the gear lever with the engine off, rotating it through every gear position.
If the lever feels stiff or sticky, the cable’s inner wire may be damaged, worn, or jammed inside its outer sleeve.
If the lever moves very smoothly with very little resistance and no gears engage, this usually means the cable is broken or disconnected at one end.
On the other hand, if the shifter feels normal but the vehicle doesn’t respond when you try to shift, the problem may be in the linkage or transmission lever rather than the cable.
Observing how the lever behaves helps determine where to look next and prevents unnecessary part replacement.
3. Inspecting the Cable Inside the Cabin
Once you suspect a cable fault, the next step is to inspect the area around the gear shifter inside the cabin.
Remove any trim panels covering the center console or shifter assembly.
This will expose the top end of the cable where it connects to the gear lever.
Look carefully for signs of wear, such as a broken housing, missing clips, or damaged bushings.
A disconnected cable end will usually allow the lever to rotate freely without changing gears.
Sometimes, you may also see frayed metal wire or rust marks on the exposed parts of the cable.
These are clear signs that the cable’s integrity has been compromised and needs attention.
4. Checking the Transmission End of the Cable
The other end of the cable connects to the transmission and this part often experiences more wear due to exposure to heat, dirt and moisture.
To access it, you may need to safely raise the car using a jack and support it with jack stands.
Once under the car, locate where the cable connects to the transmission lever.
Check that the retaining clips are still holding the cable in place and that the cable housing is intact.
A rusted, damaged, or stretched cable can prevent the transmission from responding to shifter movements.
If there are cracks in the outer sheath or if you see broken metal wires, this is a clear sign that the cable is deteriorating and needs to be replaced soon.
5. Testing Cable Movement for Final Confirmation
A simple but effective test is to check how easily the cable moves.
Disconnect the transmission end of the cable and then move the gear lever inside the car.
The inner cable should slide back and forth easily and with constant resistance.
If it feels kinked, rough, or doesn’t move at all, the inner cable is likely damaged or broken.
Conversely, if it moves very loosely without any tension, it may be stretched or broken.
Testing the movement provides final confirmation of the cable’s condition.
This careful, step-by-step inspection ensures you identify the root cause of the shifting problem and avoid unnecessary repairs or replacements later.
How to Access the Shifter Cable
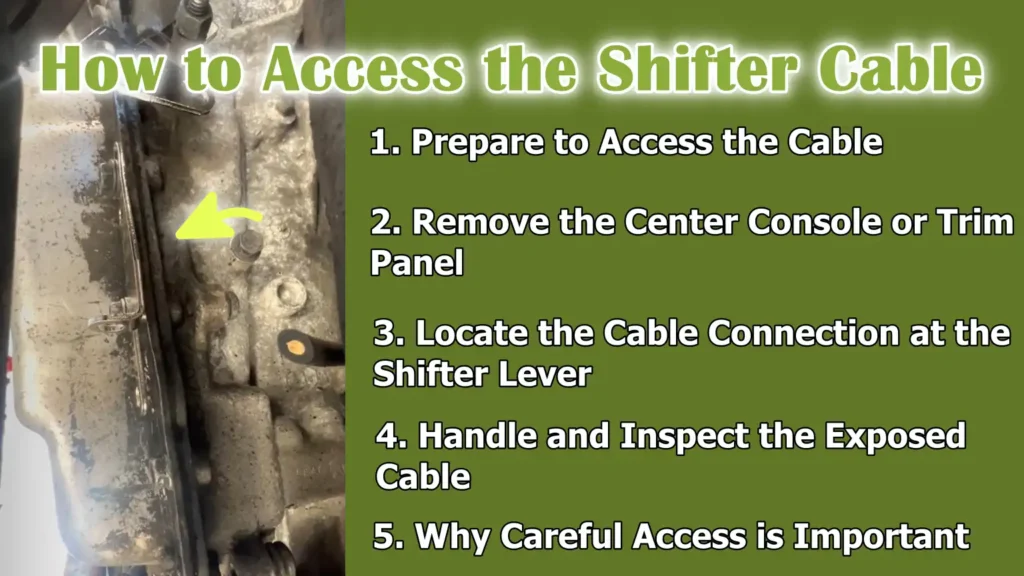
1. Prepare to Access the Cable
Accessing the shifter cable is one of the most crucial steps before beginning any repair or replacement work.
This process clearly shows you where the cable connects to the gear shifter inside the cabin.
Because the shifter cable runs from the gear lever inside the car to the transmission under the hood or under the vehicle, it passes through tight spaces and is often covered by interior trim and panels.
Taking the time to carefully remove this cable without damaging surrounding components ensures that you can properly reassemble everything later.
It also helps prevent mistakes such as incorrectly installing the new cable or losing small parts like clips or bushings.
2. Remove the Center Console or Trim Panel
In most vehicles, the shifter assembly is covered by a center console or decorative trim that may contain items such as cup holders, a gear indicator, or storage compartments.
To access the shifter cable, these panels must be removed.
First, slide the front seats back to create space for your hands and tools.
Then, gently pry up the trim panel or use a screwdriver to remove any screws holding the console in place.
Always exercise caution when removing panels, as many modern vehicles use plastic clips that can easily break if forced.
Keeping all screws and clips in a small container or tray makes reassembly easier.
Once the console is removed, you will have a clear view of the shifter assembly and the upper end of the cable.
3. Locate the Cable Connection at the Shifter Lever
After removing the interior panels, the shifter lever and its linkage will be visible.
The shifter cable is typically connected to the lever via a small ball joint or pivot arm, secured by a retaining clip or bushing.
Carefully observe how this cable is connected—it’s crucial to note its orientation and routing before disconnecting it.
In some cars, if it’s a manual transmission, there may be more than one cable, as one controls gear selection while the other manages gear engagement.
Automatic transmissions usually have a single shifter cable that moves in one direction to select different drive positions.
Be sure to check that the cable moves freely with the shifter lever, as this will further confirm whether it is still functioning or has become jammed.
4. Handle and Inspect the Exposed Cable
Once the shifter cable connection is visible, it’s a good idea to inspect the surrounding area for signs of damage or wear.
Look for cracked bushings, broken clips, or debris that could obstruct the cable’s smooth movement.
If the area appears dirty or damaged, gently clean it with a soft brush and apply a small amount of lubricant to the moving joints to aid in reconnection later.
At this time, avoid forcefully pulling on the cable, as this could further damage the internal wires or retaining components.
Instead, focus on understanding how the cable passes through the cabin firewall and connects to the transmission end.
This step makes the process of safely disconnecting or replacing the cable much easier later on.
5. Why Careful Access is Important
Taking the time to properly access the shifter cable not only makes the job easier but also reduces the risk of future problems.
Rushing through panel removal or misplacing small clips can lead to issues such as rattling noises after repairs, loose fittings, or gears not engaging correctly.
By understanding the layout of your vehicle’s shifter system and working in a systematic manner, you will make the repair process easier.
A clean, well-organized workspace also helps in quickly identifying problems—such as broken connectors or stretched cables—that, if left unaddressed, could affect shifting performance.
How to Disconnect the Cable from the Shifter
1. Understanding the Cable Connection
The gear shifter cable connects the driver’s gear lever to the transmission, enabling smooth gear changes through mechanical motion.
At the shifter end, this cable is attached to a lever or linkage system that translates hand movements into precise gear selection.
To repair or replace the cable, you must first disconnect it from the shifter assembly.
This step requires patience and precision, as the small clips, bushings, or pins that secure the cable are delicate and play a crucial role in keeping the system properly aligned.
Properly disconnecting the cable ensures that the new or repaired cable can be reattached later without issues, such as looseness or incomplete engagement during gear movement.
2. Removing the Retaining Clip or Pin
Most vehicles use a retaining clip, pin, or small bolt to secure the shifter cable to the lever assembly.
These components hold the cable end in place and prevent it from slipping during operation.
To remove it, locate the cable’s attachment point—typically a ball-joint-style connector or a simple pivot pin near the shifter base.
Use a small screwdriver or needle-nose pliers to carefully pry off the retaining clip or remove the pin.
It’s important to apply gentle pressure and avoid bending or breaking the clip, as these components are often made of thin metal or plastic.
Keeping the clip in good condition is essential, as it may need to be reused during reassembly if a replacement is not provided with the new cable.
3. Separating the Cable from the Shifter Assembly
Once the retaining clip or pin is removed, the cable can be separated from the shifter assembly.
Hold the shifter lever steady and gently pull the end of the cable away from its connector.
If the cable feels stuck, gently wiggle it loose instead of forcing it.
Over time, dirt, rust, or accumulated grease can slightly jam the connection, so taking your time during this step helps prevent breaking the mounting joint.
After disconnecting it, inspect the exposed end of the cable for signs of wear, rust, or a broken bushing.
If any damage is visible, it’s a clear indication that the cable itself was the cause of the shifting problems and should be replaced rather than reused.
4. Inspecting the Shifter Mechanism
After disconnecting the cable, take a moment to inspect the shifter assembly itself.
This is a good opportunity to ensure the lever moves freely and that any internal springs or linkages aren’t worn or loose.
You can manually test the lever’s movement and range of motion while simulating gear changes.
If it feels too tight, loose, or noisy, the problem may be related to wear within the internal shifter, which should be addressed before installing a new cable.
Cleaning the area and applying a small amount of the correct grease to the lever’s moving joints can improve performance and prevent future jamming.
5. Ensuring Proper Preparation for Reinstallation
Carefully completing the disconnection step makes the subsequent reassembly process much easier and more reliable.
Keeping all the small parts, such as clips, washers and fasteners, in a clean, labeled container prevents confusion during installation.
It’s also wise to take a quick photo of the shifter assembly before removing the cable, which serves as a visual reference when installing the new cable.
A properly disconnected cable ensures that there is no hidden stress in the system and that both the shifter lever and cable mounting points are ready for inspection or replacement.
Correct handling here guarantees accuracy, safety and smooth gear operation after the repair is complete.
How to Disconnect the Cable from the Transmission Side
1. Accessing the Transmission Area
The transmission side of the shifter cable is usually located on the top or side of the transmission housing, depending on the make and model of the vehicle.
To access this area, it’s often necessary to raise the car using a hydraulic jack and secure it on jack stands.
Raising the car provides enough space to reach underneath and locate the cable’s connection point to the transmission linkage.
Before getting under the car, always double-check that it’s on a level surface, the parking brake is engaged and the wheels are properly restrained to prevent movement.
It’s also important to let the engine and transmission cool down before starting work, as metal surfaces can remain hot for a long time after use.
Having adequate lighting under the car will allow you to see the components clearly and reduce the risk of mistakes when disconnecting the cable.
2. Identifying the Transmission Linkage and Cable Connections
Once under the car, locate where the shifter cable connects to the transmission linkage.
This linkage is the mechanism that converts the movement of the gear shifter into mechanical movement within the transmission, thereby selecting the correct gear.
The end of the shifter cable is usually connected to a small lever or arm on the transmission using a retaining clip, cotter pin, or similar fastener.
Before removing anything, take a moment to observe how the cable is routed and connected.
This visual reference will help you reinstall the new or repaired cable without confusion later.
You can also take a clear photo or draw a simple diagram to remember the cable’s exact routing and mounting points.
3. Removing the Retaining Clip and Disconnecting the Cable
After locating the connection point, gently loosen the retaining clip or pin securing the cable to the transmission lever using pliers or a screwdriver.
These clips are often small and can easily fall off or be lost, so keep a steady hand and set them aside safely for later use.
After removing the clip, the cable end can be pulled from the transmission lever.
It’s best to move the lever slightly while doing this to release any tension in the cable and make it easier to disconnect.
Avoid forcibly twisting or bending the cable, as this could damage the inner wire or outer sheath.
If the cable appears to be stuck due to rust or dirt, apply a small amount of penetrating lubricant and allow it to loosen naturally before attempting to pull it out.
4. Checking Cable Mounts and Routing Path
After disconnecting the cable, follow its length back toward the cabin to check its routing and mounting points.
Most vehicles have clips or brackets along the frame or firewall that securely hold the cable in place to prevent vibration or excessive movement.
These brackets should be checked for rust, broken fasteners, or missing retainers.
Pay attention to how the cable passes through the firewall or engine bay, as improper routing can cause friction, jamming, or improper gear engagement.
Routing the new cable exactly as the original ensures smooth and accurate shifting after reinstallation.
5. Preparing for the Next Step
Once the shifter cable is completely disconnected from both the transmission lever and its mounting bracket, it is ready to be removed from the vehicle.
Before proceeding, double-check that no clips or grommets are still holding the cable in place.
Cleaning the area around the transmission linkage with a soft cloth prevents dirt or debris from getting into the connection points during reinstallation.
Properly disconnecting and checking the cable ensures that the subsequent installation process will be smooth, factory alignment will be maintained and future shifting problems caused by incorrect routing or loose connections will be avoided.
How to Inspect and Repair
1. Checking the Cable Condition
Once the shifter cable is disconnected from both the shifter lever and the transmission, it’s crucial to carefully inspect its entire length to determine if it can be repaired or needs replacement.
The cable consists of a flexible steel wire that runs inside a protective outer sheath, allowing for smooth movement between the gear lever and the transmission.
Over time, this cable can deteriorate due to stretching, corrosion, wear, or the ingress of dirt and moisture into the housing, causing it to jam.
To assess its condition, manually move the inner wire back and forth.
A good cable should move easily and smoothly within its sheath without any binding, sticking, or excessive resistance.
If it feels tight, gritty, or uneven, it indicates that corrosion or internal damage is hindering movement.
2. Attempting Lubrication and Minor Repairs
If the shifter cable is only slightly worn, jammed, or dry, proper lubrication may resolve the issue.
First, apply a penetrating lubricant or light grease along the length of the inner wire and move it back and forth to evenly distribute the lubricant inside the sheath.
This reduces friction and allows the cable to move more freely.
You can also use a cable lubrication tool, which clamps onto the end of the cable and injects lubricant under pressure for more thorough lubrication.
This process is specially useful for vehicles exposed to dust, mud, or salt, which can cause buildup that hinders cable movement.
However, lubrication should only be considered a temporary solution if there is no visible structural damage.
If the cable’s outer sheath is cracked or the inner wire is significantly worn, the problem is likely to recur shortly after lubrication.
3. Recognizing When Replacement Is Necessary
In many cases, a damaged shifter cable cannot be permanently repaired and must be completely replaced.
If the outer sheath is cracked, the inner wire is broken, or the end fittings are corroded or detached, replacement is the only reliable solution.
A broken or stretched cable can cause incomplete gear engagement, delayed response, or complete loss of shifting control.
Using a damaged cable is unsafe as it could break completely while driving, potentially leaving the transmission stuck in gear or neutral.
When replacing, it’s best to use an Original Equipment Manufacturer (OEM) cable specifically designed for your vehicle’s make and model or a high-quality compatible alternative.
These cables are manufactured to the correct length, fitting style and tension for smooth and precise gear changes.
4. Cleaning and Preparing the Mounting Area
Before installing a new or repaired cable, take the time to thoroughly clean the surrounding area, including the shifter assembly, firewall pass-through point and transmission linkage.
Accumulations of dirt, grease and rust around these components can hinder the movement of the new cable or shorten its lifespan.
Use a soft brush and a clean cloth to remove old grease and grime.
Applying a small amount of fresh lubricant to moving joints and connection points will help protect them from corrosion and allow them to operate more smoothly.
If any clips or grommets were damaged during removal, replace them to ensure a proper fit.
This cleaning step is crucial because even a perfectly installed cable can perform poorly if surrounding components are dirty or misaligned.
5. Ensuring long-term performance:
Proper inspection and preparation are essential for extending the life of a new or repaired shifter cable.
Regular maintenance, such as periodic lubrication and checking for signs of wear, helps prevent stiffness and premature failure.
Understanding which cables can be remedied with lubrication and which require replacement saves time, money and effort while ensuring reliable performance.
By taking the time to thoroughly inspect, clean and prepare everything at this stage, you lay a solid foundation for the subsequent steps of reinstallation and adjustment, which will restore smooth and precise shifting for the long term.
How to Install the New Cable
1. Preparing the New Cable for Installation
Before installing the new shifter cable, it’s crucial to confirm that it matches the specifications of the original cable.
The cable must be the correct length, have the same style of end fittings and include any necessary clips or bushings.
Using a cable that is too long, too short, or the wrong size can result in improper gear engagement or binding.
Lay the new cable alongside the old one and compare both ends and mounting points.
Lightly lubricating the inner wire of the new cable with the correct grease or transmission-safe lubricant before installation will ensure smooth operation and prevent premature wear.
Having all the necessary tools and clips ready at this stage will streamline the process and prevent interruptions once installation begins.
2. Properly Routing the New Cable
The most critical part of installing a shifter cable is routing it correctly.
The cable should follow the same path as the original cable to avoid unnecessary bends, kinks, or contact with hot engine parts.
Incorrect routing can cause the cable to be stretched, rub against sharp edges, or overheat, leading to premature failure.
Begin by guiding the cable from the transmission end towards the cabin or vice versa, depending on which direction is easier based on the vehicle’s design.
Ensure the cable passes smoothly through all factory grommets, brackets and clips.
These securing points are designed to prevent vibration and keep the cable in the correct position.
Avoid routing the cable too tightly or too loosely, as both can lead to binding or premature wear.
3. Connecting the Cable to the Transmission Lever
Once the cable is properly routed, connect the transmission-side end to the shift lever or linkage.
Align the cable fitting with the lever pin or ball joint and firmly press it into place.
Then, reinstall the retaining clip or locking mechanism that secures the connection.
It’s crucial to ensure that the lever rotates smoothly and that the correct tension is maintained in the cable when rotating the gear selector.
A small amount of slack is acceptable, but excessive slack indicates an improper fitting.
At this stage, it’s also wise to check the clearance of surrounding parts, ensuring that no nearby hoses, wires, or brackets interfere with the cable’s movement when shifting transmission gears.
4. Connecting the Cable to the Gear Shifter
Once the transmission end is secured, move inside the cabin and connect the other end of the cable to the gear shifter assembly.
Insert the end of the inner cable wire into the shifter linkage or pivot arm in the same orientation as it was before removal.
Secure it using the retaining clip or pin, ensuring it locks tightly without any looseness.
Test the shifter lever by moving it through its full range of motion.
Each gear position should engage firmly and smoothly without any extra resistance.
If the lever is misaligned or not moving correctly, recheck the cable routing and connection points to ensure the cable is not kinked or under any undue tension.
5. Final Adjustments and Checks
Once both ends of the cable are connected, take the time to make any final adjustments.
Some vehicles have adjustable cable ends or threaded fittings that allow for fine-tuning of the tension and gear alignment.
Adjust the cable so that the gear positions match correctly between the shifter and the transmission.
This means that when the lever is placed in “Drive,” “Neutral,” or any other gear, the transmission selector should be perfectly aligned with that position.
After making the adjustments, re-secure all previously removed clips, brackets, or covers.
Ensure that the shifter returns to its natural resting position after each movement, indicating correct tension and alignment.
6. Ensuring a Reliable Installation
A properly installed shifter cable ensures smooth gear transitions and prevents future shifting problems.
Double-check that all mounting points are secure, clips are tightly fastened and the cable is not touching any moving or hot engine components.
Reinstall the center console or trim panel inside the cabin and ensure everything fits correctly as before.
Finally, perform a visual inspection under the vehicle to ensure the cable is securely attached.
Careful installation not only restores the transmission’s responsiveness but also extends the overall lifespan of the cable and related components, resulting in a reliable driving experience.
How to Adjust the Cable Tension
1. Understanding the Importance of Proper Adjustment
Once the new shifter cable is installed, it’s crucial to properly adjust its tension to ensure the transmission and gear shifter work together smoothly.
Cable tension determines how accurately the gear lever inside the cabin corresponds to the actual gear position of the transmission.
If the cable is too loose, the shifter may feel sloppy and the transmission may not fully engage the selected gear.
On the other hand, if the cable is too tight, the gear lever may be stiff, making shifting difficult or causing premature wear on the linkage and internal components.
Correct tension adjustment ensures precise gear engagement, prevents damage to the transmission and provides a factory-like feel to the gear shifter.
2. Performing the Initial Adjustment
To begin adjusting the cable, ensure the vehicle is safely parked on a level surface with the engine off and the parking brake engaged.
Locate the adjustment mechanism on the shifter cable, which is typically near the transmission end or along the cable housing.
Some cables have a threaded adjuster with a locking nut, while others have a snap-lock or clip-style adjuster.
Release the locking mechanism to allow the cable to move freely.
Position the gear shifter inside the cabin in the “Neutral” position, then manually move the transmission selector lever to the same neutral position.
This step ensures that both the shifter and the transmission are synchronized before final tightening.
Once aligned, gradually adjust the cable length or tension until both ends rest comfortably in their neutral positions without any tension or slack.
3. Fine-Tuning Gear Engagement
After the basic alignment, test the gear shifter by moving it through all gear positions one by one—such as park, reverse, neutral and drive for an automatic transmission, or all forward and reverse gears for a manual.
Each gear should engage fully without any hesitation or delay.
Pay attention to how the shifter feels during each movement.
If it feels like the lever has to be moved too far before the gear engages, the cable may still be a little loose.
If the gear engages too quickly or feels tight, the cable is probably too tight.
Small adjustments of a few millimeters can make a big difference in shifting accuracy, so proceed slowly and test after each adjustment until the movement feels smooth and consistent.
4. Verifying Gear Position Alignment
Once the adjustments feel correct, verify that the gear position displayed on the gear indicator matches the actual transmission response.
For automatic transmissions, confirm that the vehicle only starts in “park” and “neutral” and that each gear engages correctly when the lever is moved.
For manual transmissions, ensure that each gear selects smoothly without any grinding or resistance.
Misalignment between the shifter position and the internal gears of the transmission can lead to serious problems, including missed gears or transmission damage, so this verification step is crucial.
5. Securing the Adjustments and Testing the System
After confirming that all gears engage correctly and the shifter feels natural, securely lock the adjustment mechanism in place.
Tighten any locking nuts or close any adjustment clips to prevent the cable from moving out of position during operation.
Reinstall any protective covers or brackets that were previously removed.
Next, start the vehicle and retest the shifting operation while the engine is running, as increased vibration and transmission pressure can slightly affect the cable’s behavior.
A final test drive can help verify that the cable tension is properly balanced, resulting in smooth gear changes and accurate alignment between the shifter position and the transmission gears.
Properly adjusted cable tension ensures reliable performance, reduces mechanical strain and significantly improves driving comfort and control.
How to Test the Gear Shifter
1. Performing an Initial Shifter Test with the Engine Off
Before starting the engine, it’s crucial to manually test the gear shifter’s movement to ensure the new or adjusted cable is functioning correctly.
With the vehicle off, slowly move the shifter through all available gear positions and observe how it feels.
The lever should move smoothly and each gear position should engage firmly without any unusual stiffness or looseness.
This test helps verify that the shifter cable is properly installed, the clips are secure and the linkage is aligned with the transmission selector.
Pay attention to the tactile feedback when shifting gears – there should be a clear and distinct stop for each gear, indicating that the cable is properly tensioned.
If you feel resistance, sticking, or excessive looseness, it may indicate that the cable is misaligned, kinked, or still too tight or too loose.
Identifying these issues now can prevent problems once the vehicle is started.
2. Verifying Cable Response and Alignment
As you move the shifter back and forth, observe the movement at both the shifter assembly and the transmission lever, if possible.
Both should move in complete synchronization, with no delay between your input and the response at the transmission end.
This confirms that the inner cable wire is sliding smoothly within its sheath and that there are no hidden obstructions or tension points along its path.
If any part of the movement feels inconsistent or uneven, gently re-check the routing underneath the vehicle to ensure the cable is not kinked or rubbing against any surrounding components.
This visual and physical confirmation step helps verify that the initial installation and adjustments were correct and that the cable is functioning as intended.
3. Performing an Engine-On Test
Once you are confident that the gear shifter operates smoothly with the engine off, it’s time to perform a live test with the engine running.
Start the vehicle while firmly holding your foot on the brake pedal.
For automatic transmissions, move the shifter through all positions—Park, Reverse, Neutral and Drive—pausing briefly in each gear to check for proper engagement.
You should feel an immediate response from the transmission as each gear is selected.
For manual transmissions, fully depress the clutch pedal and shift through all gears, ensuring that each gear engages smoothly and disengages easily back into neutral.
If you experience any hesitation, rough engagement, or grinding noises, stop the test and recheck the cable adjustment or linkage alignment.
4. Testing in Real Driving Conditions
After confirming proper gear response while the vehicle is stationary, carefully take the vehicle for a short test drive.
Begin by driving slowly in a safe, open area such as a driveway or empty parking lot.
Shift gears gradually to observe how the shifter behaves under normal load and motion.
The transitions between gears should be natural and clean, without any delays or sudden looseness.
For automatic vehicles, check that the transmission shifts properly through all gears as the vehicle accelerates.
For manual transmissions, ensure that each gear engages correctly without popping out or slipping.
During this process, pay attention to any unusual noises, such as clicking or binding, which could indicate that the cable is rubbing against another component or is not fully seated in its mount.
5. Final Confirmation and Post-Test Inspection
Once the test drive is complete and the vehicle has performed well in all gear positions, park it on a level surface and perform a final inspection.
Check all visible connection points, clips and mounting brackets to confirm that they are still tight and that the cable has not shifted from its position.
This final step ensures the long-term reliability of your repair or replacement work.
A properly tested and aligned shifter cable guarantees precise gear engagement, smooth shifting and improved vehicle control.
By carefully following this testing procedure, you ensure that both the shifter and transmission work in harmony, resulting in safe and confident driving performance.
Read More:
How to Perform the Post-Repair Inspection
1. Ensuring Smooth Shifting Without Obstructions
After completing any repairs or replacements related to the shifter cable, it’s crucial to verify that the gear shifting action is smooth and consistent.
The shifter should move easily without any binding, rubbing, or excessive looseness.
Smooth gear transitions indicate that the shifter cable is properly routed, lubricated and adjusted to the correct tension.
If you experience any binding or roughness when shifting gears, it could mean the cable is slightly misaligned, the linkage at the transmission is binding, or debris has entered the cable sheath.
Lubricating the joints and ensuring correct routing can resolve most of these issues.
Unobstructed shifter movement not only makes driving more comfortable but also reduces wear and tear on both the cable and transmission components, extending their lifespan.
2. Checking for Any Loose Bolts or Missing Clips
During the reinstallation or adjustment process, some bolts, retaining pins, or clips may not be fully tightened or secured.
After the repair, a careful inspection should be performed on all mounting points along the cable’s path—both at the gear shifter inside the cabin and at the transmission linkage underneath the vehicle.
Every fastener should be firmly in place to prevent the cable from becoming misaligned during operation.
Missing or loose clips can lead to unwanted movement, resulting in poor gear engagement or even complete cable detachment.
Using the correct tools, ensure all hardware is tightened according to the manufacturer’s torque specifications.
If any clips or brackets appear damaged or worn, replace them immediately to maintain a reliable connection and security.
3. Verifying that the Gear Lever Position Matches Correctly
Once you’ve inspected the physical components, the next step is to confirm that each gear on the transmission correctly corresponds to the position selected by the gear lever.
For example, when the shifter is placed in Drive or Reverse, the transmission should immediately and accurately engage those gears.
If the gear position displayed on the shifter doesn’t match the actual gear in the transmission, there might be a slight misalignment in the cable adjustment.
Rechecking and fine-tuning the cable tension at the adjustment point can quickly correct this misalignment.
In manual transmissions, this also ensures that the shifter fully engages each gear without skipping or grinding.
This verification step guarantees that the cable is sending accurate signals between the gear lever and the transmission, ensuring safe and predictable vehicle operation.
4. Final Functional Observation and Recheck
After performing these checks, operate the shifter several times while the vehicle is running and stationary to observe consistent performance.
Pay attention to any noises, delayed engagement, or feelings of slippage, as these are early indicators of maladjustment or wear.
Testing the vehicle in real driving conditions by shifting through different gears is also helpful to ensure all movements feel correct and stable.
Performing these checks after a repair is a crucial part of the process because even a minor issue, such as a loose clip or improperly routed cable, can cause shifting problems or put stress on the transmission.
A thorough inspection confirms that your repair is safe, correct and ready for long-term use, giving the driver confidence that the transmission system is functioning exactly as it should.
Basic Mistakes That You Should Avoid
1. Improper Cable Routing
One of the most common mistakes people make when replacing shifter cables is failing to route the new cable along the exact same path as the old one.
Cable routing is crucial because it determines how smoothly the cable operates when shifting gears.
If the cable is sharply bent, kinked, or routed near hot engine parts or moving components, it can lead to premature wear, excessive friction, or even melting of the protective sheath.
Factory routing ensures proper alignment, minimal stress on the cable and protection from heat and vibration.
Before removing the old cable, it’s always a good idea to take clear pictures or make notes of its exact routing, including how it passes through brackets and clips.
This simple step ensures the new cable operates efficiently and lasts longer without unnecessary stress.
2. Forgetting to Adjust Tension After Installation
After installing a new shifter cable, adjusting its tension is a critical step that many people overlook.
Without proper adjustment, the gear positions on the lever may not accurately correspond to the transmission gears.
This misalignment can result in delayed engagement, gear slippage, or difficulty selecting certain gears.
Cable tension affects how accurately the shifter communicates with the transmission linkage, so even a slight variation can cause noticeable shifting problems.
Most vehicles have an adjustment point, usually near the shifter base or the transmission end, where the cable tension can be fine-tuned.
Always ensure that when the gear lever is in a specific position—such as park, neutral, or drive—the transmission correctly engages that gear.
After adjustments, performing a few test shifts helps confirm smooth, precise operation.
3. Neglecting Bushing Wear During Reassembly
Bushings are small but crucial components that secure the shifter cable and allow it to move smoothly with minimal friction.
Over time, these bushings can wear out, loosen, or become brittle, specially in older vehicles.
Many people make the mistake of reinstalling the cable without checking these bushings, which can lead to loose shifting, vibrations, or even cable detachment while driving.
It’s always advisable to carefully inspect all plastic or rubber bushings during reassembly.
If any appear damaged or brittle, they should be replaced with new bushings before completing the repair.
New bushings help maintain precise alignment between the shifter and transmission, ensuring consistent and smooth performance for years to come.
4. Reusing Worn Clips or Retainers
Clips and retainers securely hold the shifter cable in place along its path and at connection points.
Reusing old or worn clips is a mistake that can lead to future shifting problems or the cable coming loose under pressure.
Old clips often lose their grip due to corrosion, wear, or bending during removal.
Whenever you replace the cable, installing new clips or retainers ensures that all connections remain tight and secure.
These parts are typically inexpensive and readily available, making replacement a simple yet essential step for a reliable installation.
Skipping this step might save a few minutes, but it can lead to bigger problems down the road, such as shifting malfunctions or cable failure while driving.
5. Final Quality Check for the Entire Assembly
Before closing up the repair area, take a moment to double-check the entire assembly to ensure every connection, clip and adjustment is correct.
Many shifter cable problems stem from minor mistakes during reassembly.
By checking the routing, verifying tension, replacing worn parts and testing all gears before final assembly, you can prevent future malfunctions and guarantee long-lasting performance.
Avoiding these common mistakes not only improves the performance of the gear shifter system but also maintains the overall safety and smoothness of the vehicle’s transmission operation.
How to Maintain for a Longer Shifter Cable Life
Studies also shows that steel wires in cable assemblies actually degrade under combined mechanical fatigue and corrosion, that’s why it is important for automotive cables to change the cable even when small sheath damage or moisture is visible, as these things drastically accelerates the internal wire corrosion and fatigue cracking, which actually leads to the sudden cable stiffness or breakage as well. As well as, cracked sheath or any sign of moisture entry on a shifter cable is actually strong indicator that internal strands are been compromised and you need to replace them instead of lubricating them.[¹]
1. Regularly Inspect Cable Connections and Bushings
Regular inspection is the easiest and most effective way to extend the life of your shifter cable.
Over time, constant movement, engine vibrations and exposure to heat can cause cable connections to loosen or bushings to wear out.
Loose connections or worn bushings can lead to increased play in the shifter, resulting in delayed gear changes or incorrect gear engagement.
It’s a good practice to inspect the shifter cable system every 6 to 12 months, or during routine maintenance such as an oil change.
Carefully inspect both ends of the cable – the shifter end inside the cabin and the transmission end under the hood.
Look for signs of wear, corrosion, or cracks on the plastic bushings.
Catching these minor issues early prevents them from escalating into major problems, saving you from being stranded or experiencing gear shifting failures while driving.
2. Lubricate Moving Parts to Prevent Corrosion
Lubrication is crucial for the smooth and easy movement of the shifter cable.
The cable operates within a sheath and while many modern cables are pre-lubricated and sealed, the external joints, linkage points and metal connectors are still exposed to dirt, moisture and oxidation.
Applying a small amount of high-quality lithium or silicone-based grease to these areas during inspection reduces friction and prevents corrosion.
Regular lubrication is even more important in humid or coastal areas where corrosion is more prevalent.
Properly greasing the moving parts not only extends the cable’s lifespan but also ensures smoother gear changes and reduces stress on the shifter and transmission linkage.
3. Don’t Force the Gear Shifter
One of the most common causes of premature shifter cable failure is forcing the gear lever into gear when the vehicle isn’t fully ready.
For example, drivers often apply excessive force when shifting from park to drive or reverse in automatic transmissions, or when attempting to engage gears without fully depressing the clutch in manual vehicles.
This extra force stretches the cable over time and weakens the internal wires.
If you ever feel resistance or stiffness in the gear lever, it’s better to stop and investigate the cause rather than forcing it.
The shifter should always move smoothly without excessive effort.
By avoiding sudden or forceful gear changes, you prevent unnecessary stress that can damage the cable or linkage components.
4. Replace worn bushings promptly to avoid strain on the cable
Bushings play a crucial role in supporting the shifter cable and allowing it to move smoothly without friction or misalignment.
When these bushings wear out, the cable can move off-center, putting stress on the internal wires and connections.
Ignoring worn bushings can cause the cable to rub against hard surfaces or stretch unevenly, leading to premature failure.
Replacing the bushings is a low-cost and easy preventative measure that can make a big difference in extending the life of the entire shifting system.
It’s wise to replace them whenever you notice looseness, unusual vibrations, or play in the shifter while changing gears.
New bushings restore precise movement and help maintain a smooth, accurate shifting experience.
5. A Final Word on Long-Term Care
Consistent shifter cable maintenance doesn’t require any special skills – just attention to detail and routine checks.
Keeping the cable clean, properly lubricated and free of tension ensures long-lasting performance.
Preventive maintenance not only saves money on expensive transmission repairs but also contributes to safer and more responsive driving.
A well-maintained shifter cable provides a strong and reliable connection between your hand and the gearbox, allowing you to enjoy smooth and precise gear changes for years to come.
Conclusion – How to Repair Gear Shifter Cable
So, when you repair or maintain shifter cable in the good condition then it actually restores proper gear function and even your car responds exactly how you like it to be.
Basically, the shifter cable acts as a crucial communication link between your gear lever and the transmission – every smooth gear change depends on its proper functioning.
Over time, normal wear and tear, heat, or corrosion can weaken this cable, affecting how accurately your transmission responds to your inputs.
Recognizing early warning signs like a loose shifter, stiffness, or difficulty engaging gears can save you from costly repairs down the line.
By accurately diagnosing the problem, carefully handling the components and maintaining proper routing and tension during installation, you can restore precise shifting and extend the life of your transmission system.
The key isn’t just fixing the problem, but doing it systematically – checking the bushings, using the correct lubrication and ensuring every clip and connection is secure.
These steps not only protect your investment but also ensure safety and reliability on the road.
A properly functioning shifter cable provides seamless control, making gear changes effortless, reducing stress on the gearbox and improving the overall driving experience.
Regular inspection and maintenance, such as checking connections, cleaning components and avoiding forcing gear changes, can extend the cable’s lifespan well beyond its typical 80,000 to 120,000 miles.
Paying attention to these small but essential components demonstrates good vehicle ownership – preventing breakdowns and keeping your car’s performance consistent and reliable.
Now, you can ask questions in the comment box.
Frequently Asked Questions
Q1. What is a gear shifter cable and what does it do?
Answer: A gear shifter cable is a flexible metal cable that connects the gear lever inside your car to the transmission. Its job is to transmit the movement of your hand on the shifter to the transmission’s gear selector mechanism. When you move the gear lever, the cable moves as well, causing the transmission to shift into the selected gear. Without this cable, the transmission wouldn’t know which gear to engage, making it difficult to drive the car properly. Shifter cables are used in both manual and automatic cars, although their design and length may vary depending on the vehicle model.
Q2. What are the common signs of a bad or broken shifter cable?
Answer: A failing shifter cable usually shows several clear signs before it completely stops working. You might notice that the gear lever feels loose, floppy, or difficult to move. Sometimes the car won’t shift into the correct gear, even if the lever position appears correct. In severe cases, the car may get stuck in one gear or refuse to move when you select drive or reverse. Often, a visual inspection will reveal broken metal strands, corrosion, broken clips, or worn bushings near the ends of the cable.
Q3. Can I fix the shifter cable myself, or will I need a mechanic?
Answer: If you have basic mechanical knowledge and some essential tools, you can repair or replace the shifter cable yourself. This process involves removing interior panels, disconnecting the cable from both the shifter and the transmission and installing a new cable while following the original routing. However, if access to the cable is difficult or the transmission is complex, a professional mechanic might be a safer option. Most people who are comfortable with DIY car repairs find replacing a shifter cable a fairly easy task, which can save considerably on labor costs.
Q4. How much does it cost to replace a gear shifter cable?
Answer: The cost of replacing a shifter cable depends on the car model and the type of transmission it has. On average, the cable itself costs between $30 and $150 for most vehicles. If you opt for professional installation, the total cost, including labor, typically ranges from $150 to $400. Doing the job yourself can significantly reduce the cost, as you’ll only need to purchase the replacement cable and possibly some new clips or bushings.
Q5. Why do gear shifter cables fail?
Answer: Shifter cables wear out over time because they are constantly under tension and exposed to heat, vibration and moisture. The metal wires can fray, or the outer casing can crack, allowing dirt and debris to enter. In cold weather, freezing temperatures can also stiffen the cable and increase the likelihood of breakage. Another common cause is forcing the gear lever when the car isn’t fully ready to shift gears, which puts excessive stress on the cable. Poor lubrication or worn bushings can also increase friction and accelerate wear.
Q6. How long does a gear shifter cable last?
Answer: Under normal driving conditions, a gear shifter cable can last between 80,000 and 120,000 miles. However, this lifespan depends on driving habits, maintenance and environmental factors. Regular inspections, proper lubrication and smooth gear shifting can help extend its life. Promptly replacing worn bushings or clips can also prevent unnecessary stress or misalignment on the cable, allowing it to last longer.
Q7. What will happen if I continue driving with a faulty shifter cable?
Answer: Driving with a faulty shifter cable can cause serious problems. The transmission may not shift properly, leading to sudden gear slips or the car being unable to engage any gear. In automatic cars, this can cause the transmission to get stuck in a single gear or neutral, while in manual cars, shifting gears may become very difficult or impossible. Continuing to drive in this condition can also damage the internal components of the transmission. It’s best to stop driving and have the problem fixed as soon as possible.
References:
[1] Experimental Study on Corrosion Fatigue Performance of High-Strength Steel Wire with Initial Defect for Bridge Cable
https://www.mdpi.com/2076-3417/10/7/2293

Guys, I’m a car audio enthusiast and customization expert and I love clear sound and clean installation. Plus, I have spent years helping people build their dream audio setups. And whenever I’m working on cars, I probably listen to music and thinks about the next big upgrade.