 Skip to content
Written By: Don Dodi
Fact Checked By: Kristen Brown
Reviewed By: Diego Rosenberg
If you are hearing something unusual like whenever you start the engine then it make a light rattling sound at startup, then it is your timing chain tensioner which is not with the rhythm with your engine.
Yes, Timing Chain Tension actually keeps your vehicle’s timing chain properly tight and synchronized with the crankshaft and camshaft as well.
Basically, its main job is to maintain the right amount of pressure on the timing chain so that the valves and pistons actually move in perfectly rhythmic way.
And whenever the tensioner starts to wear out or fails anyhow, then it is the chain that can become loose, that cause rattling sounds, poor engine performance and even it can severely damage your internal components if the timing slips furthermore.
Now-a-days, modern vehicles actually uses hydraulic or mechanical tensioners that rely on oil pressure or spring force to work perfectly, but both can degrade over the time due to the oil contamination, seal failure or just wear out along with the time.
Which is why you should properly know How to Replace a Timing Chain Tensioner to extend the life and reliability of your vehicle’s engine easily.
Tools
| Name of Tool/Material | Purpose / Description (in Easy Words) | Helpful Tips |
|---|---|---|
| Socket Set | Used to remove and tighten nuts and bolts of various sizes. | A metric socket set works best for most modern vehicles. |
| Ratchet Handle | Works with a socket set to quickly loosen or tighten bolts. | Choose a device with a comfortable grip for better control. |
| Combination Wrenches | Helps reach bolts in tight spots where sockets can’t fit. | Use the correct size to prevent damage to the bolt head. |
| Screwdrivers (Flat & Phillips) | Used to remove small screws or clips from covers and brackets. | Keep both types of screws handy; cars usually have both types. |
| Torque Wrench | This ensures that the bolts are tightened to the correct strength. | Overtightening may cause leakage or damage, so follow specifications carefully. |
| Timing Chain Locking Tool | Holds timing chain and gears in place during replacement. | Prevents the chain from moving and losing timing alignment. |
| Harmonic Balancer Puller | Helps remove the crankshaft pulley if it blocks the timing cover. | Some engines require this to access the tensioner area. |
| Gasket Scraper | Removes old gasket material and sealant from metal surfaces. | Clean surfaces help prevent future oil spills. |
| Pliers Set | Used to hold or pull small parts, clips and hoses. | Needle-nose pliers are specially useful in tight engine spaces. |
| Oil Drain Pan | Catches used engine oil when draining oil from the engine before repair. | Always dispose of used oil properly at a recycling center. |
| Funnel | Helps to add new oil without spilling oil into the engine. | Use a clean funnel to avoid contamination. |
| Shop Towels or Rags | Used for cleaning parts and wiping up oil spills. | Maintain a good supply – oil and dirt are inevitable. |
| New Timing Chain Tensioner | New Part That Keeps Your Timing Chain Tight And Properly Aligned. | Always use high-quality or OEM parts for reliability. |
| Timing Cover Gasket | Seals the timing cover to prevent oil leakage. | Even if the old one looks fine, replace it – reusing it could cause a leak. |
| Gasket Maker or Sealant | Used to seal small gaps or corners that gaskets cannot completely cover. | Use the type recommended by your vehicle’s manufacturer. |
| Engine Oil | Required for refilling after draining and for lubricating new parts. | Use the grade and type recommended in your car’s manual. |
| Coolant (if applicable) | This is necessary when the cooling system has been exhausted during the process. | Mix properly with water according to the manufacturer’s instructions. |
| Jack and Jack Stands | It safely raises and supports the car if you need to work underneath. | Always use stands – never rely solely on a jack. |
| Battery Terminal Wrench | Safely disconnect the battery before starting work. | Prevents accidental short circuits or sparks. |
| Work Light | Provides clear visibility in dark engine areas. | LED work lights stay cool and bright for a long time. |
| Gloves and Eye Protection | Keeps your hands and eyes safe from oil, metal and debris. | Use nitrile gloves for oil resistance and safety glasses for protection. |
How to Ensure Safety During Replacing a Timing Chain Tensioner
Before beginning the process of replacing the timing chain tensioner, it is crucial to follow several safety precautions to protect both yourself and your vehicle.
Working on an engine involves electrical systems, moving parts and sometimes hazardous fluids, so taking proper care from the start can prevent accidents and costly mistakes.
1. Disconnect the Battery to Prevent Accidental Starting
Always disconnect the negative battery terminal before beginning any work.
This step is simple but essential as it prevents the engine from accidentally starting while your hands or tools are near moving parts.
Many modern vehicles also have sensitive electronic systems that can be damaged if there is a short circuit in a live circuit during repairs, so disconnecting the battery also protects the car’s electrical components.
2. Ensure the Engine is Completely Cool
Before beginning any work on the engine, ensure it is completely cool.
A recently run engine can reach temperatures exceeding 200 degrees Fahrenheit, posing a burn risk if you touch metal or coolant lines.
Allowing the engine to cool for at least one to two hours ensures safe handling and also makes it easier to remove parts like the timing cover, as metal contracts slightly when cool.
Working on a cool engine also prevents the release of hot, pressurized fluids, which could spray out and cause injury.
3. Securely Support the Vehicle with Jack Stands
If you need to access the underside of the vehicle, always lift the car using a reliable hydraulic jack and securely support it with jack stands.
Never rely solely on the jack, as hydraulic jacks can lose pressure over time and fail without warning.
Place the jack stands on solid, level ground under the recommended support points shown in your vehicle’s owner’s manual.
After lifting the car, gently shake it before going underneath to confirm that it is stable.
This ensures your safety during the repair process.
3. Follow Manufacturer’s Safety Guidelines
Every vehicle has specific safety and service recommendations provided by the manufacturer and it is crucial to follow them carefully.
These guidelines include correct torque settings, tightening sequences and safety instructions specific to your engine design.
Using the manufacturer’s repair manual ensures you are following tested procedures that protect both the car and the technician.
Ignoring these instructions can lead to incorrect installation, mechanical failure, or even injury.
Reading the manual before you begin will help you understand the layout, part locations and safety alerts specific to your make and model.
How to Locate the Timing Chain Tensioner
Locating the timing chain tensioner is a crucial first step before attempting to remove or replace it.
The tensioner is typically located behind the timing chain cover, which is mounted on the front of the engine.
This cover is a metal or aluminum housing that protects the timing chain and its associated parts, such as the camshaft gears, crankshaft sprocket and chain guides.
Because the timing chain controls the precise opening and closing of the engine valves, the tensioner must be in a specific location where it can maintain constant tension on the chain.
In most vehicles, the front of the engine faces the belts and pulleys, not necessarily the front bumper.
This means that in some vehicles, specially those with transversely mounted engines, the front of the engine may actually be towards the passenger side of the car.
1. Understanding the Timing Chain Cover Location
The timing chain cover is bolted directly to the engine block and is usually located just behind the crankshaft pulley or harmonic balancer.
To access the timing chain tensioner, this cover often needs to be removed.
Because it is sealed with a gasket or sealant to prevent oil leaks, care must be taken when removing it to avoid damaging the mating surfaces.
Once the cover is removed, depending on the engine design, the tensioner will be visible either along the edge of the timing chain or near the chain guide.
It is a small component, typically made of metal or durable plastic and in many modern engines, it is hydraulically operated to maintain constant tension.
2. Removing Accessories for Better Access
In many vehicles, several accessories may need to be removed to gain access to the timing chain tensioner.
Common components that may need to be removed include the serpentine belt, alternator, power steering pump, or air conditioning compressor.
These parts are typically located around the timing cover area and removing them provides the necessary space to safely access the tensioner without damaging other components.
In some vehicles, specially those with compact or very crowded engine bays, you may also need to loosen or remove the engine mounts to slightly tilt or lift the engine for better access.
Taking pictures or labeling each part before removal helps during reassembly and ensures that nothing is installed incorrectly.
3. Differences Between Engine Types
The location of the timing chain tensioner also depends on the type of engine layout in your car.
In inline engines, such as an inline-four, the timing chain and tensioner are located at the front of the engine, usually towards the radiator.
In V-type engines, such as a V6 or V8, there may be two timing chains—one for each cylinder bank—each with its own tensioner.
These are often located at the front of the engine block and may require more disassembly to access.
In transverse engines, which are mounted sideways in many front-wheel-drive cars, the timing chain is located on the side of the engine bay, often near the passenger-side wheel well.
This layout can make access difficult due to limited space and may require removing the wheel and inner fender liner to reach the timing cover area.
How to Drain Engine Oil and Coolant – If Necessary
Before working on the timing chain tensioner, it’s crucial to drain the engine oil and, in some vehicles, the coolant.
This step prevents oil and coolant from spilling when removing the timing cover, keeping your workspace clean and minimizing the risk of contamination.
The timing chain and its components operate within the engine’s oil system, so when the cover is opened, oil trapped behind it can quickly spill out.
In some engines, the timing cover also seals a portion of the coolant passage, meaning the coolant must also be drained to prevent leaks when the cover is removed.
Taking the time to properly drain these fluids makes the repair process safer and more organized.
1. Place a Drain Pan Below
To begin, place a large drain pan directly beneath the engine’s oil drain plug, which is typically located at the bottom of the oil pan.
Ensure the engine is slightly warm but not hot, as warm oil flows more easily and carries more dirt and debris out of the system.
Loosen the drain plug using the correct size wrench or socket and allow the oil to drain completely into the pan.
Allow several minutes for all the old oil to drain completely.
If the coolant also needs to be drained, move the pan under the radiator drain valve or carefully remove the lower radiator hose.
Using a wide drain pan helps catch both fluids and prevents spills on the floor.
Having some absorbent shop towels nearby can also help clean up any minor drips.
2. Draining Fluids Prevents Contamination and Spills
When the engine oil and coolant are properly drained, there is less risk of these fluids contaminating or leaking onto engine parts that should remain clean, such as the timing chain area or gasket surfaces.
Residual oil in these areas can prevent new gaskets or sealants from sealing properly, potentially leading to future leaks.
Removing the fluids also protects the environment and keeps your workspace clean.
Always allow ample time for the fluids to drain completely before continuing with the disassembly process.
Once the fluids have drained, temporarily reinstall the oil drain plug and radiator cap to prevent dirt or debris from entering the openings while you work.
3. Proper Disposal or Recycling of Fluids
Used engine oil and coolant should never be poured down drains, onto the ground, or into trash cans.
These fluids contain chemicals and metals that can harm the environment if not handled properly.
Most local auto parts stores, service centers, or recycling facilities will accept used oil and coolant free of charge.
Pour the drained fluids into clean, sealable containers—preferably the original containers they came in—and take them to a proper recycling facility.
Recycling helps ensure that the fluids are processed safely and reused or disposed of without harming the soil or water sources.
This extra step demonstrates environmental responsibility and makes your repair process more responsible and professional.
How to Remove Components for Access
Before accessing the timing chain tensioner, several parts must be removed to clear the front of the engine.
The timing chain system is protected by layers of components such as belts, covers and accessories that seal the engine and help it run smoothly.
Removing these parts in the correct order provides proper access to the timing chain and prevents damage to other engine components.
This step should be performed carefully, patiently and systematically to facilitate reassembly later.
Working methodically also ensures that every bolt and part is returned to its correct location, guaranteeing that the engine remains properly sealed and aligned after the repair.
1. Remove the Serpentine Belt and Timing Cover Bolts
The first major component to remove is the serpentine belt.
This long rubber belt powers several essential accessories such as the alternator, power steering pump and air conditioning compressor.
Begin by locating the belt tensioner pulley, which keeps the belt taut.
Use a wrench or a serpentine belt tool to rotate the tensioner and release the belt tension.
Once the tension is released, carefully remove the belt from the pulleys and set it aside.
Next, focus on the timing cover bolts.
The timing cover is a large metal or aluminum housing at the front of the engine that seals the timing chain area.
Depending on your vehicle, there may be several bolts of varying lengths securing it.
It’s crucial to note their positions or lay them out in order on a clean surface.
Some covers may also have hidden bolts near the oil pan or behind accessories, so double-check all locations before attempting to loosen it.
Always apply gentle pressure to avoid bending or breaking the cover.
2. Remove the valve cover if necessary
In many vehicles, specially those with overhead camshaft engines, you may need to remove the valve cover to gain full access to the timing chain and tensioner area.
The valve cover protects the upper part of the engine where the camshafts and valves operate and it is often located above the timing cover.
Removing it allows you to see the chain alignment marks and makes it easier to properly install the new tensioner.
To remove it, carefully loosen all the bolts and gently lift it off.
Sometimes, due to age or heat, the gasket may be stuck, so gently pry it off without scratching the metal surfaces.
Once removed, cover the open parts of the engine with a clean cloth to prevent dust and debris from entering.
This small step helps maintain engine cleanliness and prevents contamination during reassembly.
3. Label or photograph parts and bolts for proper reassembly
Because several bolts, hoses and small brackets are removed during this process, it’s a good idea to label or photograph them before removal.
Even experienced mechanics use photos or notes to keep track of where parts go.
You can use masking tape to label each connector, hose, or group of bolts to indicate where it came from.
Taking detailed pictures with your phone at each stage provides a reliable visual guide for putting everything back together later.
This method minimizes errors, saves time during reassembly and ensures that no essential part is forgotten or misplaced.
Organized documentation also helps avoid confusion, specially when working on engines with many overlapping components.
4. Use a harmonic balancer puller if necessary
In many vehicles, the harmonic balancer or crankshaft pulley must be removed before the timing cover can be accessed.
The harmonic balancer is a heavy, round component attached to the crankshaft that helps reduce vibrations and maintain engine balance.
Because it is tightly fitted to the crankshaft, you will need a harmonic balancer puller to safely remove it.
This specialized tool pulls the balancer straight off without damaging the crankshaft threads or pulley.
Avoid using hammers or prying tools, as these can cause serious damage.
Once removed, inspect the balancer for any cracks or wear, as this is a good opportunity to replace it if it shows signs of age or imbalance.
Read More:
How to Align the Engine Timing Marks
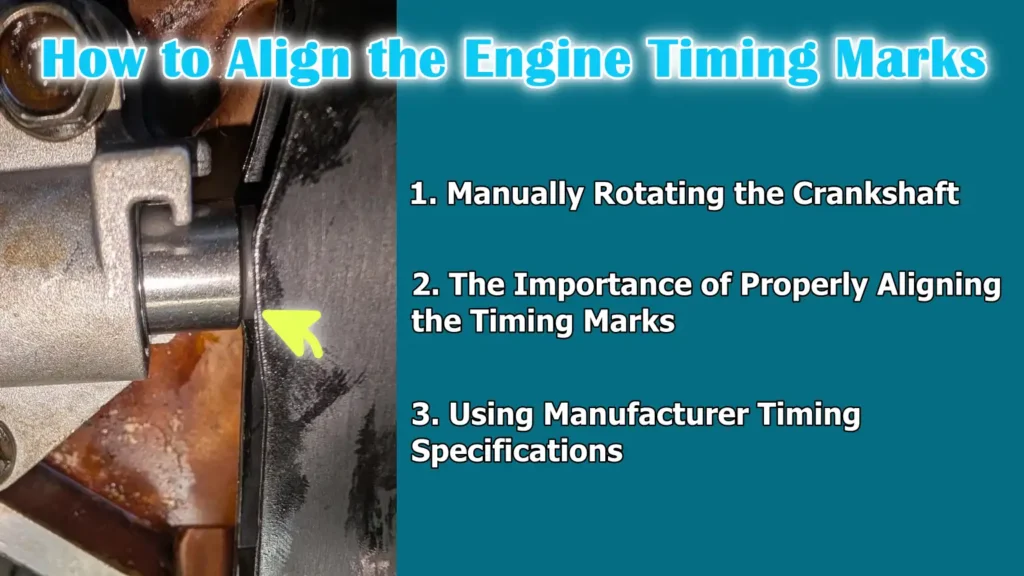
Aligning the engine timing marks is one of the most crucial steps when replacing a timing chain tensioner.
This process ensures that the crankshaft and camshafts are perfectly synchronized so that the valves open and close at the correct time relative to the piston movement.
Every internal combustion engine requires precise timing for smooth operation and even a slight misalignment can lead to misfires, power loss, or severe internal damage.
Before removing the old tensioner or disturbing the timing chain, manually rotate the crankshaft until all timing marks are properly aligned as specified by the vehicle manufacturer.
Performing this step correctly ensures that the engine’s mechanical rhythm is maintained and the new tensioner can be installed without any timing errors.
1. Manually Rotating the Crankshaft
To align the timing marks, you will need to manually rotate the crankshaft using a ratchet or breaker bar attached to the crankshaft pulley bolt and a socket of the correct size.
This should always be done slowly and gently in the normal direction of engine rotation, which is typically clockwise when viewed from the front of the engine.
Rotating it backward can cause the chain to loosen or skip teeth, resulting in incorrect timing.
As you rotate the crankshaft, observe the timing marks on the crankshaft and camshaft sprockets as they come into position.
These marks are usually small notches, dots, or etched lines on the gears that should align with matching reference marks on the engine block or cylinder head.
Some engines may also have painted or stamped marks on the timing chain itself to help match the correct alignment points.
2. The Importance of Properly Aligning the Timing Marks
This step is crucial because even a single tooth misalignment on the timing chain can cause the valves to open or close at the wrong time.
In interference engines, where the valves and pistons share close proximity within the cylinder, timing errors can cause the valves to collide with the pistons, potentially leading to bent valves, damaged pistons, or even complete engine failure.
Properly aligning the timing marks ensures that the combustion process occurs at the correct time – when the pistons are in the correct position and the valves are opening and closing in the proper sequence.
This synchronization helps the engine run smoothly, maintain power and achieve good fuel efficiency.
3. Using Manufacturer Timing Specifications
Every engine has specific timing mark positions and reference points determined by the manufacturer.
These can vary significantly depending on the engine design, the number of camshafts and whether the engine has variable valve timing.
Always consult your vehicle’s service manual or official repair guide to determine the correct alignment process and positions.
The manual will contain clear diagrams showing how the crankshaft and camshaft marks should line up before removing or installing the timing chain tensioner.
Relying on these specifications prevents costly mistakes and ensures that the chain and tensioner are installed in a way that allows the engine to run with perfect timing.
How to Remove the Old Timing Chain Tensioner
Removing the old timing chain tensioner is a delicate task that requires patience, steady hands and attention to detail.
The tensioner is responsible for keeping the timing chain taut and properly positioned on the sprockets, so when it wears out or fails, the chain can become loose, leading to timing issues or engine noise.
Before removing it, you must ensure the engine’s timing marks are perfectly aligned, as this ensures the chain remains in the correct position during disassembly.
Once the alignment is confirmed, you can carefully begin loosening and removing the old tensioner’s bolts while keeping an eye on the chain and guides to prevent them from shifting.
Taking extra care at this stage helps maintain proper timing and avoids unnecessary complications when installing the new tensioner.
1. Carefully Loosening the Tensioner Bolts
The timing chain tensioner is typically secured by two or more bolts that attach it to the engine block or timing cover area.
Use the correct size socket or wrench to loosen these bolts gradually and evenly.
Be careful not to drop them inside the timing cover, as retrieving them later can be difficult and time-consuming.
After removing the bolts, gently pull the tensioner straight out.
If the tensioner is hydraulic, some oil may leak during removal, which is normal.
Wipe up any spilled oil with a rag to keep the area clean.
Never force or pry the tensioner out with metal tools, as this can damage the housing or surrounding components.
Some tensioners may have a locking pin or a spring-loaded plunger, so keep your hand steady to prevent a sudden release of pressure.
2. Inspect the Chain for Slack and Check Timing Components
After removing the tensioner, inspect the timing chain for any slack or looseness.
A properly tensioned chain should have very little movement when gently pressed with a finger.
If the chain appears excessively loose or uneven, it may be stretched and require replacement.
Also, inspect the chain guides and sprockets for wear, scratches, or pitting.
Chain guides are plastic or metal surfaces that keep the chain aligned and they often wear down over time due to friction.
Worn guides can cause rattling noises or improper chain movement even after replacing the tensioner.
The teeth of the sprockets attached to the crankshaft and camshaft should also be inspected for sharpness or damage, as damaged teeth can shorten the life of the new tensioner.
If any components show signs of damage, it’s best to replace them now while everything is easily accessible.
3. Remove Remaining Gasket or Seal Material from the Mounting Surface
Before installing the new tensioner, it’s crucial to thoroughly clean the mounting area.
Use a gasket scraper or plastic tool to remove any remaining gasket material, old sealant, or debris from the surface where the tensioner mounts.
This ensures that the new part seals properly and prevents oil leaks while the engine is running.
Avoid using sharp metal tools that could scratch or gouge the aluminum surface, as even small scratches can cause leaks or prevent the new tensioner from seating correctly.
Once the area is clean, wipe it down with a lint-free cloth to remove any oil or residue.
A clean surface is essential for a strong seal and reliable performance of the new tensioner.
How to Install the New Timing Chain Tensioner
Installing the new timing chain tensioner is the most crucial part of this process, as it directly impacts the accuracy and stability of your engine’s timing system.
The tensioner’s purpose is to maintain the correct amount of tension on the timing chain to prevent it from slipping or becoming loose while the engine is running.
Before you begin, always ensure that all timing marks on the camshaft and crankshaft sprockets are perfectly aligned.
Even a slight misalignment can cause the valves and pistons to be out of sync, leading to poor engine performance, increased fuel consumption, or even severe engine damage.
Once you have verified that everything is in the correct position, you can carefully and properly install the new tensioner.
1. Prime the New Tensioner with Oil (if necessary)
Some timing chain tensioners, specially hydraulic ones, require priming with clean engine oil before installation.
Priming fills the oil chamber inside the tensioner, allowing it to build pressure immediately upon startup, rather than running dry for the first few seconds.
To prime it, submerge the tensioner in clean oil and manually compress it several times to expel any trapped air.
This process ensures smooth operation and prevents noise or premature wear when the engine is first started.
Not all tensioners require this step, so it’s essential to consult your vehicle manufacturer’s service manual for specific instructions.
If a hydraulic tensioner requires priming and you fail to do so, the chain tension may be insufficient for a period of time, potentially leading to timing issues or rattling noises.
2. Install and Torque According to Manufacturer’s Specifications
When installing the new tensioner, ensure that it sits properly and flush against the mounting surface.
To avoid cross-threading, initially tighten the bolts by hand and then tighten them evenly to the torque specified by the manufacturer.
Using a calibrated torque wrench is crucial, as overtightening can damage the threads or distort the tensioner housing, while undertightening can lead to oil leaks or allow the tensioner to move while the engine is running.
Correct torque ensures the part remains securely in place, even under engine vibrations and oil pressure.
Applying a light coat of oil to the bolt threads before installation is also a good idea if the service manual recommends it, as it helps achieve a more accurate torque reading and prevents thread damage.
3. Ensure the timing marks are still correctly aligned
Before proceeding, double-check the timing marks on the camshaft and crankshaft sprockets to ensure they haven’t shifted during tensioner installation.
Correct alignment is critical, as even a single tooth misalignment on the chain can cause incorrect valve timing, leading to poor performance or engine damage.
Slowly rotate the crankshaft by hand using a ratchet and socket on the crank pulley bolt to verify smooth movement and correct alignment of all marks through two complete engine revolutions.
This careful verification step ensures everything is in place before reassembling the remaining components and starting the engine.
4. If the tensioner is hydraulic, ensure correct preloading
Hydraulic tensioners use internal oil pressure to maintain chain tension and many require a preloading step before final assembly.
Depending on the design, preloading involves slightly compressing the tensioner’s internal plunger or locking it in a ready position with a retaining pin or clip.
This allows the tensioner to gradually extend as the engine starts and oil pressure builds.
If this step is omitted or performed incorrectly, the chain may become temporarily loose during startup, potentially causing noise or misalignment.
For proper preloading and reliable operation, always follow the manufacturer’s instructions for your specific tensioner type.
How to Reinstall All Removed Components
After installing the new timing chain tensioner and confirming its correct alignment, the next step is to carefully reinstall all the components that were removed during the process.
This stage is just as crucial as the disassembly, as proper reassembly ensures the engine runs smoothly, remains leak-free and all systems function correctly.
Each part must be returned to its correct location and tightened according to the manufacturer’s torque specifications.
Taking your time and working systematically at this stage prevents errors and maintains the quality of the repair.
As well as, the studies shows that clean, manufacturer-specified engine oil and timely oil changes actually reduces the timing chain and tensioner’s wear and life, as if it has measurable chain elongation or worn join roundness then you should immediately replace the chain, guides and tensioner all together as it easily restore the correct geometry.[¹]
1. Reinstall the Timing Cover with a New Gasket or Sealant
First, reinstall the timing cover, which protects the timing chain and tensioner from debris and seals the engine oil inside.
Before installing the cover, clean the contact surfaces on both the engine block and the cover to remove any old gasket residue, oil, or dirt.
A clean surface ensures a tight seal and prevents future oil leaks.
Always use a new gasket or the manufacturer-recommended sealant, as reusing old seals can lead to oil leaks.
Some engines require a specific type of RTV (Room Temperature Vulcanizing) silicone sealant, which is applied to specific areas, particularly around oil passages or corners.
When installing the cover, work slowly and ensure it is evenly aligned with all the bolt holes.
Tighten the bolts gradually in a crisscross pattern to create even pressure and prevent the cover from warping.
2. Reinstall the Serpentine Belt, Accessories and Connectors
Once the timing cover is securely in place, reinstall all the accessories that were previously removed, such as the serpentine belt, alternator, power steering pump, or engine mounts.
The serpentine belt drives several components, such as the alternator and air conditioning compressor, so ensure it is routed correctly according to your vehicle’s belt diagram.
Reconnect all hoses, brackets and electrical connectors exactly as they were.
If you labeled them or took pictures during disassembly, use those references to avoid confusion.
It is crucial that every electrical plug, vacuum line and sensor connection is properly reconnected, as these directly affect engine operation and monitoring.
Even a single connector, such as the crankshaft position sensor plug, left disconnected can prevent the engine from starting.
3. Refill Engine Oil and Coolant (if drained)
After reassembly, you will need to refill the engine with fresh oil and, if applicable, coolant.
If you drained the fluids earlier, always use the same type and grade of oil specified by your vehicle manufacturer.
Fill the crankcase to the correct level using the dipstick.
This will ensure the new tensioner receives proper lubrication as soon as the engine starts.
If you drained the coolant, refill it with a 50/50 mixture of coolant and distilled water or the correct pre-mixed version for your car’s engine type.
Be sure to bleed all the air from the cooling system, as trapped air can cause overheating.
Once the fluids are topped up, check for leaks under the vehicle and ensure all caps and plugs are securely tightened.
Final Inspection to Make Sure Everything Is Working Fine
Once all components are reassembled and fluids are refilled, performing a final inspection is a crucial step to ensure the repair has been successfully completed.
This stage verifies that the new timing chain tensioner is functioning correctly and that the engine is running smoothly without any issues.
Rushing this part can lead to overlooked problems, so it’s essential to take your time and carefully inspect every aspect of the engine.
A thorough final inspection ensures that your engine’s timing, oil circulation and sealing are all functioning perfectly.
1. Reconnect the Battery
First, reconnect the negative terminal of the battery, which was disconnected at the start of the job.
This restores power to the vehicle’s ignition and electronic systems.
Ensure the terminal is securely tightened to prevent loose connections, which can cause electrical malfunctions or starting problems.
Once reconnected, double-check that all tools have been removed from the engine bay and that there are no loose parts or wires that could interfere with moving components such as the serpentine belt or cooling fan.
3. Start the Engine and Listen for Unusual Noises
Carefully start the engine and let it idle.
In the first few seconds, listen attentively for any unusual noises such as rattling, ticking, or grinding sounds.
A properly installed timing chain tensioner should result in the engine running smoothly and quietly.
A very slight noise during startup is normal as oil pressure builds, but this should quickly disappear.
Persistent rattling or knocking sounds may indicate a problem with the tensioner installation or incorrect timing alignment.
Keep an eye on the oil pressure warning light on the dashboard – it should turn off within a few seconds.
If a warning light remains on or unusual noises come from the engine, immediately shut it off and re-inspect your work.
4. Check for Leaks Around the Timing Cover
With the engine idling, inspect the area around the timing cover for any signs of oil or coolant leaks.
Leaks can occur if the gasket or sealant was not properly installed or if the bolts were not tightened correctly.
Also, check the area around the crankshaft seal and bolt heads for any leaks.
Oil leaks not only create a mess and an unpleasant odor but can also lead to low oil levels, potentially damaging engine components.
If you find any leaks, shut off the engine, allow it to cool and carefully reseal the affected area before proceeding.
A dry, clean surface around the timing cover confirms that the sealing was done correctly.
5. Verify Engine Timing and Performance with a Scan Tool – If Applicable
For modern vehicles with electronic timing control, using a scan tool or diagnostic reader is crucial.
This tool allows you to check for any stored trouble codes and verify that the engine timing is within factory specifications.
Even a slight discrepancy in timing can affect engine idling, acceleration, or fuel combustion.
A scan tool can also help confirm proper camshaft and crankshaft synchronization, ensuring the new tensioner is maintaining the correct chain tension.
In some vehicles, you can view live data such as camshaft position readings, which helps verify that everything is functioning correctly.
Performing this check ensures your repair was successful and that the internal engine parts are operating perfectly.
Conclusion – How to Replace a Timing Chain Tensioner
Basically, when you replace a timing chain tension which is not just only the mechanical task you have to do as a formalities but you actually makes your engine more smooth, balanced and ensure the reliability again.
Furthermore, this task not only prevents potential malfunctions such as chain slippage or valve damage, but also helps maintain the correct synchronization between the crankshaft and camshaft, which is crucial for efficient combustion and smooth operation.
When done correctly, it ensures consistent timing accuracy, improved fuel economy and reduced engine noise—all contributing to a longer engine lifespan.
Throughout this entire process, the importance of preparation, cleanliness and precision cannot be overstated.
Using the correct tools, following manufacturer specifications and maintaining alignment at every stage are the foundations of a successful installation.
Taking the time to inspect other related components such as the timing chain, guides and sprockets also helps prevent future problems and ensures the entire timing system works in perfect harmony.
Even small steps like neglecting oil priming or misaligning timing marks can lead to significant performance issues or costly repairs later on.
Safety and patience also play equally important roles.
Working on a cool engine, disconnecting the battery and securely supporting the vehicle with jack stands are not just good habits—they are essential practices that protect both the mechanic and the machine.
Properly cleaning gasket surfaces, tightening bolts evenly and refilling with the correct fluids demonstrate the level of care necessary for reliable engine maintenance.
Every step, though sometimes time-consuming, contributes to a robust, leak-free and efficient outcome.
Once the job is complete, hearing the sound of a quiet, consistently running engine is a clear indicator of success.
The absence of rattling, leaks, or warning lights means the new tensioner is doing its job—maintaining correct chain tension and ensuring the smooth synchronization of engine components.
A quick scan or test drive with a diagnostic tool further confirms that everything is functioning correctly and that the effort invested in precision has paid off.
In short, replacing the timing chain tensioner is not just about fixing a mechanical part—it’s about protecting the heart of the engine.
Every engine relies on precise timing to breathe, combust and generate power efficiently.
By completing this task with patience, accuracy and proper care, you extend your vehicle’s lifespan, improve its performance and boost your confidence as a capable and responsible car owner.
It’s a repair that rewards both your mechanical understanding and attention to detail, resulting in an engine that runs stronger, quieter and more reliably than before.
So, that’s all from this one and if you still have confusion, just let us know by commenting below this guide.
Frequently Asked Questions
Q1. What does a timing chain tensioner do in an engine?
Answer: The timing chain tensioner keeps the timing chain tight and properly aligned so that the engine’s camshaft and crankshaft remain perfectly synchronized. This synchronization controls the opening and closing of the valves during engine operation. Without proper tension, the chain can become loose, skip teeth on the sprockets, or even break, leading to serious engine damage. In simple terms, the tensioner ensures the timing chain remains taut and stable at all times, regardless of how fast or slow the engine is running.
Q2. What are the symptoms of a bad timing chain tensioner?
Answer: A failing timing chain tensioner often gives warning signs, such as a rattling or clicking noise coming from the front of the engine, specially when starting or accelerating. You might also notice a decrease in engine performance, engine misfires, or a check engine light. In more severe cases, if the chain slips, the engine may misfire or refuse to start. These signs indicate that the tensioner is no longer able to keep the chain taut and the engine timing is off.
Q3. Can I drive with a bad timing chain tensioner?
Answer: Driving with a faulty or failing timing chain tensioner is not safe. If the chain becomes too loose, it can slip or break entirely, causing the pistons and valves to collide. This can result in extensive engine damage that can be very expensive to repair. If you notice any unusual rattling noises or timing issues, it’s best to stop driving and have the problem inspected immediately. Continuing to drive could turn a minor repair into a complete engine replacement.
Q4. How long does it take to replace a timing chain tensioner?
Answer: The time required depends on the type of vehicle and engine design. In most cars, replacing a timing chain tensioner can take anywhere from four to eight hours. In some engines, particularly V-type or transverse engines, accessing the tensioner often requires more disassembly, making the process longer. Professionals typically complete this job in a single day, but beginners may take longer due to the need for precise alignment and careful handling.
Q5. Do I need special tools to replace the timing chain tensioner?
Answer: Yes, you will need some special tools for this job. Common tools include a socket set, wrenches, a torque wrench and a ratchet. Depending on the engine, you may also need a timing chain locking tool, a harmonic balancer puller and a gasket scraper. These tools help ensure proper installation and prevent damage to engine components. Having the correct tools also makes it easier to maintain accurate timing and torque levels during reassembly.
Q6. Should I replace the timing chain along with the tensioner?
Answer: It’s a good idea to inspect the timing chain, guides and sprockets when replacing the tensioner. If they show signs of wear, such as looseness, stretching, or damaged teeth, they should also be replaced. While this increases the cost, replacing all related components together ensures long-term reliability and saves on future labor costs. Installing a new tensioner on a worn chain will not fully resolve the problem, as the chain may still slip or stretch further.
Q7. Why do timing chain tensioners fail?
Answer: The most common causes are wear and tear over time, poor oil maintenance, or low oil pressure. As most tensioners rely on oil pressure to maintain chain tension, dirty or low-quality oil can cause them to fail. Over time, sludge buildup or inadequate lubrication can prevent the tensioner from extending properly. In some cases, a mechanical failure in the tensioner spring or piston can also compromise the tensioner’s ability to provide tension.
Q8. What happens if the timing chain tensioner fails while driving?
Answer: If the tensioner fails completely, the timing chain can become loose or jump off its sprockets. This disrupts the alignment of the camshaft and crankshaft, leading to misfiring, engine stalling, or severe internal damage. In interference engines, where the valves and pistons are very close together, the pistons can collide with the valves, causing them to bend or break. Such a failure can lead to immediate engine failure, making timely detection and replacement crucial.
Q9. How much does it cost to replace a timing chain tensioner?
Answer: The cost depends on the make, model and engine type of the vehicle. On average, a professional replacement, including parts and labor, can cost between $500 and $1,500. If you do it yourself, the parts alone can range from $50 to $300 depending on the quality and brand. It’s always recommended to use OEM (Original Equipment Manufacturer) parts or high-quality aftermarket parts as they tend to last longer and fit perfectly.
References:
[1] WEAR INVESTIGATIONS ON TIMING CHAINS USING A CHAIN JOINT TRIBOMETER
https://www.stle.org/images/pdf/STLE_ORG/AM2018%20Presentations/Engine%20and%20Drivetrain/STLE2018_Engine%20and%20Drivetrain%20V_Session%205J_A.%20Becker_Wear%20Investigations%20on%20Timing%20Chains.pdf

Guys, I’m a car audio enthusiast and customization expert and I love clear sound and clean installation. Plus, I have spent years helping people build their dream audio setups. And whenever I’m working on cars, I probably listen to music and thinks about the next big upgrade.
