Written By: Don Dodi
Fact Checked By: Kristen Brown
Reviewed By: Diego Rosenberg
When there’s a dirty air filter which totally resembles like running with a stuffy nose and exactly like that your car will struggles to breathe properly and that leads to the weaker performance and wasted fuel as well.
Basically the engine air filter actually prevents dirt, dust and all kinds of debris from entering the engine directly and that actually ensures that only clean air mixes with the fuel for combustion purpose.
As well as, according to the U.S. Department of Energy, if there’s a clogged air filter then it can drastically reduce the acceleration by up to the 11% in the older vehicles and also it is very much possible that it can cause the poor fuel efficiency as well.
Because of the such importance most of the manufacturers recommend to replace the air filter every 12,000 to 15,000 miles, but it also depends on the driving conditions such as: if you drive on the dusty or really polluted areas then you may have to change it more frequent than normally.
So, it is the fact that your engine actually requires clean air filter that literally helps it to improve the engine performance and also helps it to reduce lots of harmful emissions as well.
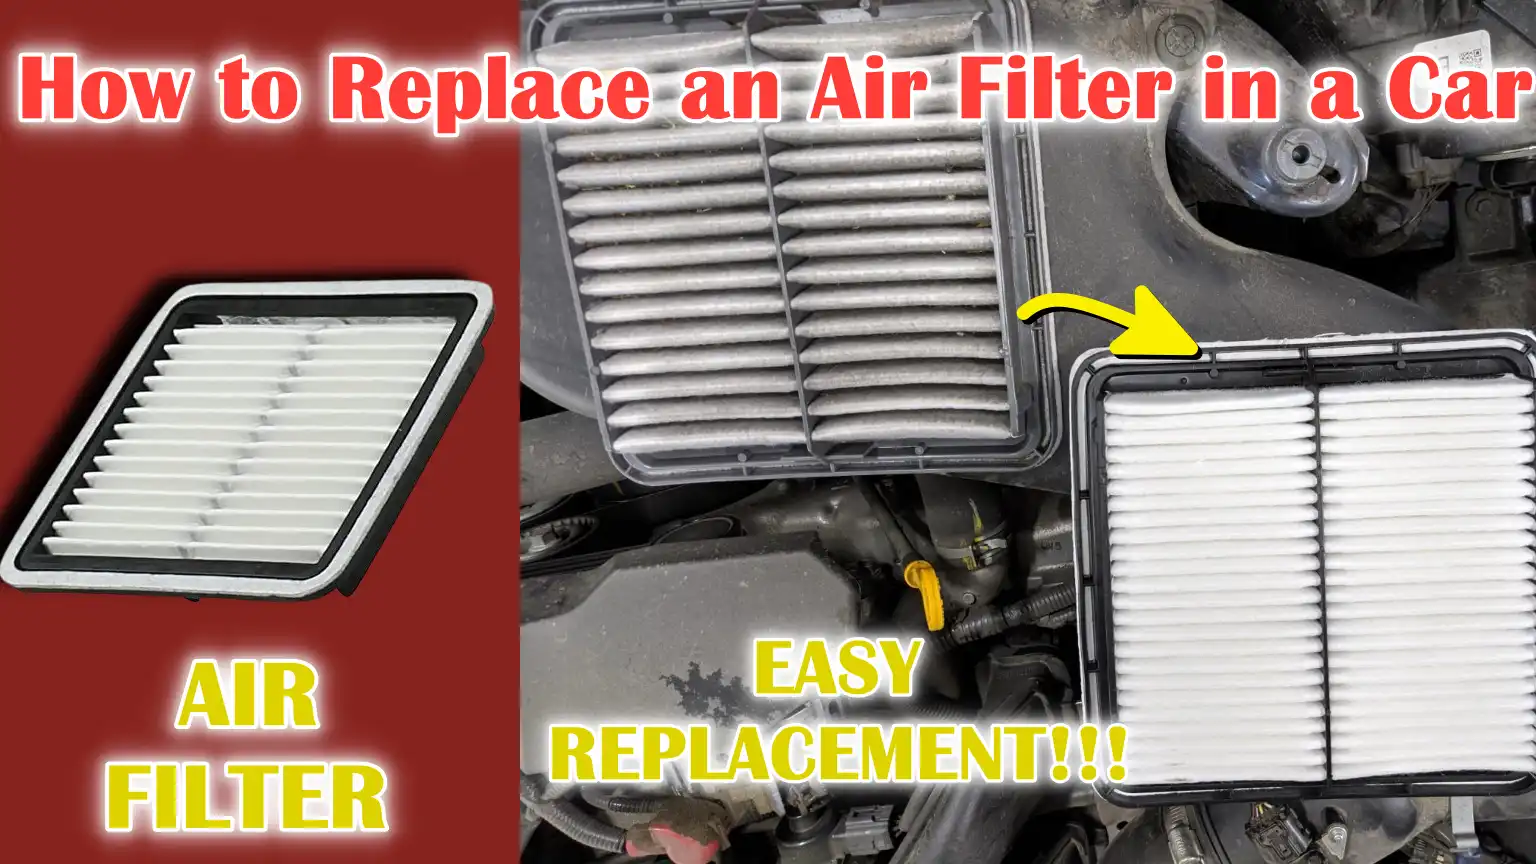
At last, it doesn’t take more than 10 minutes and this guide is specifically shows you How to Replace an Air Filter in a Car so that you can complete this job without any kind of problem.
Tools
| Item | Description | Why You Need It | Tips / Notes |
|---|---|---|---|
| New Air Filter | Replacement filter made for your car’s make and model. | To ensure your engine gets clean air for fuel combustion. | Check your owner’s manual or filter packaging for exact fit. |
| Screwdriver or Socket Set | Tool to open the air filter housing if screws or bolts are used. | The air filter cover needs to be removed safely. | Usually a flathead or Phillips screwdriver works; some cars may require a small socket set. |
| Owner’s Manual | Your car’s instruction manual. | Helps locate air filter housing and provides replacement guidance. | Keep it handy for reference, specially for first-time users. |
| Gloves (Optional) | Protective hand gloves. | Keeps your hands clean and protected from dirt or sharp edges. | Disposable or mechanic gloves work fine. |
| Clean Cloth or Vacuum (Optional) | Cloth or small vacuum to clean the air filter housing. | Removes dust and debris from the housing before installing the new filter. | Helps prevent dirt from entering the engine when a new filter is installed. |
| Flashlight (Optional) | Small handheld light. | Helps to see the air filter and housing clearly, specially in low light areas. | Not always necessary, but useful in tight spaces under the hood. |
Prepare At First
Before starting any work on your car’s air filter, it’s important to prepare thoroughly.
Preparation ensures safety and makes the job easier and more effective.
1. Park the car on a level surface
Always park your car on a flat, stable surface.
Parking on a slope or uneven ground can be dangerous as the car can suddenly tip over.
Using a flat surface allows you to reach the engine comfortably and also prevents tools and parts from sliding.
Apply the parking brake to further secure the car and prevent any accidental movements while working under the hood.
2. Turn off the engine and let it cool down
Never try to change the air filter while the engine is running or immediately after turning it off.
The engine and surrounding parts can be very hot, posing a burn hazard.
Let the car cool down for at least 15 to 30 minutes, depending on how long it was running.
This step ensures your safety and prevents accidental damage to engine parts while handling the air filter housing.
3. Open the hood and secure it with a prop rod
Once the car is safely parked and the engine has cooled, open the hood fully.
Most vehicles have a hood latch inside the cabin that opens the hood.
After lifting the hood, hold it firmly with a prop rod or hood support.
This prevents the hood from accidentally closing while working on the engine, giving you full access to the air filter housing and allowing you to work safely and efficiently.
How to Locate the Air Filter Housing
Before you change the air filter, it’s important to know where it’s located.
1. General Location
In most cars, the air filter is housed in a black plastic box located near the engine.
This box is often connected to a large intake hose that delivers air to the engine.
The air filter housing is designed to be easily accessible so that it can be replaced regularly without any special tools.
The size and shape of the housing may vary depending on the make and model of the car, but it is usually the largest plastic box in the engine bay with clips or screws that hold the cover in place.
2. Refer to the Owner’s Manual
If you have no idea about the location or type of air filter in your car, the owner’s manual is the most reliable source of information.
It provides a detailed diagram of the engine compartment and specifies the exact location, type and direction of the air filter.
Consulting the manual ensures that you don’t accidentally install the wrong part and helps you follow the manufacturer’s recommendations for maintenance.
This step is specially important for newer or less familiar vehicles, where engine layouts may be more compact and complex.
How to Remove the Old Air Filter
Changing a car’s air filter requires careful work to avoid damaging the engine or air intake system.
1. Remove the Housing Clamps or Screws
The air filter is mounted in a protective housing, usually secured with metal clamps or screws.
Begin by loosening or removing these fasteners using the appropriate tool, such as a screwdriver or socket set.
This step is important because forcefully opening the cover without removing the fasteners could damage the housing or clips, leading to costly repairs.
2. Carefully Lift the Housing Cover
After removing the clamps or screws, gently lift the air filter housing cover.
Some covers are hinged, while others may need to be removed completely.
Be careful not to let the cover fall or let any dirt from the engine bay fall into the housing, as this can contaminate the air intake system and reduce engine performance.
3. Remove the Old Air Filter
After opening the housing, carefully remove the old air filter.
It may be covered in dust, dirt, leaves or other debris, depending on how long it has been in use.
Handling it carefully ensures that any accumulated dirt does not enter the engine intake.
4. Inspect the Air Filter
Before you discard the old filter, examine it closely.
A visual inspection helps you see how much dirt and debris has accumulated inside.
An overly clogged or black filter indicates that it needs to be replaced and also indicates how often the air filter may need to be changed under your driving conditions.
This inspection step also helps you keep an eye on the condition of the engine, as an overly dirty filter can lead to decreased acceleration, increased fuel consumption and increased engine wear.
How to Clean the Housing – Optional
Cleaning the air filter housing is an optional but highly recommended step when changing a car’s air filter.
Proper cleaning ensures that no dust or debris from the engine bay enters the intake system, which can reduce engine performance or cause unnecessary wear.
1. Clean Dust and Debris
Use a clean, dry cloth to clean the inside of the air filter housing.
You can also use a small handheld vacuum cleaner to remove fine dust and particles trapped in corners or crevices.
Cleaning the housing prevents dirt from contaminating the new filter and helps maintain proper airflow to the engine.
2. Make Sure No Dirt Falls Into the Intake
When cleaning, it is important to make sure that no dirt falls into the air intake or engine parts.
Even a little dirt can cause performance issues over time.
Taking a few extra minutes to carefully clean the housing ensures the new air filter works optimally, leading to better fuel efficiency, smoother acceleration and extended engine life.
How to Install the New Air Filter
Properly installing a new air filter is vital to maintaining engine performance, fuel efficiency and the overall health of the vehicle.
A properly installed filter ensures that only clean air enters the engine, preventing damage and reducing harmful emissions.
1. Install the New Filter in the Same Direction as the Old Filter
When installing the new air filter into the housing, it is important to match the direction of the old filter.
Most filters have a specific airflow direction, often indicated by an arrow or labeled edge.
Installing the filter in the correct direction ensures that air flows efficiently through the filter material, trapping debris and providing adequate airflow for proper combustion.
2. Make sure it is fully and firmly installed in the housing
After installing the new filter, check that it is fully and firmly installed in the housing.
A misplaced or loose filter can allow unfiltered air to escape the filter, causing debris in the engine, reduced fuel efficiency and damage to engine parts.
Ensuring a secure fit also prevents vibration or rattling during driving and allows the filter to work to its maximum capacity.
Properly positioning the filter helps keep the engine air clean, improve engine performance and extend engine life.
As well as, the Oak Ridge National Laboratory actually found that for modern computer-controlled, fuel-injected cars, if you replace a clogged air filter has little to no measurable effect on fuel economy, but it does noticeably improvement in acceleration and overall engine performance as well; and in the older carburettor engines it showed that when you restored to a clean filter its fuel-economy literally gains 2% to 14% and yes it also depends on how severely clogged the air filter was.[¹]
How to Reassemble the Housing
Properly reassembling the air filter housing is the final step in ensuring that your new filter works effectively and that your engine is protected.
Proper reassembly prevents unfiltered air from entering the engine and ensures that the filter stays in place while you drive.
1. Close the Housing Cover
After installing the new filter, carefully reinstall the housing cover into its original position.
Make sure the cover is properly aligned with the sides of the housing so that there are no gaps.
A well-closed cover is essential to maintaining a sealed environment for the air filter, allowing it to efficiently trap dust and debris.
2. Secure with Screws or Clamps
After the cover is installed, secure it with the screws or metal clamps you removed earlier.
Tighten them firmly, but avoid overtightening, as this can crack the housing or strip the threads.
Proper tightening ensures that the cover stays securely in place, even if the vehicle is driven over rough surfaces or at high speeds.
3. Double-check the tightness
Finally, double-check that all screws or clamps are secure and that the cover fits snugly into the housing.
Inspect the surrounding area to ensure no tools or debris are left inside the engine bay.
This final check guarantees that the air filter is working properly, maintaining optimal airflow to the engine, improving fuel efficiency and protecting the engine from dust, dirt and harmful particles.
Carefully completing this step will give you confidence that the replacement has been performed safely and effectively.
Read More:
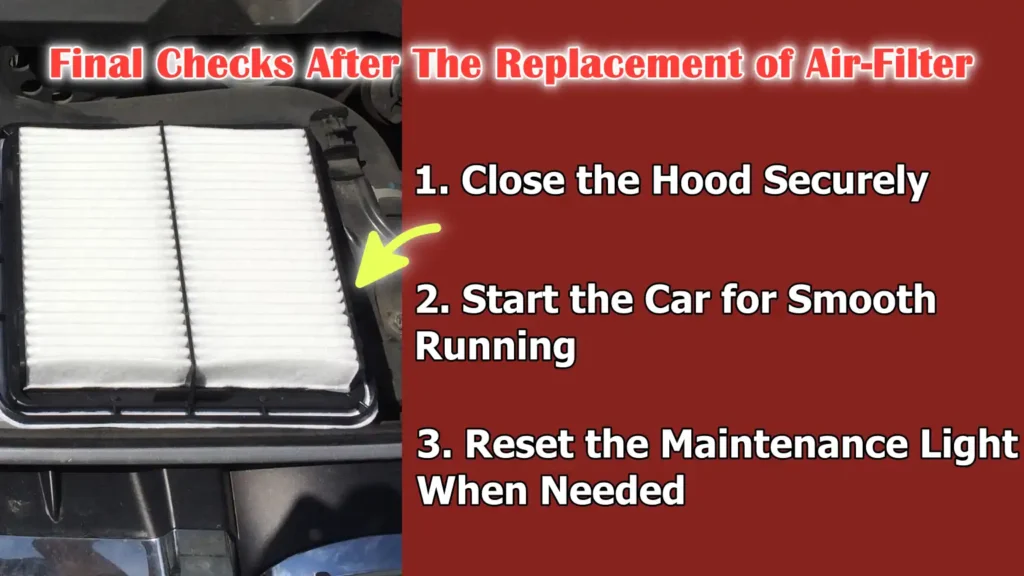
Final Checks After The Replacement of Air-Filter
After the new air filter is installed and the housing reassembled, final checks ensure that the replacement was successful and the car is ready to drive safely.
These checks help ensure that the engine is getting clean air and that all maintenance steps have been completed correctly.
1. Close the Hood Securely
Before starting the engine, make sure the hood is completely closed and latched.
A well-secured hood prevents it from accidentally opening while driving, which can be extremely dangerous.
Check that the latches are in place and that the hood is level with the rest of the car.
2. Start the Car for Smooth Running
After closing the hood, start the engine and listen for any unusual sounds such as hissing, rattling, or misfiring.
The engine should run smoothly and respond normally to acceleration.
This step confirms that the air filter is installed correctly, the housing is properly sealed and no debris has entered the intake system.
3. Reset the Maintenance Light When Needed
Some vehicles have a maintenance or service light that tracks the air filter or general engine service intervals.
If such a light appears on your car’s dashboard, follow the manufacturer’s instructions to reset it after replacing it.
Resetting the maintenance light helps keep an accurate record of your vehicle’s service history and ensures you receive timely reminders for maintenance in the future.
These final checks ensure that the new air filter will work effectively, leading to better fuel efficiency, improved engine performance and longer engine life.
Conclusion – How to Replace an Air Filter in a Car
Literally it is the fact that if you maintain the air filter then it does ensures that every drop of fuel is used very efficiently and because of the good air filter it keeps your engine healthier as well.
A clean air filter ensures that only filtered, dust-free air enters the engine, preventing wear on internal parts and ensuring smooth combustion.
Regular replacement not only improves acceleration and fuel economy, but also reduces harmful emissions, keeping the environment cleaner.
By following the right steps—from preparing and replacing the air filter housing to installing the new filter and performing a final inspection—you ensure that your car runs at its best and avoids unnecessary engine problems.
With minimal tools, low cost and only a few minutes of effort, changing the air filter is one of the most effective ways to extend engine life, save money on repairs and enjoy a more reliable, efficient driving experience.
You can now ask queries or questions in the comment box.
Frequently Asked Questions
Q1. How often should I change my car’s air filter?
Answer: Most car manufacturers recommend changing the air filter every 12,000 to 15,000 miles. However, replacement intervals may vary depending on driving conditions. If you frequently drive in dusty areas, unpaved roads or heavy traffic, the air filter may need to be changed more often. A dirty air filter can reduce engine performance, decrease fuel efficiency and increase harmful emissions. Regular inspection of the filter can help you decide when to replace it.
Q2. What are the signs that my air filter needs to be replaced?
Answer: There are some common signs that the air filter is dirty or clogged. Your car may feel sluggish or take longer to accelerate, fuel efficiency may decrease and the engine may make unusual noises. Sometimes, the air filter itself will appear dirty, covered with dust, dirt or leaves. Inspecting it periodically is the best way to know if it needs to be replaced before performance problems start.
Q3. Can I drive with a dirty air filter?
Answer: Technically, you can drive with a dirty air filter, but it’s not recommended. A clogged air filter restricts air flow to the engine, which can reduce engine power, decrease fuel efficiency and make the engine work harder than it needs to. Over time, this can lead to engine wear and damage to some internal parts. Replacing the air filter on time is an easy way to avoid long-term problems and keep the engine running smoothly.
Q4. Do I need any special tools to change the air filter?
Answer: Replacing a car’s air filter usually requires very few tools. In most cases, you just need a screwdriver or a small socket set to open the air filter housing. Gloves can be worn to keep hands clean, but these are optional. Most modern cars are designed to make changing the air filter quick and easy, even for beginners and it usually takes less than 10 minutes.
Q5. Is it necessary to clean the air filter housing?
Answer: Yes, cleaning the housing is an optional but highly recommended step. Over time, dust and debris can build up inside the air filter box. Wiping the housing with a clean cloth or cleaning it with a small vacuum cleaner ensures that no dirt gets into the engine when you install the new filter. A clean housing helps the new filter work better, improving air flow, engine efficiency and overall performance.
Q6. Can using the wrong air filter damage my engine?
Answer: Yes, using an air filter that doesn’t match your car’s make and model can cause problems. A filter that’s too small or doesn’t fit properly can allow unfiltered air to enter the engine, leading to dirt buildup, reduced fuel efficiency and long-term engine damage. Always check your owner’s manual or the filter packaging to make sure you’re buying the correct replacement filter.
Q7. What benefits will I experience after replacing the air filter?
Answer: After installing a new air filter, you may notice improved acceleration, better fuel efficiency and quieter engine operation. Your engine will also run more cleanly and efficiently, reducing harmful emissions. Over time, regular replacement extends engine life, reduces the risk of costly repairs and keeps your car performing at its best.
References:
[1] Oak Ridge National Laboratory, Effect of Intake Air Filter Condition on Vehicle Fuel Economy
https://www.fueleconomy.gov/feg/pdfs/air_filter_effects_02_26_2009.pdf

Guys, I’m a car audio enthusiast and customization expert and I love clear sound and clean installation. Plus, I have spent years helping people build their dream audio setups. And whenever I’m working on cars, I probably listen to music and thinks about the next big upgrade.