Written By: Don Dodi
Fact Checked By: Kristen Brown
Reviewed By: Diego Rosenberg
Now-a-days, every car relies on Oxygen Sensors so that it can have correct breath and yes it is the game changer as it first added to the vehicles in the late 1970s and after than oxygen sensors became a turning point as it cuts the car pollution and makes the engines way more smarter.
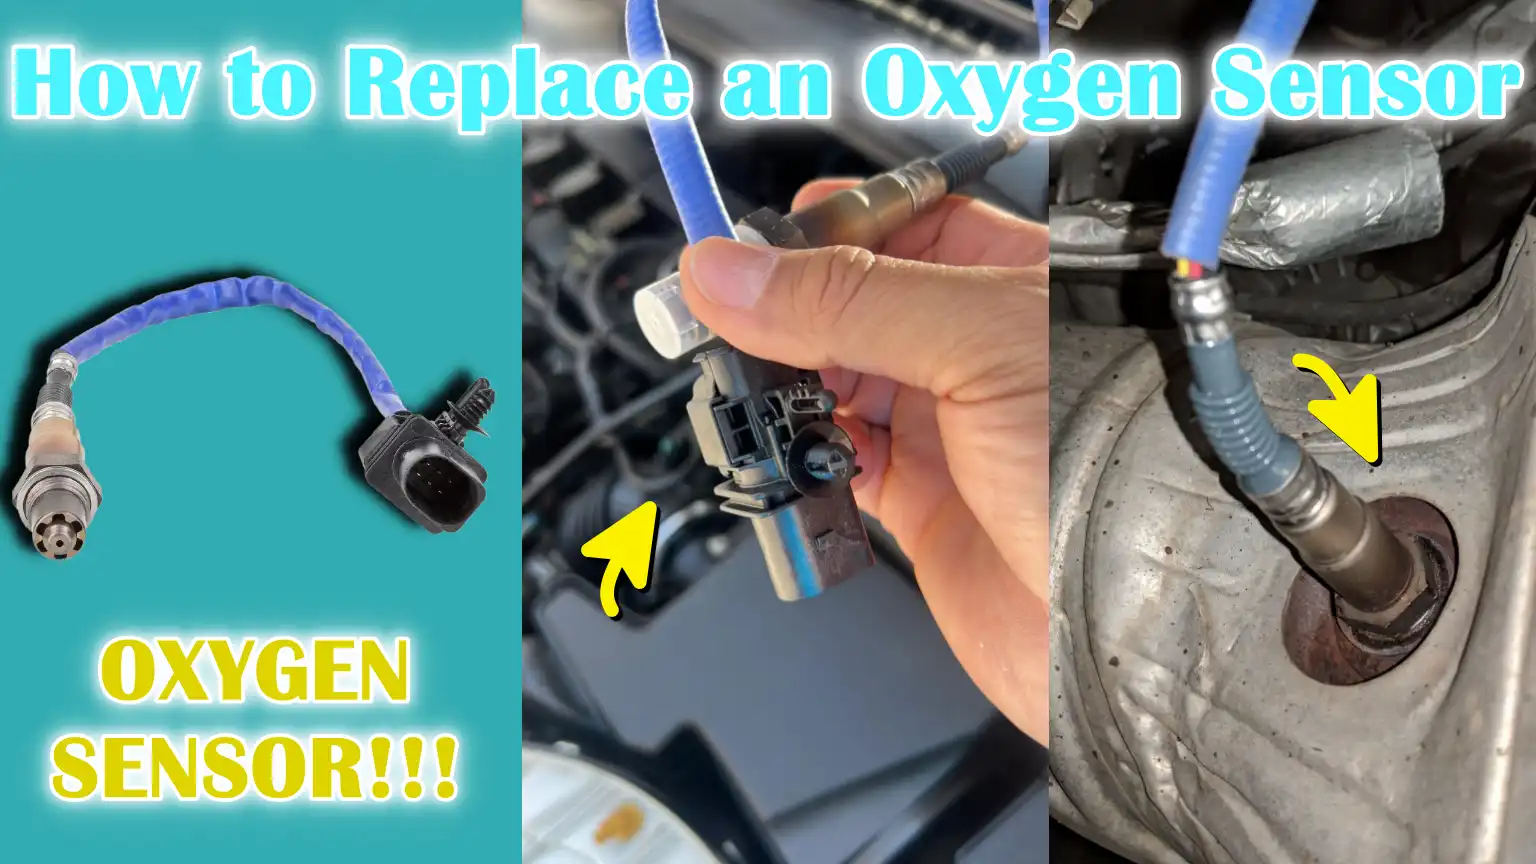
As well as, the Oxygen Sensor, often known as O2 sensor, that is really important components in a modern car’s engine management system.
So, it is introduced in vehicle to meet the emission regulations and yes without a doubt it works by constantly measuring the amount of oxygen in the exhaust gases and then it sends this information to the engine’s computer which is ECU.
Additionally, it allows the car to automatically adjust the air-fuel mixture for better performance and that enhances the fuel efficiency and on the other hand it lowers the harmful emissions as well.
Most of the cars actually have multiple oxygen sensors and some are before the catalytic converter which is upstream and some after it which is downstream, so these actually ensures about the precise monitoring.
This guide is all about How to Replace an Oxygen Sensor, as it is really important to fix this as it is beneficial for your pocket and the environment as well.
Tools
| Tools / Materials | Purpose / Use | Notes / Tips |
|---|---|---|
| Replacement Oxygen Sensor | Replaces old or defective oxygen sensors to restore proper engine performance and fuel efficiency. | Make sure it matches your car’s make, model and engine type. Check if it comes with an anti-seize coating. |
| Oxygen Sensor Socket or Wrench | Special tool for safely removing and installing the oxygen sensor without damaging it. | A slotted socket allows the sensor wire to pass through. |
| Ratchet and Extension Bar | Provides leverage for turning the socket, specially in tight spaces. | Extension bars help reach sensors located deep in the exhaust system. |
| Penetrating Oil (for example, WD-40) | Loosens rusted or stuck sensor threads for easier removal. | Spray and wait 5-10 minutes before attempting to remove sensor. |
| Anti-Seize Compound | Prevents new sensor from getting stuck in exhaust manifold or pipe. | Many new sensors come pre-coated – avoid over-applying. |
| Safety Gloves | Protects your hands from sharp edges, hot surfaces and chemicals. | Use heat resistant gloves if exhaust has not completely cooled. |
| Eye Protection/Safety Glasses | Prevents debris, rust, or oil from getting into your eyes. | Always wear when using penetrating oil or working underneath car. |
| Jack and Jack Stands | Safely raises car for easy access to sensor located underneath vehicle | Never rely solely on the jack – always secure it on a flat surface with jack stands. |
Basic Preparation Steps
1. Park the Vehicle on a Level Surface and Let the Engine Cool Down
Before you begin any work on your car, it’s important to park it on a level and stable surface.
This ensures that the vehicle doesn’t move suddenly while you’re working under or around it.
Working on an uneven surface can be dangerous, specially if you have to lift the car using a jack.
In addition, the engine and exhaust system can be extremely hot after running.
Letting the engine cool down for at least 30 minutes prevents burns and makes it safer to touch parts like the oxygen sensor or exhaust pipe.
Safety should always be paramount and a cool engine reduces the risk of accidents.
2. Disconnect the Negative Battery Cable for Safety
The next important step is to disconnect the negative battery cable.
This simple precaution prevents accidental electrical shocks and short circuits when handling sensors and electrical connectors.
The oxygen sensor may seem like a small part, but it is connected to the car’s engine control unit (ECU).
Disconnecting the battery ensures that you don’t accidentally turn on the check engine light or damage sensitive electronics during the replacement process.
Always gently unscrew the battery terminal with a wrench and secure it away from the battery post.
3. Identify the bad sensor
Cars usually have multiple oxygen sensors, usually located upstream (before the catalytic converter) and downstream (after the catalytic converter).
The first step in replacement is to identify which sensor is bad.
Modern vehicles may have sensors on different parts of the engine, often labeled as bank 1 or bank 2 depending on the arrangement of the cylinders.
Using a scan tool is the most reliable way to locate the sensor that is sending the error code to the ECU.
Alternatively, you can refer to the vehicle’s repair manual, which provides the exact locations of the sensors.
Correct identification ensures that you replace the correct sensor, avoiding unnecessary work or expense.
How To Locate Oxygen Sensor
1. Typical Sensor Locations
Oxygen sensors are typically installed in two main locations in a vehicle’s exhaust system.
Upstream sensors are installed before the catalytic converter and are responsible for measuring oxygen levels in the exhaust gases leaving the engine.
These sensors help the engine control unit (ECU) adjust the air-fuel mixture for optimal performance and fuel efficiency.
Downstream sensors are installed after the catalytic converter and monitor how well the converter is reducing harmful emissions.
Some vehicles may have multiple upstream and downstream sensors, depending on whether the engine has one or more cylinder sets.
Knowing the specific location of these sensors is important because it determines where you will need to access the exhaust system during replacement.
2. Tips for Identifying the Correct Sensor
Identifying the correct oxygen sensor for replacement requires careful inspection.
Each sensor is connected to the engine via a wiring harness that is specific to its location.
Matching the wiring harness and plug ensures that the new sensor fits properly and communicates correctly with the ECU.
Also, many vehicles have sensors labeled Bank 1 or Bank 2, indicating which side of the engine they are located on.
By using a scan tool or consulting the vehicle repair manual, the bad sensor and its exact location can be confirmed.
Correct identification can prevent errors, avoid unnecessary replacement of working sensors and ensure that the engine continues to run efficiently after the new sensor is installed.
Not only this, it is shown that narrowband sensors actually detect rich/lean transitions and on the other hand if the sensors are wideband then it measures exact air-fuel ratio values, which is why it becomes really important to match the sensor type as it can be narrowband or wideband for your vehicle and thread/wiring specifications are also necessary when you order a replacement for it.[¹]
How to Remove the Old Oxygen Sensor
1. Loosening the sensor with penetrating oil
The first step in removing the old oxygen sensor is to apply penetrating oil to the threads of the sensor.
Over time, heat and exhaust gases can cause the sensor to stick tightly to the exhaust pipe or even rust.
Spraying a high-quality penetrating oil such as WD-40 can help loosen the threads and make it easier to remove.
After spraying, it is important to wait a few minutes for the oil to penetrate and break down the rust or corrosion.
This step reduces the risk of the sensor breaking during removal and prevents damage to the exhaust pipe threads.
2. Disconnecting the electrical connector
Next, carefully disconnect the sensor’s electrical connector from the vehicle’s wiring harness.
Oxygen sensors are connected to the engine control unit (ECU) through a dedicated plug that transmits data about the oxygen levels in the exhaust.
Pulling or tugging on the wires can damage the connector or wiring, so it’s important to gently separate the plug by pressing the release tab.
Check for dirt or corrosion on the connector, as cleaning it a bit can help ensure a strong connection when installing the new sensor.
3. Unscrew and remove the old sensor
Once the sensor is loose and detached, use an oxygen sensor socket and ratchet to remove it from the exhaust pipe or manifold.
This special sensor socket has a slot that the wiring can easily pass through, making it easy to turn the sensor without damaging the wires.
Turn the sensor anti-clockwise until it comes loose.
It’s important to apply steady and controlled force as overtightening or excessive force can strip the threads or break the sensor.
4. Inspect the wiring and connector
After removing the old oxygen sensor, inspect the wiring and connector for any visible damage, wear, or corrosion.
Damaged wires or plugs can cause poor sensor readings or trigger the check engine light, even after the new sensor is installed.
If any damage is found, it must be repaired or replaced before the new sensor is installed.
Ensuring that the wiring and connectors are in good condition helps the new sensor function properly and provide accurate feedback to the engine control system.
How to Install the New Oxygen Sensor
1. Checking the Anti-Seize Coating
Before installing the new oxygen sensor, it is important to check whether the sensor already has an anti-seize coating.
Many modern sensors have this coating already on the threads so that they do not stick or seize in the exhaust pipe over time.
Applying additional anti-seize to a sensor that already has a coating can cause inaccurate torque readings or even damage the sensor.
If the sensor does not have anti-seize, carefully apply a thin layer to the threads so that it can be easily removed in the future.
2. Threading the Sensor by Hand
To avoid cross-threading, begin inserting the new sensor into the exhaust bung by hand.
Cross-threading occurs when the threads of the sensor and exhaust pipe are not properly aligned, which can permanently damage both the sensor and the exhaust pipe.
Hand tightening allows you to feel the threads and ensure smooth engagement before using tools.
Doing so carefully reduces the risk of costly mistakes and ensures a secure fit.
3. Tighten according to manufacturer’s instructions
After threading by hand, use an oxygen sensor socket and ratchet to tighten the sensor according to the manufacturer’s specified torque.
Overtightening can strip threads or break the sensor, while undertightening can cause exhaust leaks or damage the sensor.
Following the exact torque instructions in the vehicle’s repair manual ensures correct installation, reliable sensor performance and accurate readings for the engine control system.
4. Reconnect the electrical connector
The final step is to securely reconnect the sensor’s electrical connector to the vehicle’s wiring harness.
A strong connection enables the sensor to send accurate oxygen level data to the engine control unit (ECU).
Make sure the connector clicks into place and the wiring is installed securely, away from hot or moving parts, to prevent damage.
Proper connection ensures that the new sensor functions correctly, maintains optimal engine performance and helps maintain fuel efficiency and emissions control.
Final Steps
1. Reconnect the Negative Battery Cable
After installing the new oxygen sensor, the first step is to reconnect the negative battery cable.
This restores power to the vehicle’s electrical system and allows the engine control unit (ECU) to communicate with the newly installed sensor.
Reconnecting the battery securely ensures that all electronic systems are functioning correctly and that the vehicle is able to record accurate readings from the oxygen sensor.
It is important to tighten the terminals well to avoid loose connections, as this can cause electrical problems or false warning lights.
2. Start the Engine and Check for Smooth Operation
After reconnecting the battery, start the engine and allow it to idle.
Observe the engine operation for any unusual sounds, vibrations, or irregular idling.
A properly installed oxygen sensor will allow the engine to run smoothly, as it helps the ECU to accurately adjust the air-fuel mixture.
This quick check helps identify any installation problems, such as loose wiring or misalignment of sensors, before taking the vehicle on the road.
3. Clear all check engine codes
If the vehicle previously had a check engine light on due to a faulty oxygen sensor, it’s important to clear the codes using an OBD-II scanner after installation.
The ECU may still store error codes after the sensor is replaced and clearing them ensures that the system can monitor the performance of the new sensor from the start.
This step helps prevent false alerts and confirms that the replacement has resolved the problem.
4. Take the vehicle on a short test drive
Finally, take the vehicle on a short test drive to confirm proper performance.
During this drive, the oxygen sensor continues to communicate with the ECU, allowing the engine to accurately adjust fuel and air delivery.
Observe fuel efficiency, acceleration and smooth engine operation.
A successful test drive confirms that the sensor replacement was performed correctly, improves fuel economy, reduces harmful emissions and ensures that the engine is running at its best performance.
Read More:
Basic are The Safety and Maintenance Tips
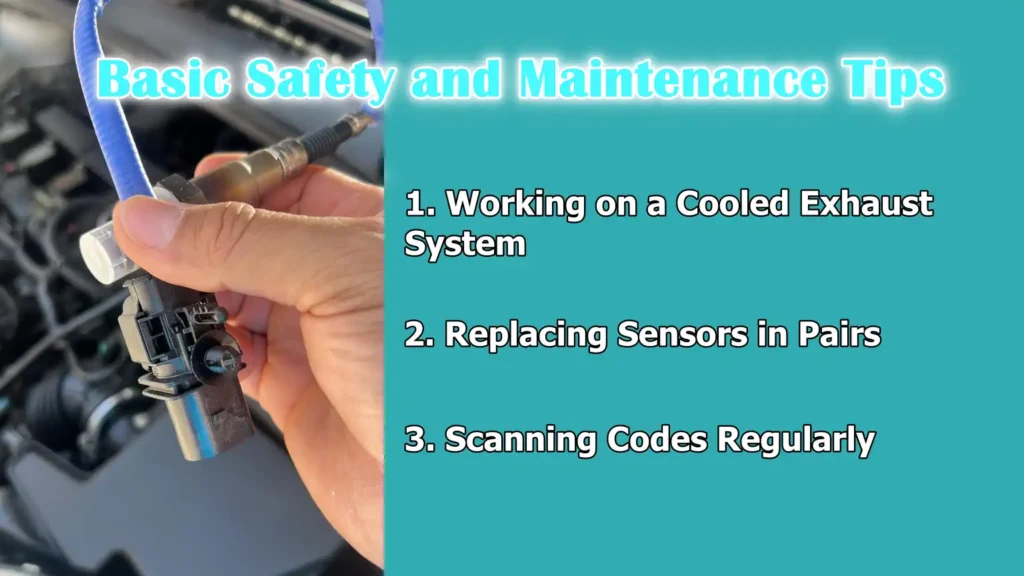
1. Working on a Cooled Exhaust System
One of the most important safety precautions when replacing oxygen sensors is to always work on a cooled exhaust system.
Exhaust pipes and parts can reach extremely high temperatures while the engine is running and touching them immediately after operation can cause severe burns.
Allowing the engine and exhaust to cool for at least 30 minutes before beginning work ensures a safe environment and reduces the risk of injury.
Wearing gloves and protective clothing further improves safety during maintenance.
2. Replacing Sensors in Pairs
In some vehicles, manufacturers recommend replacing oxygen sensors in pairs, specially if one sensor has failed due to age or wear.
This ensures that both sensors operate at the same efficiency level, providing consistent and accurate data to the engine control unit (ECU).
If the other sensor is old, replacing only one sensor can result in uneven readings, reduced fuel efficiency and inconsistent engine performance.
Following the manufacturer’s recommendations ensures long-term reliability and helps maintain optimal engine operation.
3. Scanning Codes Regularly
Regularly scanning for error codes in your vehicle is an essential maintenance habit.
Oxygen sensors can gradually deteriorate over time and early detection of problems through an OBD-II scan helps prevent serious engine problems.
By detecting sensor malfunctions early, you can avoid reduced fuel consumption, increased emissions and potential damage to the catalytic converter.
Regular scanning also helps you keep track of the status of all sensors and ensure that the engine continues to run efficiently and safely over time.
Conclusion How to Replace an Oxygen Sensor
Basically oxygen sensor is the engine’s guide as it ensures the engine control unit unit which is ECU actually receives a accurate data so that it adjust the air-fuel mixture accordingly and that helps your engine to run smoothly, it also saves fuel and that reduces the harmful gases as well.
Timely replacement also prevents unnecessary damage to other expensive parts, such as the catalytic converter.
By following the steps for proper preparation, safe operation and installation, even a novice can successfully replace the oxygen sensor while avoiding common mistakes.
Regular maintenance, including scanning sensor codes and checking wiring, ensures long-term vehicle reliability and continued performance.
Taking care of this small but essential part keeps your car running at its best, saves money on fuel and repairs and contributes to cleaner air and a healthier environment.
If you wanted to ask some questions related to this guide, just let us know in the comment section below.
Frequently Asked Questions
Q1. What is an oxygen sensor and why is it important?
Answer: An oxygen sensor, also called an O2 sensor, is a device in your car’s exhaust system that measures the amount of oxygen in the exhaust gases. It sends this information to the engine control unit (ECU), which uses it to adjust the air-fuel mixture for optimal engine performance. A properly functioning oxygen sensor helps improve fuel efficiency, reduce harmful emissions and prevent engine problems. A bad sensor can cause reduced mileage, sluggish driving, increased pollution and even damage to the catalytic converter.
Q2. How do I know if my oxygen sensor needs to be replaced?
Answer: Common symptoms of a bad oxygen sensor include the check engine light coming on, decreased fuel efficiency, sluggish driving, hesitation during acceleration and increased emissions. Your car may also fail an emissions test. Using an OBD-II scan tool can help identify which sensor is bad and it can show error codes that indicate a problem with the upstream or downstream sensor.
Q3. Can I replace an oxygen sensor myself?
Answer: Yes, replacing an oxygen sensor is a job that many car owners can do themselves with basic tools and safety precautions. It involves identifying the bad sensor, disconnecting the electrical connector, removing the old sensor and installing the new one and making sure the threading and tightening are correct. It’s important to follow safety precautions for a safe and successful replacement, such as working on a cold engine and disconnecting the battery.
Q4. How long does it take to replace an oxygen sensor?
Answer: The time required depends on the location of the sensor and the car model, but generally, it takes 30 minutes to an hour for most vehicles. Sensors that are easily accessible on the exhaust manifold can be replaced quickly, while sensors located underneath the vehicle may require the car to be raised with a jack and jack stands, which may take additional time.
Q5. Do I need special tools to replace an oxygen sensor?
Answer: Yes, the tools required include an oxygen sensor socket or wrench, a ratchet with an extension, penetrating oil to loosen corroded threads and safety equipment such as gloves and eye protection. Anti-seize compound may also be needed if the new sensor is not pre-coated. Using the right tools ensures that the sensor can be removed and installed without damaging the threads or wiring.
Q6. Should I replace all the oxygen sensors at once?
Answer: Not always, but in some cases, manufacturers recommend replacing two sensors at once, specially if one sensor has worn out due to age. This provides consistent and accurate readings from both sides of the engine and improves engine performance. Replacing just the bad sensor is usually enough, but checking other sensors for faults is a good preventative measure as well.
Q7. What happens if I ignore a bad oxygen sensor?
Answer: Ignoring a bad oxygen sensor can lead to reduced fuel efficiency, poor engine performance, increased emissions and damage to the catalytic converter. Over time, repair costs can add up. A bad sensor can also cause the check engine light to stay on, masking other potential problems in the vehicle’s engine management system.
Q8. Can replacing the oxygen sensor improve my fuel efficiency?
Answer: Yes, a new oxygen sensor helps the engine maintain the correct air-fuel ratio, which improves combustion efficiency. According to the U.S. Department of Energy, replacing a bad sensor can increase fuel economy by up to 15%. This not only saves fuel, but also reduces environmental impact by reducing emissions.
Q9. Is it safe to drive immediately after replacing an oxygen sensor?
Answer: Yes, after installing the sensor, reconnecting the electrical connector and reconnecting the battery, it is safe to drive. It is advisable to start the engine and let it idle to check for smooth operation and clear any stored error codes from the scanner. A short test drive helps ensure that the sensor is working properly and the engine is running efficiently.
Q10. How often should an oxygen sensor be checked or replaced?
Answer: Most oxygen sensors last 60,000 to 100,000 miles, depending on the vehicle and driving conditions. Routine maintenance, such as scanning engine codes and inspecting wiring during routine checks, can help detect problems early. Replacing sensors at the manufacturer’s recommended intervals keeps engine performance stable and prevents potential damage to other components.
References:
[1] BOSCH, Oxygen Sensors
https://www.boschautoparts.com/documents/647135/1488055/Oxygen%20Sensors%20Trade%20Brochure.pdf

Guys, I’m a car audio enthusiast and customization expert and I love clear sound and clean installation. Plus, I have spent years helping people build their dream audio setups. And whenever I’m working on cars, I probably listen to music and thinks about the next big upgrade.