Written By: Don Dodi
Fact Checked By: Kristen Brown
Reviewed By: Diego Rosenberg
So basically whenever you hit the brakes, then actually there are rotors that does the hard work by absorbing heat and taking on tons of pressure as well.
That actually makes it one of the most critical safety components in the car and the brake rotors also famous as a brake discs.
So, every time you press the brake pedal, then the brake pads clamp down on the rotors that slow the wheels and it also converts kinetic energy into heat through friction.
And this repeated friction actually causes the rotors to wear out by the time and thus rotors wear out, warp or develop grooves and that can lead to reduced braking efficiency, vibrations, longer stopping distances and even potential brake failure as well.
Not only this, brake rotors typically need replacement for every 30,000 to 70,000 miles which again depends on the driving habits, road conditions and vehicle type as well.
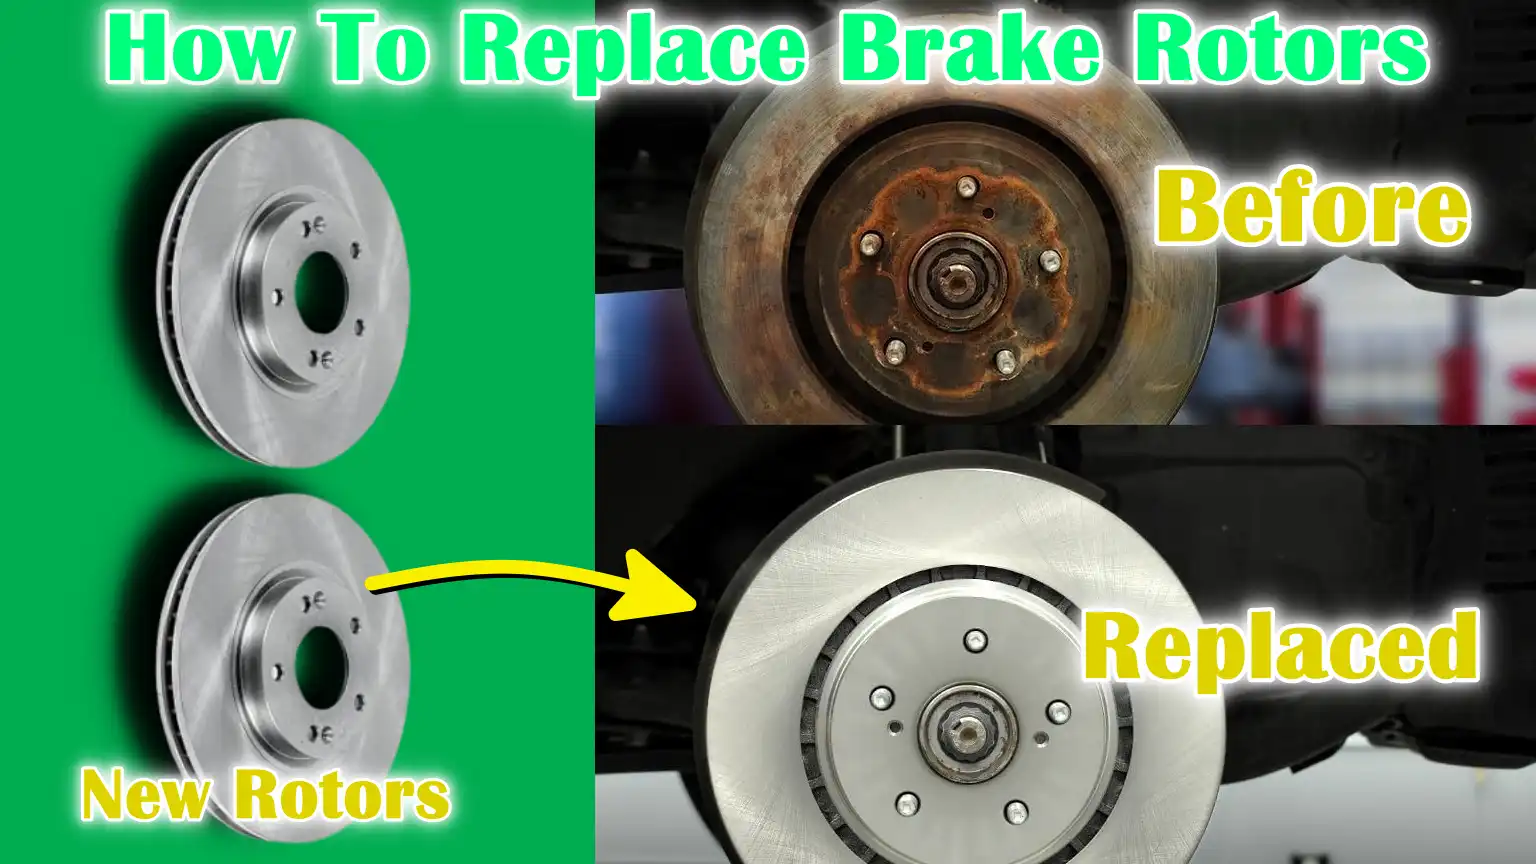
So, this guide is all about showing you How To Replace Brake Rotors in safe and effective method.
Tools
| Tool/Material | What It Is | Why You Need It |
|---|---|---|
| Jack and Jack Stands | A device to lift the car and metal stands to hold it securely. | The car needs to be raised so you can remove the wheels and work safely underneath the car. |
| Lug Wrench | A cross or L-shaped tool used for loosening and tightening wheel nuts. | Used to remove lug nuts (wheel bolts) before removing a tire. |
| Socket Set / Ratchet | A set of heads (sockets) and a handle for turning a bolt or nut. | Used to open and tighten bolts on brake parts. |
| C-Clamp or Brake Tool | A tool for gently pushing back the brake caliper piston. | Needed to make room for new brake pads and rotors. |
| Torque Wrench | A special wrench that tells you how tight a bolt is. | Make sure the bolts are tightened to the correct strength, neither too loose nor too tight. |
| Screwdriver / Impact Driver | A hand tool or powered tool for removing screws or rotor screws. | Helps to remove the screws that hold the rotor in place. |
| Brake Cleaner | A spray that removes grease, oil and dirt from brake parts. | Cleans and protects brake parts, improving brake performance. |
| Anti-Seize Lubricant | A paste used to protect metal parts from rusting or chipping. | It is bolted or mounted to the rotor hub to make it easier to remove in the future. |
| New Brake Rotors | The round metal discs that your brake pads press against to stop the car. | Replaces old or worn rotors that cause vibration, noise or poor braking. |
| Brake Pads (Optional) | The parts that put pressure on the rotors to slow the car. | Often replaced with rotors for best braking results. |
| Safety Gloves and Goggles | Gloves protect your hands and glasses protect your eyes. | Keeps you protected from dust, dirt or brake fluid while working. |
You Should Be Cautious About Safety First
Before you begin replacing your brake rotors, safety is the most important step.
Even though the job may seem easy, working on a car involves heavy tools, dangerous parts and the risk of injury if you’re not careful. Below are some important safety tips every newbie should follow to stay safe and confident while on the job:
1. Park on a Flat Surface and Use the Parking Brake
Make sure your car is on a flat and level surface. Then, press the parking brake fully.
A flat surface keeps your car stable while you’re lifting it. If you’re on a slope, the car could roll or slide off the jack. The parking brake keeps the rear wheels stationary, adding another layer of safety.
Avoid working on grass, gravel or uneven pavement. A garage floor or concrete driveway is ideal.
2. Chock the Wheels
Simply place wheel chocks (heavy rubber or metal blocks) behind and in front of the wheels that will stay on the ground.
The car may shake slightly even with the parking brake engaged. Chocking the wheels will prevent it from rolling forward or backward.
If you don’t have real wheel chocks, you can use bricks or wooden blocks, but make sure they are sturdy and firmly held in place.
3. Wear Protective Gear
Always wear safety gloves and protective glasses before you begin.
- Gloves protect your hands from sharp edges, hot parts and harmful chemicals like brake cleaner.
- The goggles protect your eyes from dust, rust particles, brake fluid and debris that may fly out while removing or cleaning parts.
Use nitrile gloves for chemical resistance and wear comfortable goggles to avoid fogging.
How To Replace Brake Rotors – Easy Method
Now, below is a step-by-step guide that will take you through the entire process from start to finish using easy-to-understand terms and real-world explanations.
1. Loosen Lug Nuts
Before raising your car, use a lug wrench to slightly loosen the lug nuts on the wheel. This step is important because once the car is off the ground, the wheel will spin freely, making it difficult and unsafe to apply force to it.
You don’t need to completely remove the lug nuts at this stage – break them off while the car is still firmly on the ground.
2. Raise and Secure the Vehicle
Use a hydraulic floor jack to raise the car to the designated jacking points (usually indicated in the owner’s manual).
Once raised, always place jack stands under the frame to fully support the vehicle. Never rely solely on the jack, as it can fail or move under the pressure. Double check that the car is stable before proceeding.
3. Remove the Wheel
Now that the car is securely resting, remove the lug nuts completely and slide the wheel off the hub. Place the wheel upright under the car as an added safety measure.
Removing the wheel gives you full access to the brake components, including the caliper, pads and rotor.
4. Remove the Brake Caliper
Remove the bolts that hold the brake caliper to the caliper bracket. Using a socket and ratchet, open the caliper and gently slide it off the rotor.
Do not let the caliper hang from the brake hose, as this can cause damage. Instead, use a metal hanger or wire to hang it securely from the suspension or frame.
5. Remove the Brake Pads
Once the caliper is removed, the brake pads will either slide out or require a little effort to remove from the caliper bracket. Pay attention to the condition of the pads, especially if you plan to reuse them.
This is a good opportunity to inspect the pads for wear or uneven surfaces.
6. Unbolt the Caliper Bracket
To fully remove the rotor, remove the bolts that attach the caliper bracket to the steering knuckle. These bolts are often large and may require additional torque to loosen.
Set the bracket aside and keep all hardware organised for re-installation later.
7. Remove the Old Rotor
If the old rotor does not come off easily, it may be stuck due to rust or corrosion. Tap the top of the rotor with a rubber mallet or dead blow hammer until it comes loose.
Once removed, clean the hub surface thoroughly with a wire brush to remove rust and debris. A clean hub ensures that the new rotor mount remains flat, preventing vibration or brake pulsation.
8. Install the New Rotor
Mount the new rotor onto the cleaned hub, aligning it with the lug holes. To prevent it from moving during reassembly, you can temporarily secure it with a lug nut or rotor retaining screw (if available).
Make sure the rotor is seated evenly and the hub does not wobble on the surface.
9. Reinstall Caliper Bracket and Pads
Bolt the caliper bracket back into place and torque the bolts to the manufacturer’s instructions using a torque wrench. Once the bracket is secure, install the new or existing brake pads into the bracket, making sure they seat properly in their clips or slots.
10. Compress the Caliper Piston
Before reinstalling the caliper, the piston must be compressed back into the housing to make room for the new rotor and pads.
Using a C-clamp or brake caliper compression tool, press the piston in slowly and evenly. Keep an eye on the fluid level in the master cylinder as you do this, as pressing the piston in can raise the brake fluid level.
11. Reattach the Caliper
Now that the piston is compressed, slide the caliper onto the bracket over the brake pads. Align the bolt holes and secure the caliper with the original bolts.
Tighten these bolts according to the torque specifications provided in your vehicle’s manual to ensure safe operation.
12. Reinstall the Wheel and Lower the Vehicle
Slide the wheel back onto the hub and tighten the lug nuts by hand. Remove the jack stands and slowly lower the vehicle with the jack.
Once the vehicle is on the ground, use a torque wrench to torque the lug nuts to the specified value, following a crisscross pattern to ensure even pressure.
13. Pump the Brake Pedal
Before driving, get inside the vehicle and press the brake pedal several times. This will push the caliper pistons back out and bring the brake pads into contact with the new rotors.
The pedal should feel hard after a few pumps. If it still feels soft, double-check all parts before proceeding.
14. Check Brake Fluid Level
After installation is complete, open the hood and check the brake fluid reservoir. If the level is low, top it up using the correct type of brake fluid recommended for your vehicle.
Do not overfill and always use clean containers to avoid contamination.
Post-Replacement Tips
After you replace your brake rotors, your job isn’t done yet. It’s important to take a few additional steps after installation to ensure your brakes work properly, last a long time and keep you safe on the road.
Below are three essential post-replacement tips every DIY lover should follow.
1. Break-in Procedure (Also Known as “Bedding-In”)
Follow the manufacturer’s recommended procedure for installing your new rotors and brake pads.
This usually involves gradually braking from a certain speed, such as 30-40 mph to 10 mph, several times without stopping completely. Repeat this process 5-10 times, taking cool downs in between.
Bedding-in helps create an even, smooth layer of brake pad material on the rotor surface. This process improves braking performance and prevents uneven wear, squeaking, or warping of the rotor.
Skipping this step can cause initial brake problems and shorten the life of your new parts.
Do not brake too hard during this process. Allow the rotors to cool between each stop.
2. Perform a Careful Test Drive
After applying the brakes, take your car for a test drive at a slow and controlled speed. Stay away from busy roads, avoid speeding and pay attention to how the brakes feel.
Test driving at low speeds helps you confirm that everything is working as expected – no rubbing, no pulling to one side and no strange sensations.
This is your chance to catch problems early, such as loose bolts, misaligned calipers, or incorrect placement of pads.
Try to do your test drive in a quiet parking lot or low-traffic area so you can listen carefully for any problems.
3. Listen and Watch for Warning Signs
During your test drive and for the next few days, keep an eye out for strange noises, vibrations, burning smells, or dashboard warning lights.
These signs could mean that something is not installed correctly or needs to be adjusted.
For example, screeching can mean a caliper is stuck, squealing noises can indicate an uneven surface and vibrations often indicate a bent rotor or incorrect wheel installation. Brake warning lights can indicate low fluid or a sensor problem.
If you notice any of these problems, stop driving immediately and recheck your installation – or consult a mechanic for safety.
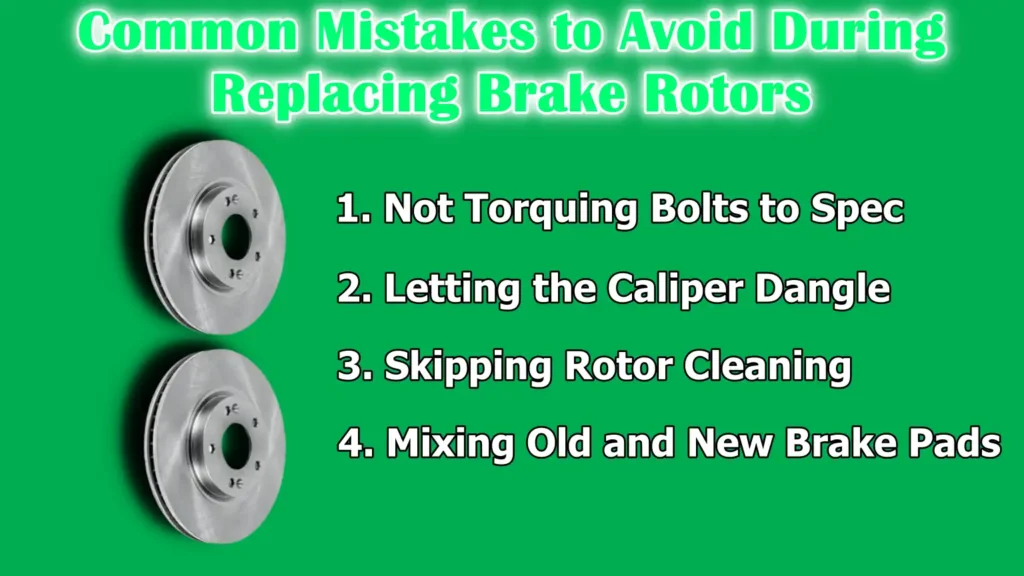
Common Mistakes to Avoid During Replacing Brake Rotors
Despite doing a careful job, many people make some common mistakes when replacing brake rotors.
These mistakes may seem small, but they can lead to brake failure, costly repairs, or unsafe driving conditions.
Below are some of the most common issues to look out for – and how to avoid them – with simple and clear explanations.
1. Not Torquing Bolts to Spec
Each bolt in your brake system has a recommended tightening level, called a “torque spec.” If you don’t use a torque wrench to tighten the bolts to the exact specification, they may be too loose or too tight.
Bolts that are too loose can come loose while driving and over-tightening can strip threads or break bolts. This applies especially to caliper bracket bolts, caliper bolts and lug nuts.
Always check your vehicle’s service manual or a reliable online source for the correct torque value.
2. Letting the Caliper Dangle
After removing the brake caliper, some people keep it hanging from the brake hose while they work.
The brake hose is not designed to support the weight of the caliper. Leaving it hanging can cause the hose to stretch, tear or leak, which can eventually lead to complete brake failure.
Always hang the caliper securely using a bungee cord, metal hook or wire hanger.
3. Skipping Rotor Cleaning
New rotors often come with a protective layer of oily coating to prevent rust during shipping. If you don’t clean this off before installation, it can contaminate your brake pads.
Leaving this oil on the rotor surface can lead to reduced brake grip, noise from the brakes and even smoke when you first drive. Dirty rotors also cause uneven pad wear and poor stopping ability.
Use brake cleaner spray and a clean cloth to remove all oil, dirt and fingerprints from the new rotor before installation.
4. Mixing Old and New Brake Pads
Some people try to save money by using old brake pads with new rotors.
Old pads are already worn and shaped to the previous rotor. Using them on new rotors can cause uneven contact, increased noise and vibration and accelerated wear on both parts. It may also void the warranty on the new rotors.
For best results, always install new brake pads with new rotors. They are designed to wear together for improved safety and performance.
Read More:
When to See a Mechanic
Although replacing brake rotors can be a great DIY job, it’s important to recognise when professional help is needed.
Brakes are a vital safety system and certain problems that occur after replacement should never be ignored. Below are some major warning signs that mean it’s time to stop and call a trusted mechanic.
1. If You Notice Leaks
Check for any fluid leaks under the car and around the wheels – especially clear, yellow or light brown fluid near the brake calipers or brake lines.
This could be a brake fluid leak, which is extremely dangerous. Brake fluid creates the pressure that helps your car stop. If not repaired quickly, even a small leak can cause complete brake failure.
If you see any fluid dripping or pooling after applying the brakes, don’t drive the car. Take it to a mechanic.
2. If the Brake Pedal Feels Soft or Spongy
If the brake pedal goes too low when you press it, or feels as soft as stepping on a sponge.
A soft or spongy pedal is often a sign of air, low brake fluid, or a leak in the brake lines. All of these factors reduce the car’s stopping ability and can make your car unsafe to drive. In severe cases, your brakes may not work at all.
This problem usually requires bleeding the brakes, which involves removing air from the system – this is a process that should be done carefully or by a mechanic.
3. If Braking Feels Uneven or the Car Pulls to One Side
When you apply the brakes, your car pulls to the left or right, or one wheel stops harder than the others.
This could mean that the caliper is stuck, the rotor is damaged, the pad is worn unevenly, or there is a problem with the brake fluid pressure. This can make the car difficult to control and increase stopping distances, especially in an emergency.
Test the brakes at low speed on a quiet road. If you feel any drag, it’s best to have the system checked immediately.
4. If Calipers or Brake Lines Are Damaged
Cracks, cuts or visible wear on rubber brake lines, or rusted, leaking or seized calipers.
Brake calipers and lines are essential for moving brake fluid and pressing the pads. If these are damaged, the entire brake system can be at risk.
Self replacement of these parts is complicated and often requires professional equipment and precise bleeding procedures.
Damaged calipers or lines should always be replaced or repaired by a certified mechanic.
Read More:
Conclusion – How To Replace Brake Rotors
Everything in the car does their job at their best, now it is your turn to check and replace the brake rotors if the are worn out.
Additionally, the experimental study measured braking system efficiency before and after replacement of both brake disc which are rotors and pads and they actually found that the efficiency rose from around 59% to 72% when worn components were replaced: and it shows the improvement of approximately 13% that significantly reduced the stopping distance and braking time as well.[¹]
So, for doing the job cleanly this is the guide which will definitely show you the path to follow, as now you have knowledge about right tools, careful and working steps and at last you need to be little patience to do replacement job.
Yes, it is very important to install replace them perfectly as brake rotors are actually one of the most important part of your stopping system.
And when you maintain them and keep them in good condition then it can directly impact your car’s safety & performance as well.
Now, if you still have questions in mind then tell us on the comment section below.
Frequently Asked Questions
Q1. Can you replace brake rotors yourself?
Answer: Yes, you can replace brake rotors yourself and it’s actually one of the most common do-it-yourself (DIY) car repair jobs for people who want to save money and take better care of their vehicle. If you have some basic tools, a safe place to work (such as a level driveway or garage) and a little patience, you can do this job. The process involves lifting the car, removing the wheels, removing the brake calipers and replacing the old rotors with new ones. You may also need to replace brake pads at the same time, especially if they are worn. It is important to follow step-by-step instructions, wear safety equipment and use a torque wrench to make sure everything is tightened properly. Although it may seem a little intimidating at first, most people find it easy once they understand the parts and tools. Just remember, if anything seems too complicated or unsafe, it’s okay to call a mechanic. But yes, with the right approach, it is very possible to replace brake rotors yourself – even for beginners.
Q2. What is the 30/30/30 rule for brakes?
Answer: The 30/30/30 rule is a simple and useful guideline used when breaking in new brake pads and rotors. This is often referred to as the bedding-in process and it helps your new brakes perform better and last longer. This means: you should make 30 smooth stops at a speed of about 30 mph, allowing about 30 seconds of cool down time between each stop. The goal is not to come to a complete stop, but to gradually reduce speed without applying the brakes. This process transfers a smooth layer of brake pad material onto the new rotor, which is very important for safe and quiet braking. If this step is skipped or done incorrectly, the brakes can squeak, vibrate, or wear unevenly over time. Think of this as a “break-in” phase — much like you would with new shoes — so that everything settles in and works together smoothly.
Q3. What are brake fade symptoms?
Answer: Brake fade occurs when your brakes get too hot and stop working properly. This is a temporary condition, but it can be dangerous, especially if you’re going downhill or driving fast. The most common symptom is that your car doesn’t slow down as quickly as it normally would, even if you’re pressing hard on the brake pedal. The brakes may feel soft or unresponsive and the pedal may travel farther than normal. In some cases, you may also hear a burning smell, smoke, or a squeaking noise. This usually means that the brake pads and rotors have overheated and have lost their ability to create enough friction to properly stop the car. Brake fade is more likely to occur if you use your brakes for long periods of time – such as on a steep mountain road – or if your brake system is old or hasn’t been properly maintained. Letting the brakes cool and using engine braking (downshifting) on hills can help prevent this. If brake fade occurs frequently, it is a sign that you need higher quality brake parts or have your brake system inspected by a professional.
References:
[1] Experimental Study of the Correlation between the Wear and the Braking System Efficiency of a Vehicle
https://www.mdpi.com/2076-3417/13/14/8139

Guys, I’m a car audio enthusiast and customization expert and I love clear sound and clean installation. Plus, I have spent years helping people build their dream audio setups. And whenever I’m working on cars, I probably listen to music and thinks about the next big upgrade.