 Skip to content
Written By: Don Dodi
Fact Checked By: Kristen Brown
Reviewed By: Diego Rosenberg
You should actually set up the amplifier’s gain knob and tune it with instrument, otherwise it is seen that most of the time blown speakers are really killed by an amplifier gain if that was set the wrong way.
In fact, the gain knob is not a volume control, instead of this it actually matches the output signal of your head unit that is stereo to the input sensitivity of your amplifier.
So, when the gain is set at too high, then simply the amplifier pushes a distorted signal that can even permanently damage the speakers and subwoofers as well.
As well as, studies in audio engineering shows that the clipping caused by the improper gain adjustment is actually the leading reason behind the speaker’s failure in the aftermarket car audio system.
And on the other hand, if you set the gain at too low, then it won’t able to get the full power and much needed clarity that your system is designed to deliver.
Not only this, there are measurement tools are available such as: digital multimeters or oscilloscoopes so that you can have the proper gain settings and this also ensures that the signal remains strong and truly distortion-free as well.
That’s why in this guide you’ll have everything about How to Set Your Amplifier Gain Correctly, so that you can actually extend the life of your equipment and it enhances the music experience as well.
Tools
| Tools / Materials | Purpose | Notes / Tips |
|---|---|---|
| Car Amplifier and Head Unit | These two devices must work together so that the gain matches the stereo’s signal to the amp’s power. | Make sure both are set properly before adjusting the gain. |
| Test Tone Audio File | Used to accurately set the gain because it’s a clean, steady sound without any musical variations. | You can download free test tones in MP3 or WAV formats. |
| Digital Multimeter (DMM) | Helps you measure the amp’s output voltage to match your speaker’s power rating. | Set it to AC Voltage Mode when testing. |
| Oscilloscope (Optional) | Used to detect clipping (distortion) in sound with professional precision. | Not required for beginners, but highly accurate if available. |
| Screwdriver and User Manual | Required for safely adjusting the gain knob and checking the manufacturer’s recommended settings. | Always keep the manual handy—it often contains the proper voltage/sensitivity values. |
Basic Preparation Steps
1. Reset Audio Settings
Before adjusting your amplifier’s gain, it’s important to start fresh.
Make sure all of your head unit’s audio settings, such as bass, treble, loudness and equalizer presets, are off or set to flat.
This ensures that the sound signal reaching the amplifier is neutral and free of artificial boosts or cuts.
Manufacturers recommend this step because altering these settings during gain adjustment can produce inaccurate results, potentially leading to distortion or low-powered output.
2. Set Amplifier Filters
Next, configure the amplifier’s filters according to the speakers you’re using.
High-pass filters allow high frequencies to reach the mids and tweeters while blocking low frequencies and low-pass filters do the opposite for subwoofers.
Setting these filters correctly ensures that each speaker receives only the frequencies it can handle.
This step protects your speakers from damage and ensures a clean, balanced sound throughout your system.
Improper filter settings are one of the main causes of distortion or unwanted noise during playback.
Temporarily Disconnect the Speakers
To prevent damage to your speakers during testing, it’s recommended to temporarily disconnect them.
When setting gain, the amplifier may output high voltage peaks that could damage your speakers if they are connected.
By disconnecting them, you prevent any accidental clipping or overloading, which is specially important for high-power systems and sensitive subwoofers.
3. Set the Head Unit Volume to the Clean Signal Range
Finally, adjust your head unit’s volume to approximately 75-80% of its maximum.
This range is considered the clean signal range, where the audio output is strong enough for accurate testing, but not so high that it causes distortion.
Staying within this range ensures that the amplifier receives a stable and clear input signal, making it easier to mix the gain correctly.
Audio engineers consistently recommend this step because it provides a reliable basis for setting the gain and prevents long-term damage to both the amplifier and speakers.
How to Set Your Amplifier Gain Correctly – Step-by-Step
1. By Ear (Basic Method)
The easiest way to set an amplifier’s gain is to use your ears and a test tone.
Start by playing a steady test tone into your system.
Slowly turn your amplifier’s gain knob up while listening carefully.
As the gain approaches the amplifier’s limit, you may hear distortion or crackling in the sound.
When you notice this distortion, reduce the gain slightly until the sound becomes clear and crisp.
This method works for most beginners because it doesn’t require additional equipment, but it is less accurate than measuring voltage.
Accurately listening for distortion ensures that your speakers are protected from overloading and the amplifier operates within a safe range.
2. Using a Digital Multimeter (Precision Method)
For more precise adjustments, a digital multimeter can be used to measure the amplifier’s output voltage.
Start by calculating the target voltage for your speakers using this formula: Voltage equals the square root of the power product and the resistance.
For example, if your amplifier is 100 watts and your speaker’s resistance is 4 ohms, this formula helps determine the exact voltage the amplifier can produce.
Set the multimeter to AC voltage mode, play a test tone and slowly adjust the gain until the multimeter reads the calculated target voltage.
This method is widely recommended by audio engineers and amplifier manufacturers because it provides precise gain settings, prevents distortion and maximizes speaker performance while ensuring safety.
3. Using an Oscilloscope (Professional Method)
The most professional method uses an oscilloscope to visually monitor the amplifier’s output waveform.
Connect the oscilloscope to the amplifier output and play a test tone through the system.
Observe the waveform on the screen as you increase the gain.
When the waveform begins to flatten at the peaks, it indicates clipping, which can damage the speakers.
Gradually reduce the gain until the waveform is completely flat, without flattening.
This method is highly accurate and is often used by professional installers and audio engineers to ensure that the amplifier delivers maximum clean power without distortion, providing the best possible sound quality and protecting the system from long-term damage.
How to Reconnect and Fine-Tune It
1. Reconnect Speakers and Subwoofers
After correctly setting the amplifier gain, the first step is to reconnect your speakers and subwoofers.
This ensures that the adjustments made during the gain-setting process are now applied to the entire system.
Reconnecting the speakers at this stage is important because it allows you to safely test the entire audio output, ensuring that all components receive the correct voltage without damage.
Professional installers emphasize that reconnecting after gain adjustments can prevent accidental overloading or clipping that may occur when speakers are connected during testing.
2. Recheck Crossover Settings and Balance
After reconnecting the speakers, it is important to review the amplifier’s crossover settings and the balance between the various speakers.
Crossovers control which frequencies are sent to each speaker, ensuring that subwoofers receive low frequencies and tweeters handle high frequencies.
Setting the balance correctly ensures that no part of your system overworks and that sound is distributed evenly throughout your car.
Audio engineers note that incorrect balance can cause distortion, blurriness, or uneven sound, even if the gain is set perfectly.
3. Play Different Music Genres to Ensure Balanced Sound
To verify that the gain and crossover settings are correct, play a variety of music genres, including bass-heavy tracks, vocals and mid-range instruments.
Different genres highlight different frequencies, allowing you to detect any distortion, imbalance, or frequency gaps in your system.
This testing step is essential to achieving a full and natural sound.
According to car audio experts, listening to a variety of music helps identify any minor adjustments needed for optimal performance, ensuring the system sounds good in all listening environments.
4. Make Small Changes If Necessary
Finally, if any issues are noticed during playback, make small adjustments to the gain, balance, or crossover.
Even small changes can significantly improve clarity and prevent speaker damage.
Experienced installers recommend taking the time to fine-tune your system after initial setup, as real-world listening can reveal subtle issues that measurement equipment alone cannot detect.
The goal is to achieve clean, distortion-free sound that is balanced across all frequencies, providing the best possible listening experience.
Common Mistakes to Avoid
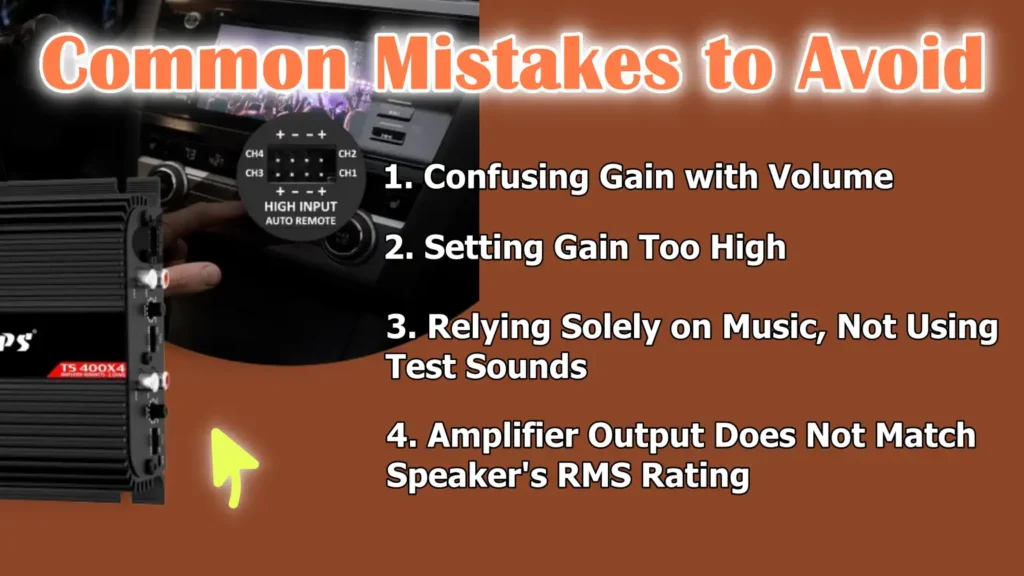
1. Confusing Gain with Volume
One of the most common mistakes beginners make is thinking that an amplifier’s gain is the same as their head unit’s volume control.
Gain doesn’t increase sound intensity; it adjusts how the amplifier responds to the input signal from the stereo.
Confusing gain with volume can easily lead to distortion or speaker damage, as an amplifier can overdrive even at moderate listening levels.
Audio engineers emphasize that understanding this difference is crucial to achieving a clear and balanced sound.
2. Setting Gain Too High
Another common mistake is setting the gain too high, which leads to clipping and distortion.
Clipping occurs when the amplifier tries to produce more power than it can handle, resulting in a harsh, distorted sound.
Prolonged exposure to this condition can permanently damage speakers and subwoofers.
Studies on car audio systems show that over 70% of speaker failures are linked to improperly adjusted gain, making it one of the most common causes of incorrect settings.
3. Relying Solely on Music, Not Using Test Sounds
Relying solely on music tracks to determine gain is a mistake because music varies in frequency and volume.
Test sounds provide a stable, clear signal that accurately reflects the amplifier’s output.
Without using test sounds, it’s easy to miscalculate the gain level, which can lead to weak or distorted playback.
Professional installers always recommend using test sounds first and then fine-tuning with music to ensure accuracy and actual performance.
4. Amplifier Output Does Not Match Speaker’s RMS Rating
Finally, a serious error is that the amplifier’s output does not match the speaker’s RMS rating.
The RMS (Root Mean Square) rating represents the continuous power a speaker can safely handle.
If the amplifier’s output exceeds the speaker’s RMS rating, it can cause overheating and permanent damage.
Matching these specifications ensures the system operates safely, provides maximum clarity and extends the lifespan of both the amplifier and speakers.
Read More:
Basic Safety Tips
1. Always Start with Minimum Gain
When beginning the gain adjustment process, it’s important to set the gain to the lowest level.
This prevents the amplifier from suddenly sending a strong signal that could damage speakers or subwoofers.
Audio engineers recommend starting at a low level and gradually increasing the gain as this allows you to safely find the optimal setting without the risk of distortion or clipping.
This simple precaution protects both the equipment and your investment.
2. Keep the EQ Stable During Setup
During the gain-setting process, all equalizer settings on the head unit should be kept stable, meaning there should be no surges or dips in the bass, mids, or treble.
Keeping the EQ stable ensures that the amplifier receives a neutral, unchanging signal, which is essential for accurate gain adjustment.
If EQ settings are applied during setup, the amplifier may misinterpret the signal, causing distortion or misalignment between channels.
Professional installers consistently emphasize this step to achieve accurate, balanced sound.
3. Protect your hearing by turning down the volume before reconnecting the speakers
Always turn down the head unit volume before reconnecting speakers or subwoofers after gain adjustments.
Sudden loud noise during testing can not only damage your hearing but also put unnecessary strain on the speakers.
Car audio studies show that temporary loud fluctuations are a major cause of speaker failure.
Turning down the volume during this phase ensures the safety of both your ears and your audio equipment, allowing you to make further fine-tuning adjustments without risk.
Not only this, KICKER shows that you should set the gain correctly with the help of test tones and tuning, as you need to set the head unit to roughly three-quarters volume and then use specific tones which are 40Hz for subs 1kHz for mids/tweeters and then slowly increase the amp gain while just watching for clipping or distortion.[¹]
Conclusion – How to Set Your Amplifier Gain Correctly
It is the fact that even the most expensive speakers and amplifiers cannot sound at their best if the gain is not set in the correct way, as in gain precious actually matters the most than just the power.
It’s not about making the music louder, but about matching the head unit’s signal to the amplifier’s input so the system performs its best without distortion or speaker damage.
By following the correct preparation steps, using test tones, carefully adjusting gain and fine-tuning the crossover and balance, you ensure each speaker and subwoofer operates within safe limits.
Avoiding common mistakes like mistaking gain for volume, setting it too high, or skipping measurements protects both your equipment and your investment.
Safety precautions like starting with minimum gain, keeping the EQ stable and controlling the volume during testing are essential to prevent long-term damage and hearing problems.
Taking the time to set gain correctly ultimately results in a system that delivers clear, distortion-free music.
Now, you can ask the more questions in the comment section below.
Frequently Asked Questions
Q1. What is amplifier gain and why is it important?
Answer: Amplifier gain is a control that adjusts the level of the audio signal coming from your stereo (head unit) before it is amplified and sent to your speakers or subwoofers. It is not the same as volume. Proper gain ensures that the amplifier receives the correct signal strength to deliver clear sound without distortion. If the gain is set too high, it can cause clipping and permanently damage your speakers. If it is too low, the system’s sound will become thin and weak. Setting gain correctly helps you achieve balanced, clear and powerful audio while protecting your equipment.
Q2. How is gain different from volume?
Answer: Volume controls the intensity of the sound in your car, while gain controls the intensity of the signal entering the amplifier. Increasing the volume only increases the output after the signal has been amplified, while adjusting the gain adjusts the amplifier to respond properly to the incoming signal. Confusing the two can cause distortion and speaker damage because high gain and high volume generate excessive power that the speakers cannot handle.
Q3. Do I need special equipment to determine the gain of an amplifier?
Answer: You don’t always need advanced equipment, but using them makes the process more accurate. Beginners can get a clearer sound using their ears and test tones, while using a digital multimeter allows you to measure the exact voltage delivered by the amplifier. Professionals often use an oscilloscope to view waveforms and detect clipping. While equipment is helpful, basic, careful listening and the use of test tones can also yield good results if done correctly.
Q4. What are test tones and why should I use them?
Answer: Test tones are steady audio signals at specific frequencies, such as 40Hz for subwoofers or 1kHz for mids and tweeters. Unlike music, which varies in volume and frequency, test tones provide a consistent signal, making it easier to accurately measure amplifier output. Using test tones ensures that the gain is set correctly without relying on guesswork, preventing both distortion and speaker damage.
Q5. Can I set the gain by listening to music alone?
Answer: Although it’s possible to adjust the gain by ear using music, it’s not as precise. Musical volumes and frequencies vary, making it difficult to identify the exact point where distortion begins. Using test tones first and then fine-tuning with music is the safest and most reliable method. This ensures that the amplifier is properly matched to the speakers and delivers clear sound across all types of music.
Q6. What happens if I set the gain too high?
Answer: Setting the gain too high causes the amplifier to output a signal louder than the speaker can handle. This causes clipping, which results in loud distortion or a buzzing sound. Prolonged exposure to clipping can permanently damage speakers and subwoofers and shorten the amplifier’s lifespan. Higher gain doesn’t improve sound quality; it increases the risk of damage.
References:
[1] Amplifier Gain Setting TEST TONES
https://www.kicker.com/kxma-kma-testtones

Guys, I’m a car audio enthusiast and customization expert and I love clear sound and clean installation. Plus, I have spent years helping people build their dream audio setups. And whenever I’m working on cars, I probably listen to music and thinks about the next big upgrade.
