Written By: Don Dodi
Fact Checked By: Kristen Brown
Reviewed By: Diego Rosenberg
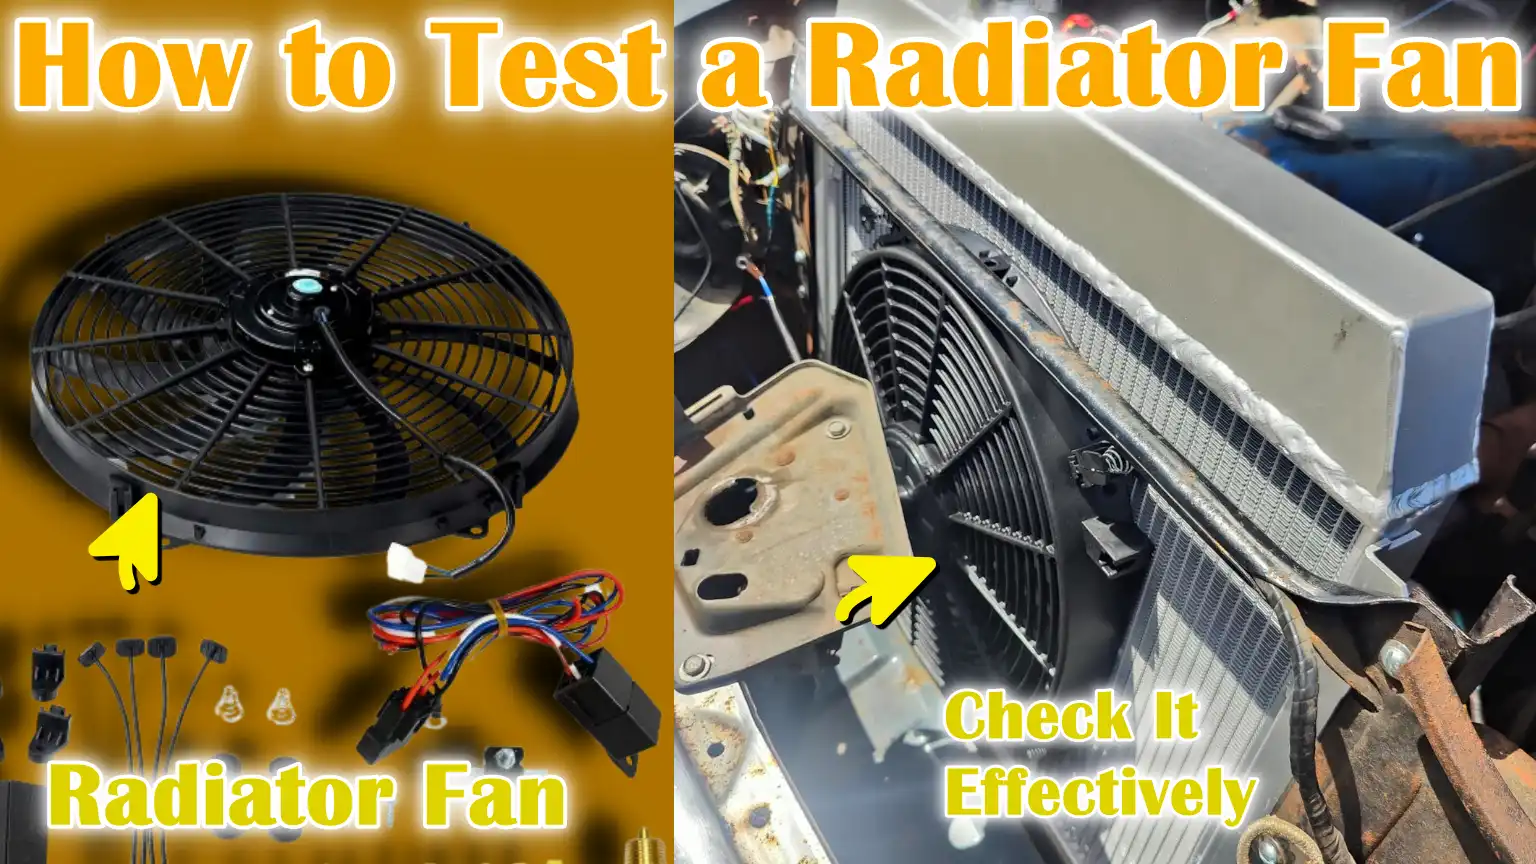
A working radiator fan is really important as it ensure that your engine remains cool and even it is not that hard to test if it is working properly or what?
Indeed, the radiator fan is important part of a car’s cooling system, as it keeps the engine at a safe temperature by pulling the air through the radiator, specially it has huge role when the car moving slowly or stopped but engine needs that cool air.
Basically, if the fan stops working, then the engine can overheat drastically and then it can leads to the warped cylinder heads or a blown head gasket as well.
Now-a-days, many modern cars actually have electric radiator fans that are controlled by sensors and relays, but older car still uses engine-driven fans.
So, this this guide actually tells you everything about How to Test a Radiator Fan, so that you can easily stop the problems early and improve your car’s overall performance as well.
Tools
| Tool / Material | Purpose / Use | Notes / Tips |
|---|---|---|
| Multimeter | Measures voltage, current and resistance in electrical circuits. | Helps check fuses, wiring, sensors and fan motor operation. |
| Jumper Wires | Connect the fan motor directly to the battery for testing. | Use insulated wires to avoid short circuits. |
| Fuse Puller | Safely removes fuses from fuse boxes. | Small plastic device that protects fuses from damage. |
| Test Light | Checks if electrical power is reaching the fan or relay. | Quick way to see if a circuit is on. |
| Protective Gloves | Protects hands from hot or sharp parts. | Always wear a mask when working near the engine. |
| Safety Glasses | Protects eyes from debris, sparks, or splashes of liquids. | Required for safety when testing or inspecting the fan. |
| Service Manual | Provides vehicle-specific wiring diagrams, relay locations and instructions. | Helps locate fan components and follow the correct testing steps. |
| Screwdrivers | Removes fan casing, screws, or connectors. | Flathead and Phillips types are typically required. |
| Socket Wrench Set | Removes bolts holding the fan assembly or motor in place. | Choose the correct size to prevent the bolt from breaking. |
| Battery Terminals Clamp | Securely connect jumper wires to the battery terminals for testing. | Ensures stable connection and prevents accidental sparks. |
| Flashlight | Provides improved visibility in the engine bay, specially in low light. | Helps in clear inspection of wires and fan blades. |
How to Be In The Safe Zone While Testing a Radiator Fan
1. Ensure the Engine is Off and Cool
Before beginning any radiator fan test, always ensure the engine is completely off and cool.
A hot engine can cause serious burns from hot metal parts, coolant, or steam.
Waiting for the engine to cool not only keeps you safe but also prevents accidental damage to sensitive components.
2. Disconnect the Battery, If Necessary
For many electrical tests, disconnecting the car’s battery is essential.
This step prevents short circuits, electric shock, or accidentally turning on the fan while working.
Disconnecting the battery ensures that electricity does not flow to the fan or wires when inspecting, removing, or testing parts.
3. Avoid Touching the Fan When the Ignition Is On
Even if the engine is off, never touch the radiator fan when the ignition is on or when the fan is connected to power.
Electric fans may turn on automatically when temperatures rise or when the air conditioning is on.
Contact with a rotating fan can cause serious injury, so always assume the fan could start at any time.
4. Wear Protective Equipment
Always wear protective gloves and safety glasses when working near a radiator fan.
Gloves protect your hands from sharp edges, hot surfaces and harmful liquids, while safety glasses protect your eyes from flying debris, coolant splashes, or sparks from electrical testing.
5. Work in a well-lit and ventilated area
Perform the test in an area with good visibility and airflow.
Proper lighting helps you clearly see small connectors, wires and fuses, reducing errors.
Ventilation is essential to avoid fume inhalation when working with engine fluids or electrical equipment.
How to Visually Inspect the Radiator Fan
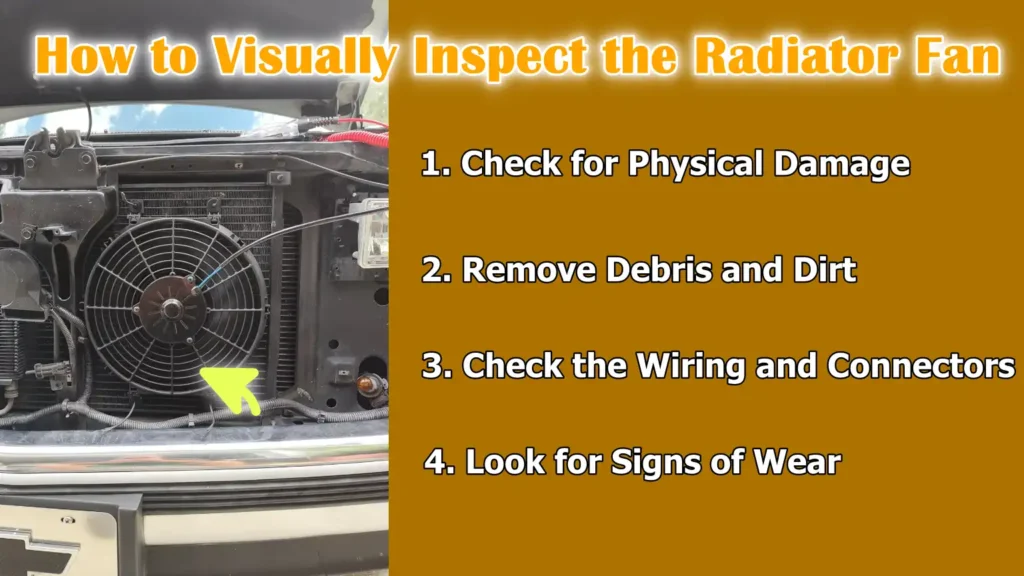
1. Check for Physical Damage
Carefully inspect the radiator fan for any visible physical damage.
Over time, fan blades can become cracked or broken due to road debris, worn parts, or accidental collisions.
Even small cracks can affect the fan’s balance and reduce its efficiency, causing it to overheat.
Inspect the blades closely for bends, broken parts, or missing parts.
2. Remove Debris and Dirt
Leaves, dirt and other debris can accumulate in the radiator fan, specially if the car is driven on rough or dusty roads.
Debris trapped in the fan can slow it down, cause noise, or even prevent it from rotating properly.
Carefully remove any visible dirt or foreign objects, taking care not to damage the blades or wires.
3. Check the Wiring and Connectors
Next, inspect all electrical wiring connected to the fan.
Look for frayed wires, loose connectors, or signs of corrosion on the terminals.
Poor wiring can prevent the fan from receiving power, causing the engine to overheat, even if the fan motor is working properly.
Make sure all connections are secure and in good condition.
4. Look for Signs of Wear
In addition to visible damage, also look for signs of general wear and aging.
Plastic fan casings can become brittle and crack and mounting points can loosen over time.
Worn parts can cause vibration, unusual noise, or uneven airflow.
Addressing these problems promptly can prevent unexpected fan failures and costly repairs.
How to Test the Radiator Fan Fuses and Relays
1. Locate the Radiator Fan Fuse
The radiator fan fuse is usually found in the vehicle’s main fuse box, often located under the hood or inside the cabin.
The fuse protects the fan’s electrical circuit from damage caused by excessive current or a short circuit.
A blown fuse can cause the fan to malfunction, even if the fan motor and wiring are perfectly fine.
Refer to the vehicle’s service manual for the exact location and rating of the radiator fan fuse.
2. Inspect and Test the Fuse
Carefully remove the fuse using a fuse puller or pliers.
Inspect the metal strip inside the fuse.
If the strip is broken or burnt, the fuse is blown and needs to be replaced with a fuse of the same rating.
For a more accurate check, use a multimeter set to continuity mode.
Place the probes on both ends of the fuse.
A good continuity reading confirms that the fuse is working, while a low continuity reading indicates that it needs to be replaced.
3. Locate the Radiator Fan Relay
The radiator fan relay is an electrical switch that controls the power sent to the fan based on signals from the engine control module or temperature sensor.
The relay is often located near the fuse box under the hood.
This ensures that the fan only runs when needed, saving energy and avoiding unnecessary wear and tear.
Consult the service manual to identify the correct relay for your vehicle.
4. Test or Replace the Relay
Over time, relays can deteriorate due to wear, corrosion, or overheating.
One way to test the relay is to replace it with another relay of the same type in the fuse box, such as a horn or accessory relay.
If the fan begins working after replacement, the original relay is bad.
Alternatively, you can use a multimeter to test the relay’s coil and contacts.
Measure resistance at the coil terminals and check for continuity between the switched terminals when the relay is energized.
Any abnormal reading indicates a faulty relay.
5. Understand the Importance
Testing both fuses and relays is important because these are common causes of radiator fan failure.
Even if the fan motor is working, a bad fuse or relay can prevent it from turning on, causing the engine to overheat.
Regular inspection and testing of these components can prevent costly repairs and ensure the engine cooling system is functioning properly.
How to Test the Fan Motor Directly With Battery Power
1. Prepare for the test
Before testing the radiator fan motor, ensure the engine is completely off and cool.
Wear protective gloves and safety glasses to avoid injury from sparks or moving parts.
Gather insulated jumper wires and ensure the car battery terminals are clean and free of corrosion.
Powering the fan directly from the battery is a safe and effective way to test the fan motor’s functionality without relying on the vehicle’s electrical system.
2. Connect the fan to the battery
Locate the radiator fan’s electrical connector and carefully disconnect it from the wiring harness.
Using jumper wires, connect the fan motor’s positive wire to the battery’s positive terminal and the negative wire to the battery’s negative terminal.
Ensure the connections are secure and never touch the fan blades during this test.
When properly connected, the fan should begin spinning immediately.
3. Observe the fan’s operation
Observe how the fan motor responds when connected to the battery.
If the fan is rotating smoothly at full speed, it means the motor is working properly and any previous problems may be due to wiring, fuses, or relays.
If the fan is not rotating, rotating slowly, or making unusual noises, this indicates a malfunction in the fan motor that may require repair or replacement.
4. Interpret the results
A successful test confirms that the fan motor itself is working and the problem lies elsewhere in the electrical components of the cooling system.
A failed test indicates that the motor is defective and needs to be replaced to prevent the engine from overheating.
Directly testing the fan motor is a simple and reliable way to diagnose the problem and avoid unnecessary replacement of other parts.
5. Safety Reminder
Always disconnect jumper wires immediately after testing and avoid touching any moving parts.
Direct battery testing provides clear information about the condition of the fan motor and also makes the process simple and safe for car owners.
How to Test the Coolant Temperature Sensor
1. Understand the role of the coolant temperature sensor
The coolant temperature sensor is a small but important part of a car’s engine management system.
It measures the temperature of the engine coolant and sends this information to the engine control unit (ECU).
Based on this data, the ECU decides when to turn the radiator fan on or off to maintain a safe engine temperature.
A faulty coolant temperature sensor can give inaccurate readings, preventing the fan from turning on when the engine is warm.
This can cause the engine to overheat, reduce fuel efficiency and cause long-term damage to engine components.
2. Locate and inspect the sensor
The coolant temperature sensor is usually mounted near the thermostat housing or screwed into the engine block.
Inspect the sensor and its wiring for corrosion, loose connections, or damage.
Even a slightly corroded connector can prevent proper signal transmission to the ECU, causing the fan to malfunction.
Ensure the sensor is securely installed and free of leaks.
3. Test the Sensor’s Function
To test the sensor, disconnect its electrical connector and use a multimeter to measure the resistance across its terminals.
Compare the readings with the specifications provided in the vehicle’s service manual at different coolant temperatures.
If the sensor shows inconsistent or out-of-range resistance, it indicates that it is faulty and needs to be replaced.
Some vehicles may also allow testing via an OBD-II scanner to view real-time temperature readings sent to the ECU.
4. Replace the Sensor If Necessary
If the sensor is faulty, replace it with a new sensor of the same type and specification.
Ensure the replacement is securely installed and the wiring is properly connected.
After installation, start the engine and monitor the fan operation to ensure that the radiator fan is now operating at the correct temperature.
Properly functioning coolant temperature sensors ensure the engine stays cool and operates efficiently, preventing overheating and costly repairs.
How to Test if The Fan Is Turning On When The Engine Is Started
1. Warm up the engine
Start the vehicle and let the engine run until it reaches its normal operating temperature.
For a more accurate reading, the engine temperature can be monitored using a dashboard temperature gauge or an OBD-II scanner.
Warming up the engine is important because the radiator fan is designed to automatically turn on only when the coolant reaches a specific temperature determined by the engine control system.
Inspecting the fan during this process helps determine if it is functioning properly under normal operating conditions.
2. Check the fan operation
When the engine reaches operating temperature, carefully check if the radiator fan starts spinning.
The fan should turn on automatically to draw air through the radiator and maintain a stable engine temperature.
If the fan does not turn on, it may indicate a problem with the fan motor, relay, wiring, or coolant temperature sensor.
Continuous fan operation at the correct temperature ensures that the engine does not overheat when idling or running slowly.
3. Test fan operation with the air conditioner running
Turn on the vehicle’s air conditioning system while the engine is running.
Most cars are designed to keep the radiator fan running when the AC is on, even when the engine is not warm.
This is because the AC condenser generates heat, which requires airflow to maintain efficiency.
If the fan does not run when the AC is on, it is a clear sign of a fault in the fan circuit, relay, or control module.
Testing with the AC off provides an additional and reliable way to check the fan’s responsiveness and overall functionality.
4. Importance of Testing
Testing the fan with the engine running and the AC on ensures that the cooling system is operating properly under real-world conditions.
This step helps prevent engine overheating, maintain AC performance and ensure that all electrical and mechanical components of the fan system are functioning as expected.
Early detection of problems through this test can prevent costly repairs and keep the vehicle safe to drive.
Read More:
How to Use a Multimeter for Electrical Testing
1. Prepare for Electrical Testing
Before starting, ensure the engine is running and has reached operating temperature while testing the fan for normal operation.
Wear protective gloves and safety glasses to avoid electric shock or accidental contact with moving parts.
Take a digital multimeter and set it to the appropriate DC voltage range.
Using a multimeter allows you to accurately measure the electrical power supplied to the radiator fan and helps identify problems in wiring or electrical components.
2. Check the Voltage at the Fan Connector
Locate the electrical connector connected to the radiator fan motor and carefully disconnect it.
Place the positive probe of the multimeter on the positive terminal of the connector and the negative probe on the negative terminal.
When the engine or AC system is running and the fan should be running, a properly functioning circuit should display a voltage close to the car battery voltage, typically around 12 to 14 volts.
This confirms that electrical power is reaching the fan as expected.
3. Interpret Normal Voltage Readings
A steady voltage reading of approximately 12 volts while the fan is running indicates that the fan motor and power supply are functioning properly.
Minor fluctuations are normal, but significant fluctuations or no voltage at all indicate a problem with the fan’s electrical circuit.
A stable voltage ensures the fan receives enough power to run efficiently and keep the engine cool.
4. If no voltage is detected, check for wiring problems
If the multimeter shows no voltage at the fan connector, the problem could be caused by a blown fuse, a bad relay, damaged wiring, or a faulty fan control module.
Start by checking the fuses and relays, then inspect for broken, worn, or loose connections in the wiring harness.
Use a multimeter to check the continuity of the wires from the fuses and relays to the fan.
Identifying the faulty part allows you to repair or replace only the damaged part, saving time and cost while restoring proper fan operation.
5. Importance of Electrical Testing
Using a multimeter to test voltage provides an accurate and reliable way to diagnose electrical problems in the radiator fan system.
This step ensures that power is properly reaching the fan, prevents overheating and ensures that all electrical components are working together to keep the engine safe and efficient.
Regular testing helps detect hidden faults before they become serious problems.
How to Test the Fan Control Module – If Equipped
1. Understand the role of the fan control module
The fan control module is an electronic device that controls the operation of the radiator fan based on signals from the engine control unit and various sensors, such as the coolant temperature sensor.
Its main function is to ensure that the fan turns on and off at the correct temperature or when the air conditioning system is in use.
By controlling the fan speed and timing, this module helps maintain optimal engine temperature, improve fuel efficiency and prevent unnecessary wear and tear on the fan motor.
2. Locate and inspect the module
The fan control module is usually located near the radiator or fuse box and its appearance may vary depending on the make and model of the vehicle.
Inspect the module and its wiring for damage, corrosion, or loose connectors.
Damaged modules or wiring can prevent the fan from receiving power, even if the fuses, relays and fan motor are all in good condition.
Proper mounting and secure connections are crucial for reliable operation.
3. Diagnose Using a Scan Tool
Many modern vehicles allow you to diagnose the fan control module using an OBD-II scan tool.
The scan tool can read real-time data from the module, including fan activation commands, temperature readings and error codes.
Observing the module’s responses when the engine reaches operating temperature or the AC is turned on can help determine if the module is functioning properly.
4. Testing Using Voltage Measurements
If a scan tool is not available, you can also test the module with a multimeter.
Measure the voltage at the fan’s output terminals while the fan is running.
The voltage should be consistent with the battery voltage or, for variable-speed fans, the manufacturer’s specifications.
No voltage or abnormal readings indicate a faulty module or a wiring problem that prevents the fan from operating as expected.
5. Importance of Checking the Fan Control Module
Testing the fan control module ensures that the radiator fan operates at the correct timing and speed, which is essential for preventing engine overheating and maintaining efficient cooling.
A faulty module can cause the fan to malfunction intermittently or stop working altogether, even if all other components are in good condition.
Early detection of module problems can prevent costly repairs and preserve the engine.
How to Scan Trouble Codes – By Using An OBD-II Scanner
1. Understand the Role of Trouble Codes
Modern vehicles are equipped with an on-board diagnostic system, commonly called OBD-II, which continuously monitors the performance of various engine and electrical systems.
This system can detect problems in the radiator fan, coolant temperature sensor, relays and wiring circuits.
When a malfunction is detected, the OBD-II system logs a Diagnostic Trouble Code (DTC) that identifies the specific problem.
These codes provide clear guidance for troubleshooting and help prevent engine overheating or further damage.
2. Connect and Use an OBD-II Scanner
Find the OBD-II port, usually found under the dashboard near the driver’s seat.
Plug in a compatible OBD-II scanner and turn on the ignition.
Follow the scanner instructions to retrieve stored or pending trouble codes.
Most scanners display codes along with a brief description of the problem, making it easy to identify whether the issue is related to the radiator fan, temperature sensor, or relay circuit.
3. Interpret the Trouble Codes
After receiving the codes, compare them with the vehicle manufacturer’s service manual to determine the exact cause.
For example, a code indicating a fault in the fan circuit may indicate a relay or wiring fault, while a temperature sensor code may indicate an incorrect reading that prevents the fan from turning on.
Using these codes, an accurate diagnosis can be made without replacing unnecessary components.
4. Confirm the Diagnosis
After identifying the trouble codes, perform the necessary tests on the indicated components, such as voltage checks, relay swaps, or sensor resistance tests.
Clearing the codes after repair and retesting ensures that the problem is resolved and the radiator fan system is functioning properly.
5. The Importance of Scanning for Trouble Codes
Using an OBD-II scanner simplifies the diagnosis of fan-related problems by providing accurate, vehicle-specific information.
This saves time, reduces guesswork and ensures the radiator fan system operates safely and efficiently, preventing engine overheating and extending the lifespan of cooling system components.
How to Interpret the Test Results
1. Evaluating the Fan Motor
The first step in interpreting the results is to evaluate the fan motor.
If the fan spins properly when connected directly to the battery, it confirms that the motor itself is functioning properly.
This means that any previous problems with the fan not running were likely caused by external electrical components, such as fuses, relays, or wiring.
If the fan doesn’t spin, spins irregularly, or makes unusual noises, this indicates that the motor is defective and needs repair or replacement.
2. Evaluating the Relays and Fuses
Next, consider the condition of the fan’s relays and fuses.
If a fuse is blown, it prevents power from reaching the fan fully and replacing it may solve the problem.
A faulty relay can cause the fan to stop working intermittently or not run at all, even if the fuses and motor are in good condition.
Testing or replacing the relay helps determine if this is the source of the problem.
3. Checking the Wiring and Connections
Electrical problems in the wiring or connectors can also interfere with fan operation.
Broken, worn, or corroded wires disrupt the flow of electricity, causing the fan to run erratically or not at all.
A multimeter test for voltage and continuity helps diagnose these wiring problems.
Properly secured and intact wires ensure reliable fan operation and prevent unexpected engine overheating.
4. Evaluating the Coolant Temperature Sensor
Finally, consider the role of the coolant temperature sensor.
If the fan motor and electrical components are functioning properly, but the fan does not start even when the engine reaches operating temperature, a faulty sensor may be sending incorrect readings to the engine control unit.
Replacing the faulty sensor restores accurate communication, allowing the fan to start at the correct temperature.
5. Conclusion of Test Results
By carefully analyzing each test result, car owners can identify the exact cause of a radiator fan problem, whether it’s a bad motor, relay, wiring issue, or faulty temperature sensor.
Accurate interpretation prevents unnecessary part replacement, ensures proper engine cooling and protects the vehicle from overheating and long-term engine damage.
How to Replace or Repair Defective Parts of Radiator Fan
Plus, NHTSA also shows that in the real-world incidents, it is really concerning safety threat which includes engine damage or fire as well, so whenever you see that the radiator fan is seized, there’s a failure of circuit protection and if there’s a connector issues; then you need to replace a radiator fan as soon as possible.[¹]
1. Replacing a Defective Radiator Fan Motor
When testing confirms that the radiator fan motor is defective, the next step is to replace it.
To ensure safety and avoid accidental electric shock, begin by disconnecting the battery.
Remove the fan assembly by removing all screws, bolts, or connectors holding the fan in place.
Carefully remove the defective motor and install a new one, ensuring it is correctly aligned and securely installed.
Reconnect all electrical connectors and test the fan to ensure it rotates properly when the engine reaches operating temperature.
A properly installed motor restores the fan’s ability to maintain optimal engine cooling and prevent overheating.
2. Replacing a Defective Relay or Fuse
If test results indicate that the problem is caused by a defective relay or blown fuse, locate that specific component in the fuse box.
Remove the faulty relay or fuse and replace it with a new relay or fuse of the same rating and specification.
Ensure the connections are clean and secure, as poor contact can cause intermittent operation.
After replacement, start the engine and inspect the fan activation to ensure the electrical pathway is functioning properly.
Replacing these small but critical components can quickly restore fan operation without major repairs.
3. Replacing a Bad Coolant Temperature Sensor
When the coolant temperature sensor is identified as the source of the problem, replacing it is simple, but essential for proper fan control.
Locate the sensor on the engine or thermostat housing and carefully disconnect its wiring.
Remove the faulty sensor and install a new sensor of the same type and specification.
Reconnect the wiring and ensure there are no leaks.
Once installed, the new sensor provides accurate temperature readings to the engine control unit, allowing the radiator fan to function properly and maintain a safe engine temperature.
4. The Importance of Proper Replacement and Repair
Replacing or repairing faulty components after accurate diagnosis ensures that the radiator fan system operates efficiently and prevents engine overheating.
Following proper installation procedures and safety measures can prevent damage to other electrical or mechanical parts, extend the life of the cooling system and improve overall vehicle reliability.
Conclusion – How to Test a Radiator Fan
Radiator Fan guards your engine by keeping it cool under various driving conditions, but if there’s a issues with radiator fan then it can worsen the fuel efficiency and performance as well.
A well-functioning fan ensures that heat is effectively removed from the radiator, preventing the engine from overheating and protecting vital components like the cylinder head, gaskets and coolant system.
By following systematic steps—visually inspecting the fan, checking fuses and relays, testing the motor, verifying sensor functionality and analyzing electrical circuits—you can identify problems early and avoid costly repairs.
Using diagnostic tools like a multimeter or OBD-II scanner adds precision to the process, helping to pinpoint the exact cause of a malfunction, whether it’s a faulty motor, relay, wiring problem, or temperature sensor.
Timely repair or replacement of damaged components restores proper cooling system performance, improves engine reliability and enhances overall vehicle safety.
Regular fan inspection and maintenance increases confidence in your vehicle’s operation and extends your engine’s life.
Now, if you still have questions related to this guide, then just let us know in the comment below.
Frequently Asked Questions
Q1. How do I know if my radiator fan isn’t working?
Answer: If the radiator fan isn’t working, the engine may overheat, specially when the car is stationary or moving slowly. You may notice the temperature gauge rising higher than normal, the engine warning light coming on, or an unusual smell from overheated coolant. Another sign could be that the air conditioner isn’t cooling properly, as many cars rely on the radiator fan to help the AC condenser. You can also check to see if the fan spins when the engine is warm or the AC is on.
Q2. Can I test the radiator fan myself?
Answer: Yes, testing the radiator fan is something most car owners can do with basic tools and safety precautions. You can check to see if it’s spinning, check for visible damage to the fan, check fuses and relays and even connect the fan directly to the battery using jumper wires. More advanced testing involves using a multimeter to check voltage and continuity, or an OBD-II scanner to check for trouble codes. Following the correct steps ensures you can safely and accurately identify the problem.
Q3. What tools do I need to test the radiator fan?
Answer: Key tools include a multimeter to measure voltage and resistance, jumper wires for direct battery testing, a fuse puller to safely remove fuses and a test light to check for power. Protective gloves and safety glasses are essential. A service manual or guide helps locate the fan, fuses, relays and temperature sensors for your specific car model. Having the right tools makes the testing process faster and more accurate.
Q4. Why doesn’t my radiator fan turn on even when the engine is warm?
Answer: There could be several reasons why the fan doesn’t turn on. It could be a blown fuse, a faulty relay, damaged wiring, a broken fan motor, or a bad coolant temperature sensor. Modern cars also have a fan control module and if it malfunctions, the fan may not receive the signal to turn on. Carefully inspecting each component helps pinpoint the exact cause and avoid unnecessary parts replacement.
References:
[1] Safety Recall VB2 / NHTSA 19V-818 Engine Cooling Fan
https://static.nhtsa.gov/odi/rcl/2019/RCRIT-19V818-4026.pdf

Guys, I’m a car audio enthusiast and customization expert and I love clear sound and clean installation. Plus, I have spent years helping people build their dream audio setups. And whenever I’m working on cars, I probably listen to music and thinks about the next big upgrade.