Written By: Don Dodi
Fact Checked By: Kristen Brown
Reviewed By: Diego Rosenberg
When you apply the simple film on your windows that can actually reduce the UV rays up to the 99% would you believe this and that’s how it keeps your car cooler and makes it look sharper than ever.
Plus, there are many modern tints are available that also reduces the interior heat by 35 to 65%, which basically means there will be less strain on your air conditioning and better fuel efficiency over time.
Not only this, tinting also adds privacy as it makes it harder for thieves to see valuables inside your vehicle.
Yes, the window tint laws actually vary widely by region to region as an example: some states in the U.S. allows a Visible Light Transmission (VLT) of only 35% on front side windows, while other permit darker shades as well.
Tinting is not just about having privacy: but it also comes with lots of advantages as it can substantially save fuel and a decrease the vehicle emissions. Plus, it reduces the reliance on air conditioning as tinted windows actually helps to maintain a cooler interior specially during the summer months. As well as, it also enhances the comfort and contributes to the environmental conservation at the same time by lowering greenhouse gas emissions.[¹]
So, with this guide you will know all about How to Tint Car Windows which included local regulations, choosing the right film type such as: dyed, metalled, carbon or ceramic and there’s a step-by-step proper installation guide is available so that you can have it perfectly.
Understanding Window Tinting
1. What is window tint film?
Window tint film is a thin, multi-layer sheet applied to the inside or outside of a car window to change the amount of light and heat that passes through it.
It can be transparent or colored and is designed to increase comfort, protect the interior and enhance the look of the vehicle.
The film works by blocking certain light wavelengths, particularly ultraviolet (UV) rays, while allowing enough visible light to pass through so you can see clearly.
Modern tint films are also designed to resist scratching and cracking, making them last longer in everyday driving conditions.
2. Types of Window Tint Film
There are four main types of tint film, each with its own specific properties.
Tinted tint film uses a layer of dye to absorb sunlight and reduce glare; it is inexpensive but can fade over time.
Metallized tint film contains microscopic metallic particles that reflect heat and UV rays, providing excellent durability, but it can interfere with radio and GPS signals.
Carbon tint film contains carbon particles that block infrared light and keep car interiors cool without affecting electronics, while also providing a dark and rich look.
Ceramic tint film is the most advanced option, containing non-metallic ceramic particles that block up to 99% of UV rays and a considerable amount of heat, all without fading or disrupting signals, although it is usually the most expensive.
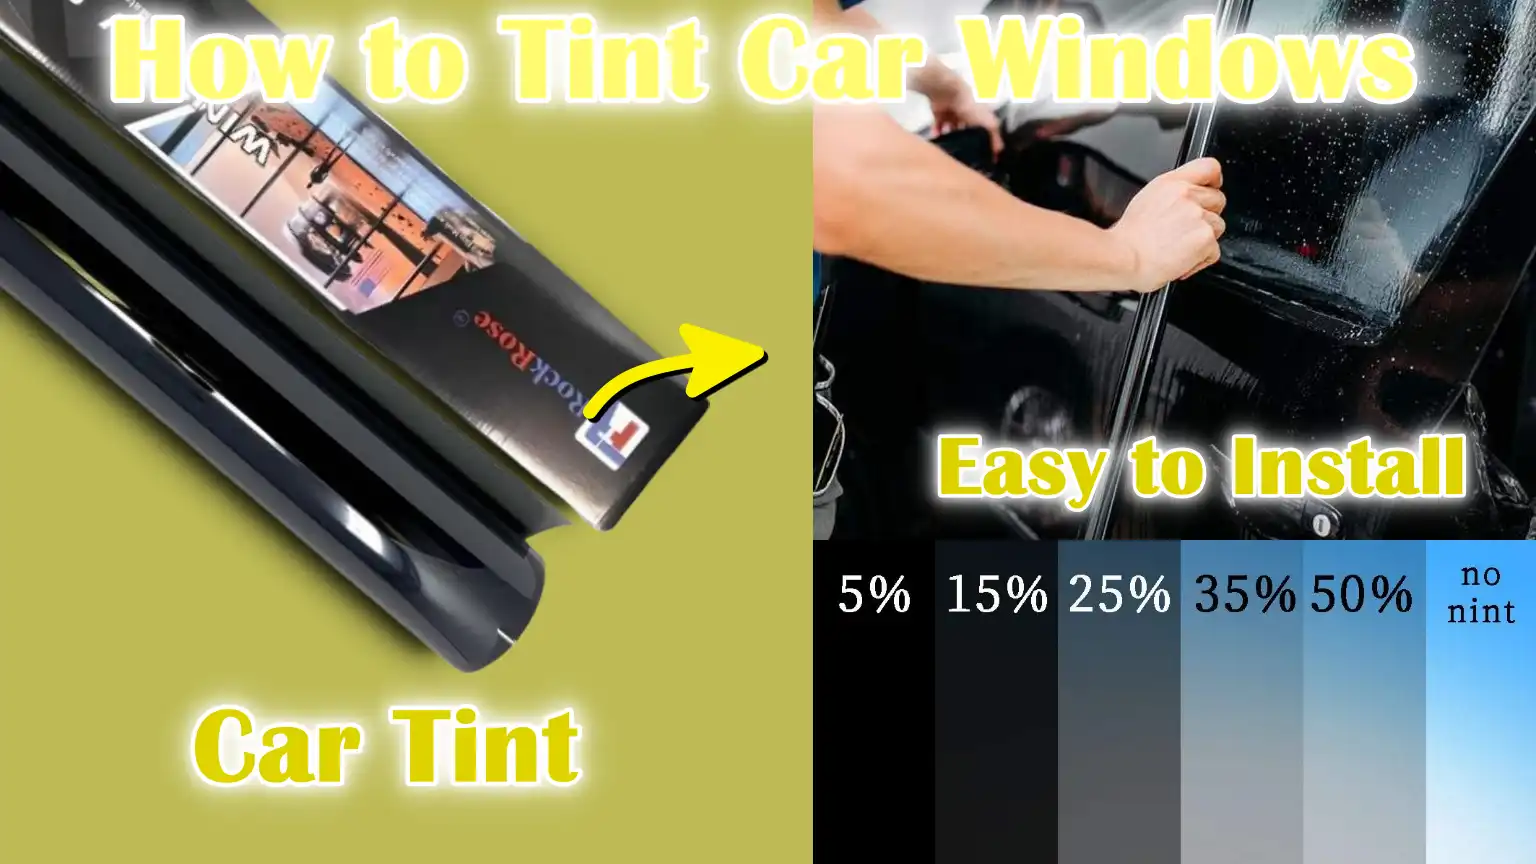
3. Different Tint Percentages (VLT – Visible Light Transmission)
The level of darkness in a window tint is measured by its visible light transmittance, or VLT, which tells you the percentage of visible light that passes through the glass.
For example, a tint with a 70% VLT lets most light in and is barely visible, while a tint with a 20% VLT is very dark and only lets in a small amount of light.
A lower VLT number means a darker tint.
Choosing the right VLT is important to maintain a balance between visibility, comfort and compliance with local laws.
Some areas may only allow a high VLT on front windows for safety reasons, while darker tints may be allowed on rear windows.
4. Benefits of Tinting
Applying tint to windows offers many practical benefits beyond just enhancing the beauty of your vehicle.
High-quality tints can block up to 99% of harmful UV rays, reducing the risk of skin damage and protecting your dashboard, seats and electronics from fading or cracking over time.
They also reduce heat inside the cabin, sometimes reducing interior temperatures by more than 60%, which reduces the need for frequent air conditioning and can improve fuel efficiency.
Tints help reduce sunlight and headlight glare, making driving safer and more comfortable and they also provide additional privacy by making it more difficult for people outside to see inside your vehicle.
5. Legal restrictions
Tint laws vary widely depending on your state, country or region and it’s important to check your local regulations before applying any film.
These laws usually define the minimum VLT percentage allowed for each window and may have different rules for front, rear and side windows.
Some laws also ban reflective or mirrored tints.
Failure to comply may result in fines, failing a vehicle inspection and requiring the tint to be removed.
The best way to comply with the rules is to check the website of your area’s department of motor vehicles or road authority, or get advice from a licensed tinter who is familiar with local regulations.
Read More:
Tools
| Tool / Material | Easy Explanation of Use |
|---|---|
| Pre-cut tint kit or tint film roll | The film that will be applied to your windows. Pre-cut kits are already cut to fit your car windows, while film rolls require you to measure and cut them to the correct size yourself. |
| Spray bottle with soapy water (baby shampoo + water) | A simple spray mixture that helps the tint film set in place before it adheres to the glass. Baby shampoo is used because it is gentle and doesn’t leave any harsh residue. |
| Squeegee or hard card | A flat, firm tool used to smooth tint film and remove any trapped water or air bubbles so that the tint will adhere evenly without wrinkles. |
| Utility knife or precision blade | A sharp cutting tool used to cut away excess tint film, so that it fits the exact shape of the window, without any gaps or overhangs. |
| Heat gun or hair dryer | A device that blows hot air to cause the tint film to shrink and fit snugly over the glass, specially on curved windows. |
| Microfiber cloth | A soft, lint-free cloth used to clean glass before applying tint and to wipe away any moisture during installation. |
| Measuring tape | A tool for measuring each window so you can accurately cut the tint film before applying it. |
| Gloves (optional but recommended) | It is worn to protect the film from fingerprints, dirt and hand oils, making it easier to stick to and look clean. |
Preparation before tinting
1. Clean the workspace
Before beginning any tinting job, it is important to set up your workspace in a place where dust and dirt are minimal.
Indoor environments such as garages or closed workshops are ideal as they protect the windows from wind, debris and sudden changes in weather.
Dust particles in the air can easily get trapped under the tint film and cause bubbles or imperfections.
The stable temperature also helps the film adhere better and prevents uneven drying during the application process.
2. Clean the windows thoroughly
Cleaning the windows is the most important step before applying tint as even a small particle of dirt can ruin the finish.
Both the inside and outside glass surfaces should be washed with a gentle, ammonia-free cleaner or a mixture of baby shampoo and water.
Avoid using ammonia-based cleaners as these can damage the adhesive layer of the tint film.
The glass should be cleaned until it is completely free of dust, smudges and fingerprints to ensure that the tint adheres smoothly and evenly.
3. Remove dust, dirt and adhesive residue
After the basic cleaning, you should check the glass for any remaining adhesive from old stickers or factory labels.
These residues can prevent the film from sticking properly.
A plastic scraper or razor blade can be used gently at a low angle to remove these substances, but this must be done carefully to avoid scratching the glass.
The surface must be completely clean so that the film can have a strong and long-lasting effect.
4. Inspect the windows for scratches or damage
Before applying the tint film, closely examine each window for any cracks, chips or scratches.
Damaged glass can cause the tint film to peel or wrinkle over time.
If the window has deep scratches or structural damage, it should be repaired or replaced before the tinting process begins.
Applying film to damaged glass can make imperfections even more noticeable, reducing the quality of the final result.
5. Remove all window stickers
Old parking permits, registration stickers or decorative decals should be completely removed before tinting.
These stickers can create uneven areas under the film and cause visible bulges or air pockets.
Any remaining adhesive should be carefully cleaned off with adhesive remover or a mild soapy solution to ensure the glass is completely smooth and ready for application.
Removing stickers not only ensures a professional finish, but also makes the tint last longer without chipping at the edges.
How to Tint Car Windows – Totally Step-By-Step
Step 1 – Measure and cut the tint film
Accurate measurements are the basis for a clean and professional tinting job.
Each window must be measured separately as windows on the same vehicle may vary slightly in size.
It is best to cut the film slightly larger than the window so there is room for final trimming during installation.
The protective liner on the tint film must be intact during this step to prevent fingerprints, dust or damage to the adhesive layer.
This ensures that the film remains clean and ready for easy application.
Step 2 – Apply the film to the outside to shape
The outside of the window is used as a template to shape the tint film.
By applying a fine spray of soapy water to the outside glass, the film can be applied without sticking.
The tint should be applied with the liner side facing out.
This allows the installer to trim the edges so that the film matches the exact shape of the window, including bends and corners.
Shaping on the outside surface prevents mistakes and the inside application will be precise.
Step 3 – Prepare the inside surface
The tint will be applied to the inside of the window, so it’s important to clean it thoroughly before application.
A light spray of soapy water helps loosen any dust or debris, which can be removed with a squeegee.
This step is important because even the smallest particle trapped under the film will be visible and can cause bubbles or peeling over time.
The purpose is to create a spotless, smooth surface so the film can adhere evenly to the entire window.
Step 4 – Apply the tint film
Once the window is prepared, the protective liner is carefully removed so that the adhesive side of the tint is visible.
This part should be lightly sprayed with soapy water so that it doesn’t stick immediately, allowing time for adjustments.
The film is applied to the inside of the glass starting at the top and then gently tacked into place.
Using a squeegee, air bubbles and water are pressed out from the center to the edges and smoothed out.
This ensures a clean, even bond without any wrinkles.
Step 5 – Heat shrink for a perfect fit
A heat gun is used to shrink the film so it perfectly matches the curves of the glass.
This is specially important for rear windows, which often have a domed shape.
The heat softens the film, allowing it to mold to the glass without wrinkles.
Be sure to work slowly and evenly so the film doesn’t overheat or melt.
This step is crucial to achieving a smooth, factory-like finish.
Step 6 – Final trimming and smoothing
The final step involves trimming the excess film so it aligns exactly with the edges of the window.
A sharp, precise blade is used to make clean, straight cuts.
After trimming, the edges are pressed firmly to ensure they are completely sealed and adhered to the glass.
This prevents chipping and keeps the tint looking new for longer.
Any moisture left between the film and the glass will dry out on its own over the next few days.
Aftercare and Maintenance
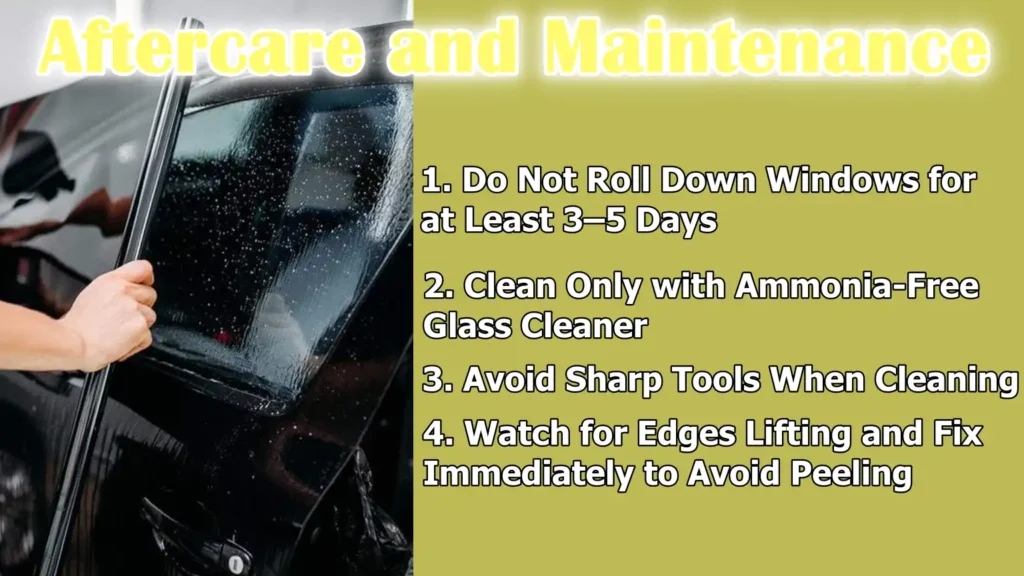
1. Do Not Roll Down Windows for at Least 3–5 Days
Freshly installed tint film needs time for the adhesive to bond firmly to the glass.
Rolling down the windows too soon can cause the film to peel, shift, or create permanent wrinkles.
Most professional installers recommend waiting at least three to five days before operating the windows, although this can vary depending on weather conditions.
In colder or more humid climates, the curing process may take slightly longer because moisture takes more time to evaporate from between the film and the glass.
Being patient during this stage ensures a smooth, long-lasting finish.
2. Clean Only with Ammonia-Free Glass Cleaner
Ammonia-based cleaners can damage the tint film by breaking down its adhesive or causing discoloration over time.
To protect your investment, always use ammonia-free glass cleaners or a mild solution of water and baby shampoo.
These solutions are gentle enough to clean the glass without harming the tint.
Soft microfiber cloths are ideal because they remove dirt and fingerprints without scratching the film’s surface.
Proper cleaning not only keeps the windows looking clear but also extends the lifespan of the tint.
3. Avoid Sharp Tools When Cleaning
Sharp or abrasive tools, such as razor blades, steel wool, or rough brushes, should never be used on tinted windows.
These can scratch or tear the film, leading to visible damage that cannot be repaired without replacing the tint entirely.
Even stubborn spots or dried residue should be gently soaked and wiped away with a soft cloth instead of being scraped.
By avoiding harsh cleaning methods, you preserve both the appearance and the structural integrity of the tint film.
4. Watch for Edges Lifting and Fix Immediately to Avoid Peeling
Over time, the edges of tint film may begin to lift slightly, often due to improper installation, heat exposure, or age.
If this happens, it is important to address it quickly because loose edges can allow dirt and moisture to get under the film, causing further peeling.
Minor lifting can sometimes be fixed by carefully reapplying heat and pressing the film back into place, but more severe cases may require partial or full replacement.
Regularly checking your windows for early signs of lifting helps prevent larger, more costly repairs.
What are The Common mistakes to avoid
1. Applying in a dusty or windy environment
It’s important to apply tint film in a clean, dust-free area to get a smooth and professional finish.
When applied in a dusty or windy environment, airborne particles can get trapped between the glass and the film, causing bubbles, bumps or rough spots.
These imperfections not only look unattractive, but can also weaken the bond between the tint and the glass, making it more likely to peel over time.
Applying indoors in a controlled space like a garage or workshop is the best way to avoid this problem and ensure long-lasting results.
2. Using an ammonia-based cleaner before application
Cleaning windows before applying tint is important, but using the wrong type of cleaner can ruin the film before it even applies.
Ammonia-based cleaners can leave chemical residues that break down the adhesive layer of the tint film, weakening the film’s adhesion and causing it to peel prematurely.
Ammonia can discolor tint and reduce its transparency over time.
For best results, windows should be cleaned with an ammonia-free solution, such as a mild mixture of baby shampoo and water, which is safe and leaves no harmful residue.
3. Rushing the Trimming Process
Precision is important when cutting and trimming tint film to the exact size of the window.
Rushing this step can result in uneven edges, gaps, or hanging film, which can reduce the quality and durability of the installation.
Poor trimming can also increase the risk of the film peeling, specially around corners and edges.
Taking extra time to take accurate measurements and cut clean, straight lines ensures that the tint looks uniform and fits perfectly on the glass.
4. Not Checking Tinting Laws Beforehand
One of the most common but costly mistakes is applying tint that does not comply with local laws.
Window tint regulations vary widely by state, province, or country and they often set limits on the percentage of visible light transmission (VLT) allowed for each window.
Applying a tint that is too dark or too reflective can result in fines, failed inspections and having to remove the film altogether.
Checking your local regulations before you begin the process will ensure that your tint is both legal and functional, saving you time, money and potential legal hassles.
Basic Cost and Time Estimation
1. Do It Yourself vs. Professional Installation
The cost of tinting your car windows depends on whether you want to do it yourself or hire a professional.
The do-it-yourself method can be quite affordable, with basic pre-cut tint kits costing around twenty to fifty dollars and entire tint film rolls costing between thirty and one hundred dollars, depending on the quality.
However, additional tools like a squeegee, utility knife and heat gun can add another twenty to fifty dollars to your total cost.
Although doing it yourself can save money initially, it also carries the risk of mistakes that may require purchasing additional film or completely redoing the job.
On the other hand, professional installation typically ranges from one hundred and fifty dollars for basic tinted film on smaller vehicles to over five hundred dollars for premium ceramic tint on larger cars or SUVs.
Professionals usually offer warranties, high precision and a clean finish, making it a more reliable option for those who want guaranteed quality.
3. Time Required for Beginners vs. Experienced Installers
The time it takes to apply tint to car windows depends largely on skill and experience.
For beginners trying to apply it themselves, the process can take anywhere from four to eight hours, as extra time is needed to carefully measure, cut and adjust the film.
Learning to apply the tint without creating creases or accumulating dust also takes time.
More experienced installers, whether amateur or professional, can typically complete an entire car in two to four hours, depending on the number of windows and the complexity of their shapes.
Professional shops often work faster because they have specialized equipment, controlled environments and sophisticated techniques.
Although taking longer may seem slower for beginners, working patiently ensures cleanliness and reduces the chance of costly mistakes.
Conclusion – How to Tint Car Windows
So, in the end of this guide it is clear that window tint is more of a guardian against sun damage, heat glare and even unwanted attention from outside world.
Properly applied tint can block up to 99% of harmful UV rays, protect your interior from fading and cracking, reduce glare for safer driving and even improve energy efficiency by reducing your reliance on air conditioning.
While the process requires patience, precision and the right environment to avoid dust and bubbles, it’s a skill that can be learned with careful preparation.
Selecting the right film type, complying with local tint laws and proper care will help ensure that your tint lasts for many years without cracking or fading.
Whether you decide to invest in a professional installation or take on the challenge of doing it yourself, the keys to success lie in precision, cleanliness and patience.
Ultimately, a quality tint not only improves your driving experience, but also protects your health and the value of your vehicle.
Now, for you comment section is open and we are ready to hear from you.
Frequently Asked Questions
Q1. What is the darkest legal tint on a car?
Answer: The darkest legal tint for a car depends entirely on the laws in your state, province, or country. These laws usually measure tint darkness using visible light transmission (VLT), which tells you the percentage of visible light that passes through the window. A lower VLT number means a darker tint. For example, if your local law requires front windows to have a VLT of at least 35%, that means 35% of light should come in and the remaining 65% can be blocked. There are often more lenient rules for rear and back windows, with some places allowing very dark or limo-style tints. In some US states, the darkest legal tint for front windows is 35%, while in others it may be 20% or less. As illegal tinting can result in fines and forced film removal, it’s always best to check your local regulations before applying a dark tint.
Q2. What to do and what not to do when applying window tint?
Answer: When applying tint to your car windows, there are a number of things you should do and avoid to get the best results and make the tint last longer. You should always work in a clean, dust-free environment to avoid particles getting trapped under the film. For a smooth finish, it is important to clean the glass thoroughly with an ammonia-free solution before application. Proper measurements, careful cutting and following the correct installation procedure will help you avoid bubbles, creases or peeling edges. After application, you should wait at least three to five days before opening the windows to allow the adhesive to set properly. You should also clean your tinted windows with a soft microfiber cloth and ammonia-free cleaner to avoid damage. On the other hand, you should never use sharp tools, harsh chemicals or rough cloths when cleaning, as these can scratch or discolor the film. Avoid applying tint outside on windy or dusty days and never ignore your local tint laws, as doing so can result in heavy fines.
Q3. Is 20% or 35% tint darker?
Answer: 20% tint is much darker than 35% tint. The percentage refers to visible light transmission, which measures how much light can pass through the window. With 20% tint, only 20% of the light from outside enters the car, making it very difficult for people to see inside during the day and appearing dimmer from the outside. 35% tint allows 35% of the light to pass through, so it appears dimmer and provides slightly less privacy, but provides better visibility from inside the vehicle, especially at night. Although 20% provides a better look and more privacy, it can make driving at night more challenging and may not be legal for front windows in many areas. 35% tint is more moderate, providing a balance between style, privacy and visibility.
References:
[1] Car Window Filming, Tinting and Shading’s Fuel, Emission Reduction and Economic Analysis around WA, NY, NC, USA and Istanbul, Turkey
https://www.researchgate.net/publication/284350807_Car_Window_Filming_Tinting_and_Shading%27s_Fuel_Emission_Reduction_and_Economic_Analysis_around_WA_NY_NC_USA_and_Istanbul_Turkey

Guys, I’m a car audio enthusiast and customization expert and I love clear sound and clean installation. Plus, I have spent years helping people build their dream audio setups. And whenever I’m working on cars, I probably listen to music and thinks about the next big upgrade.