Written By: Don Dodi
Fact Checked By: Kristen Brown
Reviewed By: Diego Rosenberg
It is very scary that the improper amplifier settings can actually have the ability to cut your car speakers lifespan in half.
Which is why tuning a car amplifier is one of the most important steps to get the best sound quality out of your car audio system.
As well as, many drivers actually not realize that simply by installing a powerful amplifier is not just enough: as it should be ideally tune as well, otherwise it can cause distortion, damage speakers and even shorten the life of your audio components as well.
And according to the leading car audio experts, the incorrect amplifier settings are actually one of the main reasons for blown speakers and the poor sound performance.
Along with this, whenever an amplifier is proper tuned, then it really delivers a clean, balanced sound and that ensure that the right amount of power is sent to each speaker without overloading them as well.
As if we take an example: if you set the gain too high that can actually cause “clipping”, which is a type of distortion that can permanently damage the speaker coils and while the right crossover settings can separate low, mid and high frequencies that makes the music sound much clearer.
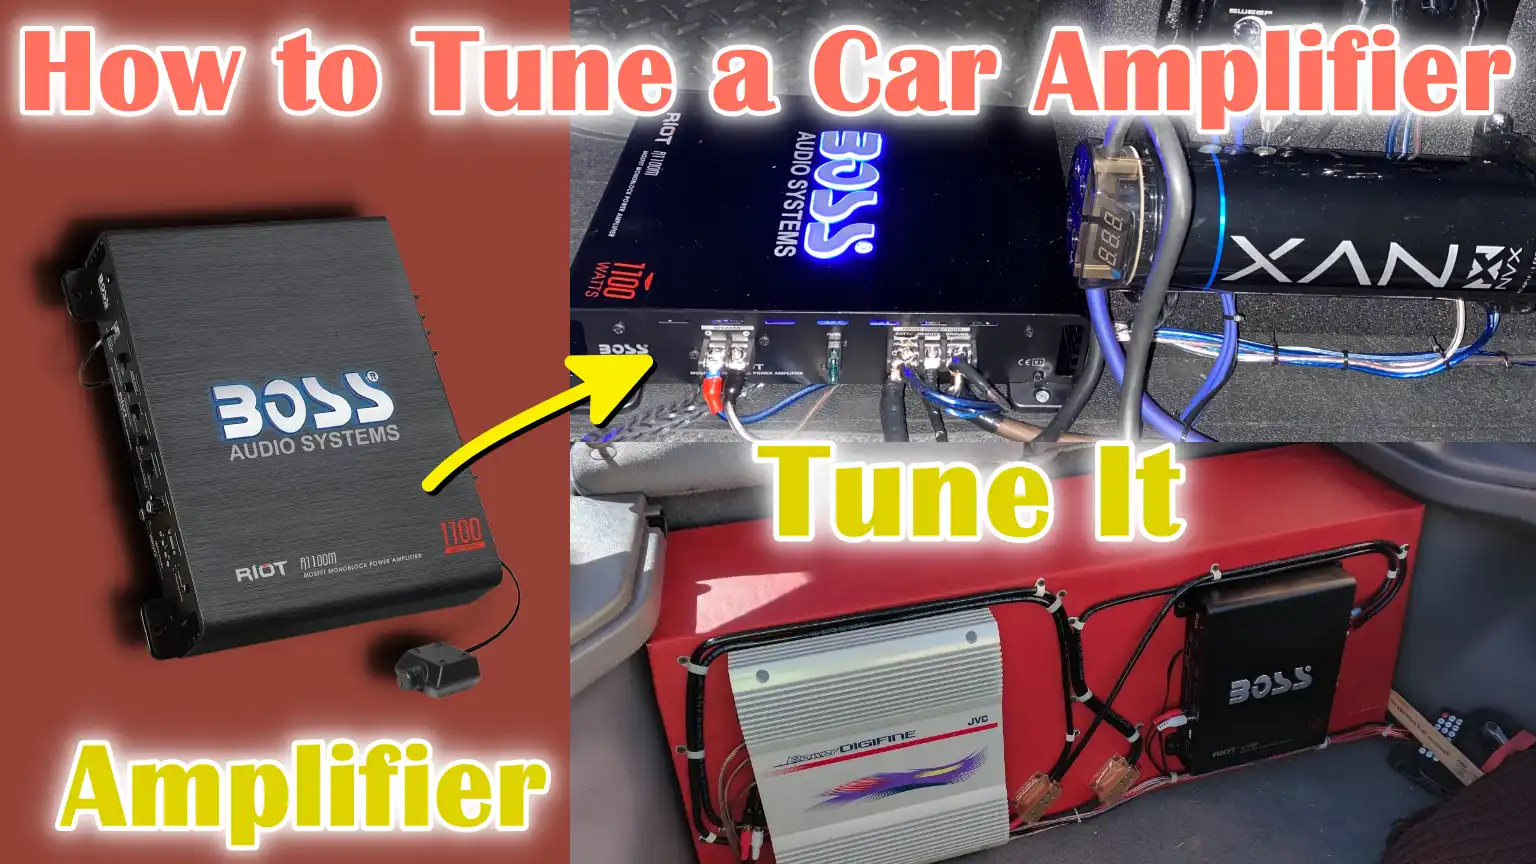
Also, this guide actually tells you How to Tune a Car Amplifier and if you done this process correctly then you’ll hear the dramatically improved version of sound quality it will produce.
Understanding the Basics
1. What is a car amplifier?
A car amplifier is an electronic device that increases the power of the audio signal sent from the car’s stereo system to the speakers.
Most car stereos have a built-in amplifier, but it is often too weak to deliver strong and clear sound, specially when aftermarket speakers or subwoofers are used.
A dedicated car amplifier takes the small electrical signal from the head unit and makes it powerful enough to drive speakers and subwoofers to their full potential.
This extra power results in louder, clearer and more detailed sound without distortion.
For example, if your factory stereo outputs 15 watts per channel, upgrading to an external amplifier with 50 or 100 watts per channel output can make an incredible difference in the sound of your music.
2. Role in Car Audio System
The amplifier plays a central role in the entire car audio system as it acts as a bridge between the source unit (head unit) and the speakers.
Without an amplifier, speakers cannot operate efficiently and subwoofers will produce weak, flat bass.
The amplifier distributes the correct amount of power to each connected speaker or subwoofer so that they can accurately reproduce sound at different frequencies.
This balance is important because each type of speaker is designed to handle a specific frequency range.
For example, tweeters are made for higher frequencies such as cymbals and vocals, while subwoofers are designed for lower frequencies such as bass notes.
A properly functioning amplifier ensures that each speaker receives enough power for the correct signal and expected performance.
3. Why Tuning Is Important: Avoid Distortion
Tuning an amplifier correctly is essential to prevent distortion, which occurs when an amplifier is asked to deliver more power than it can handle.
Distortion can make music sound harsh and unclear and over time, it can seriously damage speakers. Distortion often occurs when the gain control is set too high, forcing the amplifier to clip the audio signal.
Clipping occurs when the peaks of the audio wave are cut off, producing a harsh and unpleasant sound. By tuning the amplifier correctly, you allow it to deliver a clean and undistorted signal to the speakers, leading to better sound quality and longer-lasting audio components.
4. Why tuning is important: Adjust the amplifier output to the speaker’s capabilities
Each speaker has a certain power rating and if the amplifier sends out too much power, the speakers can be damaged.
On the other hand, if the amplifier sends out too little power, the speakers will not be able to perform at their best and may even distort at high volumes.
Tuning allows you to set the amplifier output to the power handling capability of the speaker. For example, if your speakers are rated at 75 watts RMS, the amplifier gain should be adjusted so that it is close to that volume, not exceeding it.
This ensures that the system plays as loud and clear as possible without straining any one component.
5. Why tuning is important: Balance the frequencies
Car amplifiers have built-in crossover settings that control which frequencies are sent to which speakers. If these settings are wrong, too much bass can go to the smaller speakers or too many high frequencies to the subwoofers, damaging both components and causing the sound to become unbalanced.
Proper tuning ensures that there is the correct distribution of low, mid and high frequencies between the speakers.
This not only improves the clarity of your music, but also protects your audio system. When there is the right balance of frequencies, each speaker plays the sound it is designed for, providing a rich and clear listening experience.
Tools
| Tool or Safety Step | What it is | Why it is needed |
|---|---|---|
| Multimeter | A simple electronic measuring device that can check voltage and power. | This helps you measure the correct power output from the amplifier and prevent speaker damage. |
| Test tone audio files (40Hz, 1kHz) | Pre-recorded single-frequency sound files that play in a steady tone. | These tones help you set the amplifier’s gain and crossover settings more precisely than regular music. |
| Small screwdriver | A small-pointed hand tool used to turn screws and dials. | Used to adjust the amplifier’s small knobs and settings without damaging them. |
| Owner’s manual for amplifier and speakers | A manual or PDF that came with your amplifier and speakers. | Shows the correct settings, power ratings and wiring diagrams for your exact audio system. |
| Avoid loud volumes during tuning | Keep the volume at a safe, moderate level while making adjustments. | This blocks out sudden loud noises that can damage your ears and prevents the speakers from bursting. |
| Disconnect power when wiring | Turn off and unplug the car battery or amplifier when working with wires. | The risk of electric shock, short circuit or damage to the car’s electrical system is reduced. |
How to Do Initial setup
1. Set all amplifier controls to default
Before you start tuning your car amplifier, it’s important to return all of its controls to their default or neutral position.
This step creates a clear starting point and helps you avoid carrying forward any incorrect settings from previous adjustments.
Default settings ensure that your amplifier delivers a balanced and natural signal before fine-tuning begins.
2. Reduce the gain
The gain control on an amplifier is often mistaken for a volume knob, but it’s not. Gain adjusts the intensity of the input signal coming from the head unit to match the amplifier’s output.
If the gain is set too high initially, there’s a risk of distortion and clipping, which can damage your speakers.
Turning the gain all the way down during the initial setup ensures that you’ll have room to gradually increase it later while still maintaining a clean, undistorted sound.
3. Set Bass Boost to 0
Many amplifiers have a bass boost feature that boosts the low-frequency output.
While this may sound appealing, setting it too high during initial setup can lead to an unbalanced sound and can even damage subwoofers if they are pushed beyond their limits.
Setting Bass Boost to 0 initially helps you tune the amplifier’s natural output first. Later, you can decide whether to add a little bass boost to improve the low-end sound.
4. Set the Filter (HPF/LPF) to Full Range
Most car amplifiers have a high-pass filter (HPF) and a low-pass filter (LPF) that control the frequencies sent to the speakers.
During initial setup, these filters should be set to full range so that all frequencies can pass through without interference.
This step makes it easier to identify how the amplifier is performing with the entire audio signal. Next, you can adjust filters for specific speakers or subwoofers to improve clarity and balance.
5. Check head unit settings (EQ flat, volume at about 75%)
The head unit or car stereo also affects the amplifier’s performance, so its settings should be checked before you begin tuning.
Set the equalizer (EQ) to flat so there is no boost or cut in any frequency range. This gives the amplifier a neutral signal to work with.
Next, set the head unit’s volume to about 75 percent of its maximum level. This volume level should be high enough to give the amplifier a strong signal, but not so high as to cause distortion.
By doing this, you will be able to fine-tune the amplifier accurately without causing unexpected changes in the stereo’s volume or tone.
All About Adjusting Gain
1. Explain what gain is and what it is not
The gain control on an amplifier is one of the most important settings, yet it is often misunderstood. Many people think of gain as a volume knob, but it is not designed to make your music louder.
Gain adjusts the power of the input signal coming from the head unit so that it matches the amplifier’s output capability.
If gain is set too low, the speakers will not receive enough power and the sound will be weak and flat. If gain is set too high, the amplifier will try to extract more power than it can, which can lead to distortion and clipping.
Clipping is a serious problem because it sends harsh, distorted signals to the speakers that can permanently damage them.
The goal of setting gain correctly is to allow the amplifier to deliver a strong, clean signal without pushing it beyond its limits.
2. Play the proper test tone
To set gain correctly, you first need a stable audio signal. Using a test tone is the most reliable way to achieve this.
A test tone is a sound with a single, constant frequency, such as 40Hz for subwoofers or 1kHz for full-range speakers.
These tones can be downloaded or purchased online and played through a car’s stereo system. Since this tone does not change in pitch or volume, it is easy to identify when distortion begins during the tuning process.
3. Slowly increase the amplifier gain until just before distortion begins
After the test tone has played, begin to slowly increase the amplifier’s gain control. You should increase it gradually while listening carefully for any changes in the sound.
At first, the volume will increase noticeably, but eventually you will begin to hear the sound crackling, shrill or blurry.
This is the point where distortion begins. It is important to stop as soon as you hear this change, as going beyond this level can damage your speakers and result in poor sound quality.
4. Back off a little to prevent clipping
When you reach the point where distortion begins, turn down the gain control a little.
This small reduction provides a safety margin and ensures that the amplifier can handle sudden fluctuations in the music without clipping.
Backing off a little also helps prevent your speakers from receiving a distorted signal at high volumes, which can cause long-term damage.
5. Tuning by ear vs. using a multimeter
There are two ways to determine gain: tuning by ear or using a multimeter. Tuning by ear is common and can work if you are experienced and listen carefully.
However, it can be subjective and is not always accurate. Using a digital multimeter is more accurate because it measures the amplifier’s output voltage to match the recommended power rating for your speakers.
This method eliminates the need for guesswork and gives you accurate results, specially if you know your speakers’ RMS (continuous power) rating.
Although it may take a little more time to set up, using a multimeter is the best way to ensure that your amplifier is delivering clean power without the risk of distortion or speaker damage.
How to Set the Filter (Crossover Settings)
1. The High-Pass Filter (HPF): Purpose and Recommended Settings for Speakers
The high-pass filter, commonly known as the HPF, is a setting on your amplifier that allows only high frequencies to reach your speakers and blocks very low bass frequencies for which the speakers are not designed.
Without an HPF, smaller speakers such as tweeters and mid-range speakers may be forced to play low frequency sounds, causing distortion and even permanent damage.
The purpose of the HPF is to protect these speakers and improve clarity by letting them focus only on the sounds they are made for, such as vocals, guitars and other high to mid-range instruments.
A good starting point for setting the HPF for standard full-range speakers is around 80Hz. If your speakers are particularly small, such as 4-inch or 5-inch speakers, you can raise the HPF to 100Hz or 120Hz to reduce the pressure on them.
Setting the HPF correctly will make your system sound clearer and more detailed while also preventing unnecessary wear on your speakers.
So, whenever you go to choose the crossover point then always begin with 80 Hz as a practical hand-off between the subwoofer and the mains and then you have to adjust upward for smaller door speakers that struggle below 100 to 120 Hz frequency: as it keeps the bass non-localizable and other than this it also protects the small drivers from cone over-excursion as well.[¹]
2. Low-pass filter (LPF): purpose and recommended settings for subwoofers
The low-pass filter, or LPF, works in the opposite way to the HPF. It allows only low bass frequencies to reach your subwoofer, while blocking higher sounds it isn’t designed for.
This is important because subwoofers are specifically built to handle deep bass notes and will sound muffled and unclear if they try to reproduce higher frequencies.
The LPF keeps the bass clean and powerful by allowing the subwoofer to focus only on the sounds it’s designed for.
The recommended starting point for the LPF is between 80Hz and 100Hz, which will allow the subwoofer to blend smoothly with the main speakers.
If you set the LPF too high, the subwoofer can start to overlap with the mid-range speaker and produce a thin or tinny sound. Setting it too low can leave a gap in the sound, making your music sound thin. The right LPF adjustment ensures strong, deep bass without interfering with the rest of the music.
3. Recommended starting point for HPF and LPF
Finding the right balance between the HPF and LPF is important for a clean, full-range sound.
A good universal starting point is to set the HPF for your main speakers to 80Hz and the LPF for your subwoofer to 80Hz or slightly higher, such as 90Hz or 100Hz.
This ensures that there is no frequency overlap that causes blurring or distortion and no frequency gaps that make the sound sound incomplete.
Next, you can make small adjustments based on the size of your speakers, the power of your subwoofer and your personal sound preferences.
A correctly done crossover filter will give you a balanced sound where every part of the music, from deep bass to loud vocals, is clear and distinct.
How to Set Bass Boost and Equalizer
1. When and how to use bass boost (at low volumes)
The bass boost control on a car amplifier is designed to increase the level of low-frequency sounds, giving bass more impact and depth.
Although this feature may sound appealing, it is important to use it with caution because excessive bass boost can distort sound and damage speakers or subwoofers.
When you turn up the bass boost too much, the amplifier is forced to send extra power to the low frequencies, which can cause clipping and strain the entire audio system.
Use bass boost sparingly and only after properly adjusting the gain and crossover settings. If your system already delivers strong and clear bass, you may not need bass boost.
If you do use it, start the control at zero and gradually increase it by very small amounts until you get the desired level of low-end sound without distortion.
This careful approach ensures that you enjoy deep bass without compromising clarity or damaging your audio components.
2. Set the EQ to flat first, then make small adjustments
The equalizer, or EQ, is another important tool for improving the sound of your car audio system. It lets you increase or decrease specific frequency ranges, such as bass, midrange and treble.
The most effective way to set the EQ is to set all controls to flat, which means there is no increase or decrease in any frequency range.
This gives you a clear and neutral starting point so you can hear how your system naturally sounds. After setting the EQ to flat, play different types of music and listen carefully.
If certain frequencies sound too loud or too low, make small adjustments in one or two steps. For example, you can increase the midrange slightly if the vocals sound muffled, or reduce the lower frequencies slightly if the bass is too heavy.
Avoid making large adjustments as they can unbalance the sound and cause distortion.
By first setting the EQ to flat and then making small changes, you create a balanced and natural sound that is comfortable to listen to at any volume.
How to Tune and Testing
1. Play different music genres to check balance
Once the main amplifier settings are established, it is important to test the system using different music genres.
This step helps you evaluate how your setup handles different types of sounds, from deep bass-heavy tracks to songs with strong vocals and bright treble.
Using only one type of music can give a false sense of balance because the system may perform well with that particular sound but fail with others.
Playing different genres, such as hip-hop, rock, classical and acoustic, ensures that your amplifier and speakers deliver consistent clarity and fullness across all frequency ranges.
Listening at medium volume first helps you hear the balance of bass, mids and highs clearly before testing at loud volumes.
2. Adjust the crossover and gain slightly if necessary
During fine-tuning, you may notice that some parts of the sound are too loud or too weak. This is the time to make very small adjustments to the crossover and gain controls.
For example, if the bass is overpowering the sound, you can lower the low-pass filter a little or adjust the high-pass filter to let more midrange come out of the speakers.
If the overall volume is too low even at high levels on the head unit, a slight increase in gain may be necessary, but only enough to improve the balance without distortion.
These small improvements help make your system sound natural and well-blended, with each speaker focusing on the frequency range it is best suited for.
3. Make sure there is no distortion or rattle
The final step in fine-tuning is to listen carefully for any signs of distortion, buzzing or rattling when playing music at normal and slightly higher volumes.
Distortion is usually a sign that the amplifier is being overdriven or that the gain is set too high and should be corrected immediately to protect your speakers.
Rattling is often a sign of a loose panel or something in the car that is vibrating from the bass and should be fixed so that it does not interfere with the sound quality.
Eliminating these problems ensures that your car’s audio system produces clean and powerful sound that remains enjoyable for a long time without damaging your equipment or causing discomfort while driving.
Read More:
How to Troubleshooting Common Problems
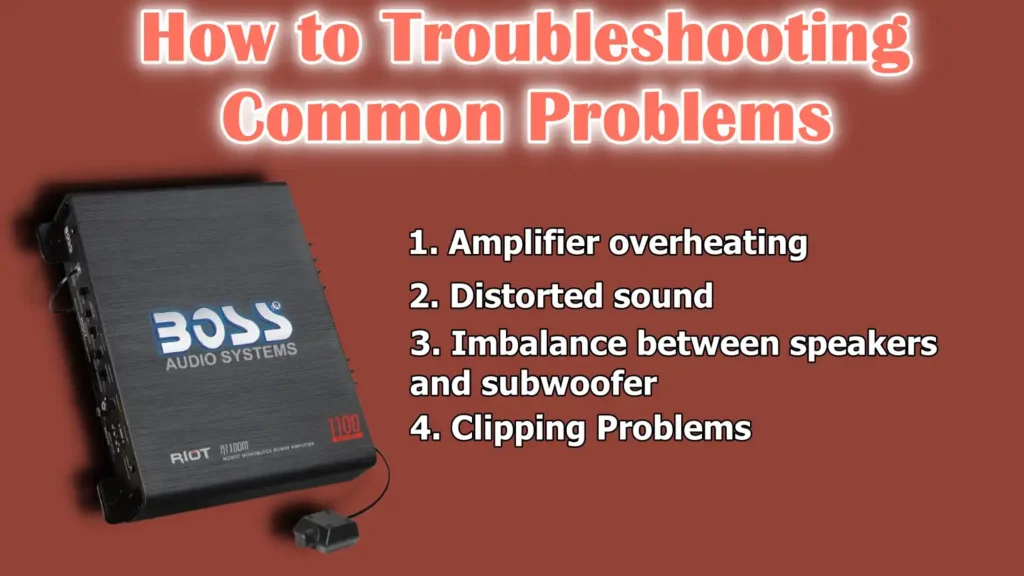
1. Amplifier overheating
Amplifier overheating is a common problem that can affect performance and even shut down your system.
This usually happens when the amplifier is forced to do more work than it needs to, either because the gain is set too high, the speaker load is too low, or there is not enough ventilation.
Amplifiers generate heat when they produce power and if they are installed in tight spaces with no air, heat can build up quickly.
To fix this, make sure the amplifier is installed in a place with proper ventilation and that it is not blocked by carpet or panels.
Also, make sure the speaker impedance matches the amplifier’s rating; using too low a load will cause the amplifier to overheat.
Reducing the gain and avoiding constant use at maximum volume can also help keep temperatures under control.
2. Distorted sound
Distorted sound is usually a sign that the amplifier or speaker is receiving a signal that is too loud or dirty. One of the most common causes is an incorrectly set gain, which can put the amplifier into a clipping situation.
Clipping occurs when the amplifier tries to deliver more power than it can, resulting in a shrill and harsh sound that can permanently damage the speakers.
To correct distortion, reduce the gain slightly and make sure the bass boost is not too high.
Check the equalizer on the head unit and make sure it is not over boosting any frequency ranges, as this can also cause distortion.
If distortion only occurs at loud volumes, this may be a sign that the speakers are unable to handle the power being sent to them and you may need to double-check the power ratings or use better-matched speakers.
3. Imbalance between speakers and subwoofer
Imbalance between speakers and subwoofer occurs when one part of the system is louder or more dominant than the other, making the sound seem unbalanced.
This is often caused by incorrect crossover settings or gain differences. If the subwoofer is too powerful and dominates the mid and high frequencies, reduce its gain slightly or increase the high-pass filter settings on the main speakers to produce stronger mid and high frequencies.
Conversely, if the subwoofer sounds weaker than the speakers, you may need to increase its gain slightly or adjust the low-pass filter to let in more low frequencies.
The goal is to achieve a seamless mix where the bass, mids and highs all complement each other, without one dominating the other.
4. Clipping Problems
Clipping is one of the most damaging problems for any car audio system. It occurs when the amplifier’s output signal exceeds its limits, causing disruptions in the top and bottom of the audio waveform.
This results in a loud but distorted sound that can quickly damage the speakers and subwoofer.
Clipping is almost always caused by setting the gain level too high and it can occur even when the music isn’t playing too loud.
To prevent clipping, set the gain carefully by using a test tone and moving it slightly past the distortion point.
Using a multimeter to match the amplifier’s output voltage to the RMS rating of your speakers is the most accurate way to eliminate clipping.
Avoid running the system at maximum volume for long periods of time, as this can also cause clipping, specially during bass-heavy music.
How to Maintain the Amplifier
1. Retune Periodically When You Replace a Part or Notice Distortion
Regular maintenance of your car amplifier settings is important to keep your audio system working at its best.
Retuning the amplifier is necessary whenever you replace or upgrade components such as speakers, subwoofers or head units.
Each new component may have different power requirements and frequency response, which means that previous settings may no longer be accurate.
Even if you don’t replace parts, it’s a good idea to recheck the settings from time to time, specially if you begin to notice distortion, imbalance or a decrease in clarity in the sound.
Vibrations from everyday driving can sometimes cause knobs or connections to move slightly, which can also cause performance issues.
By retuning your amplifier periodically, you ensure that the gain, crossover and equalizer settings remain optimized for clean and powerful sound, without putting stress on the speakers or amplifier.
2. Keep the amplifier clean and well ventilated
Another important part of maintaining your car amplifier is keeping it clean and making sure it has adequate ventilation. Dust and dirt can accumulate over time, specially if the amplifier is installed in the trunk or under a seat and this accumulation can block airflow or cause the amplifier to overheat.
Overheating can reduce performance and, in severe cases, cause permanent damage. To avoid this, periodically inspect the amplifier and gently clean off dust using a soft cloth or compressed air.
Also make sure the amplifier is not installed in a place that is tightly closed or surrounded by objects that block air flow.
If possible, leave a few inches of space around the amplifier for proper cooling. Good ventilation along with regular cleaning will help the amplifier maintain a stable temperature and increase its lifespan, allowing your car audio system to work reliably for years.
Conclusion – How to Tune a Car Amplifier
So, when you tune your car’s amplifier in the correct way then it actually important steps that build a clean and powerful car audio system.
A well-tuned amplifier ensures that your speakers and subwoofers get the required amount of power without any distortion or damage.
Proper tuning also helps balance all frequencies, making your music sound richer, clearer and more enjoyable no matter what type of music you listen to.
Each step of the process, from setting the gain and crossover filters to fine-tuning and testing, plays a vital role in achieving professional-level sound quality.
Many audio experts agree that poorly tuned amplifiers are one of the leading causes of speaker malfunction and distortion problems in car audio systems, which makes this process even more important.
Maintaining your amplifier is just as important as tuning it.
Retuning the system whenever you upgrade components or notice a change in sound quality keeps the audio balanced and prevents long-term damage. Keeping the amplifier clean and well-ventilated also helps it perform at its best and prevents overheating problems.
Your time and effort on proper setup and maintenance will provide you with a system that will not only sound great but will last for years.
Now, if you still have questions then you can comment down below, or you can share your thoughts as well.
Frequently Asked Questions
Q1. What are the best sound settings for an amplifier?
Answer: The best sound settings for an amplifier are those that produce a clean, balanced and distortion-free sound for your specific audio system. There is no one universal setting that works for everyone because every car audio system is different. The best way to get the right settings is to turn the gain all the way down, set the bass boost to zero and set the equalizer on your head unit to flat. Once you have a clear starting point, you can gradually increase the gain until you get a strong, clear sound without distortion. You should also set the high-pass filter (HPF) and low-pass filter (LPF) so that your speakers and subwoofer only play the frequencies they are designed for. For example, you can set the HPF to prevent too much bass from reaching the small speakers and the LPF to prevent too much bass from reaching the subwoofer. Making small adjustments one at a time while listening to different types of music will help you find the best settings for your system. This method ensures that your amplifier doesn’t operate too loud, your speakers are protected and the sound is clear at all volumes.
Q2. What frequency should I set my amplifier to?
Answer: What frequency you set your amplifier to depends on the size and type of speakers or subwoofers you are using. Most car audio experts recommend setting the high-pass filter (HPF) to around 80Hz to 100Hz for full-range speakers. This prevents deep bass sounds from reaching smaller speakers, which could damage them or cause the sound to become blurry. If your speakers are very small, such as 4-inch or 5-inch, you can set the HPF a little higher, around 100Hz to 120Hz, to better protect them. For subwoofers, the low-pass filter (LPF) is usually set between 80Hz and 100Hz. This ensures that only the deep bass frequencies reach the subwoofer and that it blends smoothly with the main speakers. Starting from these points and making small adjustments based on your system and personal sound preferences is the best way to find the right frequency settings for your amplifier. This approach will give you a balanced sound where the bass, mids and highs all sound clearly without overpowering each other.
References:
[1] Tips for Setting the Proper Crossover Frequency of a Subwoofer
https://www.svsound.com/blogs/subwoofer-setup-and-tuning/tips-for-setting-the-proper-crossover-frequency-for-a-subwoofer

Guys, I’m a car audio enthusiast and customization expert and I love clear sound and clean installation. Plus, I have spent years helping people build their dream audio setups. And whenever I’m working on cars, I probably listen to music and thinks about the next big upgrade.