 Skip to content
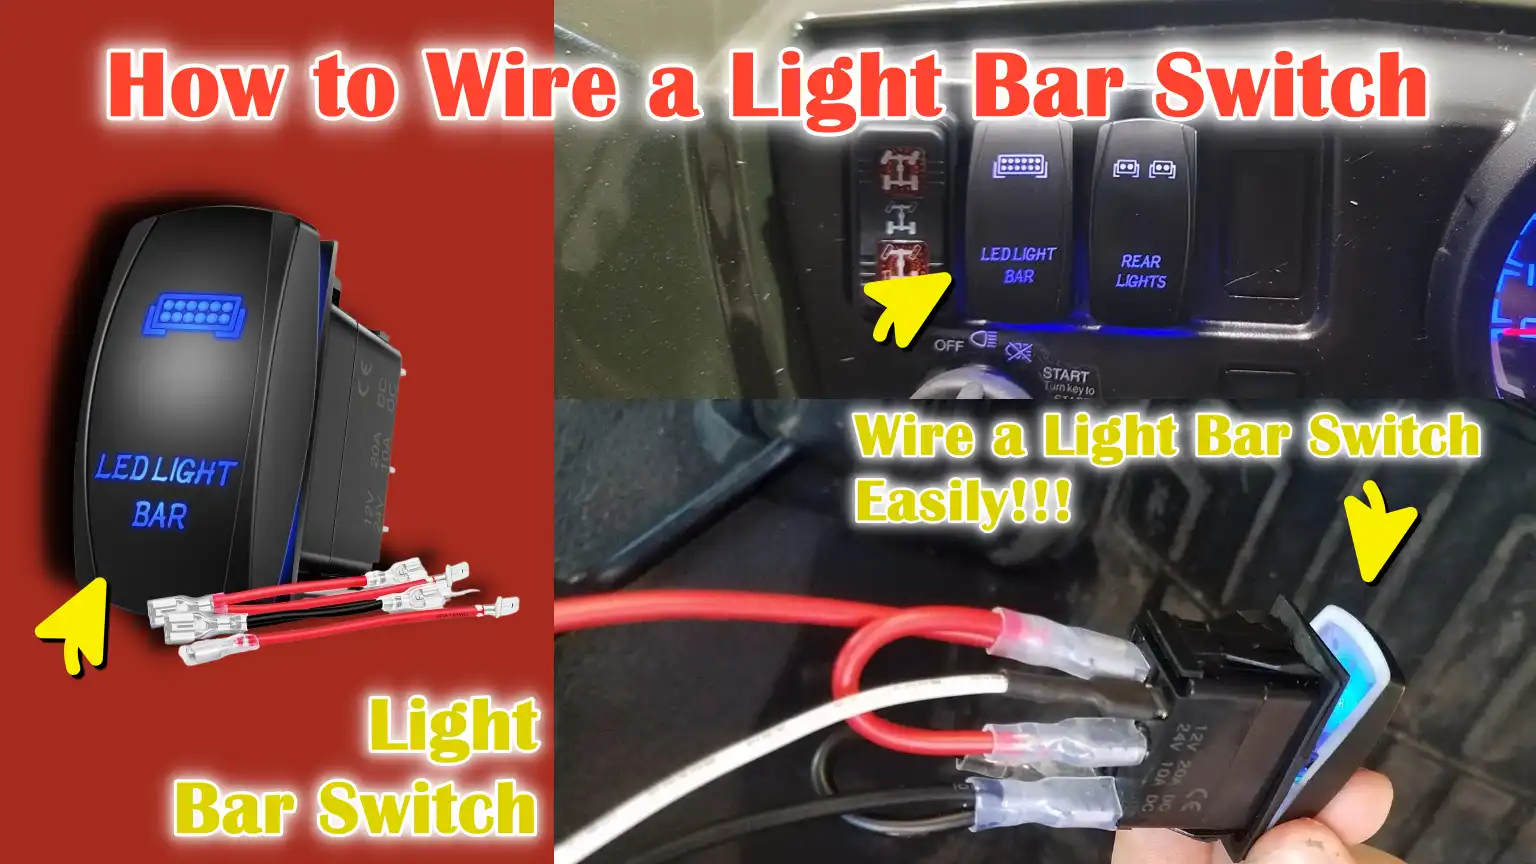
Written By: Don Dodi
Fact Checked By: Kristen Brown
Reviewed By: Diego Rosenberg
Yes, the light bar actually uses a significant amount of electrical power, so you need to wire them perfectly and with proper switch, relay and fuse so that it won’t overload the vehicle’s electrical system, even it can damage wiring or even it can cause the battery drain and there could be fire risks as well.
That’s why, it is really important to wire a light bar switch in the correct way so that you can ensure your vehicle’s auxiliary lighting works in the reliable, safe and efficient way.
Even, there’s automotive electrical standards that shows that using a switch literally allows you to control the power flow, also its relay protects the switch from high current and ensures really stable voltage delivery to the light bar.
So, this is the guide about How to Wire a Light Bar Switch so that you can improve the light performance and reduce the voltage drops to get the brighter and more consistent illumination.
Now, At First Understand About the Basics of Light Bar Switch Wiring
1. How a Light Bar Electrical System Works
A light bar electrical system works by drawing power directly from the vehicle’s battery and supplying power to the light bar as needed.
Because light bars are high-output lights, they require a steady and robust flow of electricity to function correctly.
Power flows through wires, passes through a fuse for protection and is controlled by a relay and a switch before reaching the light bar.
When the system is wired correctly, the electricity flows smoothly without overheating the wires or putting undue strain on the vehicle’s original electrical system.
This setup ensures the light bar receives sufficient power for full brightness while also protecting the vehicle from electrical damage.
2. The Role of the Switch in Controlling Power Flow
The switch plays a crucial role as it allows the driver to control when the light bar is turned on and off.
Instead of a constant flow of power, the switch acts like a gate that opens or closes the path of power.
When the switch is turned on, it sends a small signal that activates the relay, allowing the full power from the battery to reach the light bar.
When the switch is turned off, the flow of power is completely interrupted.
This controlled operation prevents unnecessary battery drain, reduces wear and tear on electrical components and improves overall safety, specially when powerful lights are installed.
3. The Difference Between Switched Power and Constant Power
Constant power means that electricity is available at all times, even when the vehicle is turned off.
If a light bar is connected directly to constant power without proper switching, it can accidentally remain on and drain the battery.
Switched power, on the other hand, only provides power when the switch or ignition is activated.
Most light bar installations utilize switched power to ensure the lights only operate when intentionally turned on.
Understanding this distinction helps prevent battery issues and ensures the light bar only operates when needed, making the system more reliable and user-friendly.
4. Overview of Voltage (12V) and Current Requirements
Most vehicles operate on a 12-volt electrical system and light bars are designed to operate within this voltage range.
Voltage represents electrical pressure, while current represents the amount of electricity flowing through the wires.
Light bars often require higher current because they produce intense light.
If the wiring, switches, or relays are not designed to handle the required current, it can lead to overheating, blown fuses, or electrical failure.
Using the correct components ensures the light bar receives a stable voltage and sufficient current, resulting in consistent brightness, a longer lifespan and safe operation.
Tools
| Tool or Material | Used To |
|---|---|
| Light Bar Switch – Toggle, Rocker, or Push Button | This allows you to safely turn the light bar on and off without touching the wiring. |
| Automotive Relay | This protects the switch from heavy electrical loads and provides full power to the light bar. |
| Inline Fuse | It prevents electrical damage by cutting off power when excessive current flows. |
| Fuse Holder | This keeps the fuse safe and makes it easy to replace it if it blows. |
| Wiring Harness | This makes installation easier and reduces wiring mistakes. |
| Correct Gauge Wires | This prevents the wires from heating up and ensures stable power flow. |
| Crimp Connectors | This results in strong and secure wire connections. |
| Electrical Terminals | This helps to firmly connect the wires to the switch and relay pins. |
| Heat Shrink Tubing | It covers the wire joints and protects them from moisture and damage. |
| Wire Stripper | This allows the ends of the wires to be kept clean, ensuring proper connections. |
| Crimping Tool | This ensures that the connectors remain firmly attached and do not come loose. |
| Multimeter | This helps to check the voltage, power flow and safety of the connections. |
| Screwdriver | It was used to install switches and tighten electrical terminals. |
What are the Common Types of Light Bar Switches Available
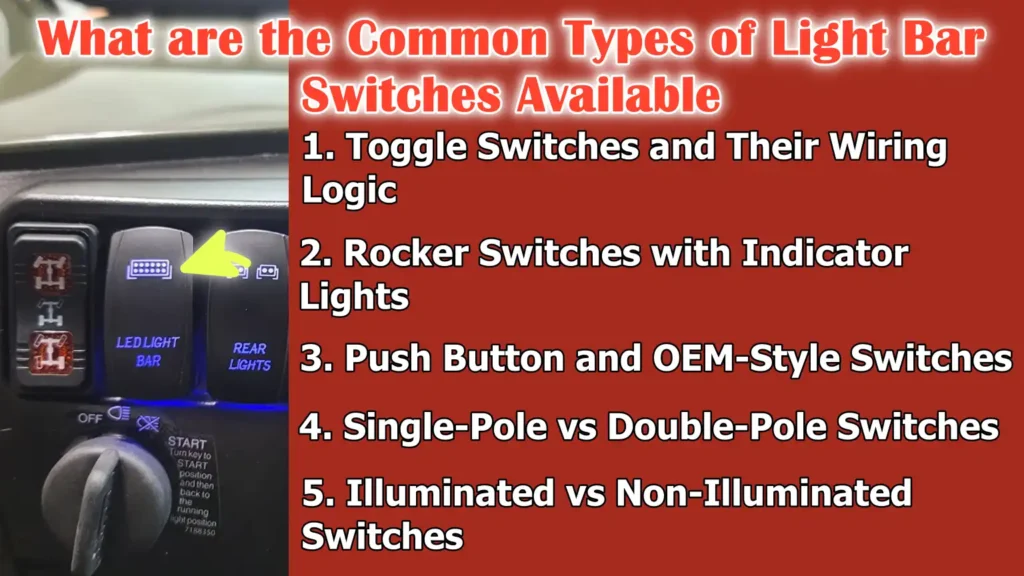
1. Toggle Switches and Their Wiring Logic
Toggle switches are one of the simplest and most commonly used switches for light bars.
They operate by flipping a small lever up or down to open or close an electrical circuit.
When the toggle switch is on, it allows power to flow to a relay, which then sends full battery power to the light bar.
When the switch is off, the circuit is broken and the light bar is completely turned off.
Toggle switches are easy to wire as they typically only have two or three terminals, making them reliable and less confusing for beginners.
Their simple design also makes them durable and suitable for demanding driving conditions.
2. Rocker Switches with Indicator Lights
Rocker switches turn the lights on when pressed on one side and off when pressed on the other.
Many rocker switches include a small indicator light that illuminates when the light bar is active.
This indicator light helps the driver know if the light bar is working, even in daylight.
Wiring a rocker switch usually involves an extra wire for the indicator light, which must be properly connected to power and ground.
When wired correctly, the indicator enhances safety by preventing accidentally leaving the light bar on.
3. Push Button and OEM-Style Switches
Push button and OEM-style switches are designed to look and feel like factory-installed controls.
These switches typically turn the light bar on with one press and off with another.
They often require more careful wiring as some models require a relay trigger signal rather than direct power.
OEM-style switches are popular because they blend seamlessly into the dashboard and provide a clean, professional look.
When installed correctly, they offer reliable control while maintaining the original aesthetics of the vehicle’s interior.
4. Single-Pole vs Double-Pole Switches
Single-pole switches control a single electrical circuit and are the most common type used for light bars.
They are designed to turn the light bar on or off using a single power path.
Double-pole switches, on the other hand, can control two separate circuits simultaneously.
This allows a single switch to manage both the power and an additional function, such as a built-in indicator light.
Understanding this difference helps users choose the correct switch type and avoid wiring mistakes that could lead to electrical problems.
5. Illuminated vs Non-Illuminated Switches
Illuminated switches have a small built-in light that illuminates when the switch is active or when the vehicle’s lights are on.
This feature makes the switch easier to locate at night and helps confirm that the light bar is receiving power.
Non-illuminated switches do not have an internal light and rely solely on the switch’s position to indicate whether the light is on or off.
While non-illuminated switches are simpler to wire, illuminated switches offer greater convenience and safety, specially when driving in the dark.
Understand How to Understand Wiring Diagrams
1. Reading a Basic Light Bar Wiring Diagram
A light bar wiring diagram is a simple visual guide that shows how electricity flows from the battery through various components like fuses, relays and switches to the light bar.
Each line in the diagram represents a wire and each symbol represents a component.
By following the diagram from the power source to the light bar, readers can clearly see where each wire should go.
Understanding this flow helps prevent incorrect connections, short circuits and damage to electrical parts.
A wiring diagram makes installation safer because it eliminates guesswork and shows the correct path for the electricity.
2. Identifying Power, Ground and Signal Wires
Power wires carry electricity from the battery to the light bar system.
These wires are responsible for supplying the necessary energy to power the lights.
Ground wires complete the electrical circuit by safely returning the electricity to the vehicle’s body or the negative terminal of the battery.
Signal wires are small control wires that carry low power from the switch to the relay, telling it when to activate.
Knowing the difference between these wires is crucial because mixing them up can damage the light bar or cause electrical problems.
3. Understanding Color-Coded Wires
Most wiring harnesses use different colored wires to make installation easier and safer.
Red wires typically carry power from the battery, black wires are usually used for grounding and other colors like blue or yellow are often used for switch or relay signals.
These color patterns help users quickly identify the purpose of each wire without needing advanced electrical knowledge.
Following color-coded wiring reduces errors and makes troubleshooting much easier if problems arise later.
4. The Importance of Relay Pin Numbers – 30, 85, 86, 87
Relay pin numbers indicate where each wire should connect and what function it performs.
Pin 30 is typically the main power input from the battery.
Pin 87 sends power from the relay to the light bar when the relay is activated.
Pins 85 and 86 control the relay by receiving signals from the switch and ground.
Understanding these pin numbers ensures the relay functions correctly and protects the switch from high current.
Proper relay wiring enhances safety, prevents overheating and provides a stable and reliable power supply to the light bar.
How to Make Sure the Proper Safety Before Wiring
1. Disconnecting the Vehicle Battery
Disconnecting the vehicle battery is the first and most crucial safety step before beginning any wiring work.
Removing the negative battery terminal stops the flow of electricity in the vehicle, preventing accidental sparks, electric shocks and damage to sensitive electronic components.
Modern vehicles have numerous electronic control systems and even a small short circuit can cause costly damage.
Disconnecting the battery makes the wiring process safer and more controlled, minimizing the risk of injury and electrical damage.
2. Preventing Short Circuits and Overloads
A short circuit occurs when electricity flows through an unintended path, often due to exposed wires or incorrect connections.
An overload happens when too much current flows through wires that are not designed to handle it.
Both problems can lead to melted wires, blown fuses and in severe cases, vehicle fires.
Using proper insulation, secure connectors and the correct wire gauge helps prevent these issues.
Careful wiring ensures that electricity flows only where it should and that the system remains stable and safe.
3. Choosing the Correct Fuse Rating
Fuses are essential safety devices that protect wiring and electrical components from excessive current.
Choosing the correct fuse rating ensures that the fuse blows before the wires overheat or the components are damaged.
A fuse that is too large may not provide adequate protection, while a fuse that is too small may blow frequently and interrupt normal operation.
Selecting the correct fuse based on the power requirements of the light bar strikes a balance between safety and reliable performance.
4. Avoiding Heat Sources and Moving Parts
Electrical wires should be routed away from hot engine parts and moving components to prevent damage over time.
Heat can degrade insulation, while moving parts can rub against or pinch wires, potentially causing short circuits or power loss.
Properly securing the wiring and keeping it away from exhaust components, fans and suspension parts ensures long-term reliability.
Correct wire routing also improves safety by reducing the likelihood of sudden electrical failures while driving.
5. Legal Considerations for On-Road Use
Many jurisdictions have laws regarding the use of auxiliary lighting on public roads.
Light bars are often intended for off-road or work use and may need to be covered or turned off when driving on highways.
Installing a proper switch allows the driver to control when the light bar is on, helping to ensure compliance with traffic regulations.
Understanding and adhering to local lighting laws helps avoid fines and ensures safe and responsible driving.
How to Wire a Light Bar Switch – Easy & Effective
1. Securely Mount the Light Bar
Securely mounting the light bar is the foundation of a safe and reliable installation.
The light bar must be firmly fixed to a sturdy surface to prevent movement or vibration during driving.
Loose mounting can lead to misalignment, strain on the wires and damage to the light housing over time.
Proper mounting also ensures the light beam remains correctly aimed, improving visibility and preventing glare for other drivers.
A stable mount reduces stress on the wiring connections and extends the overall lifespan of the light bar.
2. Install the Switch on the Dashboard or Panel
Installing the switch in a convenient and safe location allows for easy control of the light bar while driving.
The switch should be placed where it is easily accessible without obstruction and where it does not interfere with other vehicle controls.
Proper mounting prevents the switch from becoming loose and ensures consistent electrical contact.
A well-placed switch enhances safety as the driver can quickly turn the light bar on or off as needed.
3. Connect the Relay to the Battery
The relay acts as a protective bridge between the battery and the light bar.
Connecting the relay to the battery allows power to flow safely, preventing excessive current from passing through the switch.
This protects the switch wiring from overheating and damage.
The battery connection must be secure to provide a stable voltage and prevent power loss.
Using a relay is essential to handle the higher current required by most light bars.
4. Wire the Switch to the Relay
Wiring the switch to the relay allows the switch to control when the relay is activated.
This connection carries a low electrical signal rather than the full power, making the system safer and more efficient.
When the switch is turned on, it sends a signal to the relay, which then allows power from the battery to reach the light bar.
When the switch is turned off, the signal is interrupted and the light bar turns off.
This setup ensures reliable operation and protects sensitive wiring.
5. Grounding the Switch and Light Bar
Grounding completes the electrical circuit and is crucial for proper operation.
Poor grounding can cause lights to flicker, dim, or the system to fail entirely.
The switch and light bar should be grounded to clean, unpainted metal surfaces to ensure good electrical contact.
Proper grounding improves current flow and keeps the electrical system stable and safe.
6. Connecting the Light Bar Power Wire
Connecting the power wire from the relay to the light bar provides the necessary power to the lights.
This wire must be robust enough to handle the required current without overheating.
Secure connections prevent voltage loss and ensure consistent brightness.
A properly connected power wire allows the light bar to operate at full efficiency and reduces the risk of electrical problems.
7. Installing the Fuse and Making Final Connections
Installing a fuse protects the entire system from electrical overloads and short circuits.
The fuse should be installed near the battery so that it can quickly cut off power in case of a fault.
The final connections should be carefully checked to ensure they are tight and properly insulated.
Once everything is connected and tested, the system is ready for safe operation.
Proper final checks help prevent future malfunctions and guarantee long-term reliability.
How to Wire an Illuminated Light Bar Switch
1. Understanding the Extra Terminals for Illumination
Illuminated switches have extra terminals compared to regular switches.
These extra terminals are used to power a small built-in light inside the switch, which illuminates when the switch is on or when the vehicle’s lights are activated.
Understanding the purpose of each terminal is crucial, as incorrect wiring can lead to the indicator light malfunctioning or even damaging the switch.
Referring to the switch diagram or labels ensures that the correct terminals are used for power, ground and control signals.
2. Connecting to Dash Light or Ignition Power
The indicator light of an illuminated switch typically requires a low-power connection to either the dash lighting circuit or ignition power.
Connecting to dash light power allows the switch’s light to illuminate with the vehicle’s dashboard lights, making it visible at night without draining the battery.
Connecting to ignition power ensures the indicator only operates when the vehicle is running, preventing unnecessary battery drain.
Choosing the correct power source optimizes energy efficiency and provides clear visibility when the switch is active, enhancing safety.
3. Properly Grounding the Indicator Light
Like the main switch circuit, the indicator light also requires a proper ground connection to function correctly.
Grounding should be done to a clean, unpainted metal surface near the switch location to ensure a stable electrical flow.
Poor grounding can cause the indicator to flicker or not illuminate at all, making it difficult for the driver to determine if the light bar is on or off.
Proper grounding ensures both the main switch and the indicator operate reliably and safely.
4. Testing the Switch Illumination Functionality
After wiring, it’s essential to test the illuminated switch before completing the installation.
Start the vehicle and turn on the switch to ensure the indicator light illuminates correctly when the light bar receives power.
This testing confirms that all terminals are properly connected, the ground connection is secure and the power source is correct.
Verifying the switch illumination before final assembly helps prevent potential problems later and ensures that the lighting system is fully functional and safe to use.
How to Test Light Bar Switch Wiring
1. Safely Reconnecting the Battery
After all wiring connections are complete, the first step in testing is to reconnect the vehicle’s battery.
The negative terminal should be connected carefully to avoid sparking.
Safely reconnecting the battery ensures that power is flowing through the system and allows for proper testing of the switch, relay and light bar.
It is crucial to avoid touching bare wires or metal parts during reconnection to prevent accidental short circuits or electric shocks.
A secure battery connection lays the foundation for accurate testing and protects both the installer and the vehicle.
2. Checking Voltage with a Multimeter
Using a multimeter to check the voltage confirms that power is reaching the switch, relay and light bar correctly.
Measuring the voltage at various points allows the installer to identify weak connections, voltage drops, or improper grounding.
A fully charged battery should supply approximately 12 volts to the system and any significant drop could indicate loose wires, incorrect connections, or faulty components.
This step is essential as it verifies that the system can provide sufficient power to operate the light bar at full brightness without overloading the wiring.
3. Testing Switch Functionality
Once the voltage is confirmed, the switch itself should be tested.
Activating the switch should trigger the relay and the light bar should turn on and off smoothly.
Both illuminated and non-illuminated switches should respond immediately when pressed or toggled.
Testing the switch functionality ensures that the control circuit is working as expected and that the relay is properly handling the high current.
A properly functioning switch provides reliable control over the light bar, reduces the risk of electrical malfunctions and enhances overall safety.
4. Troubleshooting a Non-Responsive Light Bar
If the light bar does not turn on, systematic troubleshooting is necessary.
First, check the fuse to ensure it hasn’t blown.
Next, confirm that all wiring connections are secure, the terminals are properly seated and the ground connection is strong.
If voltage is present but the light bar remains off, the relay may be faulty or incorrectly wired.
Testing each component step by step allows the installer to quickly identify and resolve problems without damaging the electrical system.
Following a logical troubleshooting process saves time and ensures the light bar operates reliably.
Know, About the Common Wiring Mistakes to Avoid Them Effectively
Plus, there’s automotive electrical fundamentals that shows that the vehicle wiring systems that must handle expected the electrical loads without any kind of failure, so this also includes distributing current through dedicated wiring wiring harnesses, relays and switch circuits which should be designed to prevent overloads and voltage drops as well, so basically proper switch wiring for high-current accessories such as: light bars literally reduces stress on factory wiring and increases system reliability over the time.[¹]
1. Not Using a Relay
One of the most common mistakes when installing a light bar is not using a relay.
Some people think it’s easier to connect the light bar directly to the switch.
This can be dangerous because the switch is not designed to handle high current, which can cause it to overheat or fail.
Using a relay ensures that the high current required by the light bar comes directly from the battery, while the switch only carries a low signal.
Not using a relay can lead to switch failure, melted wires and even a fire hazard.
2. Using the Wrong Wire Gauge
Another common mistake is using wires that are too thin or undersized for the light bar’s current requirements.
Thin wires cannot safely handle high current and can overheat, causing the insulation to melt or even catch fire.
Choosing the correct wire gauge based on the light bar’s power rating ensures stable voltage, consistent brightness and safe operation.
Proper wire sizing also prevents voltage drop, ensuring the light bar doesn’t dim or flicker during use.
3. Poor Grounding Connections
Weak or improper ground connections can lead to serious electrical problems.
If the light bar or switch is not properly grounded to a clean, unpainted metal surface, electricity will not flow correctly, resulting in flickering, dimming, or complete failure of the lights.
Poor grounding also increases the risk of relay or switch failure due to irregular current flow.
A strong ground connection ensures stable power flow and improves the overall reliability of the system.
4. Incorrect Fuse Placement
Placing the fuse too far from the battery or omitting it entirely is a dangerous mistake.
The fuse protects the wiring and electrical components by interrupting the power in case of an overload or short circuit.
Incorrect placement will prevent it from properly protecting the system, potentially damaging the wires and devices.
Installing the fuse in the correct location near the battery provides maximum protection and reduces the risk of electrical fires.
5. Loose or Exposed Wire Connections
Loose or exposed wires can cause intermittent operation, sparking, or short circuits.
Exposed metal wires can come into contact with the vehicle’s body or other components, potentially blowing fuses, damaging relays, or causing electrical fires.
Securing all connections with the proper terminals, connectors and insulation prevents these hazards.
Tight and properly secured connections also extend the system’s lifespan and ensure that the light bar operates reliably in all driving conditions.
How to Solve Light Bar Switch Problems
1. Light Bar Not Turning On
If the light bar is not turning on, the first step is to check the power supply and switch connections.
A loose wire, disconnected battery, or faulty switch can prevent power from reaching the light bar.
It’s crucial to verify that the fuse is intact and the relay is properly connected and functioning.
Ensuring all connections are secure and carefully following the wiring diagram helps pinpoint the cause.
In a properly wired system, the light bar should illuminate immediately when the switch is activated.
2. Switch Light Not Working
Sometimes the indicator light on an illuminated switch doesn’t work, even though the light bar itself is functioning.
This is usually due to a lack of or incorrect connection to the dash lights or ignition power, or poor grounding for the indicator.
Checking the auxiliary terminals for the switch light and confirming they are connected to a low-power source ensures the indicator functions correctly.
Proper wiring and grounding guarantee that the switch light provides a clear indication of the light bar’s status.
3. Flickering or Intermittent Operation
Flickering or intermittent lights often indicate loose connections, poor grounding, or a voltage drop in the system.
Overloaded wires or a faulty relay can also cause unstable power flow.
Using a multimeter to check the voltage at different points can help diagnose the problem.
Tightening connectors, securing ground wires and ensuring the correct wire gauge stabilizes current flow and provides consistent light performance.
4. Blown Fuse Issues
A blown fuse can prevent the entire system from working and is typically caused by a short circuit, overload, or incorrect fuse rating.
Checking the fuse for damage and replacing it with a fuse of the correct rating restores functionality.
To prevent recurring failures, it’s crucial to identify the root cause of the blown fuse, such as exposed wires or excessive current.
The correct placement of the fuse near the battery ensures immediate protection against electrical problems.
5. Relay is clicking but the light bar is not turning on
If the relay is clicking but the light bar isn’t turning on, the problem is often due to a broken connection between the relay and the light bar, a damaged relay, or insufficient current reaching the light.
Checking the power wire from the relay to the light bar and confirming a solid ground connection can resolve the issue.
Ensuring the relay is rated for the light bar’s current and that all terminals are properly connected guarantees that the relay will power the light bar correctly.
Read More:
How to Maintain Them for Long-Term Reliability
1. Regular Wiring Inspection
Regular inspection of the wiring is crucial for the safe and efficient operation of your light bar system.
Over time, vibrations from driving, heat and general wear and tear can cause connections to loosen or insulation to degrade.
Checking the wires, connectors, fuses and switches helps detect early signs of damage or corrosion.
Early detection prevents minor issues from escalating into costly electrical failures and ensures the light bar remains reliable in all conditions.
2. Protecting Wiring from Moisture and Corrosion
Moisture and corrosion are common problems in vehicle electrical systems, specially for off-road or outdoor use.
Water, mud and road salt can damage exposed wires and connectors, leading to short circuits or intermittent malfunctions.
Using heat shrink tubing, waterproof connectors and protective conduit shields the wiring from water and chemicals.
Keeping the wiring dry and protected improves performance, reduces voltage drop and extends the lifespan of both the light bar and the switches.
3. Securing Loose Wires and Connectors
Loose wires and connectors can cause lights to flicker, blow fuses, or lead to complete system failure.
Wires should be securely fastened with cable ties or clamps to prevent them from moving or rubbing against sharp edges.
Ensuring that connectors are tight and properly crimped maintains good electrical contact.
Secure wiring reduces stress on the system, improves reliability during driving on rough roads and ensures consistent performance from the light bar over time.
4. Upgrading Switches for Heavy-Duty Use
Standard switches are often sufficient for occasional use, but for frequent use or high-current light bars, upgrading to a heavy-duty switch improves durability and safety.
Heavy-duty switches are designed to handle higher electrical loads without overheating or failing prematurely.
Using a robust switch protects the wiring, relays and lights from damage caused by frequent use, ensuring long-term reliability and reducing the need for frequent replacements.
Conclusion – How to Wire a Light Bar Switch
Now, you have understood about that installation of a light bar is really simple, but you need to wire them in the correct way so that you can easily prevent any electrical problems and ensure your lights to shine bright exactly when you needed.
Also, just use the correct tools, carefully following wiring diagrams, properly grounding components and regularly checking the system all contribute to a durable and trouble-free setup.
So, whether you’re using light bars for off-road adventures, work vehicles, or improved nighttime visibility, understanding the wiring process and avoiding common mistakes will save you time, money and potential safety risks.
Its really important to take the time to properly wire the system not only improves performance but also provides peace of mind, knowing that your auxiliary lighting will function safely and reliably whenever you need it.
So, that’s all from this guide and you can ask questions in the comment below.
Frequently Asked Questions
Q1. What is the best way to wire a light bar switch?
Answer: The best way to wire a light bar switch is to use a relay system. The switch should send a small signal to the relay and the relay should carry the high power from the battery to the light bar. This setup prevents the switch from overheating, ensures a consistent power supply to the light bar and protects your vehicle’s wiring from damage. Using the correct fuse near the battery also protects the system from overloads or short circuits. Carefully following a wiring diagram and properly grounding all components will ensure a safe and reliable installation.
Q2. Do I need a relay for a light bar switch?
Answer: Yes, a relay is highly recommended for any light bar installation. Light bars draw a significant amount of current and most switches cannot handle that much power directly. A relay allows the switch to carry only a small control signal, while the main current flows directly from the battery to the light bar. This prevents overheating, switch failure and blown fuses. Relays make the system safer and improve the performance of the light bar.
Q3. How do I know what wire gauge to use for a light bar?
Answer: The correct wire gauge depends on the power rating of your light bar. Higher-powered light bars require thicker wires to safely carry the current without overheating. Using wires that are too thin can lead to problems such as voltage drop, dim lighting, or even melting insulation. Most light bars in vehicles work well with 12-gauge or 10-gauge wires, but it’s always safest to check the manufacturer’s specifications to determine the correct wire size.
Q4. Why is proper grounding important for a light bar?
Answer: Proper grounding is crucial because it completes the electrical circuit and allows electricity to flow correctly. If the ground connection is weak, loose, or on a painted surface, the light bar may flicker, dim, or not work at all. Grounding should always be done to a clean, unpainted metal surface near the light bar or switch. A strong ground ensures stable power flow, reliable operation and protects other components from electrical problems.
Q5. Can I use a light bar on public roads?
Answer: The use of light bars on public roads is regulated in many areas. Light bars are typically designed for off-road or work use and may need to be covered or turned off when driving on highways. Always check your local traffic laws before using a light bar on public roads. Installing a switch allows you to easily control the lights and comply with regulations, ensuring both safety and legality.
Q6. Why is my light bar flickering or working intermittently?
Answer: Flickering or intermittent operation is usually caused by loose connections, poor grounding, or voltage drop. It can also occur if the wire is too thin for the light bar’s current, or if the relay is not properly installed. Checking all connections, tightening terminals, securing ground wires and verifying the wire gauge can resolve these issues. Using a multimeter to measure voltage at different points helps pinpoint the exact cause.
Q7. How do I wire an illuminated light bar switch?
Answer: An illuminated switch has extra terminals for the indicator light. The indicator typically connects to the dash lighting or ignition power, while the main switch terminals control the relay. Proper grounding of the indicator is crucial for its correct operation. When the switch is turned on, the indicator light should illuminate, showing that the light bar is receiving power. Testing the lights before final installation ensures everything is working safely.
Q8. What should I do if my relay clicks but the light bar doesn’t turn on?
Answer: If the relay clicks but the light bar remains off, it usually means there’s a problem with the connection between the relay and the light bar, a broken ground connection, or a faulty wire. First, check the power wire from the relay to the light bar and confirm that the ground connection is secure. If everything is properly connected, the relay itself may be defective. Replacing the relay or repairing the wiring will usually resolve the problem.
References:
[1] Introduction to Automotive Electrical and Electronic Systems
https://www.researchgate.net/publication/339795701_Introduction_to_Automotive_Electrical_and_Electronic_Systems

Guys, I’m a car audio enthusiast and customization expert and I love clear sound and clean installation. Plus, I have spent years helping people build their dream audio setups. And whenever I’m working on cars, I probably listen to music and thinks about the next big upgrade.
