Written By: Don Dodi
Fact Checked By: Kristen Brown
Reviewed By: Diego Rosenberg
If the fuel injector is slightly clogged then also it can waste the fuel, reduce power and increases the pollution as well.
Basically, fuel injectors is reponsible for delivering the exact amount of fuel an engine actually needs for having clean, efficient combustion.
Yes, now-a-days electronically controlled fuel systems are actually regulated by the engine control module, but fuel injectors spray a fine, pressurized mist of the fuel directly into the intake port of the combustion chamber in the really precise millisecond pulses.
So, this precision is really important, otherwise even a small imbalance in fuel delivery can literally lead to the engine misfires, rough idling, reduced fuel economy, increased in exhaust emissions and even long-term engine damage is the possibility as well.
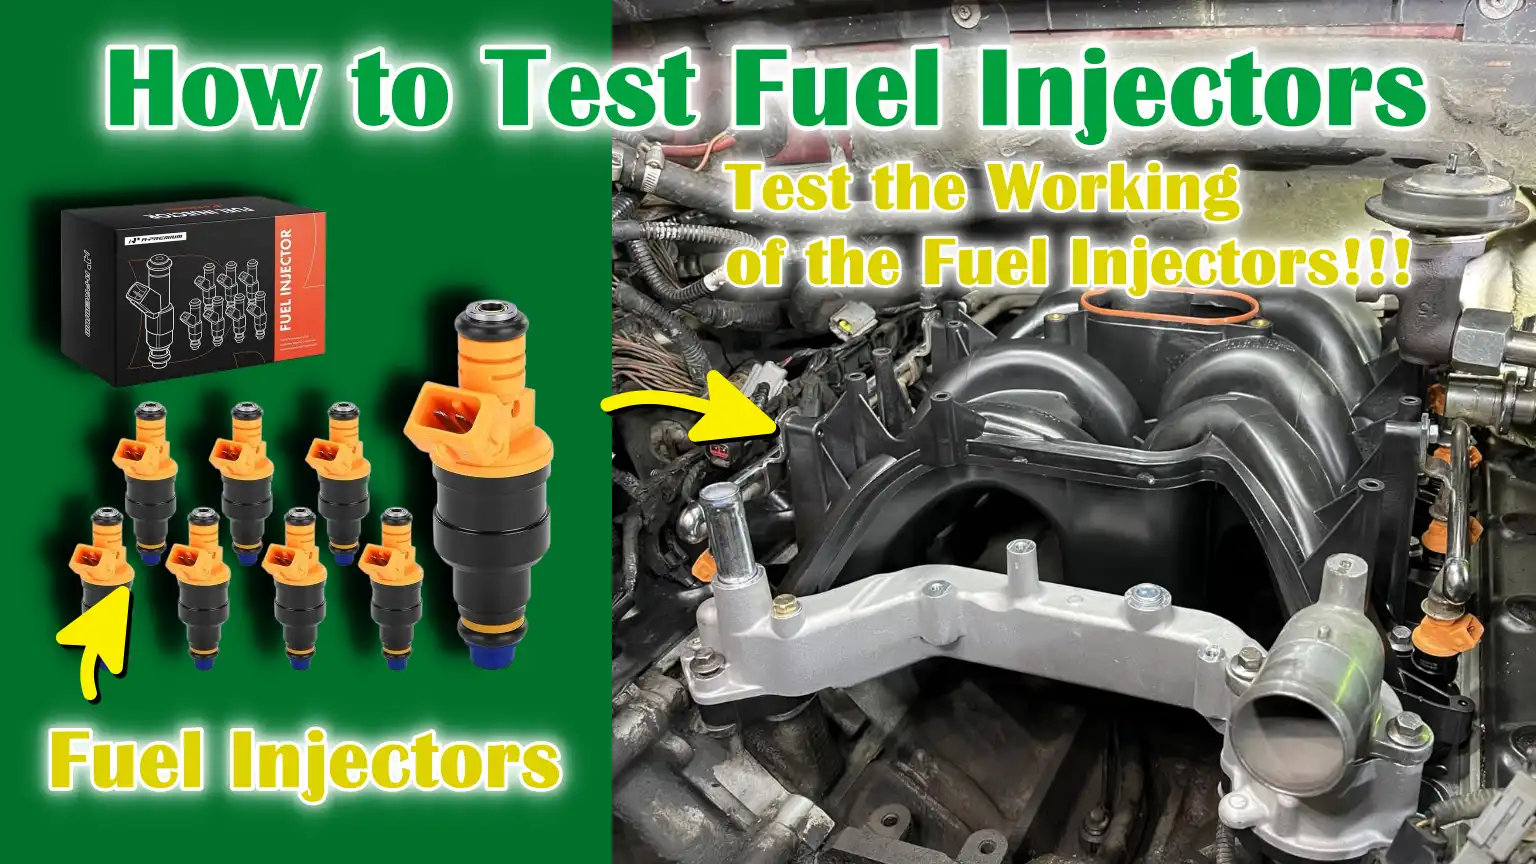
Now, this is the proper guide on How to Test Fuel Injectors, so that you can accurately and easily test it and know if it is safe or you need to do something to maintain it.
What are Fuel Injectors At The First Place?
Fuel injectors are small but vital engine parts that deliver fuel to the engine in a precise and controlled manner.
In modern vehicles, fuel injectors replace older carburetor systems and are designed to improve fuel efficiency, engine performance and exhaust emission control.
Instead of letting fuel flow freely, injectors spray fuel into a very fine mist so that it mixes properly with the air before burning.
This precise fuel delivery helps engines run smoothly, produce consistent power and meet stringent emission standards set by regulatory authorities like the U.S.Environmental Protection Agency.
Because engines operate thousands of times a minute, fuel injectors must operate quickly, consistently and with precise timing to prevent power loss, rough running, or excessive fuel consumption.
1. Definition and Basic Function
A fuel injector is an electronically controlled valve that sprays a very small, measured amount of fuel into the engine.
Its basic function is to deliver the right amount of fuel at the right time so that it mixes with the air and burns efficiently inside the combustion chamber.
When fuel and air are properly mixed, the engine produces sharp, controlled bursts that push the pistons and generate power.
If too much fuel is injected, the engine runs “rich,” wasting fuel and increasing harmful emissions.
If too little fuel is injected, the engine runs “lean,” which can lead to overheating, misfires and even engine damage.
The injector’s ability to precisely measure fuel helps maintain the ideal air-fuel ratio, which in gasoline engines is typically around 14.7 parts air to 1 part fuel under normal conditions.
Maintaining this balance is crucial for performance, fuel economy and long-term engine reliability.
2. How Electronic Fuel Injectors Work in Modern Engines
Electronic fuel injectors operate by receiving signals from the Engine Control Module, often called the ECM or ECU.
The ECM continuously monitors data from sensors such as the oxygen sensor, throttle position sensor, airflow sensor and engine temperature sensor.
Based on this information, it calculates precisely how much fuel each cylinder needs and sends an electrical signal to open the injector for a few milliseconds.
Inside the injector is a tiny electromagnetic coil called a solenoid.
When electricity passes through the solenoid, it creates a magnetic field that lifts a small valve, spraying pressurized fuel in a fine pattern.
When the electrical signal stops, the valve immediately closes.
This opening and closing can occur thousands of times per minute while driving.
Because of this fast and precise control, electronic fuel injection systems offer better cold starts, smoother acceleration, improved fuel economy and lower emissions than older mechanical systems.
3. Difference Between Port Fuel Injection and Direct Injection Systems
Port fuel injection, commonly known as PFI, sprays fuel into the intake port just before the intake valve.
In this system, the fuel mixes with air before entering the combustion chamber.
PFI systems typically operate at medium fuel pressure, often between 40 and 60 PSI and are known for smooth operation and low maintenance complexity.
Direct injection, commonly referred to as DI, sprays fuel directly into the combustion chamber at very high pressures, which can exceed 2,000 PSI in some engines.
Because fuel is injected directly into the cylinder, DI systems offer more precise fuel control, improved fuel efficiency, higher compression ratios and better power output.
However, DI systems can be more complex and can cause carbon deposits on the intake valves because fuel no longer flows over them.
Both systems aim to improve performance and reduce emissions, but they differ in injection location, pressure levels, efficiency characteristics and maintenance requirements.
4. Key Parts: Injector Nozzle, Solenoid, Pintle, Electrical Connector
A fuel injector is made up of several essential parts that work together to ensure precise fuel delivery.
The injector nozzle is the small end from which fuel is expelled in a fine spray pattern.
The spray pattern must be uniform in shape to ensure proper mixing with the air.
The solenoid is an electromagnetic coil that opens and closes an internal valve upon receiving an electrical signal from the ECM.
The pintle is a small needle-like valve inside the injector that moves up and down to control fuel flow.
When the solenoid is activated, it raises the pintle to pass fuel through the nozzle.
The electrical connector is the external plug that connects the injector to the vehicle’s wiring harness, allowing it to receive commands from the ECM.
Each of these components must function properly for correct fuel metering.
If any part becomes jammed, worn, or electrically damaged, the injector may leak, stick, or not spray properly, which can reduce engine performance and
Understand, Common Signs of a Bad Fuel Injector
For the engine to run properly, the fuel injector must deliver the correct amount of fuel at the correct time.
When an injector becomes clogged, leaks, becomes loose, jammed, or has an electrical problem, the air-fuel mixture within the engine becomes unbalanced.
This imbalance can cause noticeable performance issues, increased fuel consumption and increased exhaust smoke.
Modern vehicles are designed to monitor fuel delivery through sensors and onboard diagnostic systems that comply with U.S.Environmental Protection Agency and California Air Resources Board standards.
This monitoring can provide early warning signs of even minor injector problems.
Recognizing these signs early can help prevent engine damage, protect the catalytic converter and reduce repair costs.
1. Engine Misfires
Engine misfires occur when the cylinder doesn’t burn fuel properly.
A faulty fuel injector can cause this if it delivers too little fuel, too much fuel, or no fuel at all.
When the fuel-air mixture is incorrect, combustion becomes weak or incomplete.
Drivers may experience jerks, sudden power loss, or a popping sound from the engine.
Misfires can increase exhaust emissions and allow unburned fuel to enter the exhaust system, overheating and damaging the catalytic converter.
If misfires persist for a long time, they can also cause wear inside the engine.
Because modern engines fire thousands of times a minute, even minor injector malfunctions can cause frequent misfires.
2. Rough Idle or Shaking
A healthy engine should idle smoothly at a stable RPM when the vehicle is stopped.
If a fuel injector is clogged or not spraying fuel properly, one cylinder may produce less power than the others.
This imbalance can cause the engine to shake or vibrate, specially when idling at traffic lights or in a parking lot.
A rough idle may make it seem like the engine is struggling to keep running.
In some cases, RPM may fluctuate instead of remaining steady.
This is because the engine control system tries to adjust fuel delivery to compensate for the faulty injector, but cannot completely correct the imbalance.
3. Poor Acceleration or Hesitation
When you press the accelerator pedal, the fuel injector should respond immediately.
If the injector is dirty or slightly blocked, it may not deliver enough fuel during acceleration.
This can cause hesitation, slow response, or delayed power when driving on the highway or climbing hills.
In more severe cases, the vehicle may stumble or jerk during acceleration.
Proper fuel atomization is essential for good combustion and when the spray pattern is not uniform, the engine cannot deliver its full power.
This reduces overall performance and driving comfort.
4. High Fuel Consumption
Leaking or clogged injectors can cause excessive fuel to enter the engine.
When this happens, the engine runs “rich,” meaning it burns more fuel than necessary.
Drivers may notice that they are refueling more frequently than normal.
Even a slight fuel imbalance can reduce fuel efficiency by several percentage points over time.
Excess fuel can also create carbon deposits inside the engine and exhaust system.
Due to high fuel prices in many regions, increased fuel consumption due to injector problems can be costly if not addressed promptly.
5. Strong Fuel Smell
A strong gasoline smell around the vehicle can be a sign of a leak.
When fuel leaks from the outside or drips into the combustion chamber without burning properly, it produces a strong odor.
This odor may be more noticeable after starting the engine or when the vehicle is parked.
A fuel leak is not only unpleasant but also dangerous because gasoline is highly flammable.
If the odor is strong or persistent, it should be inspected immediately to prevent safety hazards and engine damage.
6. Check Engine Light – CEL
Modern vehicles are equipped with onboard diagnostic systems that monitor fuel delivery and combustion efficiency.
If a fuel injector electrically fails or repeatedly misfires, the system may trigger the Check Engine Light.
Diagnostic trouble codes related to the injector often include cylinder-specific misfire codes or injector circuit codes.
These systems are designed to detect emissions-related problems early to comply with environmental regulations.
When the check engine light comes on, scanning the vehicle with an OBD-II scanner can help determine if the fuel injectors are the culprit.
7. Failing an emissions test
A bad fuel injector can cause a vehicle to fail an emissions test because it affects fuel combustion.
Running rich can produce more carbon monoxide and hydrocarbons.
Running lean can increase nitrogen oxide emissions.
Proper combustion is essential to keeping exhaust gases within legal limits.
Because many countries enforce emission standards, including those set by agencies like the U.S. Environmental Protection Agency, injector problems can result in vehicle registration not being renewed in some areas.
Fixing injector problems not only improves performance but also helps comply with environmental regulations.
Tools
| Tool | Simple Details |
|---|---|
| OBD-II Scanner | This tool reads error codes stored in the car’s computer. It helps you diagnose injector-related problems, such as misfires or circuit faults. It saves time by guiding you in the right direction before physical testing. |
| Digital Multimeter | This device measures electrical resistance and voltage in the injector. It helps check if the injector coil is functioning properly. A normal reading means the injector is not electrically damaged. |
| Noid Light Set | This small light is located in the injector wiring connector. It lights up when the engine computer sends a signal to the injector. If it doesn’t, there may be a problem with the wiring or the computer. |
| Fuel Pressure Gauge | This tool measures fuel pressure inside the fuel rail. Correct pressure is essential for proper fuel spray. Low or unstable pressure can affect injector performance. |
| Mechanic’s Stethoscope | This listening tool helps you listen for clicking sounds from the injector. A steady clicking sound usually indicates that the injector is working. No sound or an uneven sound may indicate a problem. |
| Basic Hand Tools | Simple tools like ratchets, sockets and screwdrivers help remove engine covers or disassemble parts. These are needed to safely access the injector. Using the right size tools helps prevent damage. |
| Safety Equipment | Gloves protect your hands from fuel and sharp parts. Eye protection prevents fuel or dirt from getting into your eyes. Safety gear is essential because the fuel system is under pressure. |
How to Ensure Safety While Testing the Fuel Injector
Fuel injector testing involves working with gasoline, electrical circuits and pressurized fuel systems.
Gasoline is highly flammable and can easily catch fire if handled carelessly.
Modern fuel systems also operate under pressure, which means that if the fuel is not properly discharged, it can spray rapidly.
Furthermore, the vehicle’s battery and wiring carry electrical current that can cause sparks if shorted.
Because of these dangers, taking proper safety precautions is not only crucial, as it is also essential to prevent fire, injury and vehicle damage.
Taking a few extra minutes to prepare safely can protect both you and the engine.
1. Disconnect the Battery If Necessary
Before performing an electrical test or disconnecting a fuel injector, it’s often recommended to disconnect the vehicle’s battery, specially the negative terminal.
This step reduces the risk of accidental sparks, short circuits, or accidental injector activation.
The battery supplies power to the engine control module and fuel pump and accidental contact between wires and metal parts can cause sparks.
Even a small spark near fuel vapor can be dangerous.
Disconnecting the battery also protects sensitive electronic parts from voltage spikes when working on connectors and wiring.
2. Reduce Fuel System Pressure
Modern fuel injection systems keep fuel under pressure so the injectors can spray it in a fine mist.
In many vehicles, port fuel injection systems operate at around 40 to 60 PSI, while direct injection systems can exceed 2,000 PSI.
If you disconnect the fuel line or injector without reducing the pressure, fuel can suddenly spray and cause injury.
Safely releasing pressure, usually by following the manufacturer’s procedure or removing the fuel pump fuse and running the engine until it stops, prevents a sudden fuel discharge.
This step reduces the risk of fuel splashing into the eyes or onto hot engine parts.
3. Work in a Well-Ventilated Area
Fuel vapors are not only flammable but also harmful if inhaled in large quantities.
Inhaling gasoline fumes in a confined space can cause dizziness, headaches, or burns.
Working outside or in a garage with proper airflow helps prevent vapor buildup.
Good ventilation also reduces the risk of fumes accumulating near the ground, where a spark could ignite.
Fresh air circulation during testing keeps the workspace safer and more comfortable.
4. Avoid sparks or open flames
Gasoline vapor can ignite at very low temperatures and only a small spark is needed to ignite.
Therefore, it is important to avoid smoking, open flames, welding equipment, or grinding tools near the vehicle during testing.
Electrical sparks can also come from faulty wiring or metal tools touching battery terminals.
In some cases, static electricity can also cause small sparks.
Keeping the area away from ignition sources while working on the fuel system greatly reduces the risk of fire.
5. Use the right personal protective equipment
Wearing the right personal protective equipment, often referred to as PPE, is a simple yet effective way to prevent injuries.
Safety gloves protect your hands from contact with fuel, which can dry out the skin and cause burns.
Eye protection protects your eyes from fuel spray, dirt and debris that may fall while working under the hood.
In some cases, wearing protective clothing can prevent fuel from soaking into everyday clothing.
These small precautions make injector testing safer and help you focus on the correct diagnosis without unnecessary risk.
How to Test Fuel Injectors – Easy Methods
Fuel injector testing should always be performed in a clear and logical order.
Modern vehicles use advanced electronic control systems that continuously monitor fuel delivery, combustion quality and emission output.
Because of this, injector problems often show early warning signs in the vehicle’s computer system before mechanical failures become apparent.
A proper testing method begins with electronic diagnosis, then progresses to sound checks, electrical measurements and finally fuel pressure testing.
This structured approach eliminates guesswork, reduces unnecessary part replacements and helps identify whether the problem is electrical, mechanical, or fuel-related.
How to Test Fuel Injectors by Scaning for Trouble Codes
Scanning for trouble codes is the foundation of modern vehicle diagnosis.
Every vehicle with an OBD-II system stores fault information to detect abnormal engine behavior.
Fuel injectors are closely monitored because improper fuel delivery directly impacts emissions and engine performance.
By scanning the vehicle first, you can quickly determine which cylinder or circuit may be affected.
1. Use an OBD-II Scanner
An OBD-II scanner connects to the diagnostic port, usually located under the dashboard.
Once connected, it communicates with the engine control module and retrieves stored diagnostic trouble codes.
This tool allows you to see if the computer has detected any faults, misfires, lean or rich fuel conditions, or other related problems in the injector circuit.
Scanning first saves time by focusing your physical testing on the correct cylinder instead of randomly checking all injectors.
2. Common Injector-Related Codes – P0200–P0208, P0300–P0308
Injector circuit codes typically range from P0200 to P0208.
A P0200 code indicates a general injector circuit fault, while codes like P0201, P0202, etc., point to a specific cylinder.
Misfire codes range from P0300 to P0308. A P0300 code indicates random or multiple cylinder misfires, while P0301 to P0308 identify misfires in a specific cylinder.
These codes help identify whether the problem is electrical, fuel-related, or combustion-related.
However, it’s important to remember that a misfire code doesn’t always mean a bad injector, as problems with the spark plugs, ignition coil, or compression can also cause similar codes.
3. Understanding Diagnostic Codes
Diagnostic codes should always be interpreted carefully.
A code tells you where the computer detected a problem, but it doesn’t always indicate which part is faulty.
For example, an injector circuit code could be caused by a bad wire, a loose connector, a blown fuse, or a faulty engine control module.
Freeze frame data stored with the code shows engine conditions such as speed, temperature and load at the time of the fault.
Viewing this information can help determine whether the problem occurred at idle, during acceleration, or under heavy load.
Clearing the code and taking a short test drive can also confirm whether the problem has returned, helping to verify the diagnosis.
How to Test Fuel Injectors by Listen to the Injector – Click Test
Listening to the injector is one of the easiest mechanical checks.
Each fuel injector has a solenoid that opens and closes rapidly when the engine is running.
This movement produces a clicking sound that can be heard with the right tools.
1. Using a Mechanic’s Stethoscope
When the engine is idling, a mechanic’s stethoscope is placed directly in front of the injector body.
This tool amplifies the internal sounds so you can clearly hear the clicking action.
If a stethoscope is not available, a long screwdriver placed carefully in front of the injector body and near your ear can also help detect the sound, though this must be done carefully.
2. What a Healthy Injector Sounds Like
A healthy injector produces a consistent, rhythmic clicking sound that matches the engine speed.
The clicks should be uniform and evenly spaced.
This indicates that the solenoid is receiving electrical signals and that the internal valve is functioning properly.
3. Identifying a Silent or Irregular Injector
If one injector makes no sound, makes a very faint clicking sound, or makes an irregular sound compared to the others, it may be faulty.
A silent injector may have an electrical fault, while an irregular sound may mean the injector is stuck or clogged.
Comparing the sounds of all the injectors can help identify which one is different.
How to Test Fuel Injectors by Electrical Resistance – Multimeter Test
Electrical testing involves checking whether the injector’s inner coil is within the correct resistance range.
Because injectors operate by electromagnetic action, correct resistance is crucial for proper operation.
1. Turn off the engine and disconnect the injector
Before performing this test, the engine should be turned off and the injector’s electrical connector disconnected.
This prevents false readings and ensures safety during testing.
2. Set the multimeter to ohms
The digital multimeter should be set to measure resistance in ohms.
The test probe is placed on the injector’s electrical terminal to measure the resistance of the inner coil.
3. Normal Resistance Range – Varies with Each Vehicle
Most port fuel injectors measure between 12 and 17 ohms, although this may vary by manufacturer.
Specifications for direct injection injectors may vary.
If available, it’s important to compare readings with manufacturer data.
4. Comparing Readings Across Injectors
Even if exact specifications aren’t available, it’s helpful to compare readings across injectors.
If one injector shows a significantly higher or lower reading than the others, it may have an internal electrical fault.
Identical readings across all injectors usually indicate a bad electrical coil.
How to Test Fuel Injectors by Noid Light
The noid light test checks whether the injector is receiving a pulse signal from the engine control module.
1. What the noid light does
The noid light is a small test light that plugs into the injector wiring harness instead of the injector itself.
It monitors whether the computer is sending electrical pulses.
2. Checking the injector pulse signal
When the noid light is connected, the engine cranks or starts.
If the computer is sending signals, the light will flash repeatedly.
This flashing indicates that the wiring and control module are functioning properly.
3. Understanding Flashing vs No Flashing
If the light flashes normally, the injector is receiving a command signal.
If it doesn’t flash, there could be a wiring problem, a blown fuse, a faulty relay, or a problem with the engine control module.
This test helps differentiate electrical control problems from mechanical injector problems.
How to Test Fuel Injectors by Fuel Pressure
Fuel pressure testing checks whether the injectors are receiving the correct fuel supply and whether they are leaking or clogged.
1. Connecting the Fuel Pressure Gauge
A fuel pressure gauge is connected to the fuel rail test port.
The engine is then started to measure system pressure.
2. Checking Pressure Drop When Injectors Fire
When injectors operate, they create a slight change in pressure in the system.
Observing pressure behavior during operation can help determine if the injectors are flowing properly.
3. Identifying Clogged or Leaking Injectors
If fuel pressure drops rapidly after the engine is turned off, it could be a sign of a leaking injector.
If the pressure remains stable but there are signs of a misfire in one cylinder, the problem may be clogging.
Correct pressure levels are essential for a proper spray pattern and combustion efficiency.
How to Test Fuel Injectors by Injector Balance – Advanced Method
The injector balance test is a more advanced method used to compare fuel flow between cylinders.
1. Purpose of Balance Testing
This test measures how much fuel pressure drops when each injector is activated individually.
This helps determine if all injectors are delivering an equal amount of fuel.
2. Measuring Fuel Pressure Drop at Each Injector
With a pressure gauge installed, each injector is triggered individually using a scan tool or testing device.
The pressure drop for each is recorded.
3. Comparing Results Between Cylinders
All cylinders should show a similar pressure drop.
If one injector has too little pressure drop, it may be clogged.
If one injector has too much pressure drop, it may be leaking.
This test provides a clear comparison and is often used in professional workshops for accurate diagnosis.
How to Test Fuel Injectors Without Removing Them
Testing fuel injectors without removing them from the engine is often the first and most practical method.
In most vehicles, the injectors are mounted on the fuel rail and are tightly sealed to prevent fuel leaks.
Removing them is time-consuming and requires seal replacement.
Fortunately, many injector problems can be detected while they are still in place.
Modern engines are designed with onboard diagnostic systems that monitor fuel delivery and combustion efficiency in real time.
By using the right tools and following safe procedures, you can diagnose electrical faults, flow problems and signal issues without disassembling major engine components.
This method saves time, reduces labor costs and minimizes the risk of damaging seals or connectors during removal.
1. Quick Diagnostic Checks
Quick diagnostic checks focus on identifying obvious symptoms before conducting in-depth testing.
The first step is to scan the vehicle with an OBD-II scanner to check for injector circuit codes or cylinder misfire codes.
These codes help identify which injector is causing the problem.
It’s also important to pay attention to engine performance.
A rough idle, hesitation during acceleration, high fuel consumption, or a flashing check engine light can all indicate an injector imbalance.
You can also check the injector connectors for loose wiring, corrosion, or broken clips.
Checking the fuel rail for leaks or a fuel smell can reveal external leaks.
These quick checks often point directly to the problem without eliminating the problem.
2. Electrical and Sound Testing Methods
Electrical and sound testing are effective, non-removable methods that provide strong diagnostic evidence.
Using a mechanic’s stethoscope, you can listen to each injector while the engine is running.
A steady, rhythmic clicking sound usually means the injector solenoid is opening and closing properly.
If one injector makes a slower or more irregular noise than the others, it may be stuck or electrically damaged.
Electrical testing with a digital multimeter allows you to measure the injector’s resistance by disconnecting only the electrical connector, not the injector itself.
Significantly different resistance readings from other injectors may indicate internal coil damage.
To confirm that the engine control module is sending the correct pulse signals, a solenoid light can also be connected to the injector wiring harness.
These methods together help confirm that the injector is receiving power and is mechanically functioning.
3. Advantages and Disadvantages of Testing Without Removal
Testing the injector without removing it has several advantages.
It is faster, less expensive and reduces the risk of fuel leaks caused by seal failure.
It also allows diagnosis under real engine operating conditions, which can reveal problems that only occur during idle or acceleration.
However, it has some limitations.
Testing without removal cannot directly determine injector spray patterns, internal clogging levels, or the correct amount of fuel flow.
An injector may click and exhibit proper resistance, but its nozzle may still be slightly blocked, affecting fuel atomization.
In such cases, advanced testing, such as injector balance testing or removal for bench testing, may be necessary.
Understanding the advantages and disadvantages of non-removal testing helps you determine when further inspection is necessary.
How to Test Fuel Injectors After Removing Them
Removing fuel injectors from the engine allows for a more thorough inspection than installing them.
Once removed, you can closely examine the nozzles, internal components and sealing areas without damaging the engine.
This type of testing is specially useful when non-removal methods reveal a problem but cannot clearly confirm clogging, leaks, or uneven spray.
Fuel injectors operate at high pressure and must produce a very fine and uniform fuel mist to burn properly.
Even minor dirt or internal damage can disrupt this spray pattern and reduce engine performance.
Testing after removal helps confirm the mechanical condition of the injectors, the quality of the internal flow and their overall health before cleaning or replacing them.
1. Check for Clogs or Carbon Buildup
The first step after removal is to carefully inspect them.
Over time, fuel injectors can become clogged with carbon deposits, varnish, or dirt, specially if poor-quality fuel is used or the vehicle is frequently driven in stop-and-go traffic.
The injector nozzle should appear clean and free of heavy black carbon deposits.
Any visible blockage in the small spray holes can reduce fuel flow or distort the spray pattern.
You should also check the O-rings and seals for cracks, flattening, or hardening, as worn seals can cause fuel leaks or air leaks if replaced.
Wet fuel may be visible on a leaking injector tip, indicating a defect in the internal seal.
Even small, invisible changes can significantly impact engine efficiency.
2. Bench Testing Methods
Bench testing allows you to test the injectors outside the engine using specialized equipment.
A bench tester delivers controlled electrical pulses to the injectors, along with a choice of pressurized cleaning fluid or fuel.
This setup mimics real engine conditions, but in a controlled environment.
During this test, you can measure how much fluid flows through an injector over a period of time.
Comparing flow rates between multiple injectors helps detect imbalances.
If an injector flows too little, it may be clogged.
If it flows too much or drips without activating, it may be leaking internally.
Bench testing provides accurate data on injector performance and is commonly used in professional workshops.
3. Spray Pattern Testing
Spray pattern testing is one of the most important checks after removal.
A healthy injector should produce a fine, cone-shaped mist that spreads evenly.
The droplets should be very small and uniform.
If the spray appears uniform, heavy, or streaky instead of misty, combustion is likely poor.
Poor atomization can lead to incomplete fuel combustion, increased emissions, poor engine performance and reduced fuel economy.
Observing the spray pattern during testing can help determine if internal cleaning is needed or if the injector has irreparable mechanical damage.
4. Cleaning Options
If testing reveals clogging but the injector is not electrically damaged, cleaning can restore proper operation.
There are two common cleaning methods: ultrasonic cleaning and pressurized solvent cleaning.
Ultrasonic cleaning uses sound waves in the cleaning solution to break up carbon deposits inside the injector.
Pressurized cleaning uses a special cleaning fluid to remove varnish and dirt.
After cleaning, the injector should be retested to ensure proper flow and spray pattern.
If cleaning doesn’t achieve balanced flow or the correct spray shape, replacement is usually the safest course of action.
Proper cleaning and retesting can extend injector life and improve fuel efficiency without the expense of new parts.
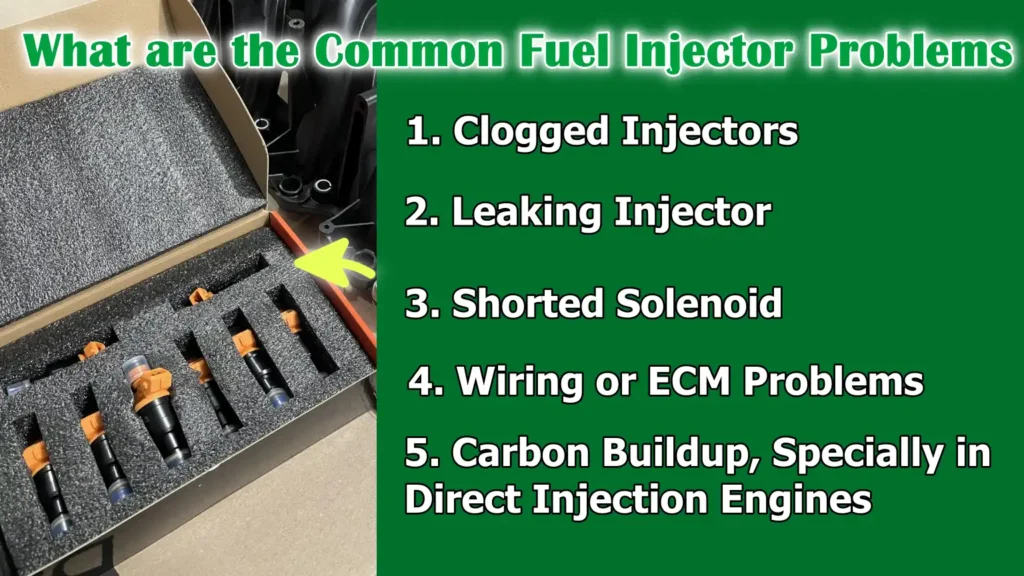
What are the Common Fuel Injector Problems
Fuel injectors are designed to function perfectly thousands of times every minute, but over time, they can deteriorate due to heat, fuel contamination, electrical wear and carbon deposits.
Because injectors directly control how fuel is injected into the engine, even minor malfunctions can impact performance, fuel economy, emissions and the engine’s long-term health.
Modern engines rely on a proper air-fuel balance to function properly.
When an injector fails, the engine may deliver too much or too little fuel, which can damage internal components and increase harmful exhaust gases.
Understanding the most common injector problems helps drivers recognize symptoms early and avoid costly repairs.
1. Clogged Injectors
Clogged fuel injectors are one of the most common fuel injector problems.
Injectors have very small spray holes designed to create a fine mist of fuel.
Over time, small particles, fuel varnish, or deposits from poor-quality gasoline can partially block these holes.
If clogged, the injector may deliver less fuel than necessary.
This can lead to a lean fuel mixture, causing poor idling, hesitation during acceleration, engine misfires and reduced power.
In severe cases, the engine may struggle to start.
Even minor blockages can reduce fuel efficiency and increase engine temperature because lean mixtures burn hotter.
Regular fuel system cleaning and using good-quality fuel can help reduce this risk.
2. Leaking Injector
A leaking injector allows fuel to drip into the engine even when it should be closed.
This can happen if the internal valve isn’t properly sealed or if there’s a crack in the injector body.
When fuel leaks into the cylinder, it creates a rich mixture, meaning there’s too much fuel and too little air.
This can cause black smoke in the exhaust, a strong fuel odor, poor fuel economy and poor engine performance.
Fuel leaks can also wash away the thin oil layer that protects the cylinder walls, increasing engine wear over time.
In severe cases, a leaking injector can cause fuel dilution in the engine oil, which reduces lubrication quality and can damage internal parts.
3. Shorted Solenoid
Every electronic fuel injector has a small electromagnetic coil inside called a solenoid.
This coil receives electrical signals from the engine control module and opens the injector valve.
If the solenoid becomes electrically shorted or internally damaged, the injector may stop working completely or may not function properly.
A shorted solenoid often causes an injector circuit fault code and can prevent the engine from firing that cylinder.
Electrical failures can be caused by heat stress, manufacturing defects, or long-term wear.
When the solenoid fails, the injector usually needs to be replaced because the internal electrical components are usually beyond repair.
4. Wiring or ECM Problems
Not all injector problems are caused by the injector itself.
Sometimes the problem lies in the wiring harness, connectors, or engine control module.
Damaged wires, loose connectors, corrosion, or blown fuses can interfere with the electrical signals controlling injector operation.
If the injector does not receive the correct voltage or ground signal, it may fail to open properly and spray fuel.
Engine control module malfunctions are less common, but they can occur, specially if there’s water damage, voltage spikes, or internal circuit failure.
Diagnosing wiring or control problems requires electrical testing with a multimeter or diagnostic scanner to confirm signal delivery.
5. Carbon Buildup, Specially in Direct Injection Engines
Carbon buildup is particularly common in direct injection engines.
In these systems, fuel is sprayed directly into the combustion chamber instead of through the intake port.
Because fuel no longer flows through the intake valve, oil vapor from the crankcase ventilation system can stick to the valve and form carbon deposits.
Over time, these deposits can impact airflow and combustion efficiency.
Direct injection injectors also operate at very high pressures, which can lead to increased deposits on the nozzle tips.
Carbon deposits can cause rough idle, power loss, misfires and increased emissions.
Regular maintenance and the right fuel quality can help reduce carbon buildup and extend injector life.
Learn, When to Clean and Replace Fuel Injectors
Not only this, there’s a systematic review in Energies that shows that how fuel mass flow rate is literally the foundational to getting the engine efficiency and emissions control, as it also shows that maintaining the precise injection control through the accurate testing actually helps the engine to optimize air-fuel mixtures for better performance and having cleaner exhaust emission as well.[¹]
Fuel injectors are vital components that must deliver the correct amount of fuel to the engine for proper operation.
Over time, they can become dirty, worn, or electrically damaged.
Whether to clean or replace them depends on the type of problem, the condition of the injector and testing results.
When the problem is caused by deposits or minor blockages, cleaning can often restore performance.
Electrical failure, internal mechanical damage, or serious leaks may require replacement.
Making the right decision can help save money and prevent further engine damage.
1. Signs of Need for Cleaning
Cleaning is usually effective when the injector is slightly clogged but electrically functioning.
Common symptoms include a rough idle, slight hesitation during acceleration, mild misfiring and a slight drop in fuel economy.
If the resistance readings are within the normal range and the injector still clicks properly during testing, the internal solenoid is likely functioning properly.
In these cases, carbon deposits or fuel varnish may be obstructing the flow.
Professional cleaning methods, such as ultrasonic cleaning, can remove deposits from the nozzle and internal passages.
After cleaning, the spray pattern and flow balance should be retested to confirm improvement.
Cleaning is often successful if the spray from the injector appears inconsistent but there is no electrical fault.
2. When Replacement is Necessary
If the injector has an electrical fault, such as a shorted or open solenoid coil, replacement is necessary.
If the multimeter shows a resistance much higher than the manufacturer’s specifications or if the injector solenoid light does not work during testing, the internal electronics may be damaged.
Mechanical failure is another reason for replacement.
For example, if the injector leaks fuel even when it’s off, it can cause a rich mixture, black smoke and engine damage.
A broken injector body, broken connectors, or repeated clogging that doesn’t resolve after cleaning also require replacement.
In direct injection engines, severe wear and tear caused by excessive fuel pressure may also justify installing new injectors rather than attempting a repair.
Read More:
3. DIY vs Professional Service Cost Comparison
The price difference between cleaning and replacement can be significant.
Basic fuel system cleaner poured into the fuel tank is inexpensive, but it can only help with minor deposits.
Professional off-car ultrasonic cleaning with testing equipment is more expensive, but it provides accurate flow measurement and spray pattern verification.
Fuel injector replacement can be slightly more expensive depending on the vehicle and direct injection injectors are generally more expensive than port injection types.
If professional installation is required, labor charges increase the total cost.
Do-it-yourself cleaning or replacement can reduce labor costs, but the right tools and knowledge are required to avoid fuel leaks or installation errors.
Choosing the right option based on accurate testing results can save unnecessary costs and ensure long-term engine reliability.
Difference Between Professional Testing vs DIY Testing
Fuel injector problems can be diagnosed at home or by a trained technician, but the depth and accuracy of testing can vary greatly.
Modern fuel systems are complex and operate under precise electronic control.
While vehicle owners can perform many checks with basic tools, professional workshops use advanced diagnostic machines that provide detailed measurements of fuel flow, spray patterns, pressure balance and electronic signals.
Choosing between professional testing and DIY testing depends on the severity of symptoms, available tools, technical knowledge and budget.
Understanding the advantages of each method helps you make a safe and cost-effective decision.
1. Benefits of Professional Diagnostics
Professional workshops use specialized equipment that goes beyond simple code scanning.
Advanced diagnostic scan tools can read live engine data, monitor fuel trim levels and individually trigger the injectors to test response.
Many shops use injector bench testing machines that measure the exact fuel flow rate and compare injectors for accuracy.
Technicians are trained to interpret the data correctly and identify whether the problem lies with the injectors, wiring, fuel pump, pressure regulator, or engine control module.
Professional testing also reduces the need for guesswork by incorporating electronic data, mechanical inspection and fuel pressure analysis.
Additionally, workshops adhere to proper safety procedures when working with high-pressure direct injection systems, which can exceed thousands of pounds per square inch.
This level of accuracy and safety often leads to faster and more accurate repairs.
2. When to Seek Mechanical Help
Seeking help from a mechanic is recommended when symptoms are severe or unclear.
If the engine repeatedly misfires, stalls, emits a strong fuel odor, or displays a persistent check engine light code even after a basic inspection, professional testing is recommended.
It’s also wise to seek assistance when working with direct injection systems, as they operate at very high pressures and require specialized tools for safe service.
If electrical testing reveals unusual readings or affects multiple cylinders, the problem may be related to the engine control module or wiring harness, requiring expert diagnosis.
Seeking help quickly can prevent damage to expensive components like the catalytic converter, pistons, or cylinder walls.
3. Cost Expectations
The cost of fuel injector testing depends on the vehicle type and diagnostic depth.
Basic diagnostic scanning at a repair shop may incur standard inspection fees.
More advanced injector testing, such as off-car cleaning and flow measurement, increases the overall cost but provides accurate results.
Injector replacement can increase the cost of both parts and labor, specially in engines with difficult access.
Direct injection injectors are typically more expensive than port injection types because they operate at much higher pressures and use more advanced materials.
While DIY testing can reduce labor costs, it requires the right tools, such as a multimeter, fuel pressure gauge and scan tool.
Choosing the right option depends on balancing budget, skill level and the severity of the problem.
Conclusion – How to Test Fuel Injectors
So, that’s it from this guide and now you have clearly understood that small part like: fuel injector literally has a powerful effect on how smoothly, efficiently and cleanly your vehicle’s engine performs every day.
Yes, fuel injectors are responsible for delivering the correct amount of fuel needed for proper combustion, often firing thousands of times per minute while maintaining precise timing and spray patterns.
And. when they function properly, the engine runs smoothly, burns fuel efficiently, emissions remain within legal limits and fuel economy remains stable.
But, if they malfunction, even slightly, the engine can misfire, reduce power, consume more fuel and produce more harmful exhaust gases.
As well as, a clogged injector can create a lean mixture that increases engine temperature and can cause internal damage over time.
So, if you still have otherwise questions in mind, just comment that down below for more information.
Frequently Asked Questions
Q1. What exactly does a fuel injector do in a car engine?
Answer: The fuel injector is a small but vital part that sprays fuel into the engine as a fine mist. The engine mixes this fuel with air and then burns it to produce power. Modern injectors are controlled by the vehicle’s computer, which determines how much fuel to spray and when. This precise control helps the engine run smoothly, improves fuel efficiency and reduces harmful emissions. If the injector doesn’t spray properly, the air-fuel mixture becomes unbalanced, which can lead to rough running and power loss.
Q2. How do I know if my fuel injector is bad?
Answer: Common symptoms of a bad fuel injector include engine misfires, rough idle, jerking when stopping, hesitation during acceleration, poor fuel economy, a strong fuel odor and a check engine light on the dashboard. In some cases, if too much fuel is being supplied, you may also notice black smoke from the exhaust. A diagnostic scan can help confirm whether the problem is with the injector or another engine part.
Q3. Can I drive with a bad fuel injector?
Answer: Driving with a bad injector for a short period of time is possible, but it is not recommended. A clogged injector can cause lean conditions, which increase engine temperature, while a leaking injector can cause rich conditions, which waste fuel and damage the catalytic converter. Driving for long periods with an injector problem can cause more serious engine damage and higher repair costs.
Q4. How long do fuel injectors typically last?
Answer: Fuel injectors are designed to last a long time, often 100,000 kilometers or more, depending on driving habits and fuel quality. However, poor fuel, carbon buildup, poor maintenance, or electrical problems can shorten their life. Regular maintenance and using good-quality fuel can help extend injector life.
Q5. Can fuel injectors be cleaned instead of replaced?
Answer: Yes, in many cases, if the problem is caused by dirt, varnish, or carbon deposits, fuel injectors can be cleaned. Professional cleaning methods, such as ultrasonic cleaning, can restore proper spray patterns and flow. However, if the injector has an electrical fault, internal damage, or severe leakage, it usually requires replacement.
References:
[1] Injected Fuel Mass and Flow Rate Control in Internal Combustion Engines: A Systematic Literature Review
https://www.mdpi.com/1996-1073/17/24/6455

Guys, I’m a car audio enthusiast and customization expert and I love clear sound and clean installation. Plus, I have spent years helping people build their dream audio setups. And whenever I’m working on cars, I probably listen to music and thinks about the next big upgrade.