Written By: Don Dodi
Fact Checked By: Kristen Brown
Reviewed By: Diego Rosenberg
The undeniable fact that: really clean car mirrors can improve the reaction time, as it literally gives drivers a clearer and more accurate view of the surrounding traffic and people and real road conditions.
The car mirrors actually plays big role to drive you to the home safely, as there’s studies on the road safety that shows that the reduced visibility is a huge impact during the lane-change accidents and blind-spot collisions as well.
So, there can be lots of things like: dirt, dust, water spots, fingerprints and pollution which can be build up quickly on mirrors, specifically when you drive your vehicle daily or in rainy weather.
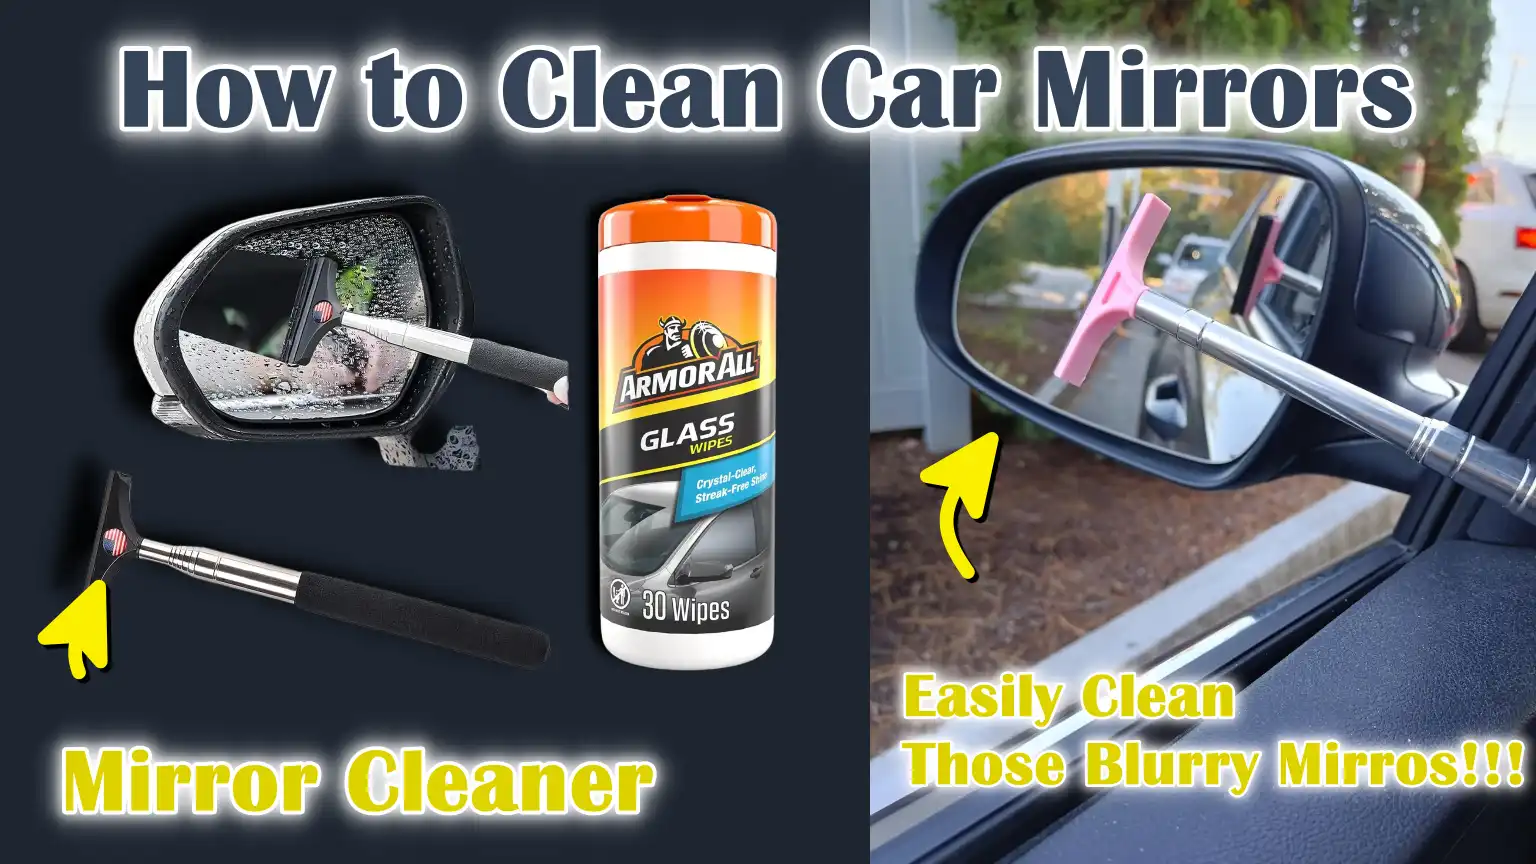
That’s why, you just need to learn How to Clean Car Mirrors so that you can improve the visibility in the right way.
What are The Car Mirrors That You Need to Clean
1. Side Mirrors – ORVMs
Side mirrors, also known as outside rear-view mirrors (ORVMs), are constantly exposed to dust, dirt, rain and other external elements, which can quickly reduce visibility if not cleaned regularly.
Road grime, bird droppings, water spots and even fingerprints from adjusting the mirrors can accumulate on the surface.
Maintaining clean side mirrors is crucial as they help drivers monitor traffic in adjacent lanes, perform safe lane changes and check blind spots.
Carefully cleaning these mirrors with a soft microfiber cloth and a mild, non-abrasive cleaner ensures that all dirt and smudges are removed without scratching the reflective surface.
Regular maintenance helps protect the mirror coating from long-term damage and provides a clear view while driving, both during the day and at night.
2. Rear-View Mirror – Interior Windshield Mirror
The rear-view mirror located inside the windshield is essential for monitoring traffic approaching from behind.
While it is mostly protected from external dirt, it can still accumulate dust, fingerprints, grease and smudges from regular use or contact with passengers.
A dirty rear-view mirror can cause glare from headlights at night and reduce overall visibility, compromising safety.
Using a soft, lint-free cloth with a mild glass cleaner or a damp microfiber cloth easily removes dirt without scratching the mirror.
Keeping this mirror clean provides a clear and accurate view of traffic, improving reaction time and overall driving safety.
3. Auto-Dimming or Heated Mirrors – Require Special Care
Auto-dimming and heated side mirrors are designed with special coatings and built-in heating elements to reduce glare and prevent fogging or ice buildup.
These mirrors require extra care because harsh chemicals, abrasive materials, or excessive scrubbing can damage the coating or affect the heating system.
Cleaning them with a soft microfiber cloth and a mild, ammonia-free cleaner ensures that the mirror remains fully functional and free from dirt and smudges.
Regular maintenance of these specialized mirrors not only preserves their advanced features but also ensures clear visibility in challenging conditions such as night driving, fog, or cold weather.
Tools
| Tool / Material | Purpose | How to Use / Additional Notes |
|---|---|---|
| Microfiber cloths | To clean mirrors without scratching them. | Use a clean, lint-free cloth to wipe the glass. Avoid using rough cloths or paper towels, as these can scratch the glass. |
| Glass cleaner or mild soap solution | Removes dirt, grease and fingerprints. | Spray a small amount of soap solution onto the mirror surface or onto a cloth and wipe evenly. A mild soap solution is safe for delicate surfaces. |
| Distilled water | Prevents mineral stains. | Use distilled water for laundry or mixing with soap, specially in areas where tap water is hard. This prevents white spots. |
| Spray bottle | For evenly applying cleaning agents or water. | This allows for the application of cleaner or water without pouring it directly, reducing streaks and splashes. |
| Isopropyl alcohol – optional | It removes stubborn greasy or sticky residue. | Dilute with water if needed and apply a small amount to the mirror surface. Avoid repeated use on coated mirrors. |
| Vinegar solution – optional | Natural cleaning for stubborn stains. | Mix a little vinegar with water and apply it gently. To protect the coating, don’t leave it on the glass for too long. |
| Soft detailing brush – optional | Clean edges and hard-to-reach corners. | Use carefully around mirror frames and corners where the cloth can’t reach, taking care not to scratch the glass. |
How to Prepare the Mirror Windows Before Cleaning
1. Park the car in the shade to prevent streaks
Before cleaning your car’s windows, it’s essential to park the car in a shaded area.
Direct sunlight can cause the cleaning solution or water to dry too quickly on the glass surface, leading to streaks, spots, or haziness.
A shaded location ensures the glass remains cool, allows the cleaning solution to work effectively and lets you see dirt and grime more clearly.
This step improves the overall quality of the cleaning and prevents unsightly marks on the glass.
2. Allow the windows to cool down
Car windows, specially the side mirrors, can get hot if the vehicle has been in the sun.
Cleaning hot windows can cause the cleaner to evaporate too quickly, making it difficult to remove dirt and resulting in streaks.
Allowing the windows to cool down before starting the cleaning ensures that the cleaning solution works evenly and prevents damage to the reflective surface from sudden temperature changes.
This simple step also prevents burns from touching hot glass surfaces.
3. Gently remove loose dust and debris
Before applying any liquid cleaner, it’s crucial to remove any loose dust, dirt, or debris from the glass surface.
Using a soft microfiber cloth or a soft brush, carefully wipe away the particles to prevent scratching the glass.
Loose dirt and sand particles can act like small abrasive particles, potentially causing permanent scratches if rubbed directly with a wet cloth.
This preparatory step makes the cleaning process easier and protects the glass from damage.
4. Inspect the windows for scratches or damage
Before cleaning, inspect the windows for any pre-existing scratches, chips, or cracks.
Identifying potential damage beforehand allows you to adjust your cleaning techniques, use milder solutions, or avoid excessive scrubbing in sensitive areas.
Early detection of glass damage enables timely repairs or replacements if needed, ensuring that cleaning doesn’t worsen the situation.
Careful inspection preserves both safety and the long-term quality of the glass.
How to Clean Car Exterior Mirrors – Easy Steps
1. Gently Wash to Remove Surface Dirt
The first step in cleaning car exterior mirrors is to gently wash the mirror surface with water.
This removes loose dust, dirt and small particles that could scratch the glass during cleaning.
Using a gentle stream of water instead of high-pressure water helps prevent damage to the mirror housing and keeps dirt from getting into edges or crevices.
The initial wash also prepares the surface for the cleaning solution, leading to better results and reducing the risk of streaks or scratches.
2. Apply Glass Cleaner or Diluted Soap Solution
Once the surface dirt is washed away, apply a suitable glass cleaner or a diluted mild soap solution to the mirror.
Choose cleaners that are safe for coated or painted surfaces to avoid damage.
Spraying the cleaner directly onto the glass or onto a soft microfiber cloth ensures even distribution.
This solution loosens stubborn dirt, grease, water spots and fingerprints, making them easier to remove without excessive scrubbing, which could damage the mirror surface.
3. Wipe in Straight or Circular Motions
After applying the cleaner, carefully wipe the mirror with a microfiber cloth using straight or gentle circular motions.
Straight motions are effective for a streak-free finish, while circular motions help remove persistent spots and marks.
Avoid applying too much pressure, as excessive pressure can scratch the glass or damage the coating.
Cleaning in a systematic manner ensures that the entire mirror surface is covered and no areas are missed, resulting in a clean and sparkling finish.
4. Carefully Cleaning the Edges and Housing of the Mirror
Dirt often accumulates around the edges and housing of the mirror.
Use the corner of a microfiber cloth or a soft detailing brush to reach these areas, taking care not to scratch the surface.
Avoid getting excessive water or cleaning solution on electronic components, such as heating elements or auto-dimming features, to prevent malfunctions.
Paying close attention to the edges and housing ensures that the mirror looks clean overall and functions safely.
5. Final Buffing with a Dry Microfiber Cloth
The final step is to buff the mirror with a clean, dry microfiber cloth.
This removes any remaining streaks, water spots, or residue from the cleaning solution.
Gentle buffing enhances the mirror’s shine and leaves a sparkling, clear surface that improves visibility.
Regular buffing after each wash helps maintain the mirror’s condition, prevents dirt buildup and ensures a clear view for safer driving over time.
How to Clean the Interior Rear – View Mirror
1. Use Minimal Cleaner to Avoid Dripping
When cleaning the interior rear-view mirror, it’s crucial to use only a small amount of cleaning solution.
Excess liquid can drip onto the dashboard, electronics, or windshield, potentially causing damage or stains.
Using a minimal amount ensures the cleaner works effectively on the mirror surface without spreading dirt.
Spraying directly onto a microfiber cloth or using a lightly dampened cloth is the safest method for controlled cleaning and better results.
2. Wipe Gently to Protect the Mirror Coating
Most interior mirrors have a reflective coating that can be damaged by harsh cleaning or abrasive materials.
Gently wiping the mirror with a soft, lint-free microfiber cloth removes dirt and smudges while preserving the coating.
Light pressure prevents scratches and ensures the mirror remains fully reflective, providing a clear view for safe driving.
3. Removing Fingerprints, Haze and Smoke Film
Interior mirrors often accumulate fingerprints, haze and smoke residue, specially in cars where passengers frequently touch the mirror or where smoking occurs.
These layers can reduce visibility and cause glare during nighttime driving.
Carefully wiping with a safe cleaner removes these deposits, restoring a clear and accurate reflection.
Regularly cleaning these contaminants ensures a clear view of traffic behind the vehicle, improving safety.
4. Dry Buffing for a Crystal-Clear Finish
After cleaning, it’s essential to dry buff the interior mirror using a clean, dry microfiber cloth.
This final step removes any remaining streaks or smudges and enhances the mirror’s reflectivity.
Dry buffing ensures a crystal-clear surface that improves visibility, reduces glare and extends the mirror’s lifespan, keeping it in optimal condition for everyday driving.
How to Ensure Safety While Cleaning Auto-Dimming and Heated Mirrors
1. Avoid Harsh Chemicals and Ammonia-Based Cleaners
Auto-dimming and heated mirrors contain delicate electronic layers and coatings that can be damaged by harsh chemicals or ammonia-based cleaners.
Using strong cleaning agents can strip the protective coating, reduce the mirror’s effectiveness, or even cause permanent damage to the heating and dimming functions.
It’s crucial to use only mild, safe cleaning solutions to preserve both the reflective quality of the mirror and its electronic features.
2. Use Only a Lightly Damp Microfiber Cloth
When cleaning these specialized mirrors, always use a soft, lightly damp microfiber cloth instead of saturating the surface with liquid.
Excess water or a very wet cloth can seep into the electronic components, potentially causing malfunctions or corrosion.
A lightly damp cloth is sufficient to safely remove dust, dirt and fingerprints while minimizing the risk of water damage.
3. Apply Gentle Pressure to Protect Electronic Layers
Applying excessive pressure while wiping can damage the delicate electronic layers within auto-dimming or heated mirrors.
Gentle, consistent pressure ensures that dirt and smudges are removed without harming the internal sensors or heating elements.
Gentle cleaning maintains the mirror’s functionality and lifespan while keeping the reflective surface clear.
4. Manufacturer-Recommended Cleaning Methods
Following the mirror manufacturer’s guidelines is the safest way to clean auto-dimming and heated mirrors.
Many manufacturers provide specific instructions on which cleaners are safe, what types of cloths to use and what precautions to take regarding the electronic components.
Following these tips will ensure that your windshield continues to function properly, the warranty remains valid and you stay safe and have clear visibility while driving.
Read More:
How to Remove Stubborn Stains and Water Spots from Car Mirrors
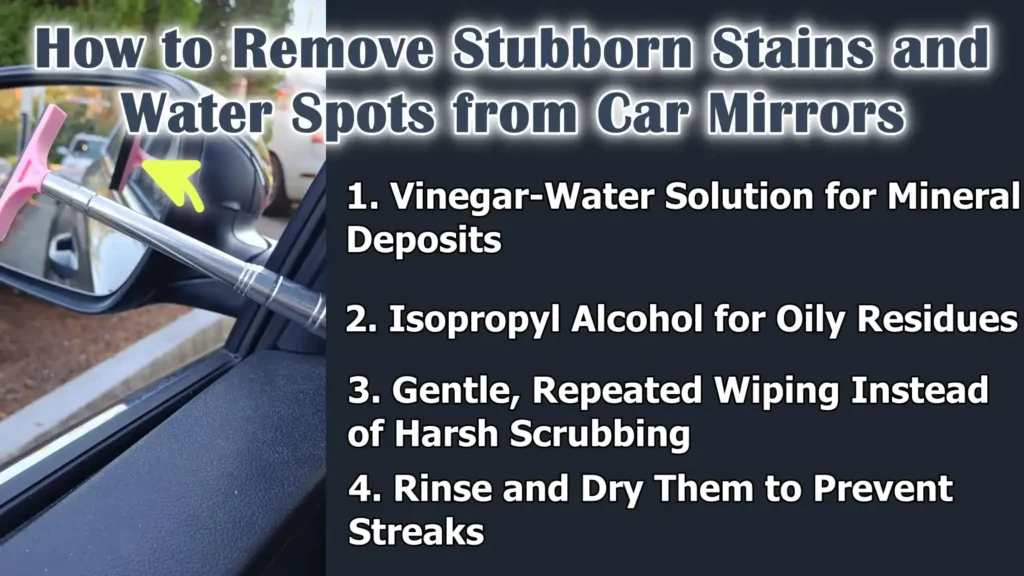
1. Vinegar-Water Solution for Mineral Deposits
Hard water can leave white mineral deposits on car windows, reducing clarity and making driving less safe.
A diluted vinegar-water solution is very effective at dissolving these deposits without damaging the glass surface.
Gently apply the solution with a microfiber cloth, let it sit for a short time to allow the minerals to loosen, then wipe it away.
This method cleans the glass surface and prevents further buildup with regular use.
2. Isopropyl Alcohol for Oily Residues
Oily residues from fingerprints, grease, or environmental pollutants can create stains that are difficult to remove with regular cleaners.
Isopropyl alcohol is an effective solution because it quickly dissolves oils and evaporates without leaving any residue.
Apply a small amount to a soft cloth and gently wipe the affected areas to restore glass clarity without damaging any coatings.
3. Gentle, Repeated Wiping Instead of Harsh Scrubbing
When dealing with stubborn stains, it’s crucial to wipe gently and repeatedly rather than scrubbing harshly.
Scrubbing too hard can scratch the glass surface or damage special coatings, specially on auto-dimming or heated windows.
Multiple gentle wipes will gradually remove the stain while preserving the glass’s integrity and reflective quality.
4. Rinse and Dry Them to Prevent Streaks
After removing stains and deposits, lightly rinse the glass with distilled water to wash away any remaining cleaner or residue.
Immediately dry with a clean microfiber cloth to prevent water spots and streaks.
This final step ensures a sparkling, streak-free surface that enhances visibility and keeps the mirrors in optimal condition for safe driving.
How to Prevent Streaks and Smudges on Car Windows
Not only this, there’s scientific studies on automotive surface contamination that shows that even small particles of road film, pollution particles, environmental residues and dust particles and that disrupts the reflectivity of the mirror, that’s why it is recommended to perform cleaning at the regular time interval to remove these unwanted blur effect and contaminants, so that you can easily improve both clarity and safety when you drive in the high-traffic or in the dusty environments as well.[¹]
1. Correct Wiping Direction and Technique
How you wipe your car windows significantly impacts their cleanliness.
Wiping in straight horizontal or vertical strokes is more effective than circular or random motions, as it prevents streaking and ensures even cleaning.
For stubborn stains, a gentle circular motion can be used, but most cleaning should be done in a single direction to maintain a smooth, streak-free surface.
The correct wiping technique properly polishes the glass surface, improving visibility while driving.
2. Using a Clean, Dry Microfiber Cloth
Dirty or wet cloths can leave smudges, lint, or scratches on the glass surface.
Always use a clean, dry microfiber cloth to remove any remaining moisture or cleaner.
Microfiber cloths are specifically designed to be soft and absorbent, making them ideal for streak-free cleaning.
Regularly replacing or washing microfiber cloths ensures that trapped dirt or particles don’t damage the glass surface.
3. Avoiding Excessive Use of Cleaning Liquid
Applying too much cleaning liquid can lead to drips, streaks and residue buildup on the glass surface.
Only a small, controlled amount of cleaner is necessary for effective cleaning.
Spraying the cleaner onto the cloth instead of directly onto the glass prevents oversaturation and reduces the risk of liquid seeping into delicate areas like window frames or electronic components.
Using less cleaning solution results in a sparkling, clear finish.
4. Cleaning the mirrors last in the car washing routine
The mirrors should be cleaned last in the car washing process, after the body, windows and other surfaces have been cleaned.
This prevents new dirt, soap residue, or water spots from settling on the freshly cleaned mirrors.
Cleaning the mirrors last ensures they remain spotless and sparkling, providing maximum visibility and safety when driving immediately after washing the car.
What are The Common Mistakes to Avoid While Cleaning the Car Mirrors
1. Using Paper Towels or Rough Cloths
One of the most common mistakes when cleaning car windows is using paper towels, old rags, or rough cloths.
These can scratch the glass surface, damage coatings and leave lint or fibers behind, impairing visibility and making the glass look cloudy.
It’s crucial to use a soft, lint-free microfiber cloth as they clean effectively without causing damage, resulting in a smooth, streak-free shine that enhances driving safety.
2. Cleaning Windows in Direct Sunlight
Cleaning windows in direct sunlight is another common mistake.
The heat causes the cleaning solution to dry too quickly, leaving streaks, water spots and residue on the surface.
Sunlight can also make it difficult to see dirt clearly, leading to incomplete cleaning.
Always clean windows in a shaded area or when the car is cool to achieve a streak-free, sparkling finish.
3. Spraying Cleaner Directly onto Sensitive Windows
Spraying cleaning solutions directly onto windows with special coatings, such as auto-dimming or heated windows, can be dangerous.
Excess liquid can seep into electronic components, causing malfunctions or damage.
The correct method is to spray the solution onto a microfiber cloth first, then gently wipe the window.
This ensures the surface is cleaned safely without damaging any delicate features or coatings.
4. Neglecting Window Edges and Corners
Many people focus only on the main surface of the window and neglect the edges and corners, where dirt and grime often accumulate.
Neglecting these areas can result in incomplete cleaning, leading to dirt buildup that diminishes shine and can damage the glass over time.
Gently cleaning the edges and corners with a cloth or soft detailing brush will ensure the glass remains perfectly clean and fully functional.
So, How Often Should You Clean Your Car Windows?
1. Daily light cleaning for frequently used vehicles
Vehicles that are driven daily or in areas with heavy traffic, pollution, or construction can accumulate dirt quickly on their windows.
A daily light cleaning removes fingerprints, dust and water spots before they build up.
This simple routine ensures that the windows remain clean at all times, providing good visibility for changing lanes, reversing and monitoring surrounding traffic, thus enhancing safety.
2. Weekly cleaning for normal driving conditions
For vehicles used in normal driving conditions and not exposed to excessive dust or dirt, a thorough cleaning once a week is sufficient.
This involves washing the windows, applying a mild cleaner, wiping and polishing them to keep them spotless.
Weekly maintenance prevents the buildup of dirt and water spots, provides clear reflections and preserves any protective coatings on the glass, extending their lifespan.
3. More frequent cleaning during rainy, dusty, or winter weather
Weather conditions and seasonal changes can accelerate the dirt accumulation process.
During rainy seasons, water splashes can leave spots and streaks on the windows.
Dusty environments and construction zones can cause fine particles to settle on the glass, while winter weather can leave behind road salt or ice residue.
In such conditions, windows should be cleaned more frequently to maintain clear visibility and prevent long-term damage.
Regular attention during these times ensures safety and keeps the windows in optimal condition throughout the year.
What are the Additional Pro Tips for Long-Lasting Glass Clarity
1. Using Rain-Repellent or Anti-Fog Products
Applying rain-repellent or anti-fog treatments to car windows can significantly improve visibility in wet or humid conditions.
Rain-repellent products help water bead up and slide off the surface, reducing water spots and streaks during rain.
Anti-fog solutions prevent condensation from forming on windows in cold or humid environments, ensuring clear visibility at all times.
Regular use of these products enhances safety by keeping windows functional even in bad weather.
2. Keeping a Microfiber Cloth in the Car
Keeping a clean microfiber cloth in the car allows for quick cleaning of windows whenever needed.
This enables drivers to promptly remove fingerprints, dust, or water spots without waiting for a full wash, maintaining consistent clear visibility.
Microfiber cloths are soft and scratch-free, making them ideal for quick touch-ups to maintain and polish glass surfaces.
3. Quick Touch-Ups During Fuel Stops
Performing regular quick touch-ups on windows during short stops, such as at fuel stations, helps prevent the accumulation of dirt, grime, or water spots.
These brief cleaning sessions maintain clarity, reduce the need for more intensive cleaning later and ensure that windows are always ready for safe driving.
This simple habit improves visibility and prevents minor dirt from becoming permanent stains.
4. Regular Checks for Glass Alignment and Damage
Regularly checking windows for proper alignment and any damage, such as scratches, cracks, or loose housings, is crucial for maintaining both safety and clarity.
Misaligned or damaged mirrors can distort reflections and reduce their effectiveness, even if the surface is clean.
Regular inspections allow for timely repairs or adjustments, ensuring that the mirrors remain functional, safe and provide the clearest possible view of the surroundings.
Conclusion – How to Clean Car Mirrors
Now, you have clearly understood the importance of having a clean mirrors as these literally ensures safety by providing high-level clarity to protect you, your vehicle and everyone on the road.
Clean mirrors provide clear reflections, helping drivers make informed decisions when changing lanes, reversing, or checking for traffic behind them.
Regular cleaning prevents the buildup of dirt, water spots, fingerprints and grime that can distort reflections or reduce visibility.
Using the right tools, gentle cleaners and proper techniques protects the mirror surface and coatings from damage, extending their lifespan.
Paying special attention to auto-dimming and heated mirrors ensures these electronic components remain functional and effective.
Adopting daily, weekly and seasonal maintenance routines, along with simple pro tips like applying rain-repellent treatments and performing quick touch-ups, ensures the mirrors stay clean, clear and reliable.
Overall, clean and well-maintained mirrors boost driver confidence, improve road safety and contribute to the overall care and value of your vehicle.
So, that’s all from this guide and if you wanted to ask some questions then, just comment down below for more information.
Frequently Asked Questions
Q1. How often should I clean my car windows?
Answer: The frequency of cleaning depends on how and where you drive. If you drive daily in heavy traffic, dusty areas, or polluted environments, a light wipe once a day is best to remove fingerprints, dust and water spots. For normal driving conditions, a thorough cleaning once a week is sufficient. During rainy seasons, winter, or dusty weather, more frequent cleaning is recommended to prevent the buildup of dirt, road salt, or water spots, which can reduce visibility and affect driving safety.
Q2. What is the safest way to clean car exterior mirrors?
Answer: Exterior mirrors should first be rinsed to remove loose dirt and debris, then cleaned with a mild soap solution or a safe glass cleaner. Use a soft microfiber cloth to gently wipe the mirror in straight or circular motions, avoiding excessive pressure. Pay attention to the edges and mirror housing, but be careful not to get water or cleaner into the electronic components of heated or auto-dimming mirrors. Finally, polish the mirror with a clean, dry microfiber cloth to remove any streaks and achieve a clear reflection.
Q3. Can I use paper towels or regular cloths to clean the mirrors?
Answer: No, using paper towels or rough cloths can scratch the mirror surface and leave lint or fibers behind. Microfiber cloths are the best option because they are soft, lint-free and absorbent, allowing you to clean the mirrors without causing any damage. Using the correct cloth results in a streak-free, sparkling finish while also protecting any coatings and reflective surfaces.
Q4. How should I clean the interior rearview mirrors?
Answer: For interior mirrors, use a small amount of cleaning solution to prevent dripping onto the dashboard or windshield. Gently wipe with a soft microfiber cloth to protect the reflective coating. Focus on removing fingerprints, smudges and smoke residue and finally, polish the surface with a dry cloth. This ensures a crystal-clear finish and maintains visibility, specially when driving at night or in low-light conditions.
Q5. How do I safely clean auto-dimming and heated mirrors?
Answer: These mirrors contain electronic layers that can be damaged by harsh chemicals or excessive moisture. Avoid ammonia-based cleaners and strong chemicals. Use only a slightly damp microfiber cloth and apply light pressure when wiping. Follow the manufacturer’s cleaning instructions to protect the mirror’s electronic components and coatings, ensuring long-term performance and clear visibility.
Q6. What can I do to remove stubborn stains and water spots?
Answer: For mineral deposits or water spots, a vinegar-water solution works well and dissolves them without damaging the mirror. Oily residue from fingerprints or road grime can be removed using a small amount of isopropyl alcohol. Avoid scrubbing; instead, use repeated, gentle wiping motions to gradually lift the stain. After cleaning, rinse lightly with distilled water and dry the surface with a clean microfiber cloth to prevent streaks.
Q7. How can I prevent streaks and smudges on my mirrors?
Answer: To prevent streaks, always wipe the mirror in a single, straight motion, use clean, dry microfiber cloths and avoid using too much cleaning solution. Cleaning your windows at the end of your car washing routine ensures that no dust, soap, or debris settles on them afterward. With regular attention and the right technique, your windows will remain streak-free and sparkling clean.
Q8. What mistakes should I avoid when cleaning my windows?
Answer: Common mistakes include using paper towels or abrasive cloths, cleaning windows in direct sunlight, spraying cleaner directly onto sensitive windows and neglecting the edges and corners. These practices can cause scratches, streaks, or damage to the electronic components in heated and auto-dimming windows. Following the correct technique and paying attention to detail will prevent these problems and keep your windows safe and clean.
References:
[1] Surface contamination of cars: A review
https://journals.sagepub.com/doi/10.1177/0954407017695141

Guys, I’m a car audio enthusiast and customization expert and I love clear sound and clean installation. Plus, I have spent years helping people build their dream audio setups. And whenever I’m working on cars, I probably listen to music and thinks about the next big upgrade.