Written By: Don Dodi
Fact Checked By: Kristen Brown
Reviewed By: Diego Rosenberg
So, in terms of power window, even a simple blown fuse can completely stop it from moving at all.
And, because power windows have been a standard feature in most of the modern vehicles since the late 20th century, as it replaced manual crank systems with the small electric motors and regulators that move the glass up and down at the push of a switch.
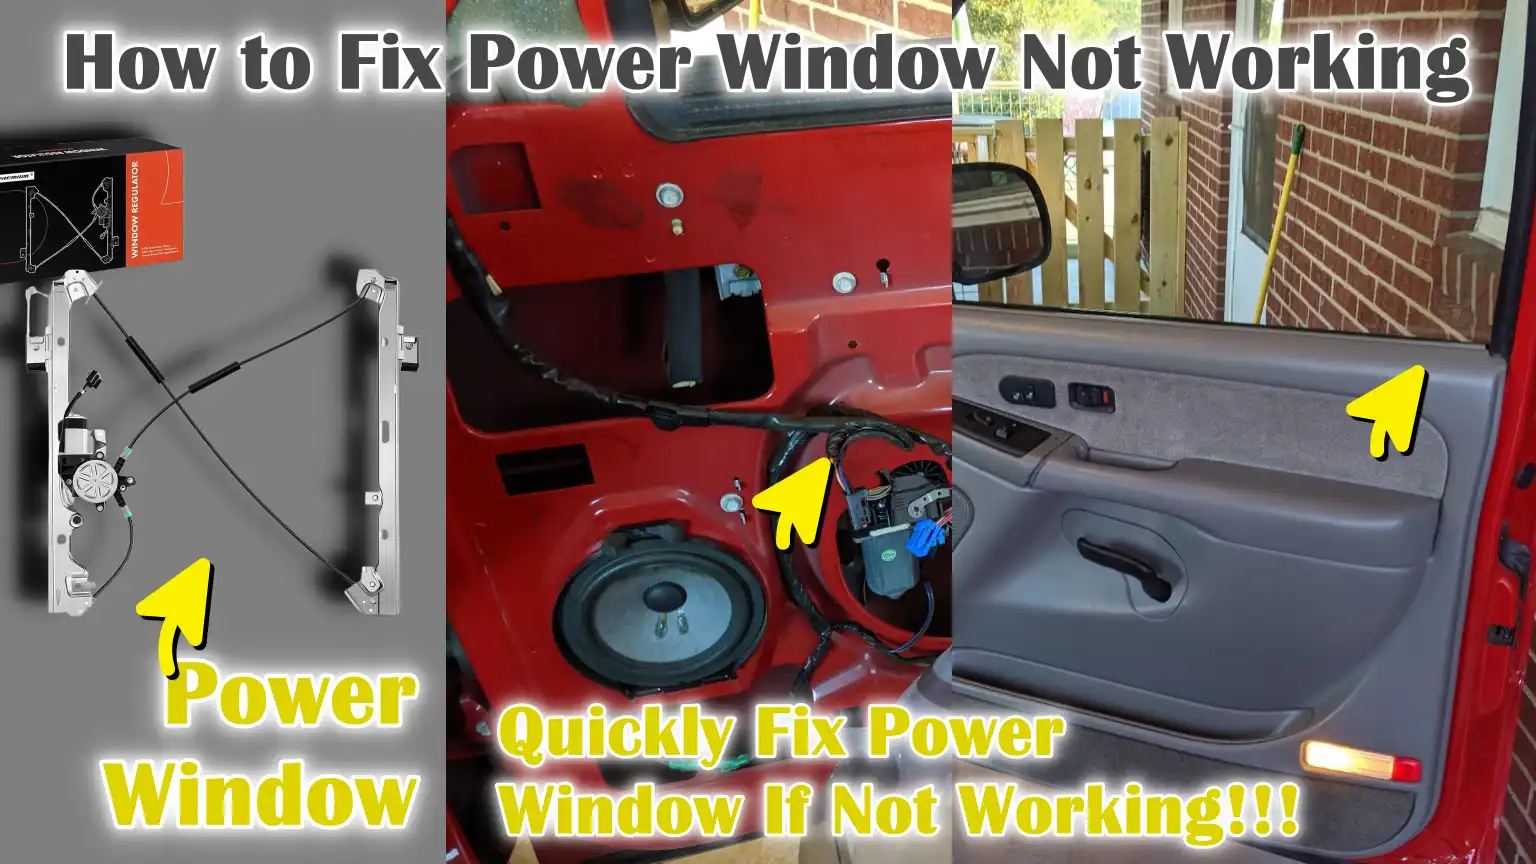
At first, just know that the typical power window system includes: a fuse, relay, switch, wiring harness, window motor and a regulator mechanisms as well that all things are needed to guide the glass along a track.
But, if the power window stops working, then the problem is generally electrical such as: it could be blown fuse, weak motor, faulty switch or damaged wiring as well, or it can be mechanical as well such as: a broken regulator or jammed track as well.
Now, this is the proper guide on How to Fix Power Window Not Working, so that you can understand how the system actually works as it makes fixing more easy, reduces guesswork and also it prevents unnecessary part replacement as well.
What are the Safety Precautions You Need to Take Before You Begin
1. Disconnect the Car Battery to Avoid Electric Shock
Before working on the power window system, the first and most important step is to disconnect the car’s battery.
Power windows operate using the vehicle’s electrical system, which typically runs on a 12-volt battery.
Although this voltage is lower than household electricity, contact with wires during work can cause sparks, short circuits, or accidental motor starts.
Disconnecting the negative battery terminal stops the flow of electricity from the circuit inside the door.
This protects both the repair person and the vehicle’s electrical components.
Modern vehicles also contain sensitive electronics such as control modules, sensors and relays and sudden exposure to electricity can sometimes damage them.
By simply disconnecting the negative battery cable before beginning a repair, you can reduce the risk of electric shock, prevent the window from suddenly moving and create a safe working environment while diagnosing or repairing the power window system.
2. Ensure the vehicle is parked on a level surface and the ignition is off.
Another important safety step is to ensure the vehicle is parked on a stable and level surface and the ignition is completely off.
When the car is parked on a slope or uneven ground, it may roll or slide slightly, which can be dangerous when leaning towards the door to remove a panel or check wiring.
A level surface keeps the vehicle stable and reduces the chance of movement while working.
Turning off the ignition also ensures that no electrical systems are actively operating, preventing the power window motor or other parts from accidentally operating.
In many vehicles, the power window circuit may remain active even when the ignition is on or in accessory mode.
Keeping the ignition off helps prevent the window motor from suddenly moving when your hands are near the mechanism.
This simple precaution helps prevent unnecessary damage to both the technician and the parts inside the door.
3. Wear Gloves and Safety Glasses
Wearing the right protective gear when repairing any vehicle parts, including power windows, is a simple yet highly effective safety measure.
Inside the door panel are sharp metal edges, small brackets and mechanical parts like window regulator arms and cables.
Handling these parts without protection can easily result in cuts or scratches.
Gloves help protect your hands from sharp edges and provide better grip when removing bolts, clips, or panels.
Safety glasses are equally important because removing a door panel can cause small particles of dirt, rust, or plastic clips to fall off or become loose.
In some cases, window regulators use springs for tension and sudden loosening of parts can cause debris to fly off.
Safety glasses help protect your eyes from sudden debris and dust.
Using simple protective equipment like gloves and safety glasses reduces the risk of injury and allows you to focus on the repair process with greater confidence.
4. Keep small parts organized to prevent damage
During power window repairs, many small parts must be removed, including screws, bolts, clips, fasteners and electrical connectors.
These parts may seem small, but they play a vital role in securing the door panel, window glass and regulator.
If these parts are lost or mixed up during the repair, it can be difficult to reassemble the door properly.
Missing clips can cause the door panel to rattle and missing bolts can cause the window system to become unstable.
To avoid these problems, it’s helpful to keep all small parts organized while working.
Many technicians store screws and clips in small containers, labeled trays, or separate sections so they can easily remember where each part is.
Keeping parts organized saves time and unnecessary hassle when reassembling.
Proper alignment ensures that every component goes back into its proper place, ensuring the smooth functioning of the power window system after the repair is complete.
How to Identify the Problem with Power Window
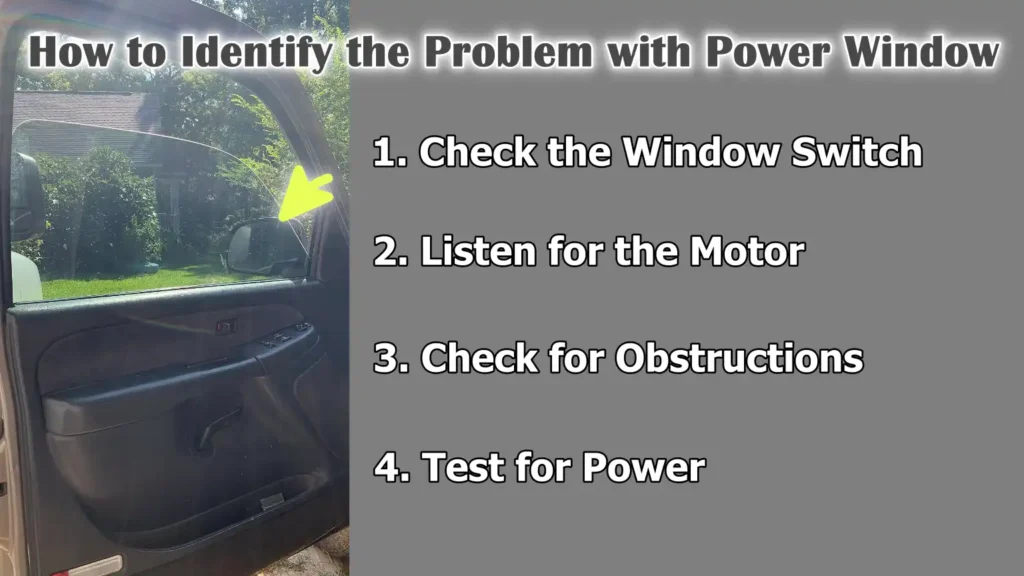
1. Check the Window Switch
One of the first and most important steps in diagnosing a power window problem is to check the window switch.
The switch is a control device that sends an electrical signal to the window motor to raise or lower the glass.
Because power windows are used frequently, the switch can wear out over time due to repeated pressing, dust buildup, or internal electrical contact failure.
To determine if the switch is the cause of the problem, try operating the window using both the driver’s master control switch and, if the vehicle has a separate passenger door switch, the switch.
Many modern cars allow the driver to control all the windows from the main panel on the driver’s door.
If the window works with one switch but not the other, it’s usually a faulty switch.
This simple comparison helps identify the problem quickly.
In many cases, the switch contacts inside the control panel become worn or dirty, preventing power from reaching the motor.
It’s important to check the switch first, as it’s one of the most common and easiest power window problems to diagnose and fix.
2. Listen for the Motor
Another helpful way to diagnose the problem is to listen carefully for any noise coming from inside the door when the window switch is pressed.
The power window motor is a small electric motor that activates the window regulator to move the glass.
When the switch is pressed, the motor should make a slight humming or buzzing sound as it rotates.
If you hear this noise but the window doesn’t move, the motor may be working, but the mechanical parts connected to it, such as the window regulator, cable system, or gear mechanism, may be damaged or disconnected.
On the other hand, if there’s no sound at all when the switch is pressed, the problem is likely electrical.
This could mean the switch isn’t sending power, a fuse has blown, the wiring is damaged, or the motor itself is completely damaged.
Listening to motor activity is a quick and useful diagnostic step as it helps determine whether the problem is mechanical or electrical before opening the door.
3. Check for Obstructions
Power windows operate on thin tracks inside the door and these tracks allow the glass to move up and down smoothly.
Over time, dirt, dust, small stones and other debris can accumulate in the window channel, specially if the vehicle is frequently driven in dusty areas or parked outside.
When debris accumulates in the track, it can prevent the window glass from moving or cause blockages, causing the motor to malfunction.
In some cases, the window may move slowly, tilt to one side, or stop completely.
Broken pieces of plastic guide or worn rubber seals can also hinder window movement.
A close examination of the window track and the area around the glass can reveal if anything is physically obstructing movement.
Cleaning the track and removing debris can sometimes fix the problem without replacing any parts.
Cleaning and properly lubricating the window track helps the system function smoothly and reduces stress on the motor and regulator.
4. Test for Power
If the window still won’t move and there’s no obvious mechanical obstruction, the next step is to test whether power is reaching the window motor.
This can be done using a multimeter or a simple diagnostic tool called a test light.
A multimeter measures voltage and helps determine whether power is flowing through the circuit when the window switch is pressed.
To perform this test, the door panel usually needs to be removed to access the wiring connectors connected to the motor.
When the switch is pressed, the multimeter should detect a voltage signal, usually around 12 volts, which is the standard voltage for most vehicle electrical systems.
If power is reaching the motor but it isn’t responding, the motor itself may be faulty and need to be replaced.
However, if power isn’t reaching the motor, the problem may be elsewhere in the circuit, such as a blown fuse, a faulty wiring, or a faulty switch.
Testing the power is an important diagnostic step because it confirms that the electrical system is functioning properly and helps prevent unnecessary replacement of parts that are still working properly.
Understand, Common Causes of Power Window Failure
1. Bad Window Switch
The window switch is one of the most heavily used electrical components in a vehicle and because it’s pressed multiple times a day, it can deteriorate over time.
Inside the switch are small electrical contacts that complete the circuit when the button is pressed.
After years of use, these contacts can become worn, dirty, or damaged, preventing proper power from reaching the window motor.
Moisture, dust and spilled drinks can also get into the switch panel and corrode the connections inside.
When a switch begins to fail, the window may only work occasionally, require a harder push than usual, or stop working altogether.
In many vehicles, there’s a master switch panel on the driver’s door that controls all the windows and this panel experiences the most wear.
Because the switch serves as the main control point for the entire power window system, a faulty switch is one of the most common reasons for a window to suddenly stop working.
2. Blown Fuse
Blown fuses are another very common cause of power window failure.
Every vehicle has fuses to protect the electrical circuits from damage caused by excessive current or short circuits.
Power window systems usually have a dedicated fuse in the vehicle’s fuse box, which can be found under the dashboard, inside the engine compartment, or on the side of the dashboard.
If a fuse blows, it breaks the electrical circuit and prevents power from reaching the window motor and switch.
This can prevent overheating, wiring damage and the possibility of an electrical fire.
When a fuse fails, the power window may suddenly stop working without warning.
In some vehicles, a single fuse controls multiple windows, so multiple windows may stop working at the same time.
Checking fuses is often one of the quickest diagnostic steps because a bad fuse is easy to identify and inexpensive to replace.
3. Bad Window Motor
The power window motor is the part responsible for raising and lowering the window.
This small electric motor is located inside the door and, along with the window regulator, controls the window’s movement.
Over time, repeated use can damage the motor, specially as the power window is often operated during daily driving.
Heat, moisture and vibration inside the door can also affect the motor’s internal components.
When the motor begins to fail, the window may move slowly, stall, or require several attempts before starting.
In some cases, the motor may make a humming or grinding noise, but the window will not move.
Eventually, the motor may burn out completely and stop working when the switch is pressed.
A bad motor usually needs to be replaced because its internal electrical windings or mechanical gears cannot be easily repaired.
4. Broken Window Regulator
The window regulator is the mechanical system that raises and lowers the window glass inside the door.
It works with a motor to convert the motor’s rotation into direct movement of the glass.
There are several types of regulators, including cable-operated regulators and scissor-style regulators, but all rely on moving parts such as gears, arms, cables and pulleys.
Over time, these parts can wear out, break, or become dislocated from repeated use.
A broken cable, a faulty gear, or a bent arm can prevent the window from operating properly, even if the motor still works.
When the regulator malfunctions, the window may fall into the door, become stuck, or simply not function properly.
Because the regulator supports the weight of the glass, any damage to this part can prevent the window from functioning properly and may require replacement of the entire regulator assembly.
5. Wiring Problems
Power window systems rely on a network of electrical wires that transmit power from the battery to the switch and then to the motor.
These wires run through the door frame and flexible rubber pipes, allowing the door to open and close without damaging the wiring.
However, over time, frequent door movements can cause the wires to bend, stretch, or break within the insulation.
Loose connectors, worn wires, or damaged terminals can disrupt the flow of electricity and prevent power from reaching the window motor.
Moisture in the door panel can also corrode electrical connections, increasing resistance and weakening the electrical signal.
When wiring problems occur, the window may stop working intermittently or fail completely.
Detecting wiring problems often requires checking the connectors and testing the voltage with a multimeter to ensure that electricity is flowing properly in the circuit.
6. Blockage in the Window Track
The window glass moves on thin tracks inside the door that guide it smoothly as the door opens and closes.
These tracks contain rubber or plastic channels that help reduce friction and keep the glass properly aligned.
Over time, dirt, dust, small stones and other debris can accumulate inside these tracks, specially if the vehicle is driven on dusty roads or parked outside for long periods.
When debris accumulates, it can cause blockages, making it difficult for the motor and regulator to move the window.
In some cases, the window may move slowly, tilt to one side, or become stuck altogether.
Misaligned tracks or worn rubber guides can also prevent smooth movement.
Cleaning the tracks and removing debris can sometimes restore normal window operation without replacing any parts.
Keeping the window channels clean and occasionally applying the correct lubricant helps reduce stress on the motor and regulator and extends the life of the entire power window system.
Tools
| Tool or Material | Usage |
|---|---|
| Screwdrivers – Flathead and Phillips | These are basic hand tools used to remove the screws holding the door panel and switch panel in place. A flathead screwdriver has a straight tip, while a Phillips screwdriver has a cross-shaped tip. Using the correct type helps remove the screws safely without damaging them. |
| Socket Set and Wrench | A socket set and wrench are used to loosen and tighten the bolts holding the window motor, regulator and door components. These tools offer better grip and rotational power than a standard screwdriver. They allow for careful removal of parts without removing the bolt heads. |
| Multimeter or Test Light | A multimeter or test light is used to check whether power is reaching the window motor or switch. It measures voltage and helps detect electrical problems in the power window circuit. This tool helps confirm whether the problem is electrical before replacing any parts. |
| Replacement Fuse, Switch, Motor, or Regulator | Sometimes, repairing window movement requires replacing a faulty part. A blown fuse, a bad switch, a weak motor, or a broken regulator can prevent the window from working. Having the right replacement part ensures that the repair fixes the underlying problem. |
| Lubricant Spray – Silicone-Based | Silicone lubricant spray is used to reduce friction inside the window track. This allows the glass to move smoothly and prevents the motor from overworking. Unlike oil-based sprays, silicone lubricant does not attract dust and dirt. |
| Gloves and Safety Glasses | Gloves protect your hands from sharp metal edges inside the door panel. Safety glasses protect your eyes from dust, debris, or small clips that may fall out during repairs. These work safety items help prevent injuries while working on your vehicle. |
How to Fix Power Window Not Working – Easy Working Method
How to Check the Fuses
1. Find the Vehicle’s Fuse Box
The first step in diagnosing a power window problem is to locate the vehicle’s fuse box.
Most vehicles have at least two fuse boxes.
One is usually located under the dashboard near the driver’s seat and the other is often located inside the engine compartment.
The fuse box protects the vehicle’s electrical circuits and cuts off power if excessive current flows through the wires.
The easiest way to find the correct fuse box for your vehicle is to consult the owner’s manual.
The manual usually includes a diagram that clearly shows the location of each fuse and the system it controls.
Because power windows draw power from the car’s battery, their circuit is protected by fuses to prevent overheating or electrical damage.
It’s important to find the correct fuse box before beginning any testing or repairs.
2. Identify and check the fuses for the power window circuit
Once you’ve located the fuse box, the next step is to identify the specific fuses that control the power window system.
Most fuse box covers have a diagram labeling each fuse according to the system it protects, such as headlights, radio, or power windows.
Once you’ve identified the correct fuse, carefully remove it using a fuse puller or small pliers.
When inspecting the fuse, look for a thin metal strip inside the plastic housing.
If this strip is broken or burned, it means the fuse has blown and the electrical circuit is interrupted.
A blown fuse prevents electricity from reaching the power window motor and switch.
Sometimes the fuse may appear slightly blackened or melted inside, which also indicates a malfunction.
Closely examining the fuse helps confirm whether the power window problem is related to the electrical protection system.
3. Replace a fuse with the same rating
If a fuse has blown, it must be replaced with another fuse with the same amperage rating.
The rating is usually printed on the fuse as a number, such as 20A or 30A.
This number indicates how much electrical current the fuse can safely handle before breaking the circuit.
Using a fuse with a higher rating can cause excessive power loss, potentially damaging wiring or electronic components.
Using a fuse with a lower rating can cause it to blow again even during normal use.
After installing the correct replacement fuse, reconnect the battery if it was disconnected and test the power window switch.
If the window works again, a blown fuse is likely the cause of the problem.
However, if the fuse blows again immediately after replacement, it may be a deeper electrical problem that requires further investigation.
How to Test the Window Switch
1. Carefully Remove the Switch Panel
The window switch panel is usually located on the door armrest or near the door handle.
In many vehicles, this panel can be removed by gently prying it upwards with a plastic trim tool or a flathead screwdriver wrapped in a cloth to avoid scratching the surface.
The panel is usually held in place by clips or small screws.
When removing the panel, it’s important to work slowly and carefully to avoid breaking the plastic clips or damaging the wiring connectors underneath.
After lifting the panel, the electrical connector attached to the switch assembly becomes visible.
Disconnecting this connector allows you to take a closer look at the switch and prepare it for testing.
2. Check for Corrosion or Damage
After removing the switch panel, inspect the switch and its electrical connectors for any signs of damage.
Corrosion is a common problem, specially if moisture has entered the door area.
Corrosion on metal contacts appears as green, white, or powdery marks and can block the flow of electricity.
Dirt and dust accumulation inside the switch can also affect its function.
Also, look for broken plastic pieces, loose buttons, or bent metal terminals inside the connector.
Any visible damage can interfere with the switch’s ability to send electrical signals to the motor.
Carefully cleaning light corrosion with electrical contact cleaner can sometimes restore proper operation.
3. Test Continuity with a Multimeter
Testing the switch with a multimeter helps confirm whether the switch is functioning properly.
A multimeter measures electrical continuity, which means it checks whether electricity can flow through the circuit.
When the switch button is pressed, the multimeter should indicate that the circuit is complete.
If the meter doesn’t show continuity when the switch is turned on, the switch’s internal contacts may be worn or damaged.
Testing the switch in this way clearly indicates whether it is working properly.
This step helps prevent unnecessary replacement of other parts when the actual problem is the switch.
4. Replace the Switch If It’s Defective
If the switch fails the continuity test or shows obvious signs of damage, replacing it is the best course of action.
Window switches are fairly simple parts and are often designed for easy replacement.
A new switch will restore the correct electrical connection between the driver’s control panel and the window motor.
When installing a replacement switch, securely reconnect the wiring harness and return the switch panel to its original location.
After installation, retesting the window will confirm whether the switch was the cause of the problem.
How to Check the Wiring and Connections
1. Check for Damage or Loose Connectors in the Wiring Harness
The wiring harness carries electrical power from the battery to the switch and then to the window motor.
These wires run through the door frame and through a flexible rubber boot between the door and the vehicle body.
Because the door opens and closes several times a day, the wires within this space are constantly exposed to movement.
Over time, this repeated bending can weaken, break, or tear the wires.
A thorough inspection of the wiring harness can help detect loose connectors, worn insulation, or exposed wires.
Any wear and tear in the wiring can prevent power from reaching the window motor.
2. Repair worn wires with electrical tape or connectors
If wires are found to be frayed or damaged, they will need to be repaired to repair the electrical circuit.
Small areas of damaged insulation can sometimes be repaired with good-quality electrical tape.
However, if the wire itself is broken, it may need to be reconnected using the correct electrical connector or soldering methods.
These repairs can restore normal power to the circuit.
Ensuring a strong and secure connection is crucial, as a weak connection can cause the power window to operate intermittently.
3. Ensure all connections are secure and clean
Electrical connectors inside the door must be clean, tight and properly fastened.
Loose connectors can sometimes cause the window to stop working or work only occasionally.
Dirt, moisture and corrosion can build up on the metal terminals, increasing electrical resistance and reducing the amount of power reaching the motor.
Cleaning the connectors with electrical contact cleaner and reconnecting them firmly helps restore proper electrical flow.
Ensuring all connections are secure improves the reliability of the entire power window system.
How to Check the Window Motor and Regulator
1. Safely Remove the Door Panel
The inner door panel must be removed to access the window motor and regulator.
The panel is usually held in place by a combination of screws and plastic clips.
Carefully removing these fasteners allows the panel to be lifted from the door frame.
It is important to support the panel when disconnecting any wiring connectors connected to speakers or switches.
After removing the panel, the internal components of the power window system become visible.
2. Check the motor for signs of wear or a burning smell
The window motor is the small electrical unit responsible for moving the window glass.
If the motor is having problems or overheating, it may show signs of wear, such as strange noises, signs of overheating, or a burning smell.
These signs often indicate internal electrical damage.
Worn motors may make noise but may not be able to move the window properly.
A careful inspection can help determine if the motor can still function.
3. Test the motor directly with a 12V battery
To ensure the motor is working, test it by connecting it directly to a 12-volt power source, such as a car battery.
When power is applied, the motor should immediately begin rotating.
If the motor does not work or moves very slowly, it probably needs to be replaced.
Direct testing eliminates uncertainty because it checks the motor separately from the rest of the vehicle’s electrical system.
4. Check the Regulator Mechanism for Broken Gears, Cables, or Arms
The window regulator is a mechanical structure that raises and lowers the window glass.
Depending on the vehicle’s design, the regulator may use a metal arm, cable, gear, or pulley.
If any of these parts are broken or misaligned, the window may not move properly even if the motor is working.
A broken cable can cause the window to fall into the door, while a faulty gear can prevent movement altogether.
Carefully inspecting the regulator helps identify these mechanical faults.
5. Replace the Motor or Regulator If It’s Defective
If either the motor or regulator is clearly defective, it’s essential to replace the defective part.
These parts work together as a system, so a failure in one can cause the entire window system to stop working.
Installing a new motor or regulator can restore the system’s ability to move the glass smoothly.
Proper installation ensures that the window operates safely and reliably.
How to Lubricate the Window Track
1. Clean Dirt and Debris from the Window Track
Window tracks guide the glass as it moves up and down.
Over time, dust, sand and small particles can accumulate inside these tracks, specially in vehicles traveling on dusty roads.
This buildup increases friction and makes it difficult for the motor and regulator to move the window.
Cleaning the tracks with a soft cloth or brush removes these obstructions and allows the window to move more smoothly.
2. Apply Silicone-Based Lubricant to the Track
After cleaning the tracks, applying a silicone-based lubricant helps reduce friction between the glass and the track surface.
Silicone lubricant is best because it doesn’t attract dust and has a long-lasting effect.
Spraying a small amount onto the tracks creates a smooth surface, allowing the window to slide smoothly.
This also reduces the workload on the motor and regulator.
3. Ensure the glass moves smoothly before reassembling
Before reinstalling the door panel, it’s important to test the movement of the window glass.
Gently move it up and down to ensure it slides smoothly in the window track.
If the glass moves without any obstruction or noise, it means the track is properly cleaned and lubricated.
Ensuring smooth movement at this stage prevents the need to re-open the door later.
How to Do Reassembly and Testing
1. Carefully Reinstall the Door Panel
After completing all repairs and inspections, carefully reinstall the door panel.
Align the panel with its mounting clips and press it down gently to lock the clips securely.
Reinstall all screws and fasteners that were removed earlier.
Properly installing the door panel ensures it is firmly attached to the door frame and prevents vibration or rattling while driving.
2. Reconnect the Battery
Once the door panel is completely reassembled, reconnect the vehicle’s battery by reinserting the negative terminal that was previously disconnected.
Repairing the battery connection restores power to the power window circuit.
This step prepares the system for the final functional test.
3. Test Window Operation with Both Driver and Passenger Switches
After reconnecting the battery, press the window switch on both the driver’s master control panel and the passenger door switch.
Testing both controls confirms that the electrical system and switch network are functioning properly.
If the window responds properly to both switches, it means the wiring, switches and motor are all working as expected.
4. Ensure the Window Rotates Smoothly and Fully
The final step is to observe the entire movement of the window as it moves from the fully closed position to the fully open position and back again.
The glass should rotate smoothly without any jerks, strange noises, or hesitation.
Smooth movement confirms that the regulator, motor, track and electrical parts are working properly together.
Complete and smooth movement of the window indicates that the troubleshooting and repair process was successful and the power window system has returned to normal operation.
How to Maintain Power Window In Perfect Working Condition
Not only this, there’s engineering study which is published in the journal safety science that investigate how it reduces the closing speed of power windows that can lower the risk of the injuries which is caused by the pinch or shear points between the glass and frame, so this research measured human reaction time and finger deformation to determine the safe closing speeds that allow a person to withdraw their hand before injury occurs. So, this study concluded that when you limits the closing velocity of powered windows and implementing obstruction detection systems that can significantly reduce injury risk, so this research supports that the use of the modern safety technologies such as the anti-pinch sensors and automatic reverse mechanisms, which are now common in many vehicles as well.[¹]
1. Don’t Apply Too Much Pressure to the Window
Power windows are designed to operate smoothly with the help of a small electric motor and a mechanical regulator system inside the door.
When the switch is pressed, the motor raises or lowers the window on a guided track using electrical energy from the vehicle’s battery.
Because this system is designed to operate with controlled electrical movement, applying excessive force to the window or repeatedly pressing the switch when the window is stuck can damage internal components.
For example, if the window is frozen in winter or the track is clogged with dirt, repeatedly pressing the switch can overheat the motor or put pressure on the regulator mechanism.
This excessive pressure can rapidly wear out the gears, cables, or arms inside the regulator.
It can even burn out the motor over time.
A good preventative measure is to stop pressing the switch if the window isn’t working properly and check the system for blockages or mechanical problems.
Using power windows gently and allowing the motor to complete its movement without repeated force helps extend the life of the entire system.
2. Keep the window tracks clean and lubricated
Window tracks are thin channels inside the door that guide the glass as it moves up and down.
These tracks are usually made of rubber or plastic material to reduce friction and keep the glass properly aligned.
Over time, dust, sand and small debris can accumulate inside these tracks, specially if the vehicle is frequently driven on dusty roads or parked outdoors.
When debris accumulates in the tracks, it creates resistance, forcing the motor and regulator to work harder to move the glass.
This increased force can gradually weaken the motor and damage regulator parts.
Regularly cleaning the window tracks with a soft cloth or brush helps remove dirt and prevent clogs.
After cleaning, apply a small amount of silicone-based lubricant to help the glass glide more easily on the track.
Silicone lubricant is recommended because it doesn’t attract dust and remains effective for a long time.
Keeping the track clean and properly lubricated reduces friction, smooths window movement and helps prevent premature failure of the power window system.
3. Periodically check fuses and switches for faults.
Power window systems rely on many electrical parts, including fuses, switches, wiring and motors.
Over time, these parts can show signs of wear, which can cause future problems.
Periodically checking the fuse box helps ensure that the fuses protecting the power window circuit are in good condition.
If a fuse appears slightly burnt or discolored, it could indicate electrical stress in the circuit.
Similarly, window switches may show signs of wear after years of repeated use.
A faulty switch may feel loose, require more pressure to operate, or the window may move slowly.
These early symptoms often appear before the switch is completely damaged.
Identifying and replacing a faulty switch early can prevent unexpected window failure.
Regularly inspecting these small electrical components ensures reliable window system operation and reduces the likelihood of sudden electrical problems.
4. Don’t close the door too forcefully to avoid track misalignment
Car doors contain many internal parts, including the window glass, regulator mechanism, motor and guiding track.
When the door is closed forcefully, the internal structure of the door experiences intense vibrations.
Repeated door closing can gradually loosen bolts, shift alignment points, or slightly bend parts of the window track.
Even minor defects can affect the movement of the glass inside the door.
Misaligned tracks can cause the window to tilt, not move properly, or make strange noises when operating.
Over time, this defect can increase friction and put more strain on the motor and regulator.
This problem can be easily prevented by closing the door gently and avoiding unnecessary force.
Operating the door slowly and carefully helps maintain the proper alignment of the window system parts and protects the mechanical structure inside the door.
This simple habit goes a long way in ensuring the long-term reliability of the power window system.
Read More:
When You Should Go to The Professional Help
1. Replacing the Motor or Regulator Is Difficult or Hard to Reach
In many vehicles, the window motor and regulator are embedded in the door structure, making them difficult to access without the proper tools and experience.
The door panel must be carefully removed and in some cases, additional parts such as speakers, insulation panels and protective plastic covers must also be removed before accessing the motor and regulator assembly.
These parts are usually secured with bolts and attached to the window glass with brackets or clamps.
Because the regulator supports the weight of the glass, it must be handled with care during removal and installation.
Some regulators also use spring-loaded mechanisms or cable systems that require precise alignment to function properly.
If these parts are installed incorrectly, the window may not move properly, become stuck, or even fall inside the door.
Professional technicians are trained to handle these mechanisms safely and efficiently.
They also have specialized tools that allow them to remove and install parts without damaging the glass, wiring, or door frame.
When accessing or replacing a motor or regulator is difficult, seeking professional help can prevent accidental damage and ensure the repair is done correctly.
2. Persistent Electrical Problems Even After Troubleshooting
Sometimes, power window problems persist even after checking fuses, switches, wiring and the motor.
Persistent electrical problems can be difficult to diagnose because modern vehicles often use complex electrical systems controlled by modules and relays.
In many newer cars, the power window system may be connected to the body control module or integrated electronic control unit, which manages many functions within the vehicle.
If this module or its programming malfunctions, it can prevent the window system from receiving the correct electrical signals.
Electrical problems can also occur in wiring harnesses, where wires pass through the vehicle body or door hinges.
These hidden areas are not always easy to inspect without specialized diagnostic equipment.
Professional mechanics use advanced tools like digital multimeters, circuit testers and scan tools to track electrical signals throughout the system.
These tools help identify hidden problems that are difficult to find with basic troubleshooting methods.
When electrical problems persist even after careful inspection, professional diagnosis can save time and prevent unnecessary replacement of working parts.
3. Water Damage or Corrosion in Door Panel Wiring
Water damage inside the door panel is another situation that may require professional assistance.
Car doors have drainage holes and protective seals to keep water away from electrical components, but over time, these seals can deteriorate or wear out.
Rainwater, moisture from car washing, or condensation can sometimes penetrate the door and reach the wiring, connectors and motor.
When electrical parts are exposed to moisture, the metal contacts can corrode.
Corrosion appears as a green, white, or rust-colored deposit on connectors and wiring terminals.
This deposit increases electrical resistance and impairs the flow of electricity to the motor and switches.
Severe corrosion can permanently damage connectors and cause intermittent electrical problems that are difficult to detect.
Furthermore, moisture trapped inside the door can affect several electrical systems, including speakers, locks and mirror controls.
Professional technicians are experienced in identifying water entry points, safely cleaning the corrosion and repairing or replacing damaged wiring components.
Seeking professional help in the event of water damage can help protect your vehicle’s electrical system and prevent further problems.
Conclusion – How to Fix Power Window Not Working
So, you can actually understand really well about the problem and related repairs; if you understand about their common power window problems and we have mentioned their solutions as well, so that you can correctly gain valuable knowledge about their prevention and maintaining them as they should be.
It consists of several essential parts, such as fuses, wiring, switches, motors, regulators and window tracks.
When any of these parts fail, the window may stop moving, move slowly, or become stuck in place.
Understanding how each part of the system works makes it much easier to diagnose the problem and take appropriate action.
In many cases, simple problems like a blown fuse, a dirty window track, or a worn switch can be identified and fixed without any complex tools.
Severe power window problems require careful troubleshooting.
Checking fuses, testing switches, wiring and examining the motor and regulator can help determine the cause of the problem.
These steps help prevent unnecessary replacement of parts and ensure that the repair corrects the underlying problem.
Regular maintenance also plays an important role in preventing future problems.
Keeping window tracks clean, avoiding excessive force on the switches and paying attention to early warning signs can extend the life of the entire power window system.
So, that’s it about this guide and you can still ask unsolved queries that your mind trying to know, by commenting that below.
Frequently Asked Questions
Q1. What are the most common reasons for power windows to stop working?
Answer: Power windows can stop working for a variety of reasons and most of them are related to electrical or mechanical problems within the door. One of the most common causes is a blown fuse, preventing power from reaching the window motor. Another common problem is a worn window switch that no longer sends the signal to activate the motor. Over time, repeated use, heat, or wear and tear can damage the window motor itself. In some cases, the window regulator, the mechanical device that raises and lowers the glass, can break or become misaligned. Dirt, debris, or damage inside the window track can also prevent the glass from moving. Because the power window system relies on many interconnected parts, a failure in any one of them can cause the window to stop working properly.
Q2. How can I tell if the power window motor is bad?
Answer: A faulty window motor usually shows clear warning signs before it stops working completely. A common sign is a buzzing or whirring sound from inside the door when the window switch is pressed, but the glass doesn’t move. This usually means the motor is running, but a worn gear or regulator is preventing the window from moving. Another sign is slow or weak window movement, which may indicate that the motor is losing power due to wear. Sometimes the window may only work sporadically or take several revolutions to move. If there’s no sound at all when the switch is pressed, the problem may be electrical, such as a blown fuse, broken wiring, or a faulty switch. Testing the motor directly from a power source or using a multimeter can help confirm whether the motor is still working.
Q3. Can a blown fuse cause a power window to stop working?
Answer: Yes, a blown fuse is one of the simplest and most common reasons for a power window to stop working. In a vehicle’s electrical system, fuses are designed to protect the circuit from excessive electrical current. If too much current flows through the power window circuit, the fuse will break the connection to prevent damage to the wiring or other components. When a fuse blows, power cannot reach the window motor or switch, causing the window to stop working completely. In many vehicles, the fuse box contains a diagram that shows which fuse controls the power window system. Replacing a blown fuse with the correct amperage rating can sometimes fix the window immediately. However, if the fuse continues to blow after replacement, it may indicate a major electrical problem, such as a short circuit or faulty wiring.
Q4. Is it safe to drive with a broken power window?
Answer: Driving with a broken power window is usually safe for a short time, but it can cause several practical problems. If the window is left open, the vehicle can be exposed to rain, dust and outside noise. This can also reduce the vehicle’s security by making it easier for someone to break in. If the window is left closed, it can affect ventilation and passenger comfort, especially in hot weather. In some situations, even a slightly open window can impair vision if the glass is not in the correct position or vibrates while driving. Although a broken power window usually doesn’t affect engine or driving performance, prompt repair can maintain vehicle comfort, safety and environmental protection.
Q5. How much does a power window repair cost?
Answer: The cost of power window repair depends on the specific part that is damaged and the type of vehicle. If the problem is simple, such as a blown fuse or a dirty window track, the repair cost can be very low and can sometimes be fixed without professional assistance. Window switches are generally inexpensive because they are fairly simple electrical parts. However, if the window motor or regulator needs to be replaced, the cost may increase because these parts are more difficult to remove and require more labor to access the inside of the door. Labor costs also depend on the vehicle model and how difficult it is to remove the door panel and internal parts. In many cases, early and accurate problem diagnosis helps avoid unnecessary expenses and ensures that only the faulty part is replaced.
References:
[1] Finger injuries caused by power-operated windows of motor vehicles: An experimental cadaver study
https://www.sciencedirect.com/science/article/abs/pii/S0020138311005845

Guys, I’m a car audio enthusiast and customization expert and I love clear sound and clean installation. Plus, I have spent years helping people build their dream audio setups. And whenever I’m working on cars, I probably listen to music and thinks about the next big upgrade.